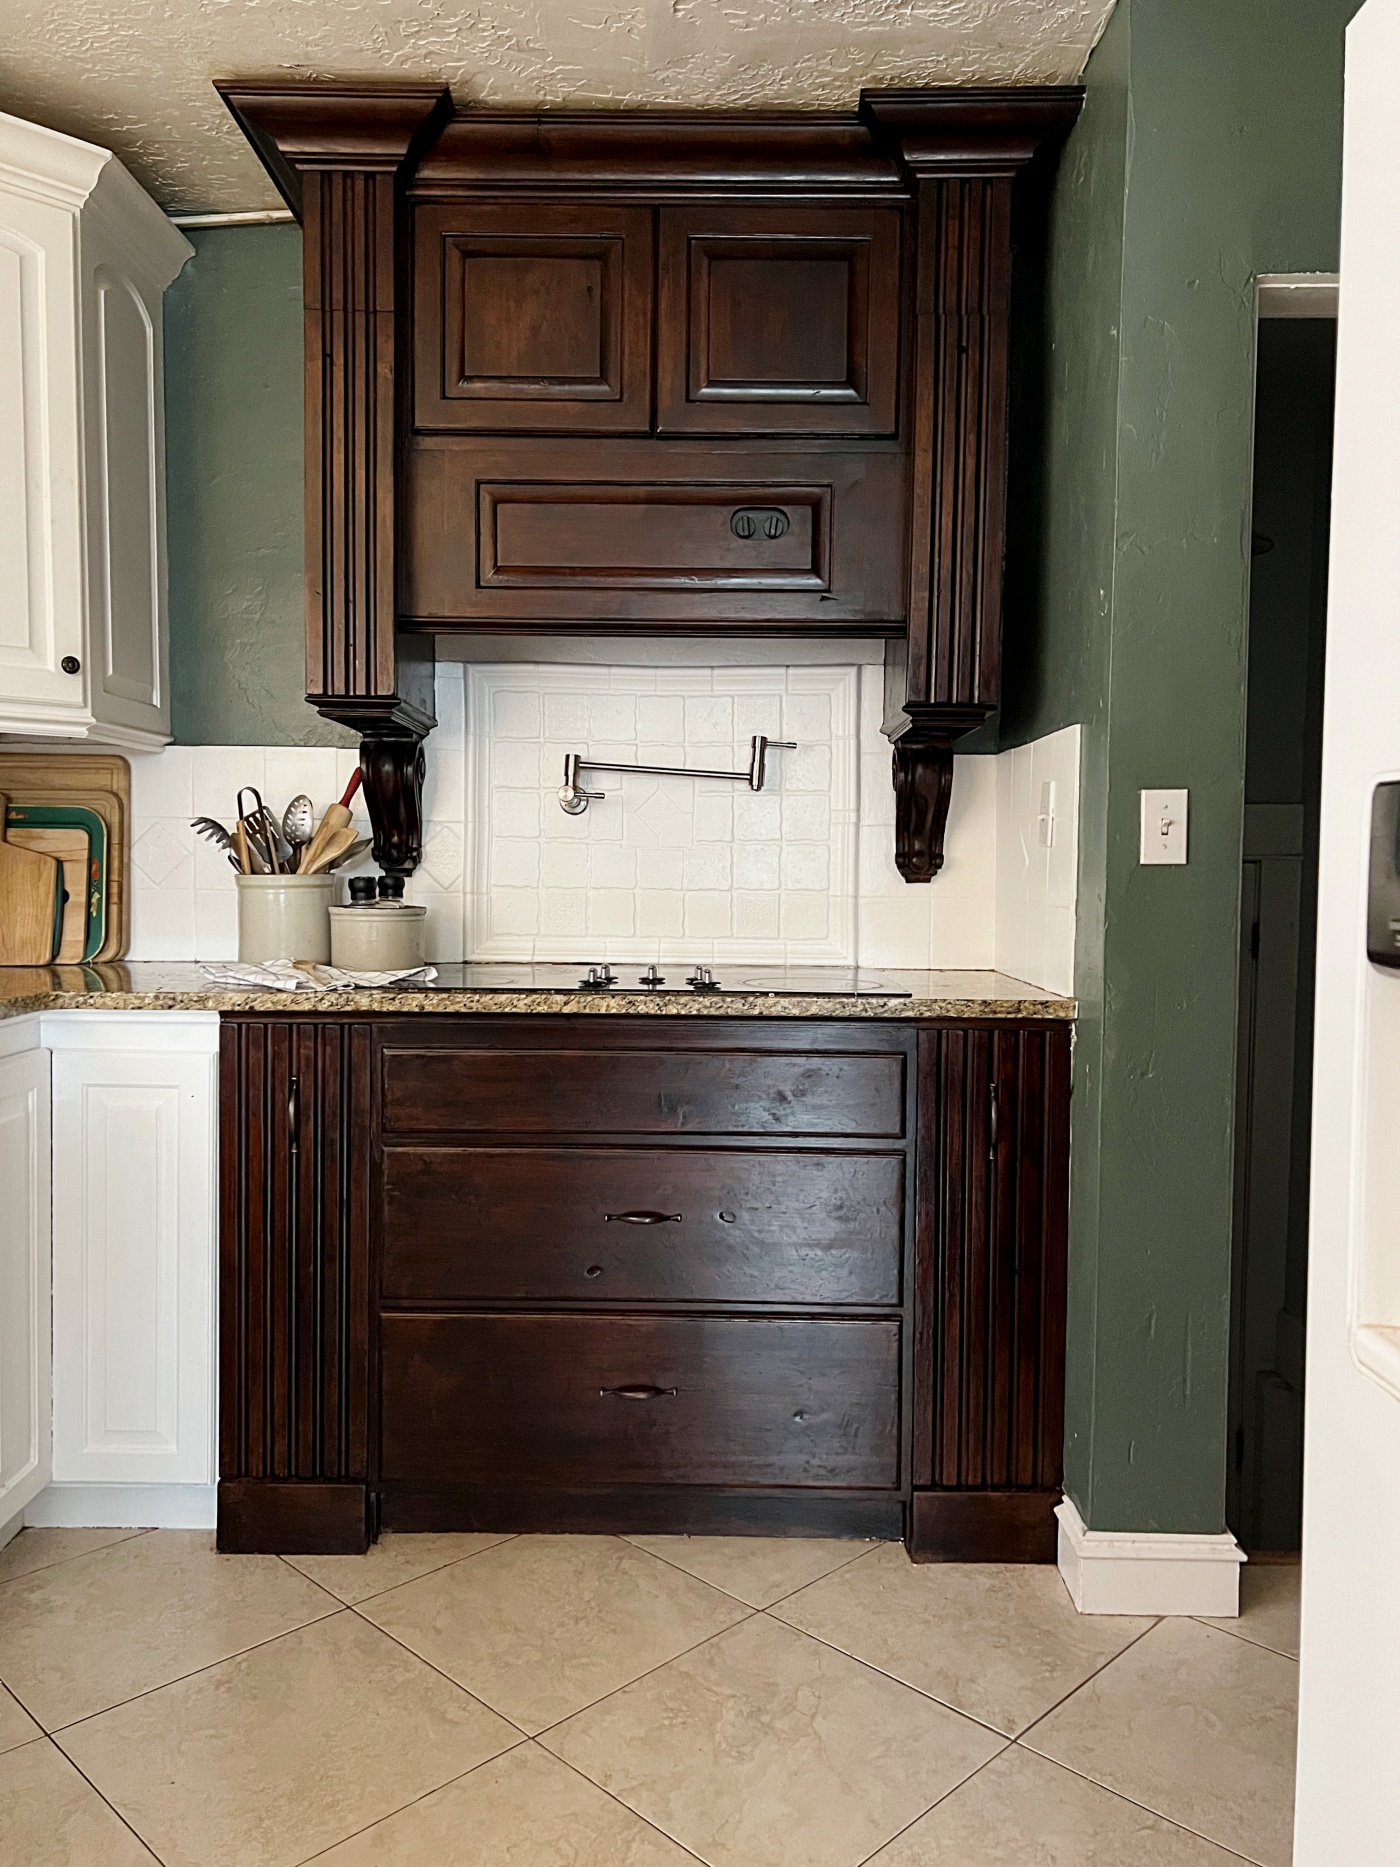
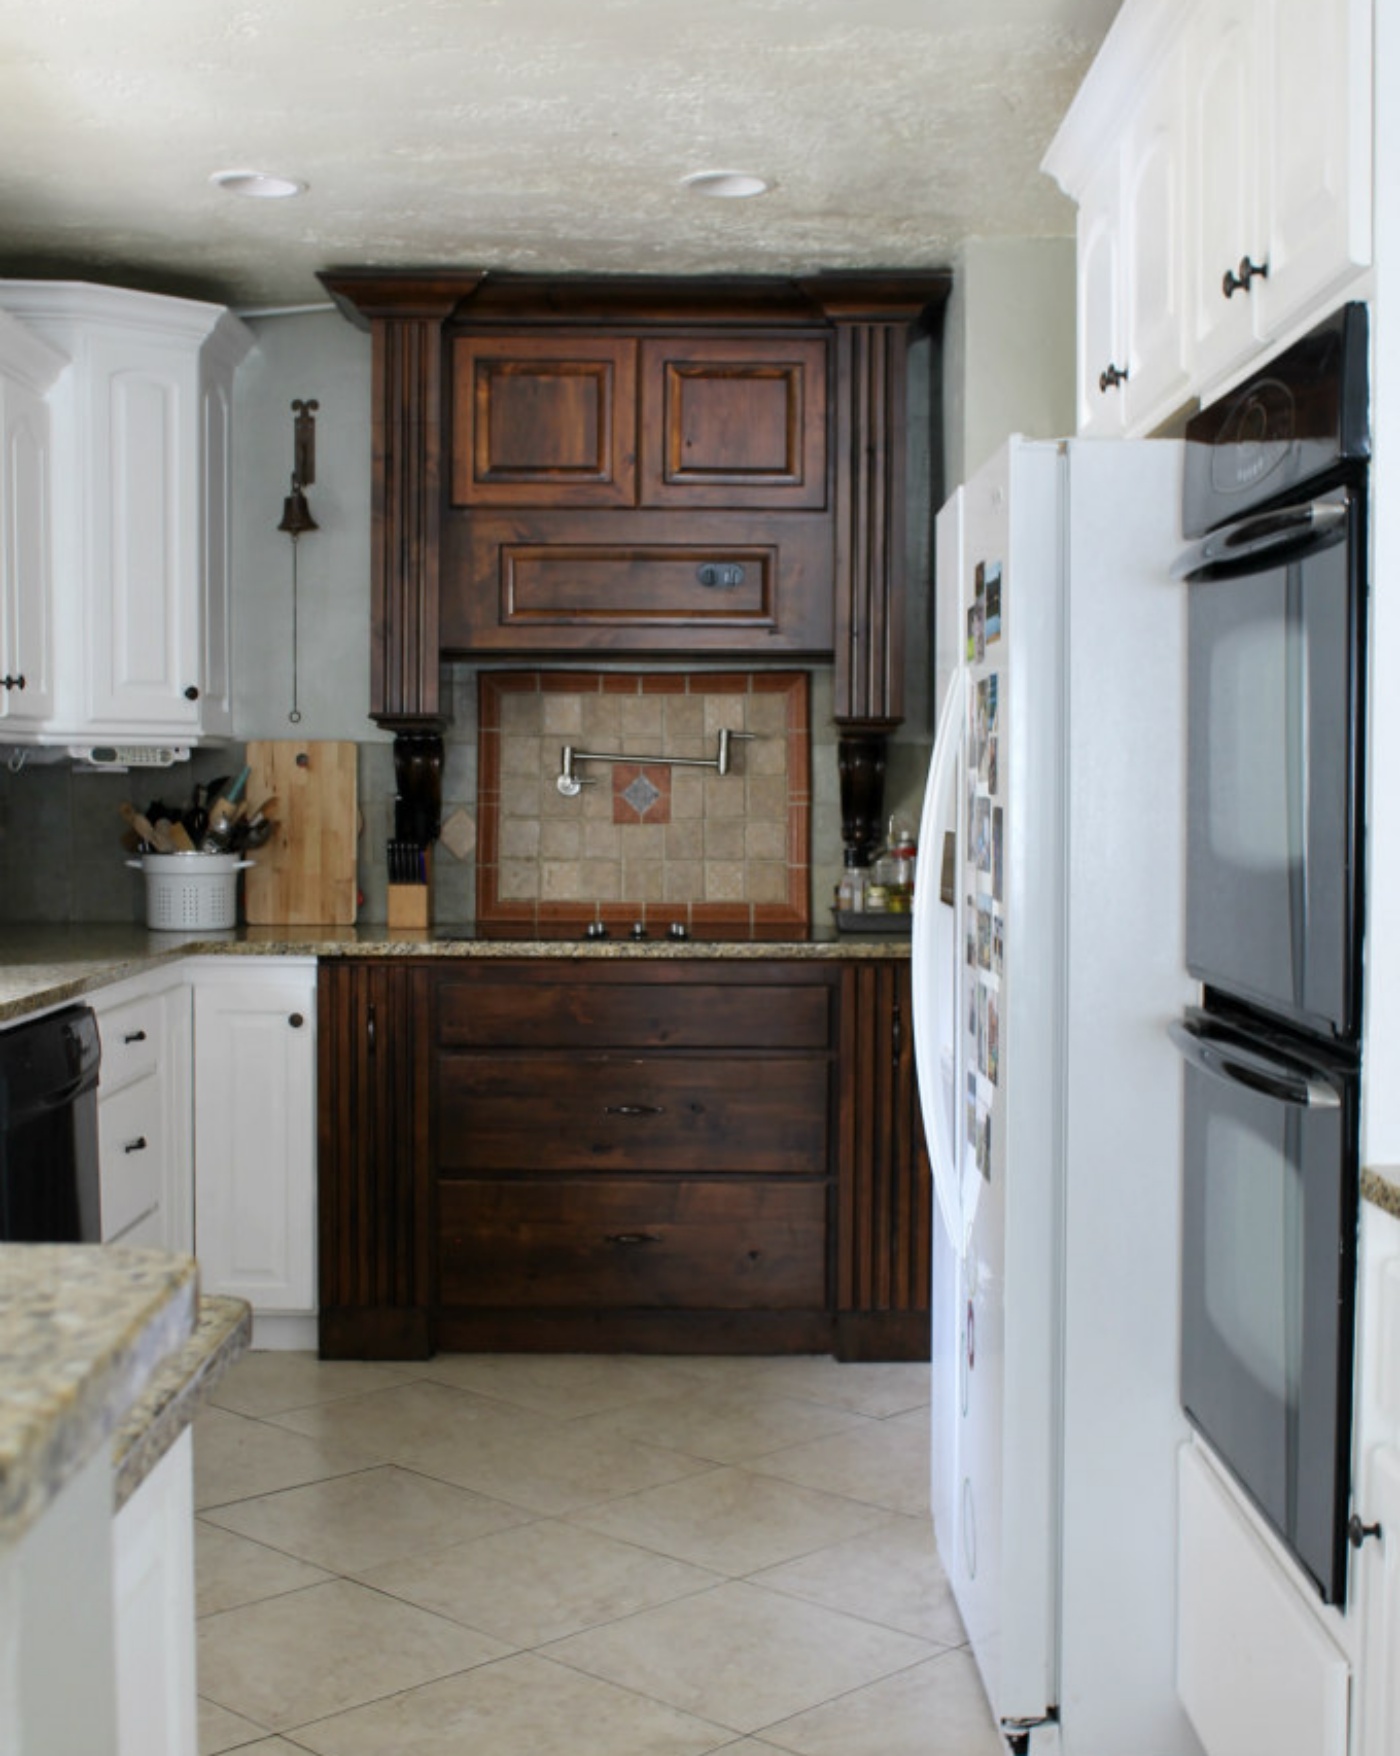
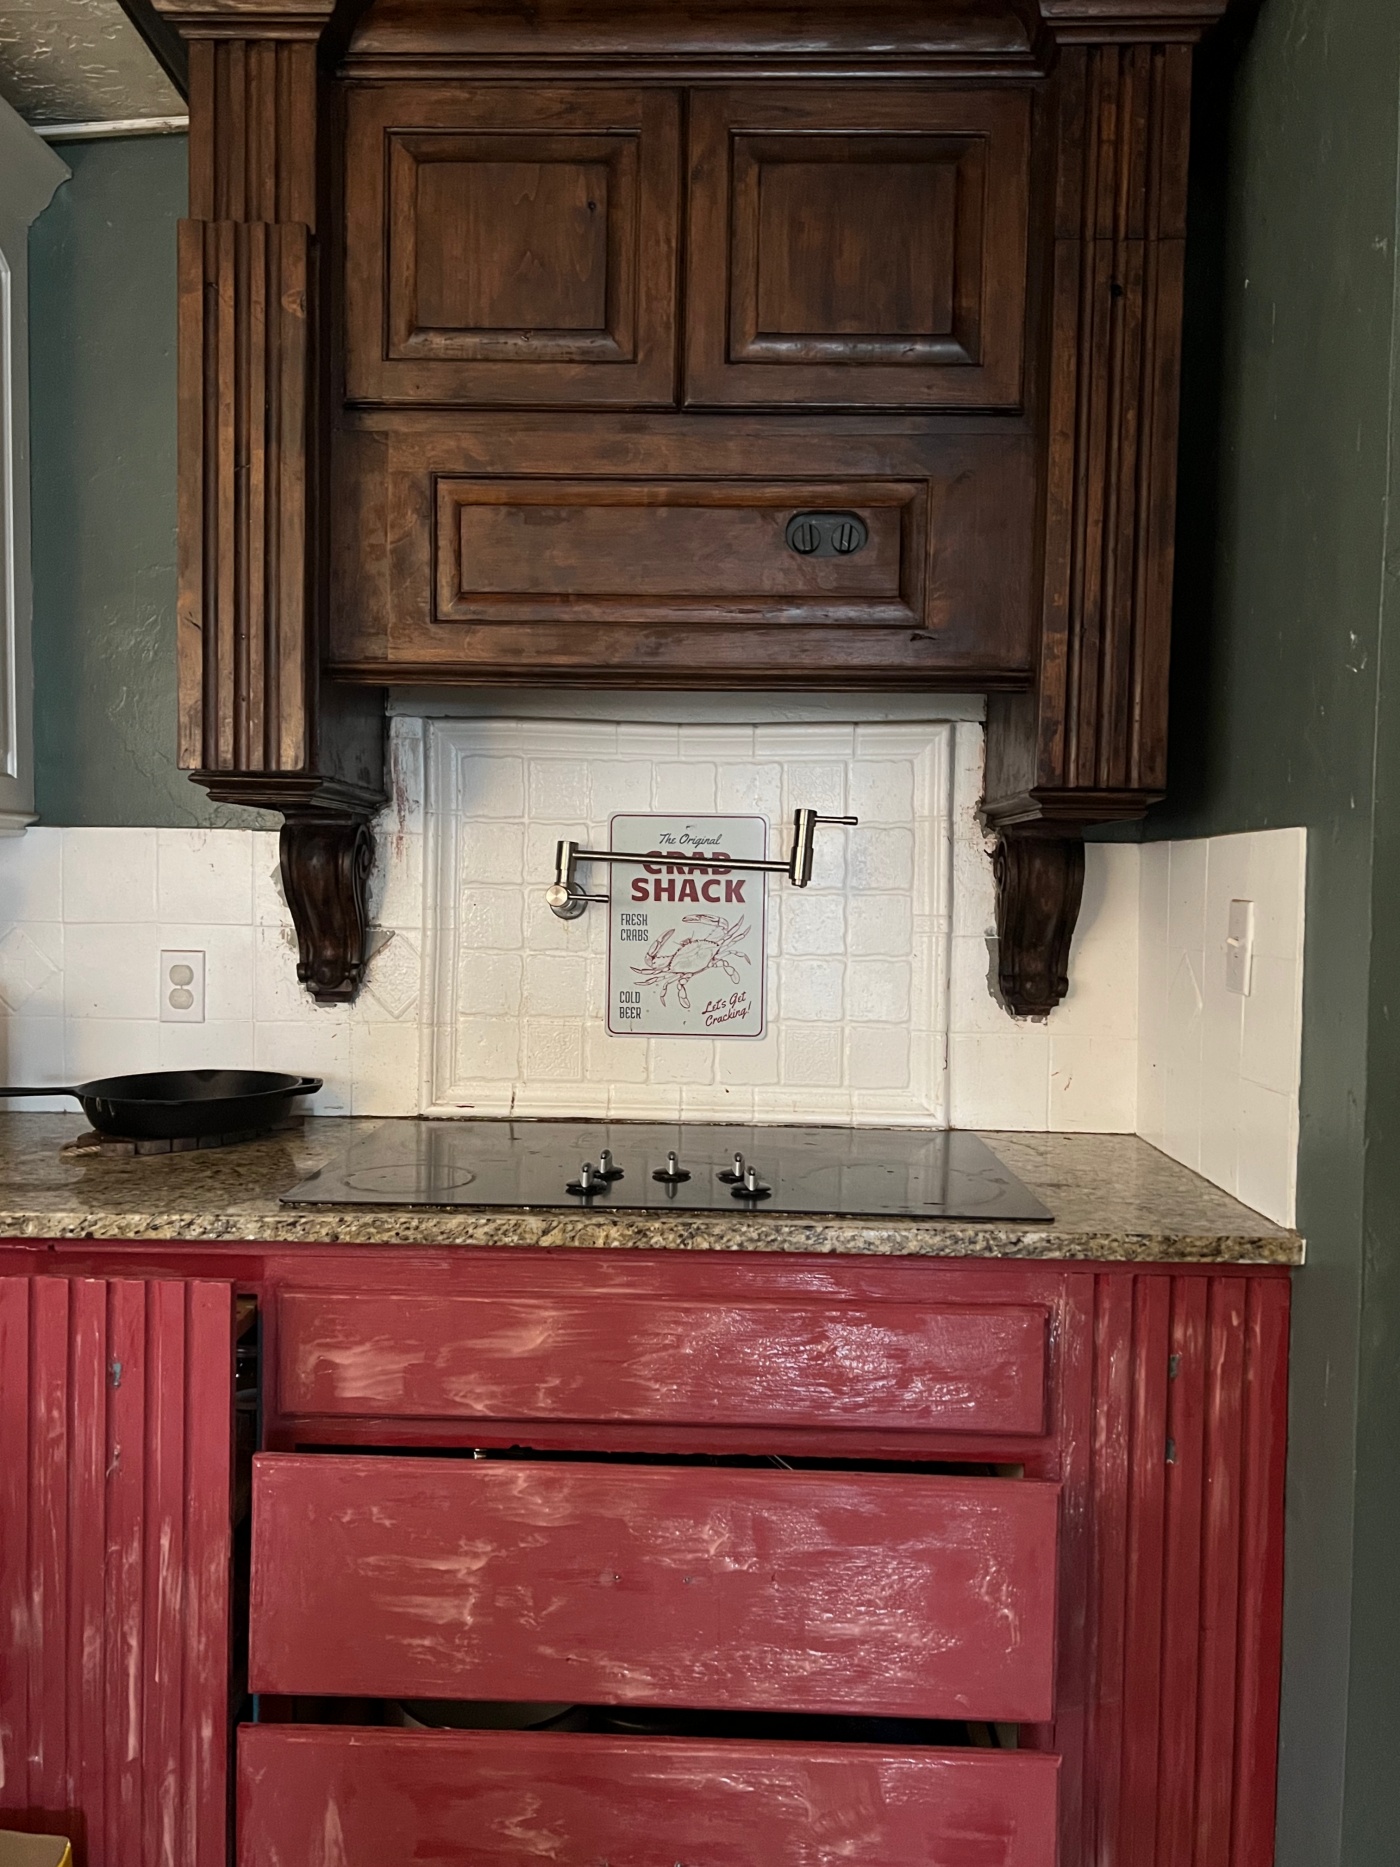
I’m happy to share this project with you today since it has taken me months to finish. I Stripped four layers of paint from our stove hood mount and then I sanded it and stained it with gel stain.
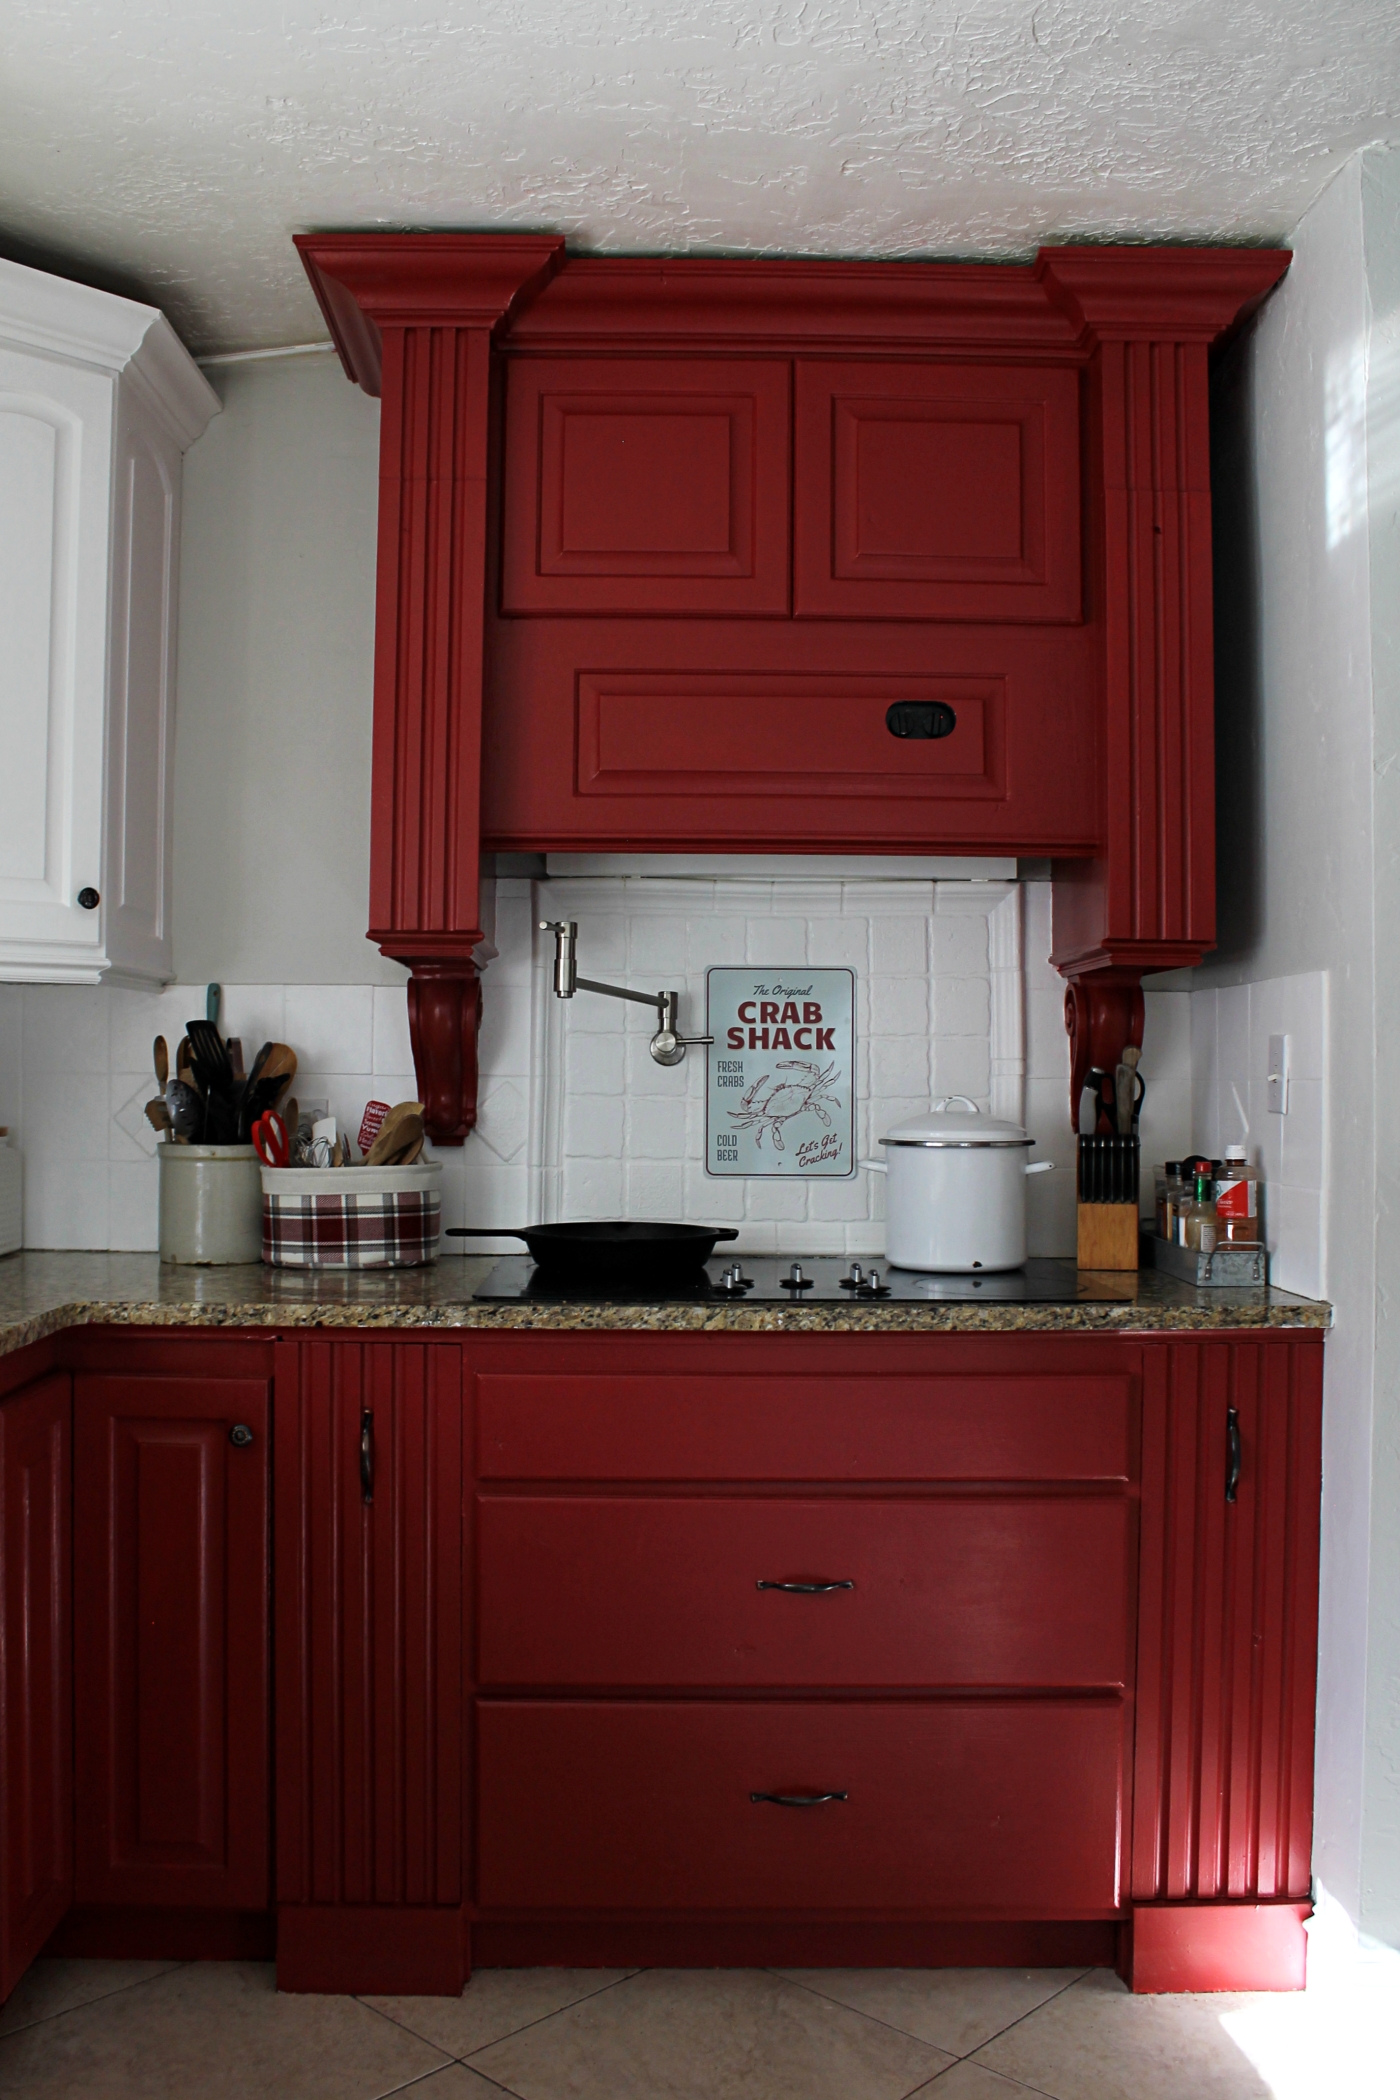
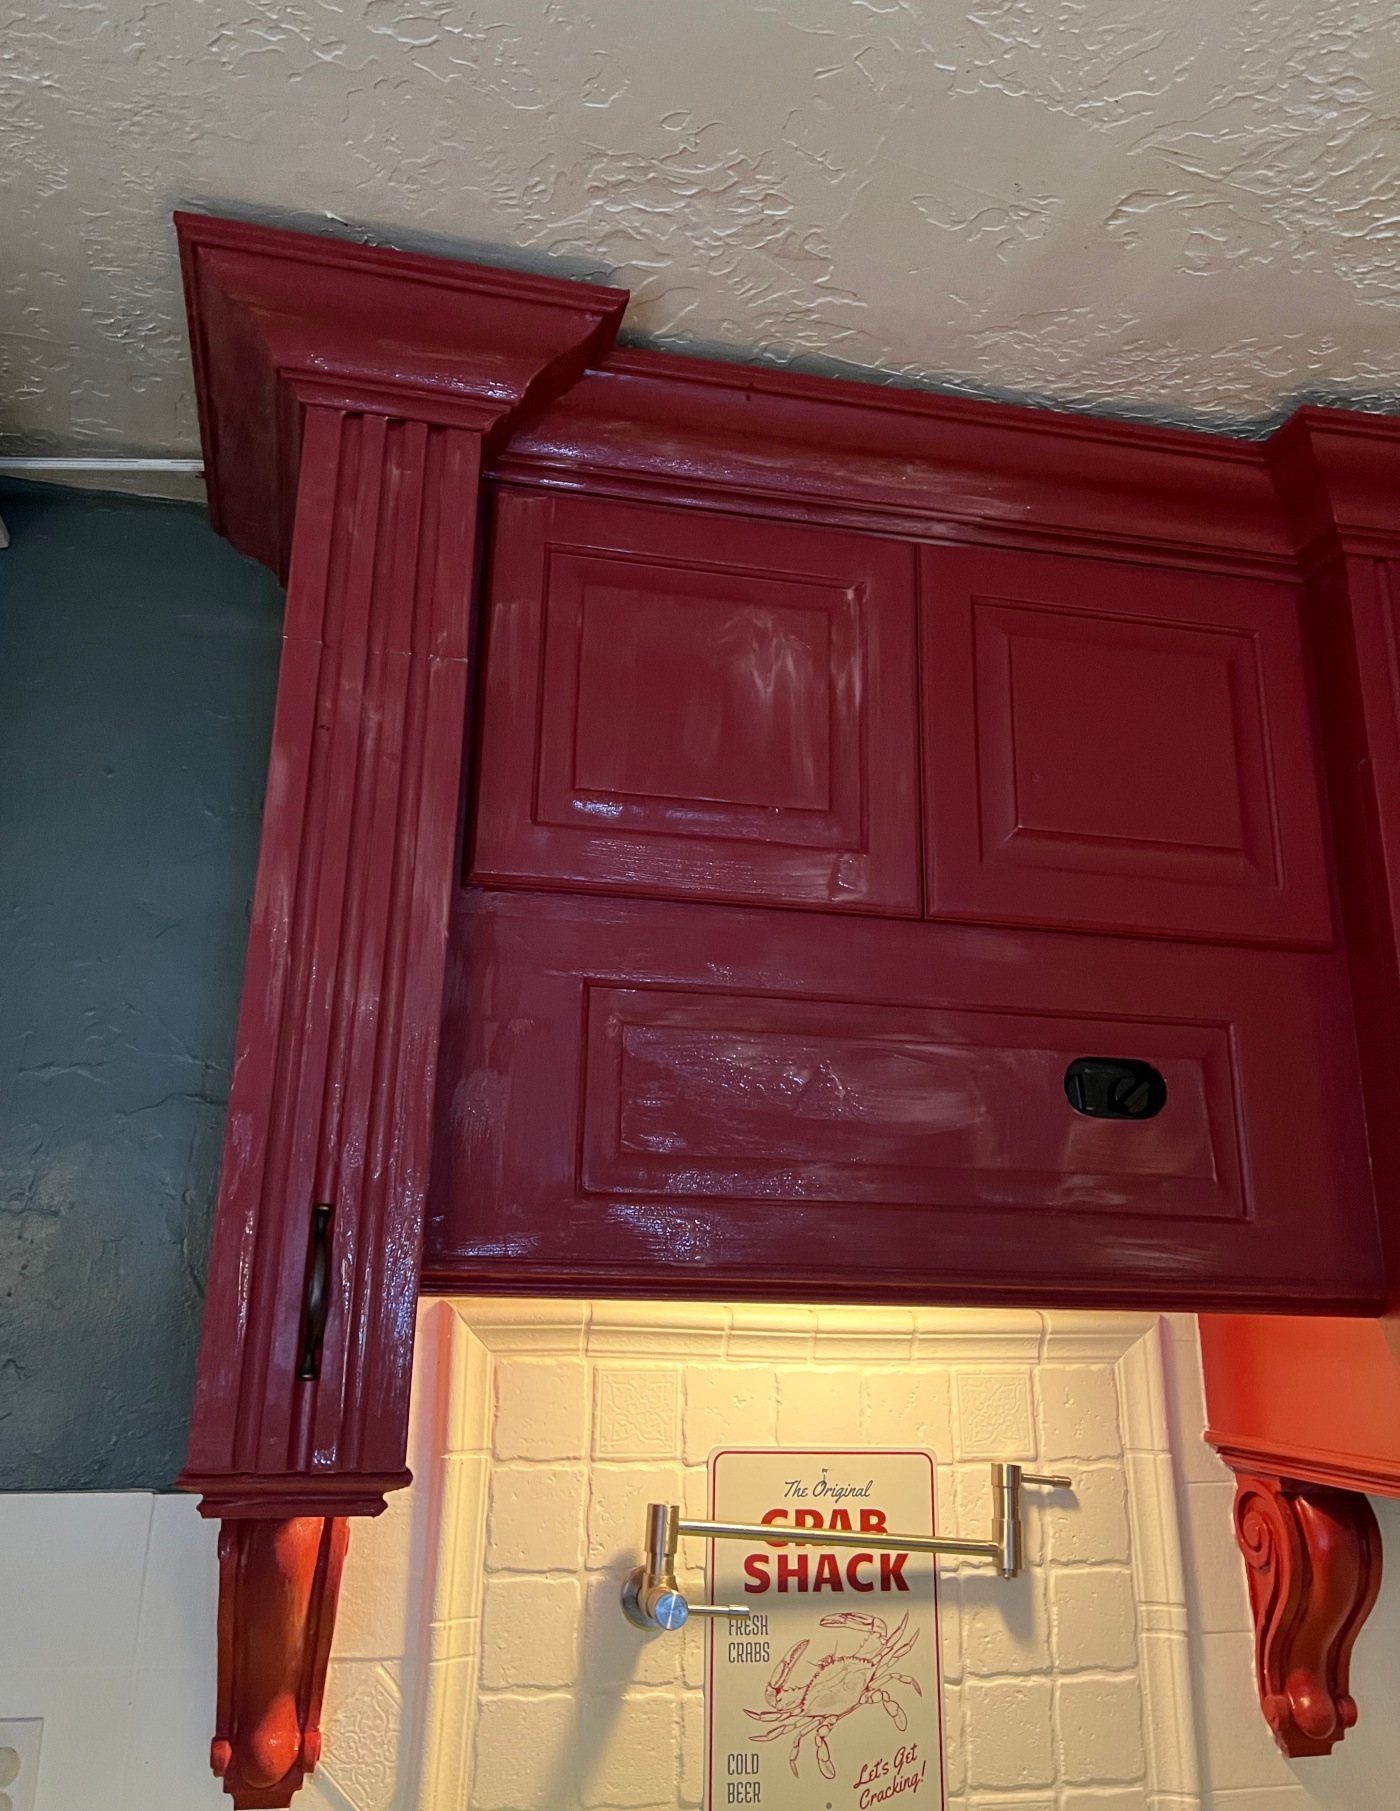
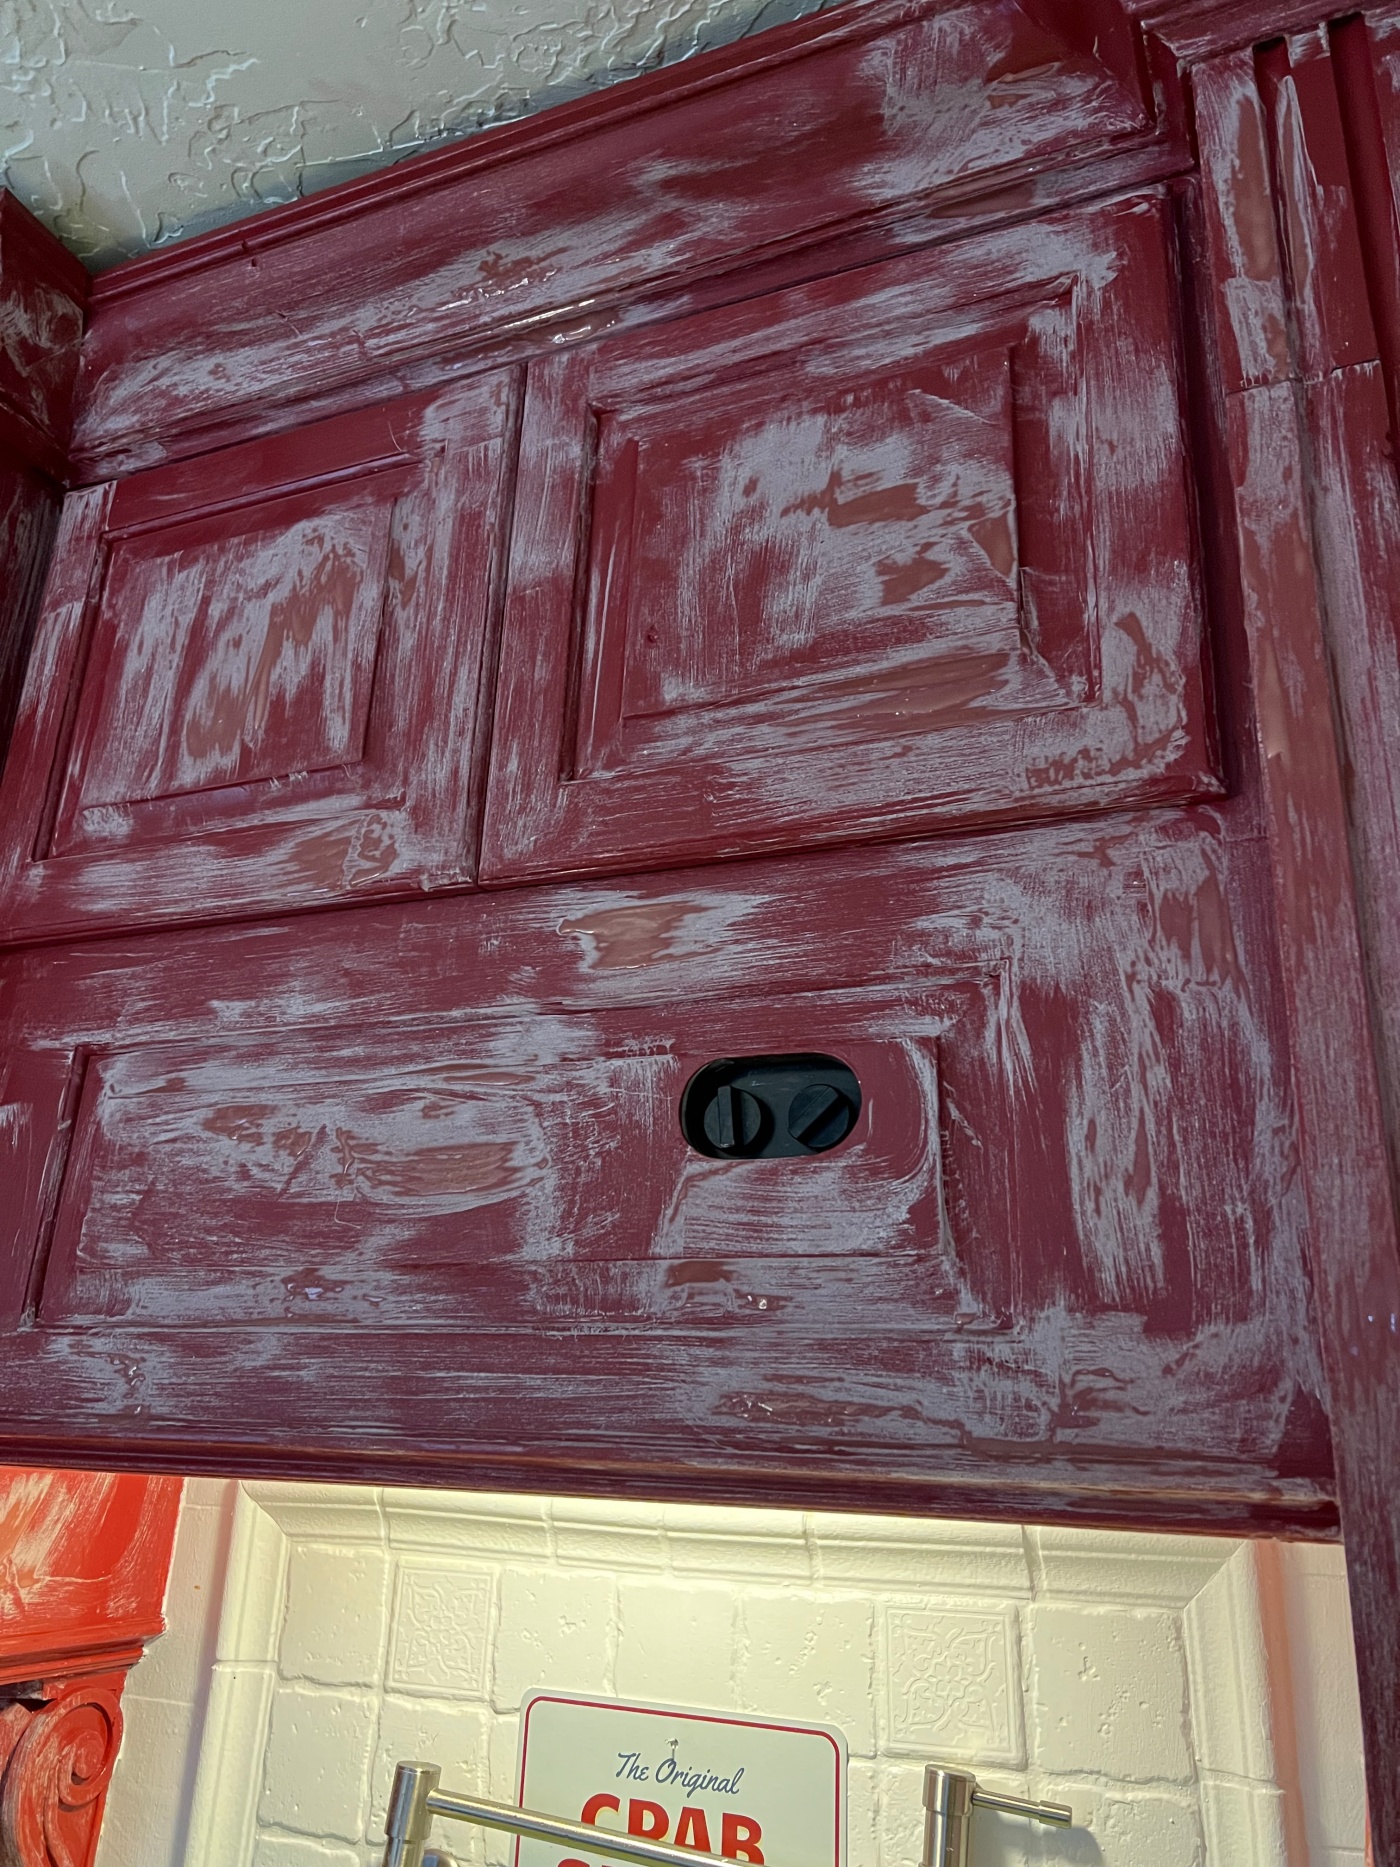
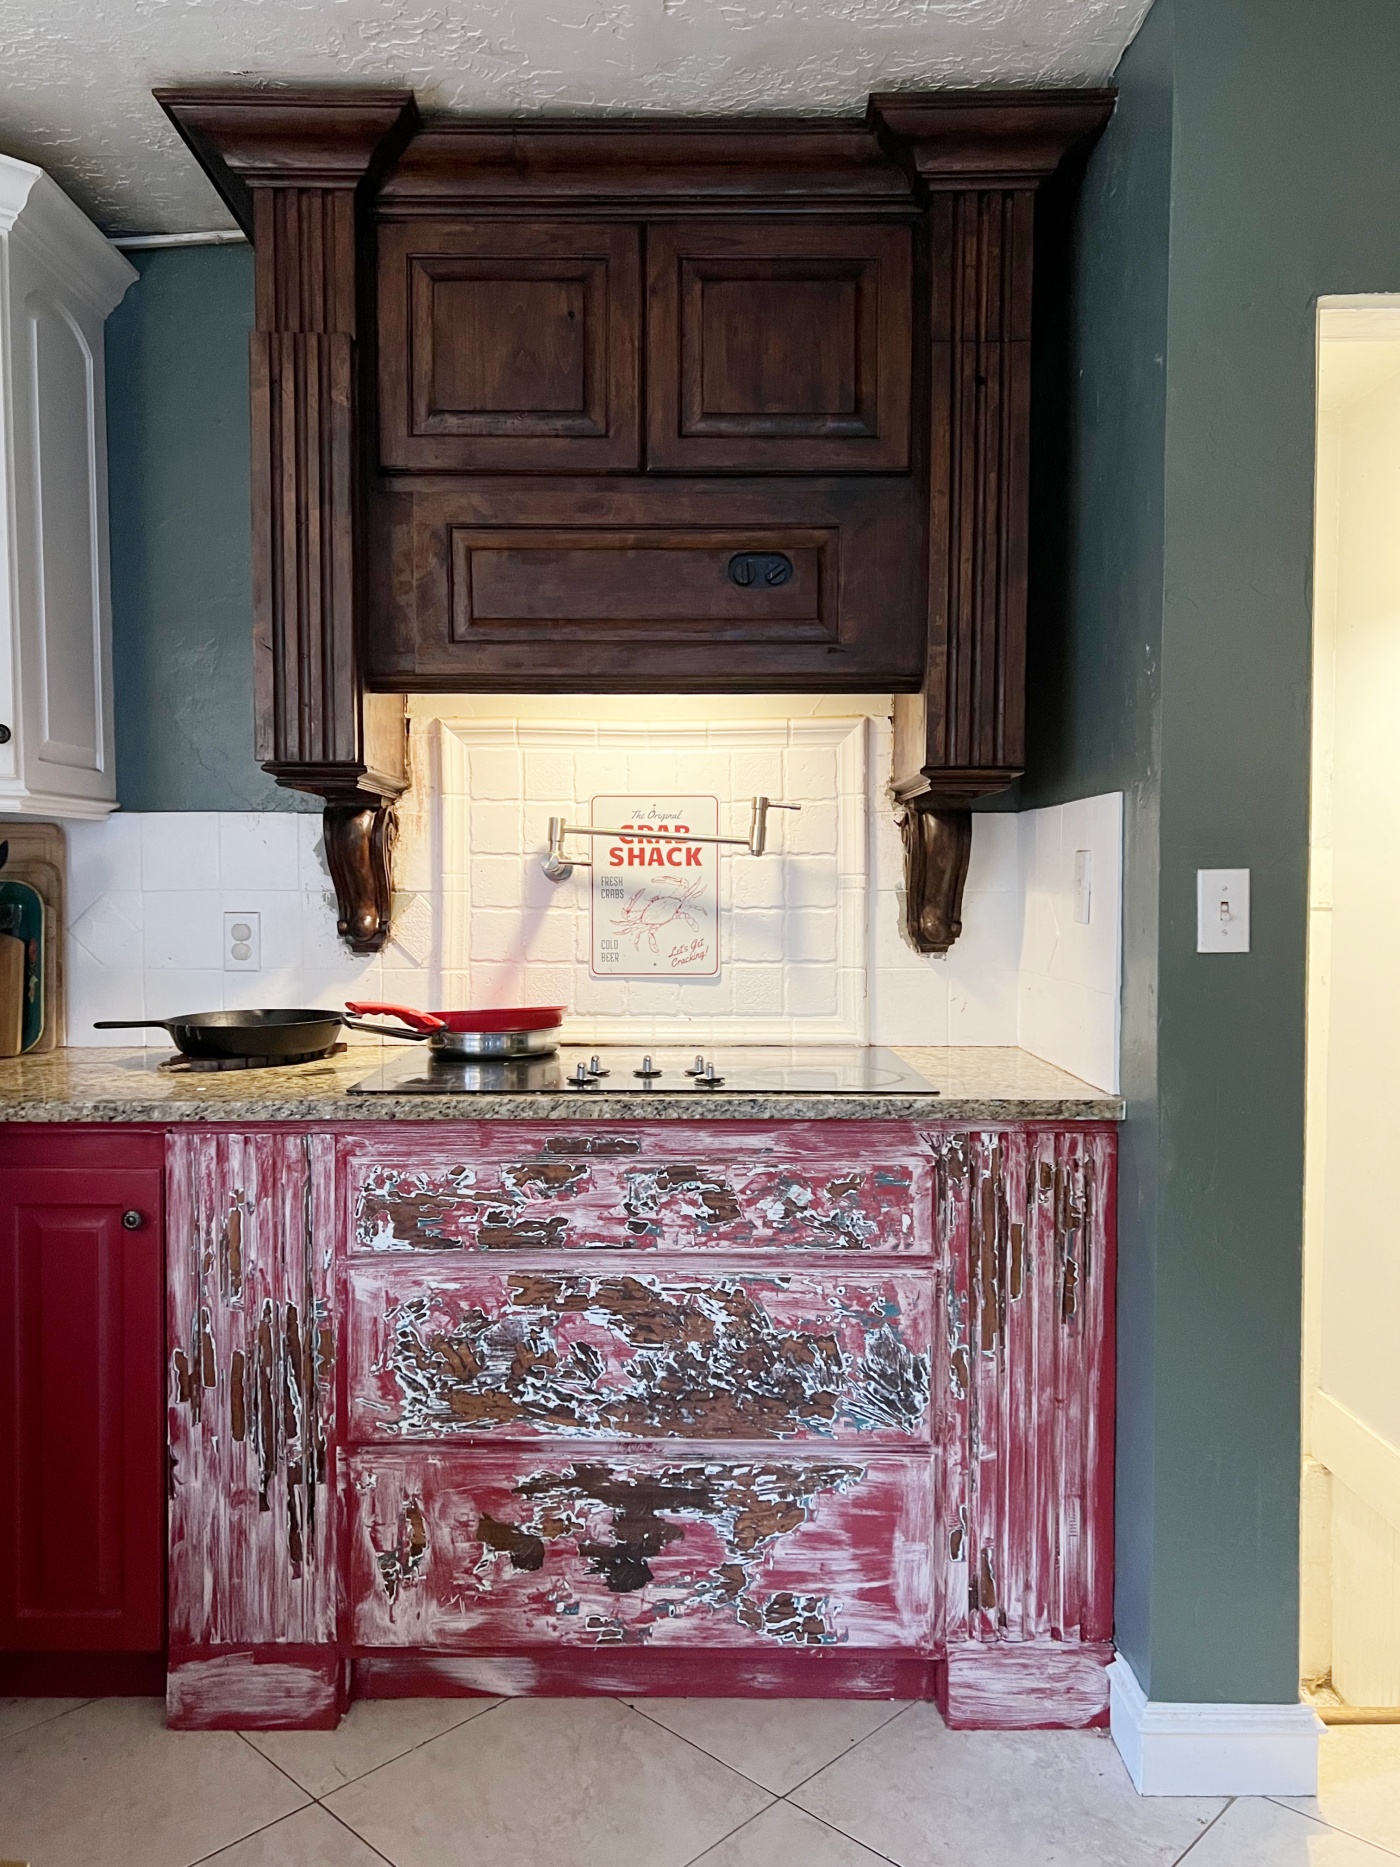
Before, this stove mount was painted red. This Red is named, Caliente by Benjamin Moore. See more about our red kitchen HERE.
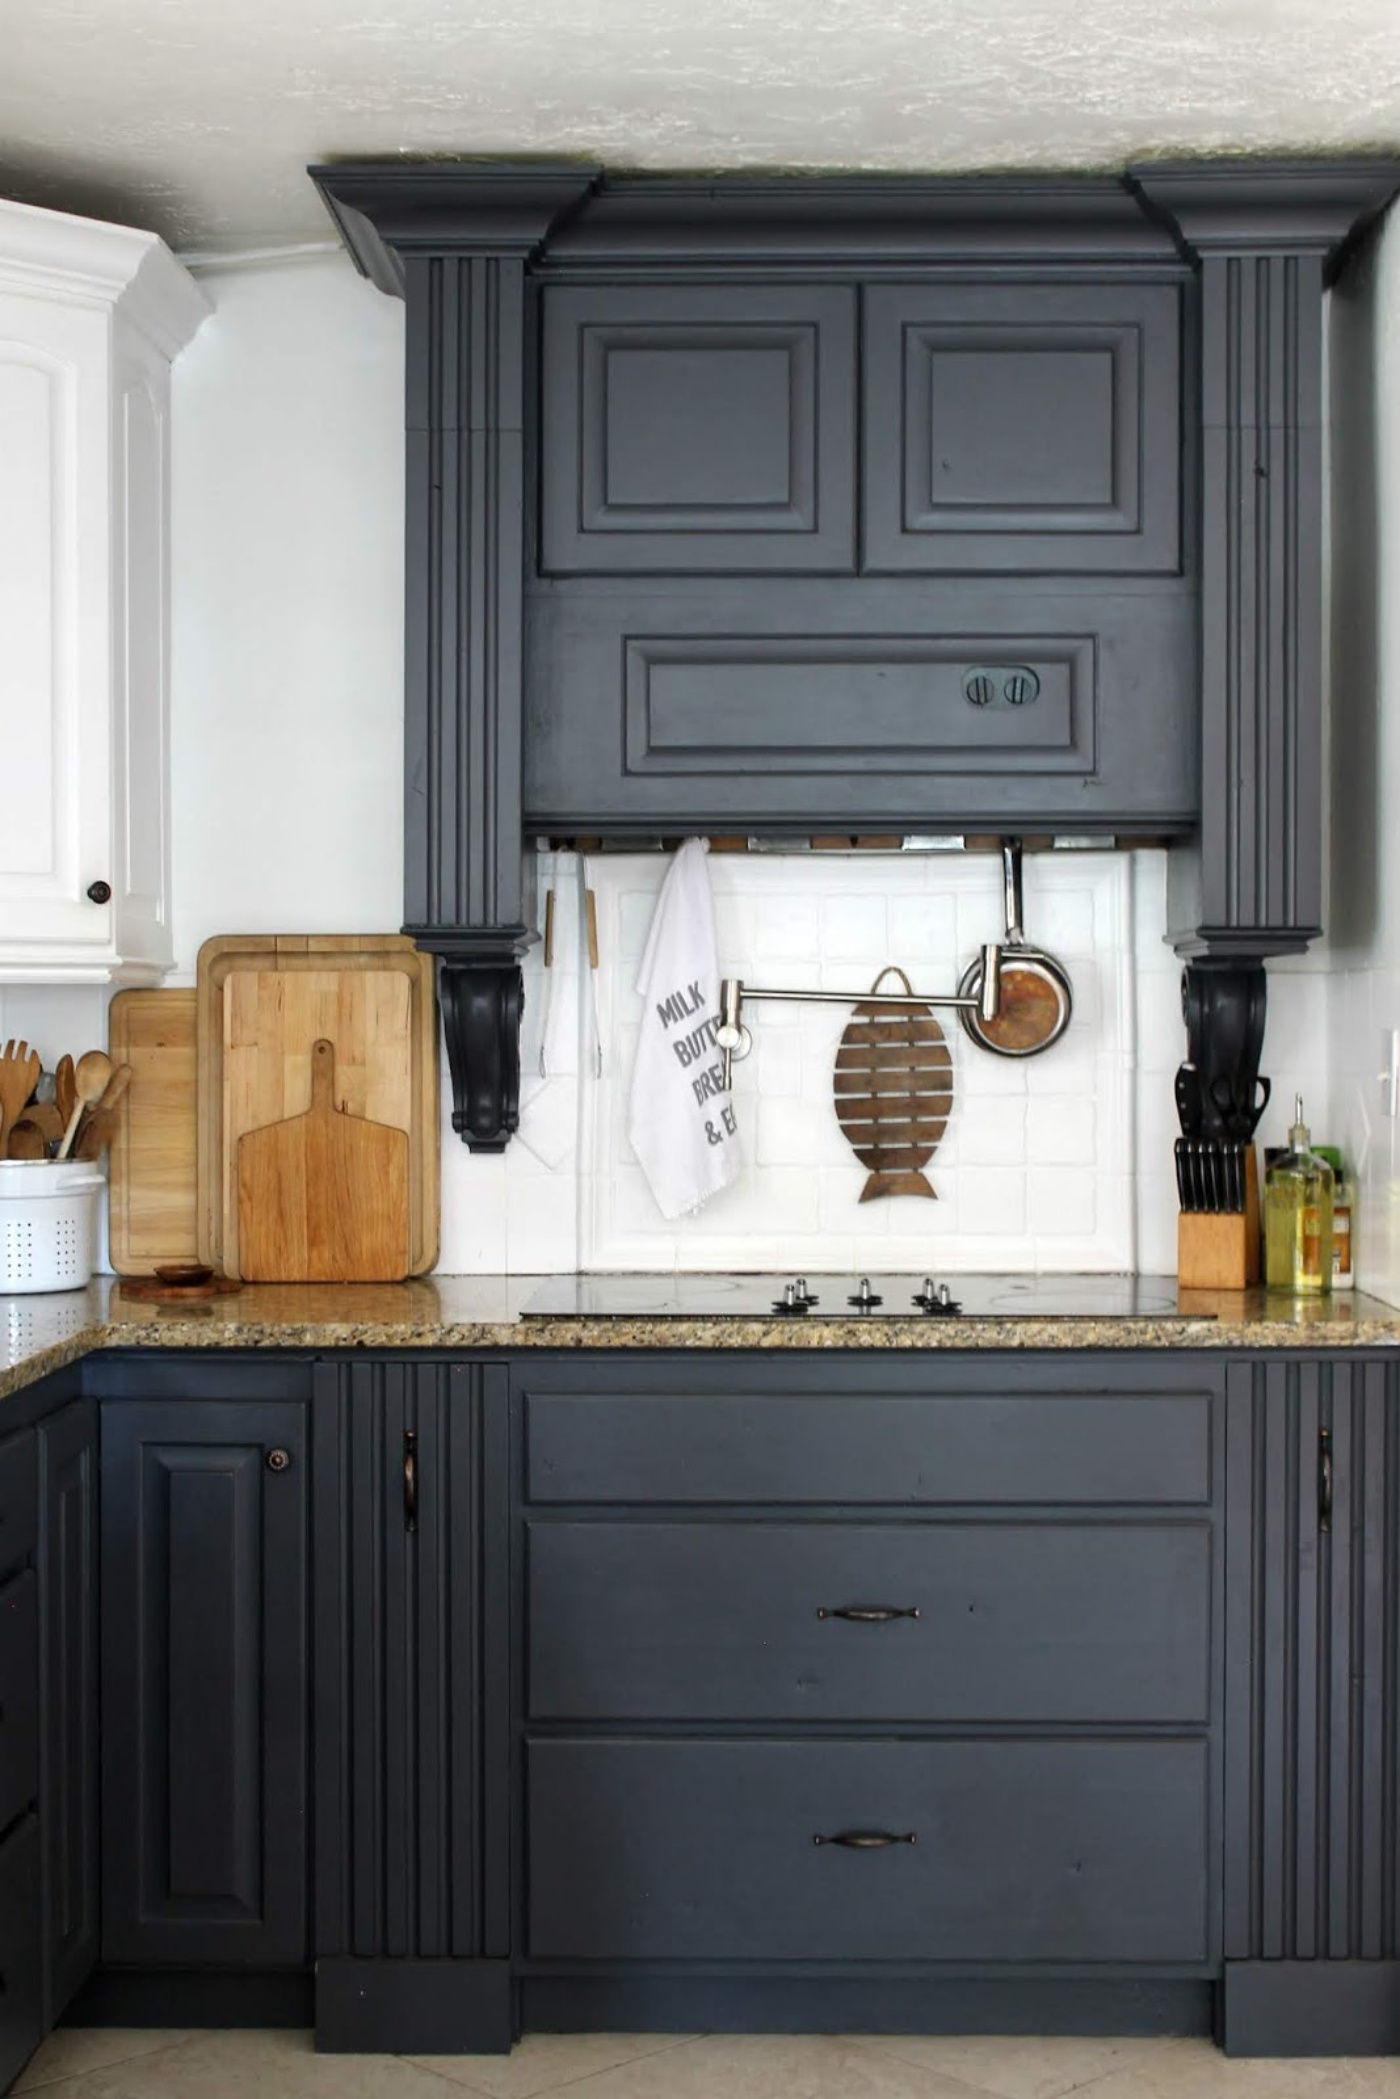
Then before it was red, I had painted this stove mount in a color named, Wrought Iron by Benjamin Moore. See more of this look HERE and HERE.
Then before the stove mount was painted dark it was painted white on top and green on bottom. The green paint is named, Lucky Shamrock from Olympic paint. See more of this look HERE.
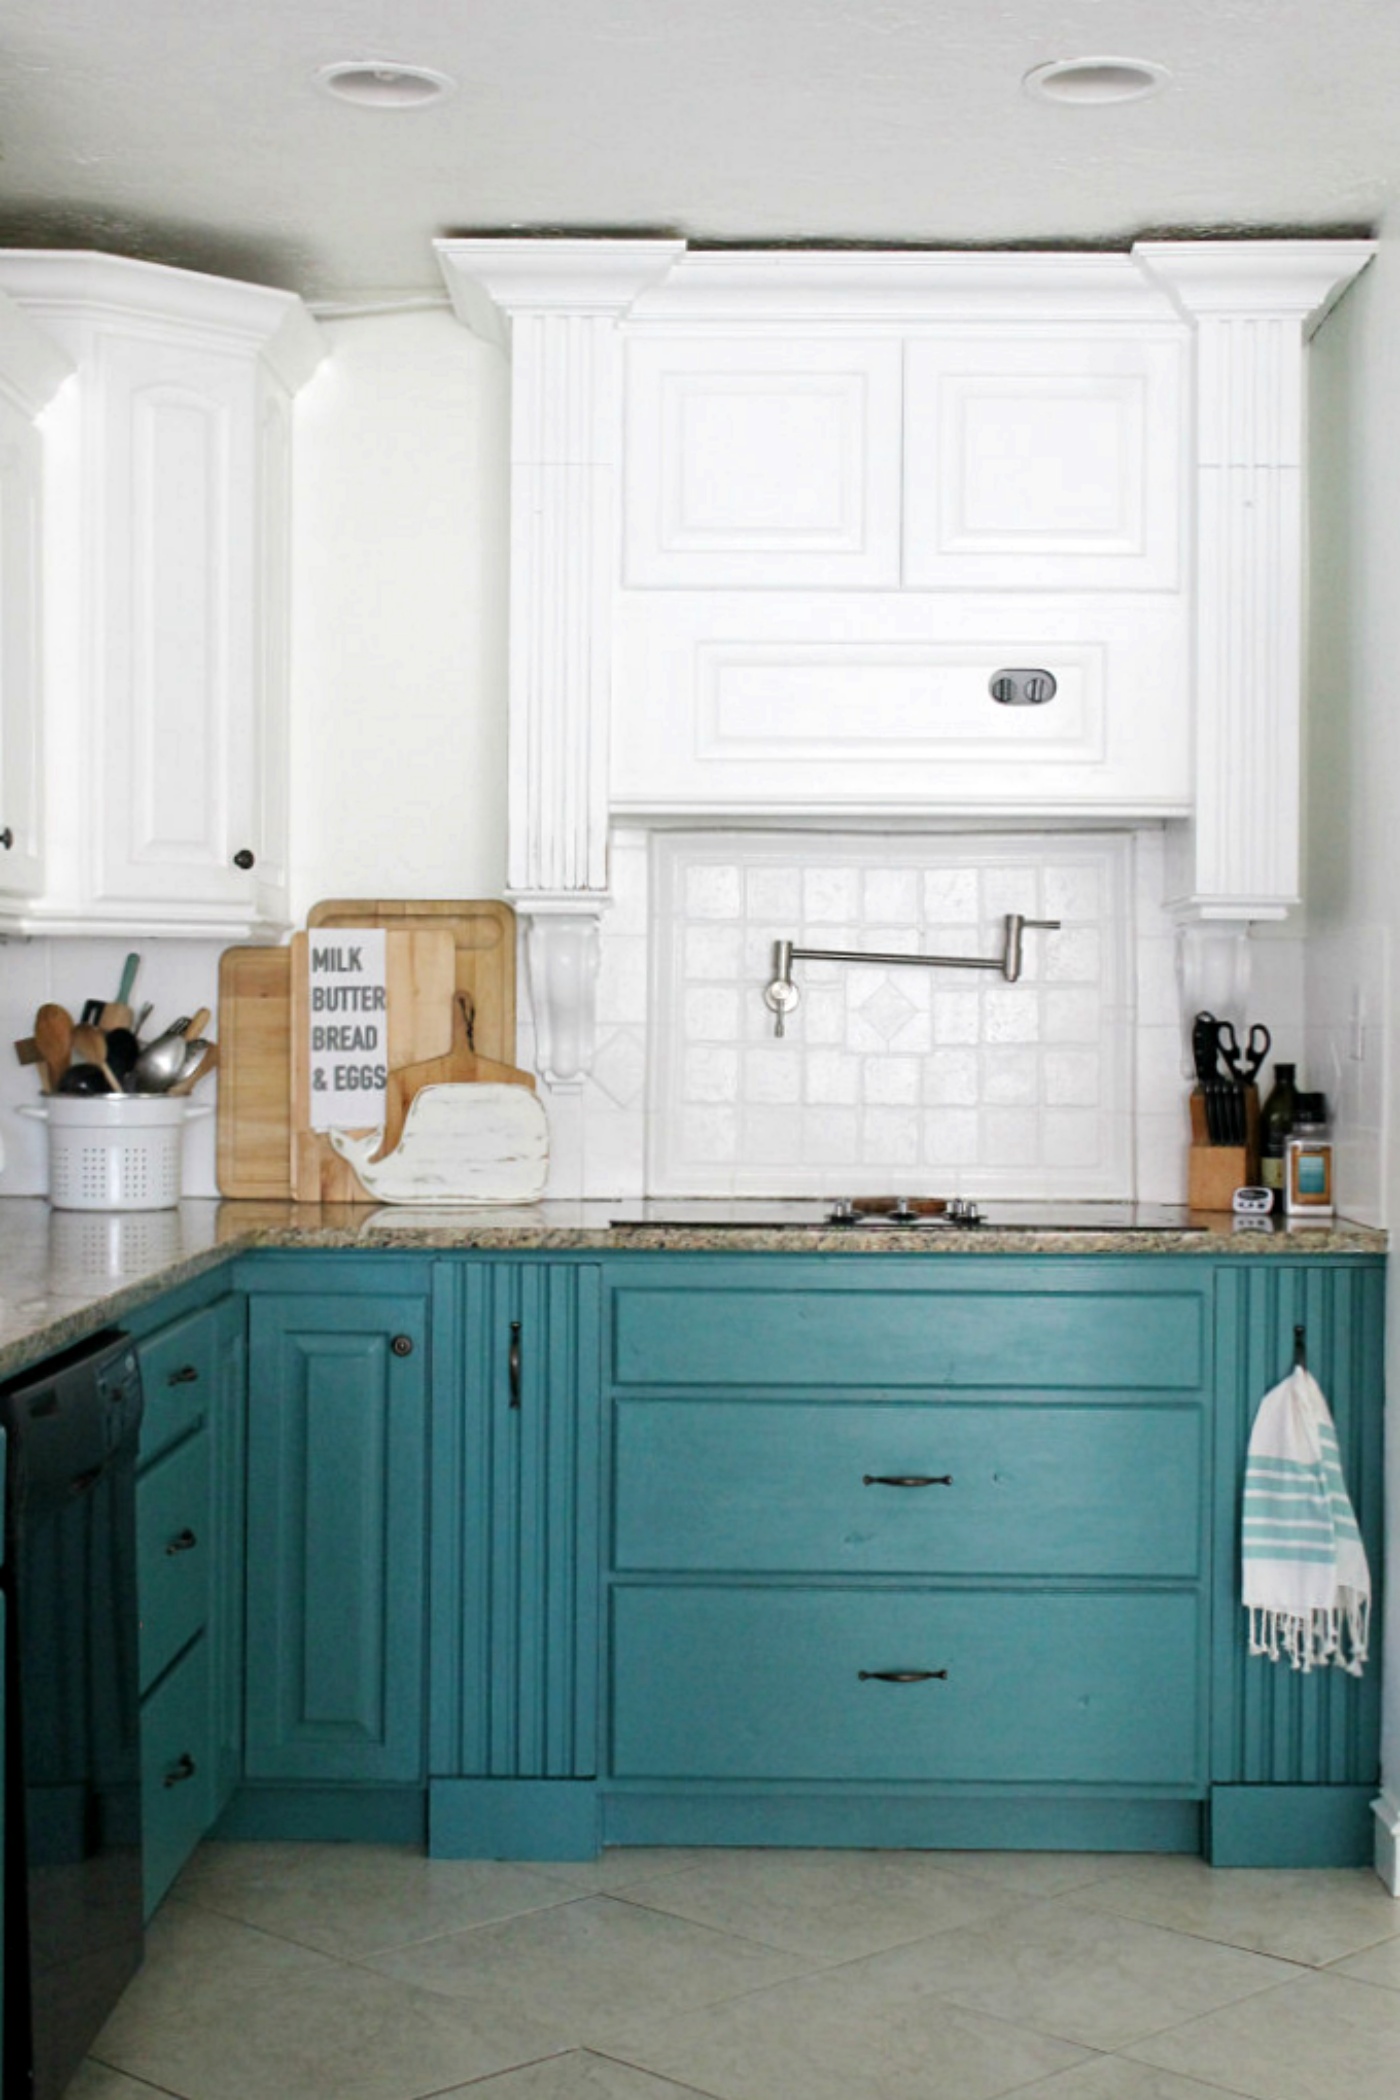
Then before the stove mount was painted green, it was painted all in white. You can see more of this look Here and HERE.
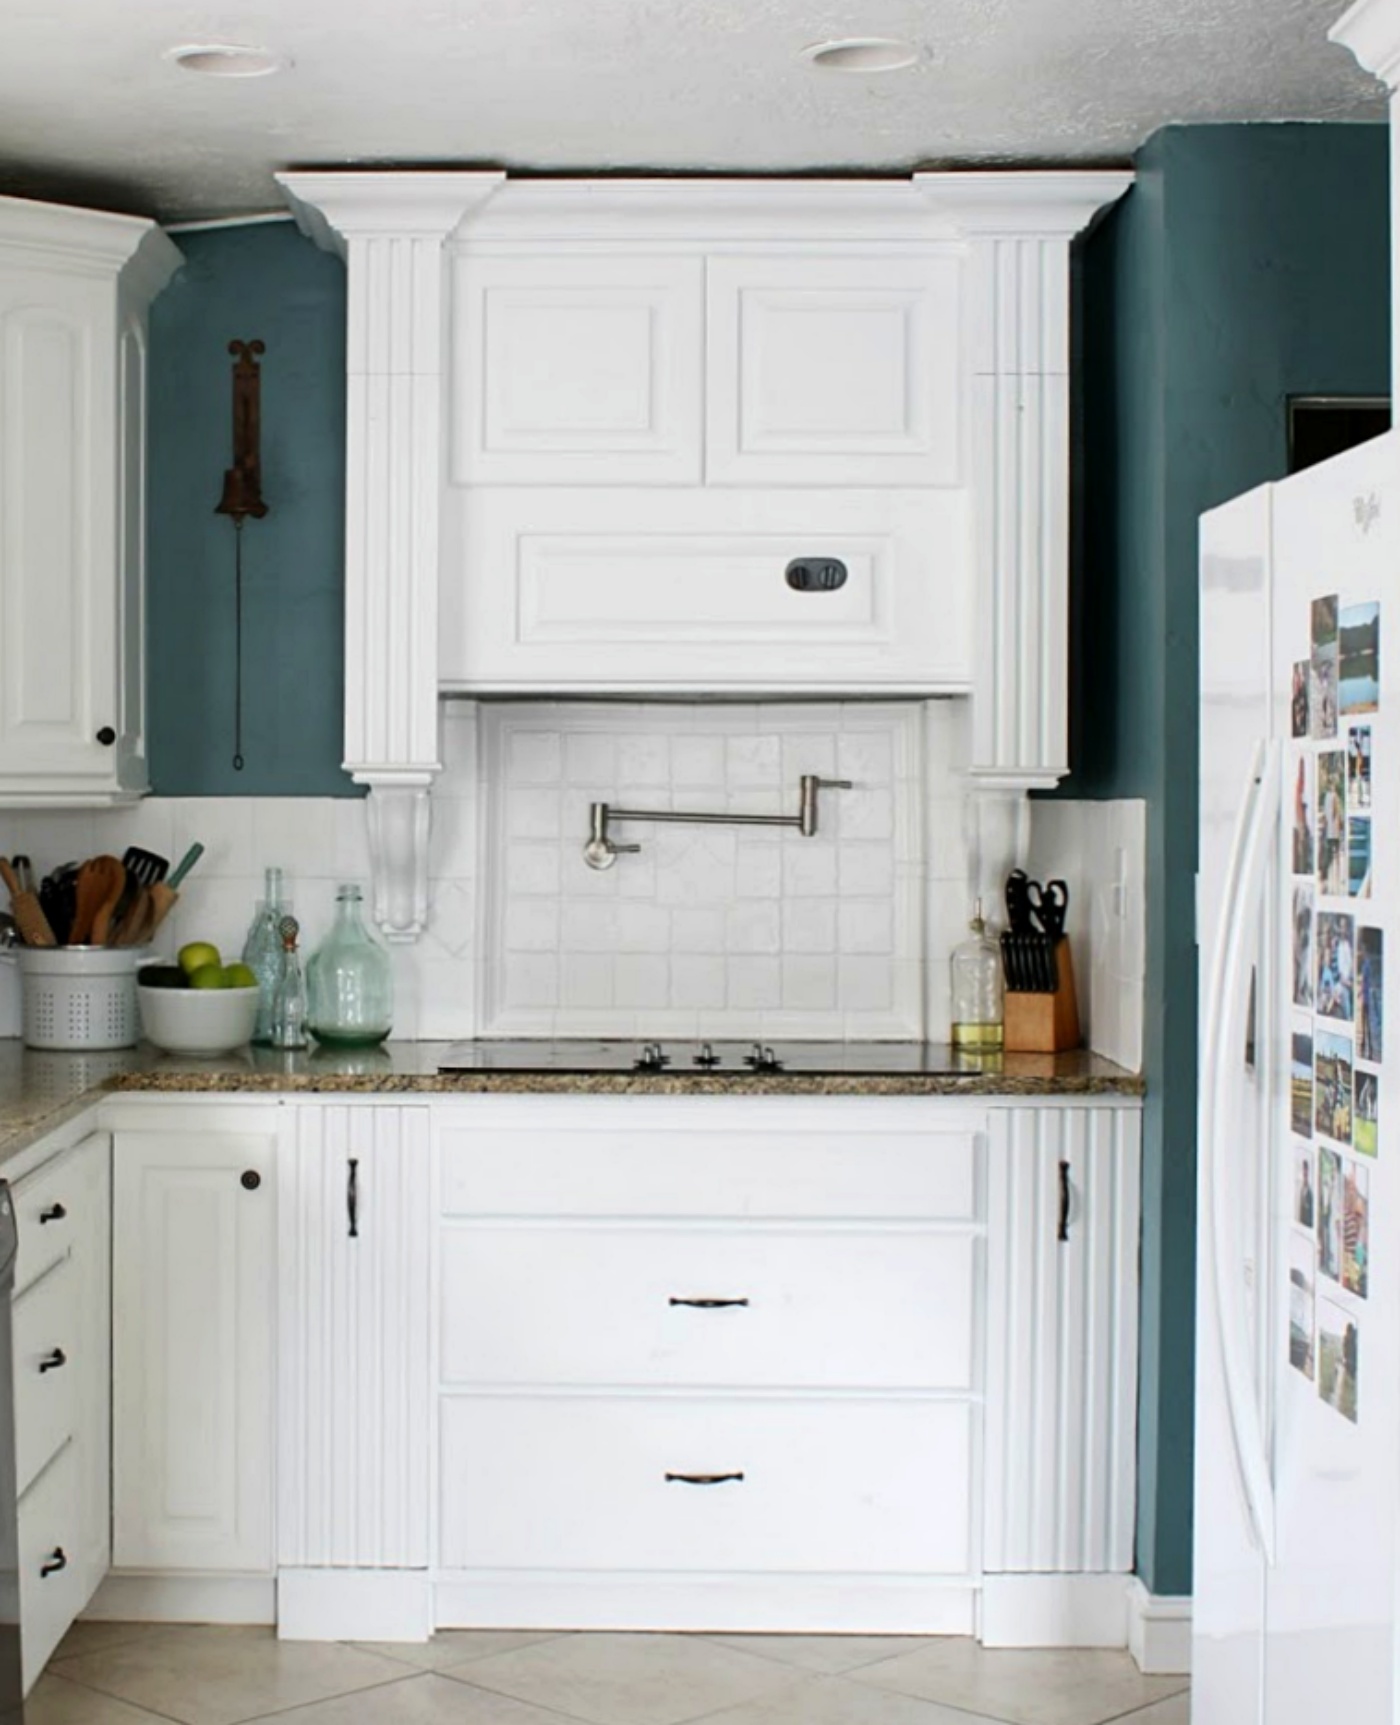
It actually took me some serious guts to paint the stove mount white since it was originally wood when we bought our home. See more of this look HERE. So now we have gone in a complete circle, and the wood stove mount is back to how it looked originally, well almost. I also painted the tile backsplash white, as seen Here.
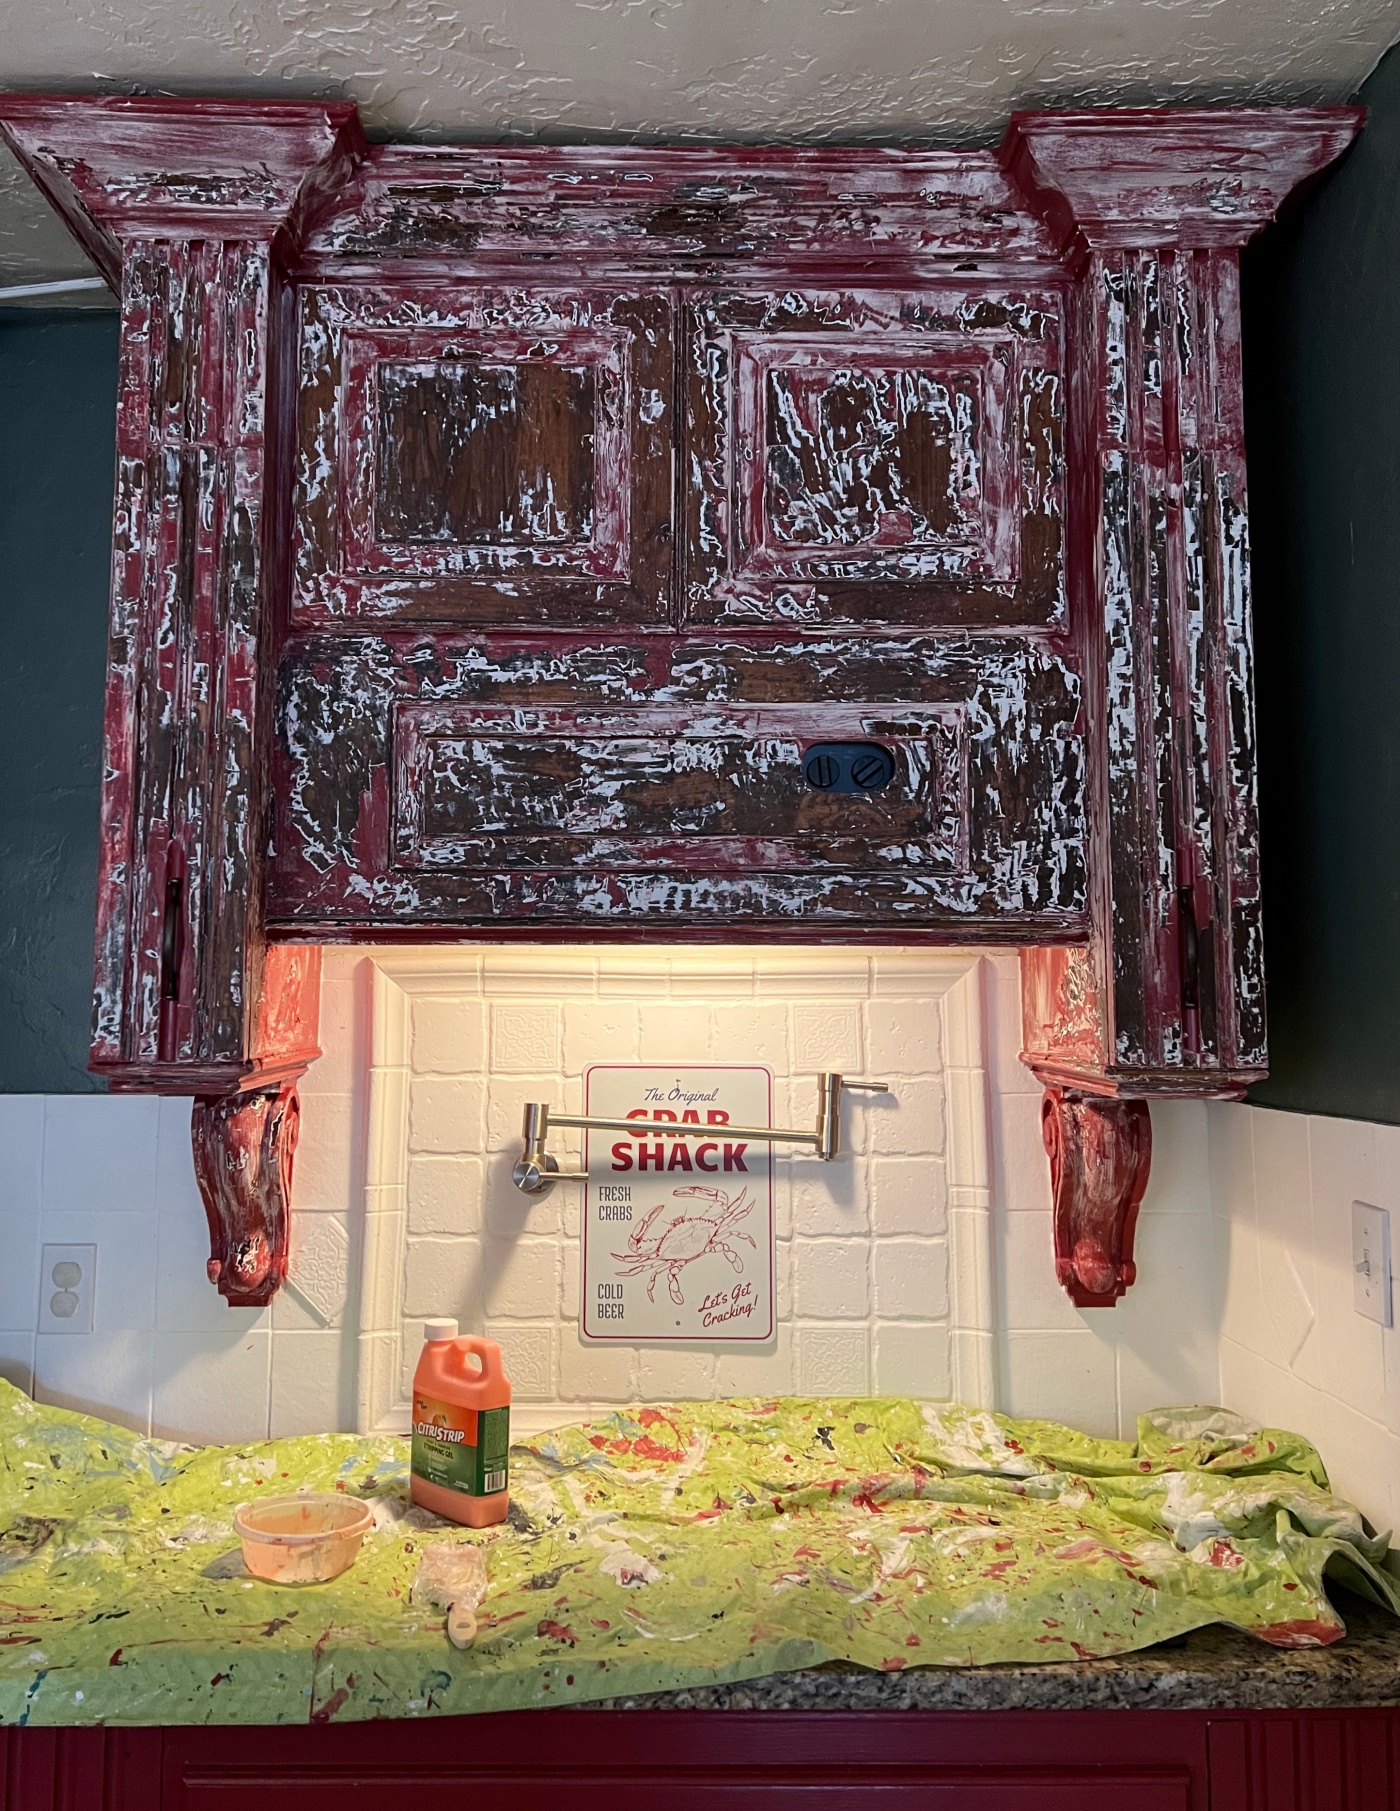
So How did I strip the stove mount back to wood? Well, with some Citristrip, a metal scraper, and a heck of a lot of work and patience. I’ll list the products that I used (or similar to) at the end of this post.
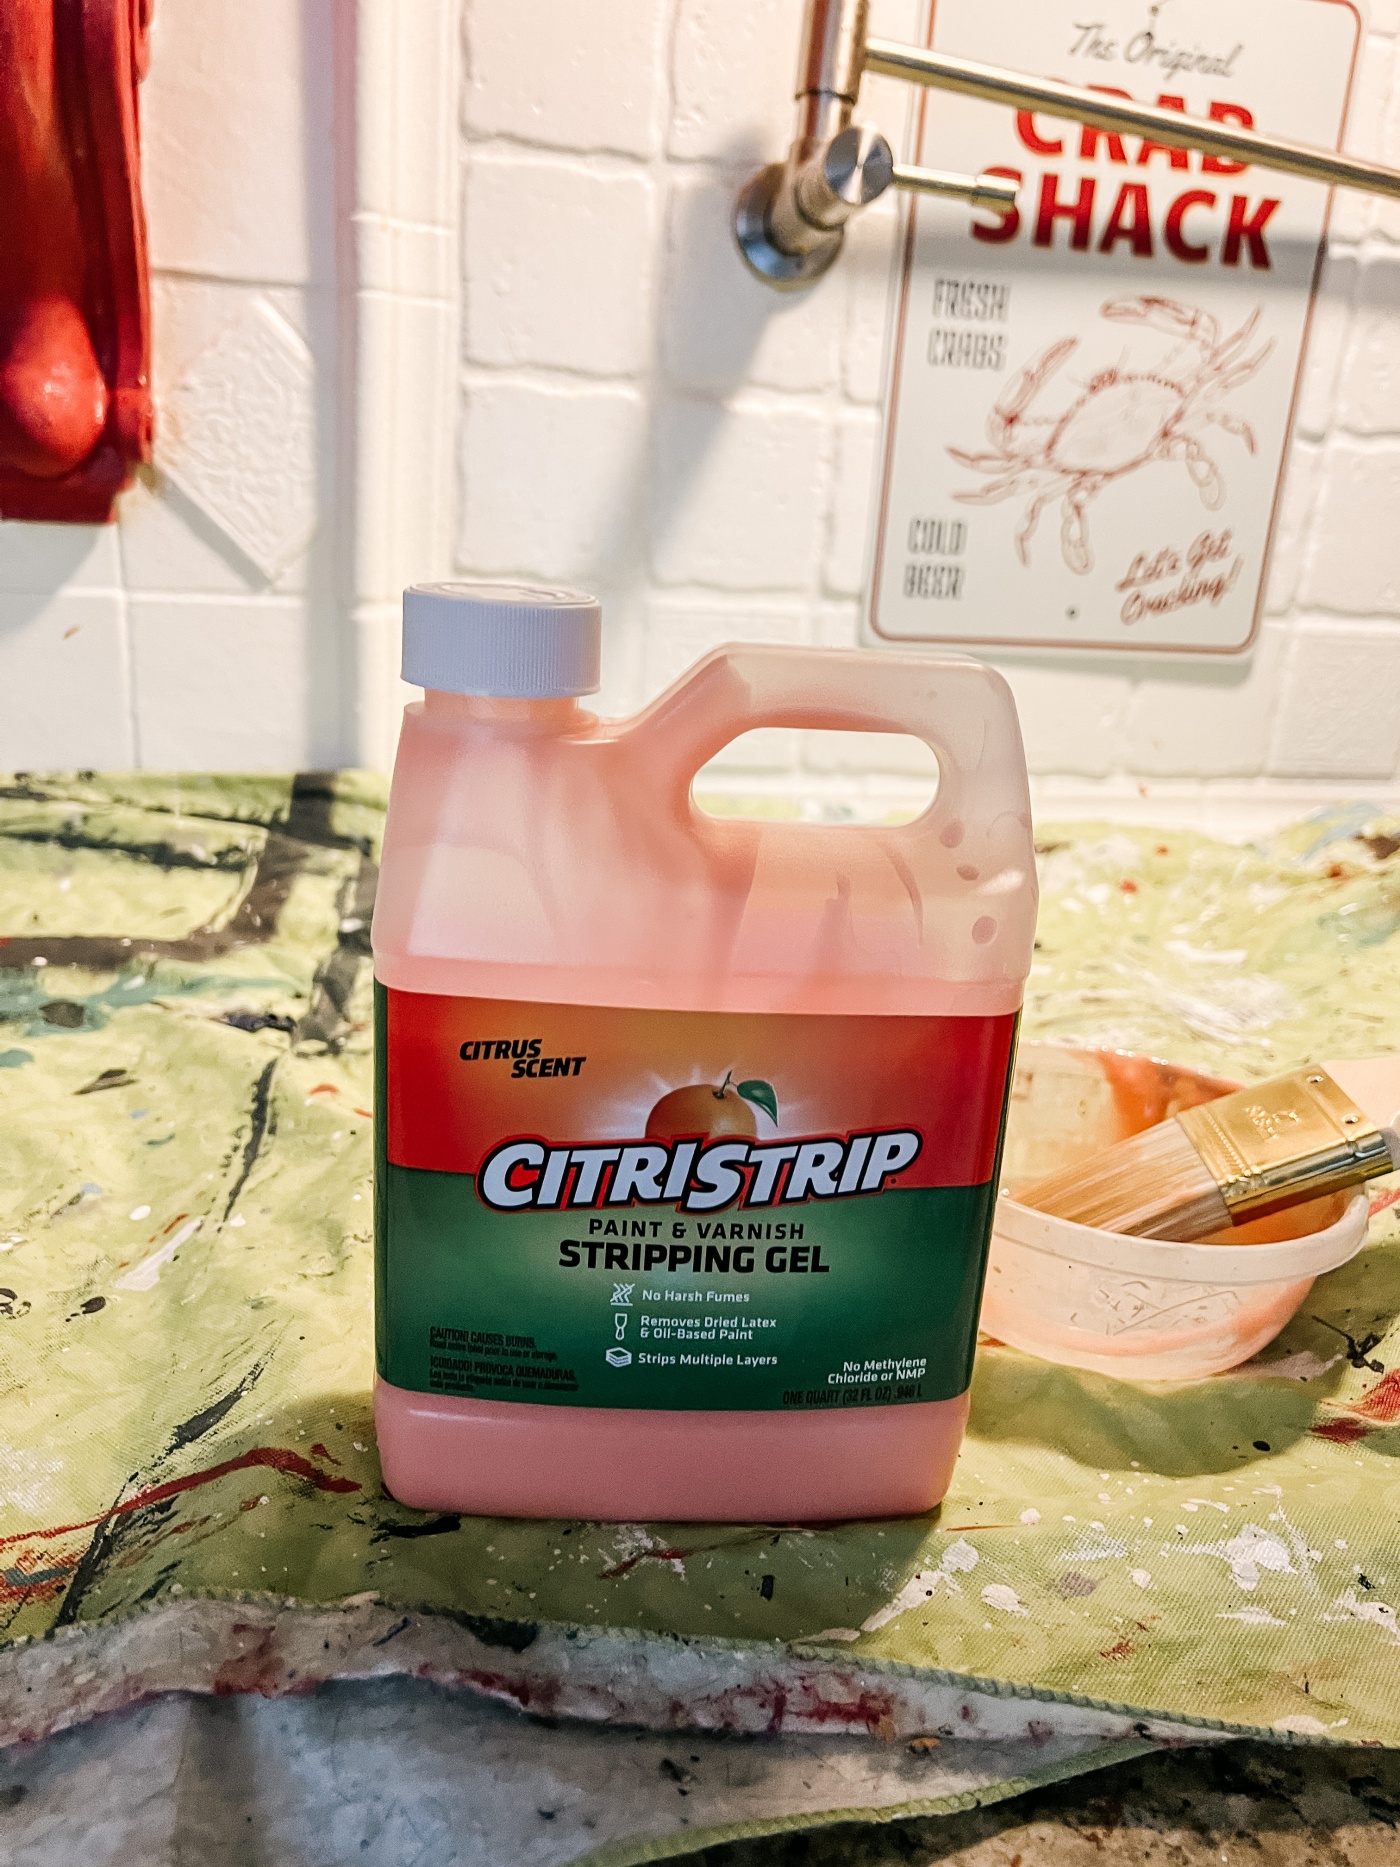
Have you used this Citristrip before? This was my first time using this product and I did like it because It did the job, but with that said, I did also notice that I got headaches after using this Citristrip, so I’m guessing it’s pretty toxic. I always wore rubber gloves and a face mask, but ya, it’s strong stuff. I went through Three 32 oz bottles of this Citristrip on this project to strip away four layers of paint.
I used a cheap paint brush from the dollar store to heavily coat the Citristrip to the stove mount. *TIP I kept the paint brush in the freezer with a sandwich bag around it so that I didn’t have to clean up after every time I used it.
I left the Citristrip alone for about 24 hours so it could do it’s thing. At first I was only waiting an hour or so, but then I later found out that it worked better to leave it on longer. Then Using my metal scraper I would scrape off what I could. Once I scrapped off as much as I could, I added more Citristrip and continued the process until I had all of the paint fully removed. This was a lot of work and took me several coats of the Citristrip to fully remove all of the paint. The top mount was more work than the bottom because of the molding and the Corbels….. Those corbels were a pain!
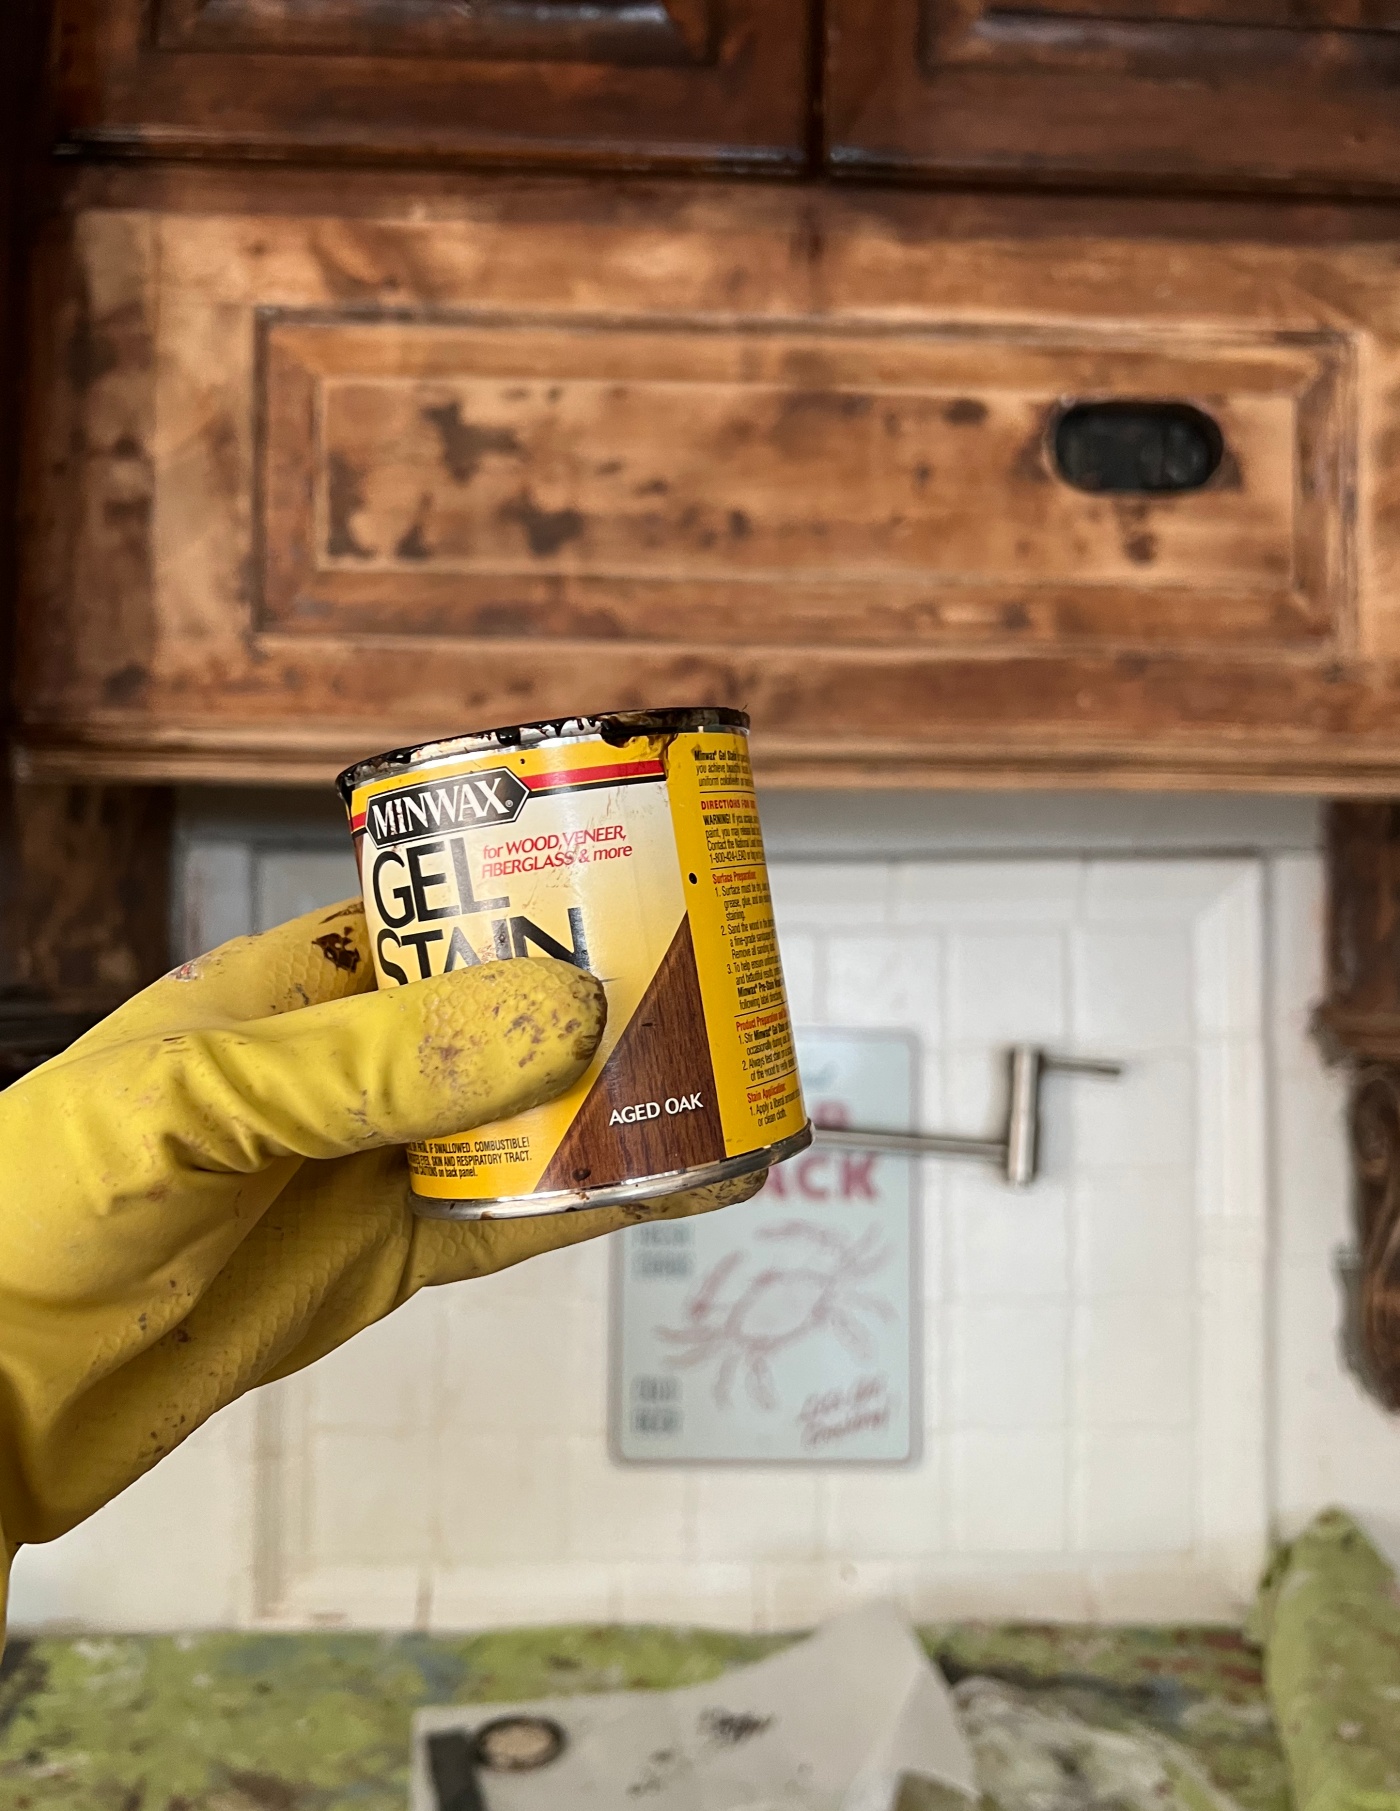
After I had all of the paint removed, I used my small corner/hand sander to sand it all down. I also had to used sheets of sandpaper to get into those hard to reach areas. The picture below shows how it looked before I gel stained it. As you can see, there were some blotchy spots. This is why I knew I had to use Gel stain instead of regular stain. Gel stain just covers better and allows you to layer on coats until you get the look you desire. Plus, I love Gel stain! As you should know, I gel stained our entire wood floors with it. Which you can read about HERE.

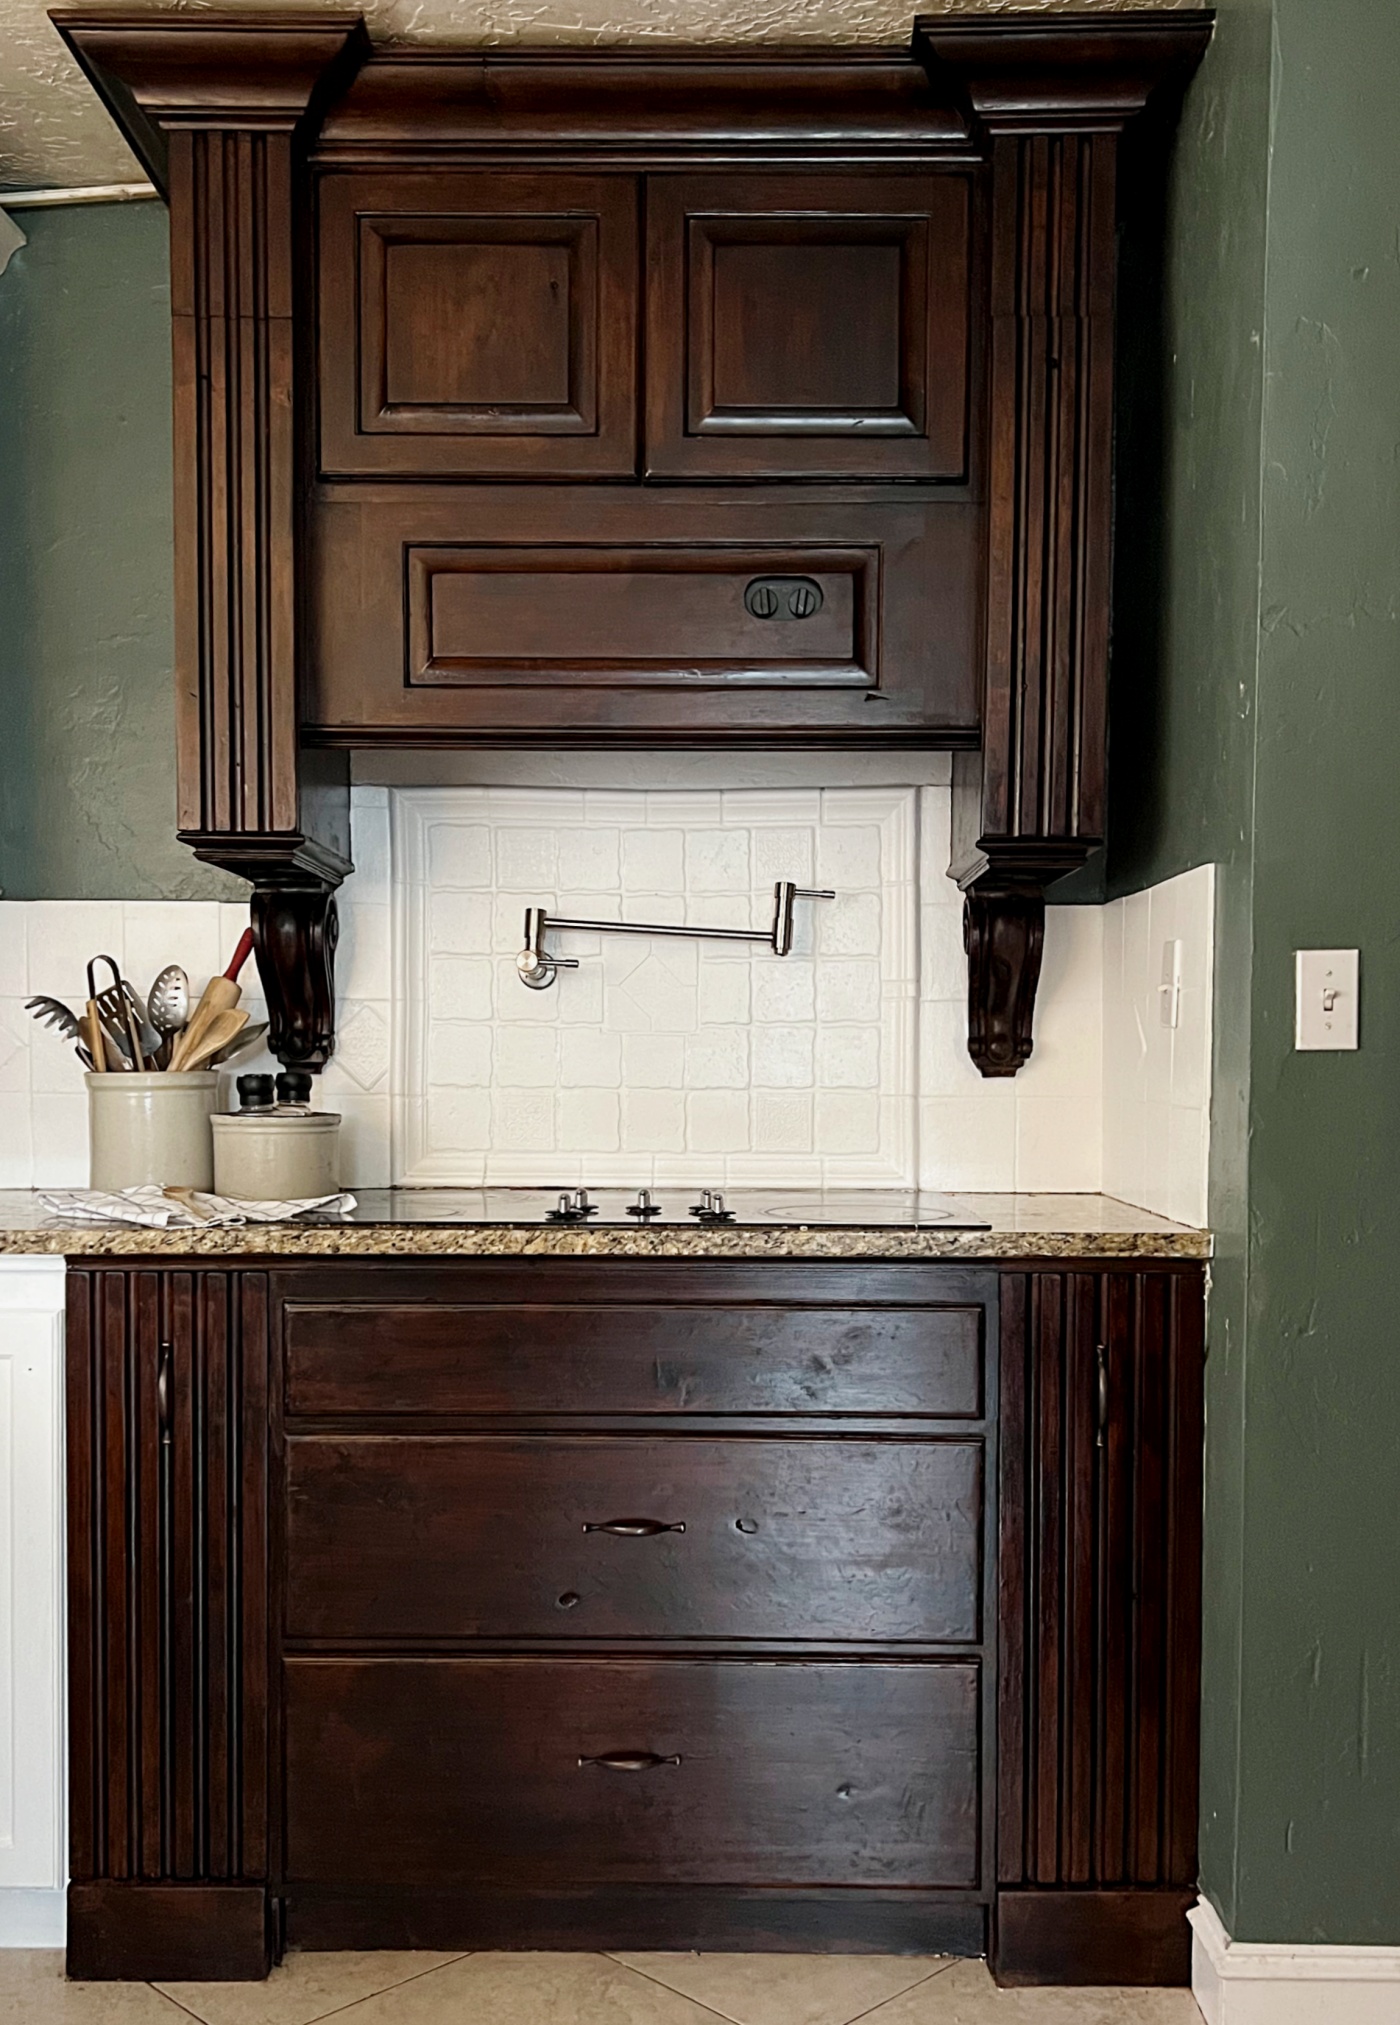
The Gel stain I used was from Minwax and the color is named, Aged Oak. As you can see I’m wearing rubber gloves to apply it. I’m also wearing a mask (thank you 2020 for my endless supply of mask) and then again, I just used a cheap paintbrush from the dollar tree to apply it. And same tip as above, wrap your paint brush in a plastic sandwich bag and place in the freezer for next time.
I ended up adding 3 coats of the gel stain to the wood. I just waited at least 24 hours in between coats for it to dry.
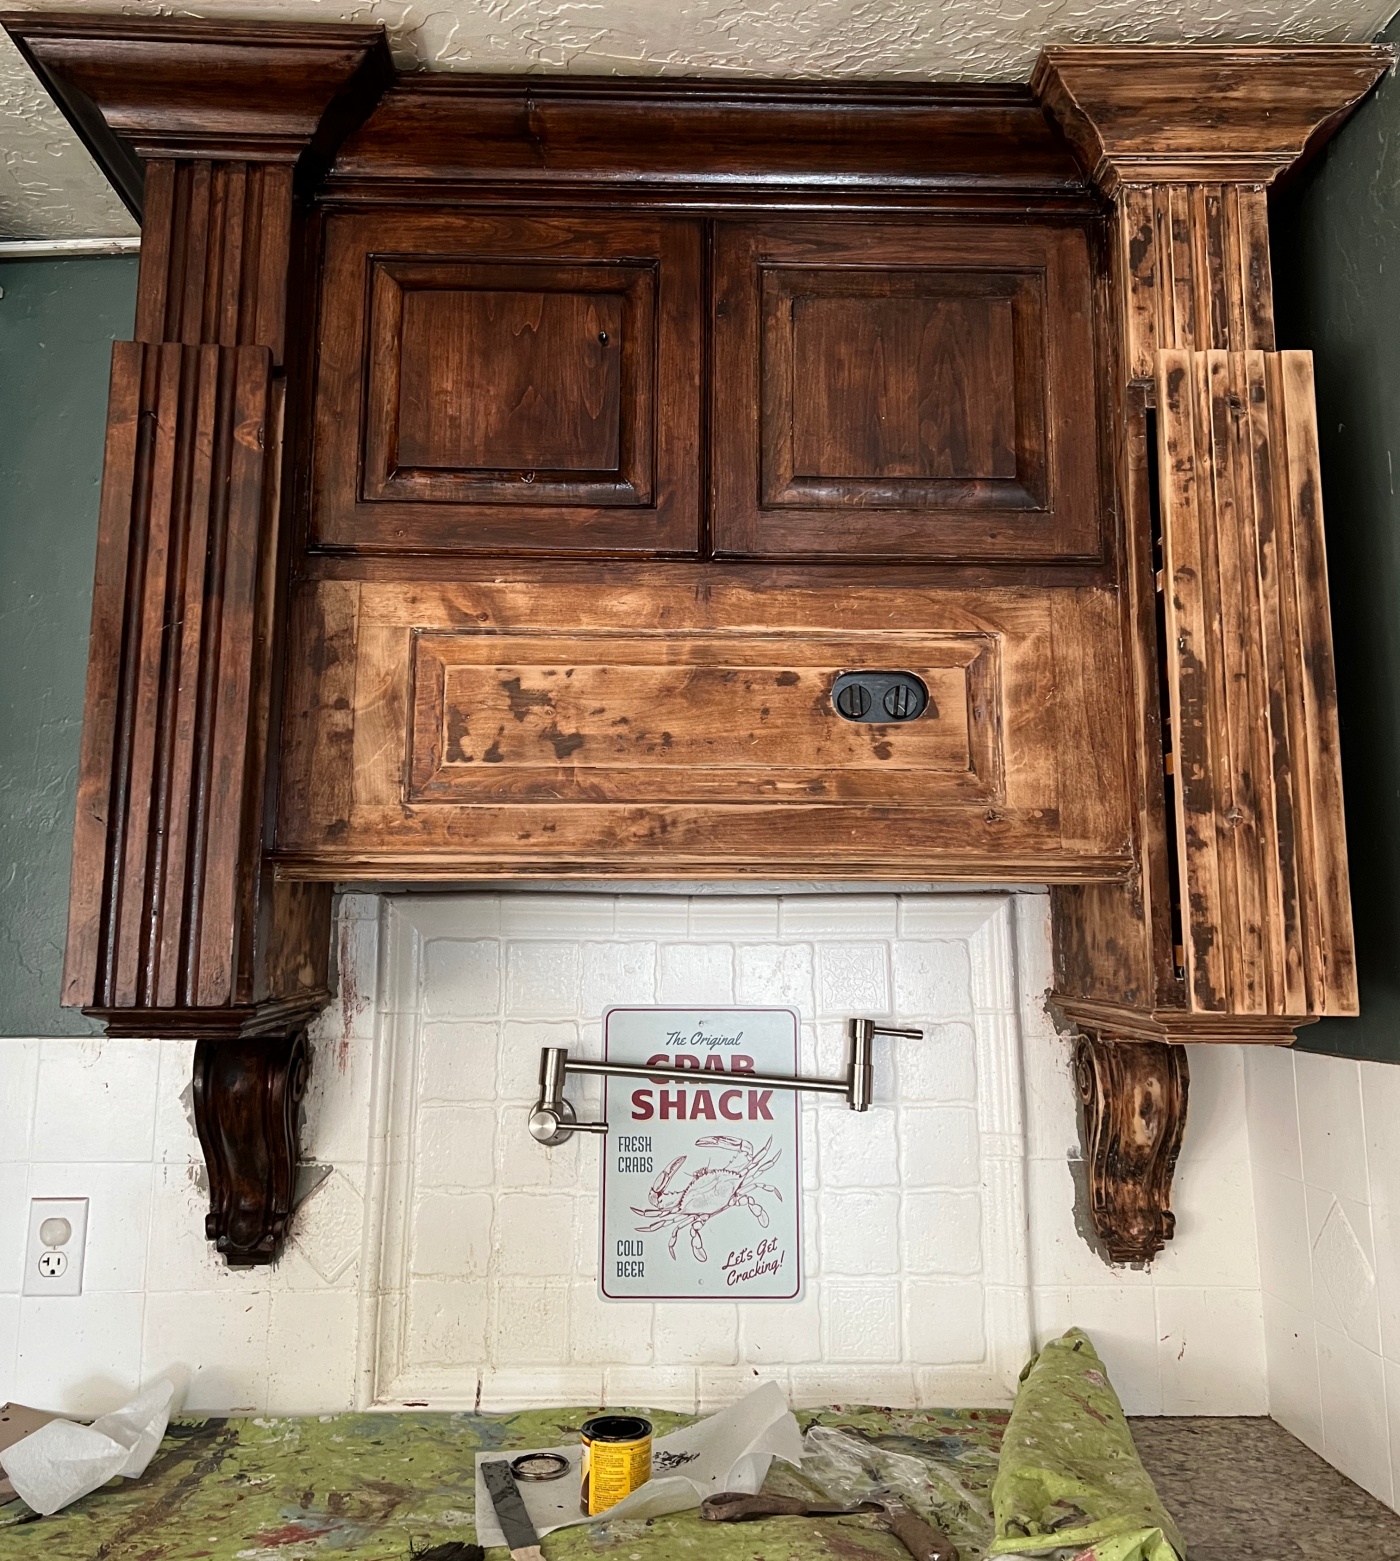
Once the top section of the stove mount was finished, I began on the lower half and followed the same steps as above.
I actually found it fun to scrap paint. I thought of it almost as a puzzle. It takes time and patients but slowly it all starts to come together and is so satisfying and rewarding in the end.
The bottom section was a lot easier than the top and I could sit on the floor to work on it, whereas I was on a ladder the whole time I was working on the top.
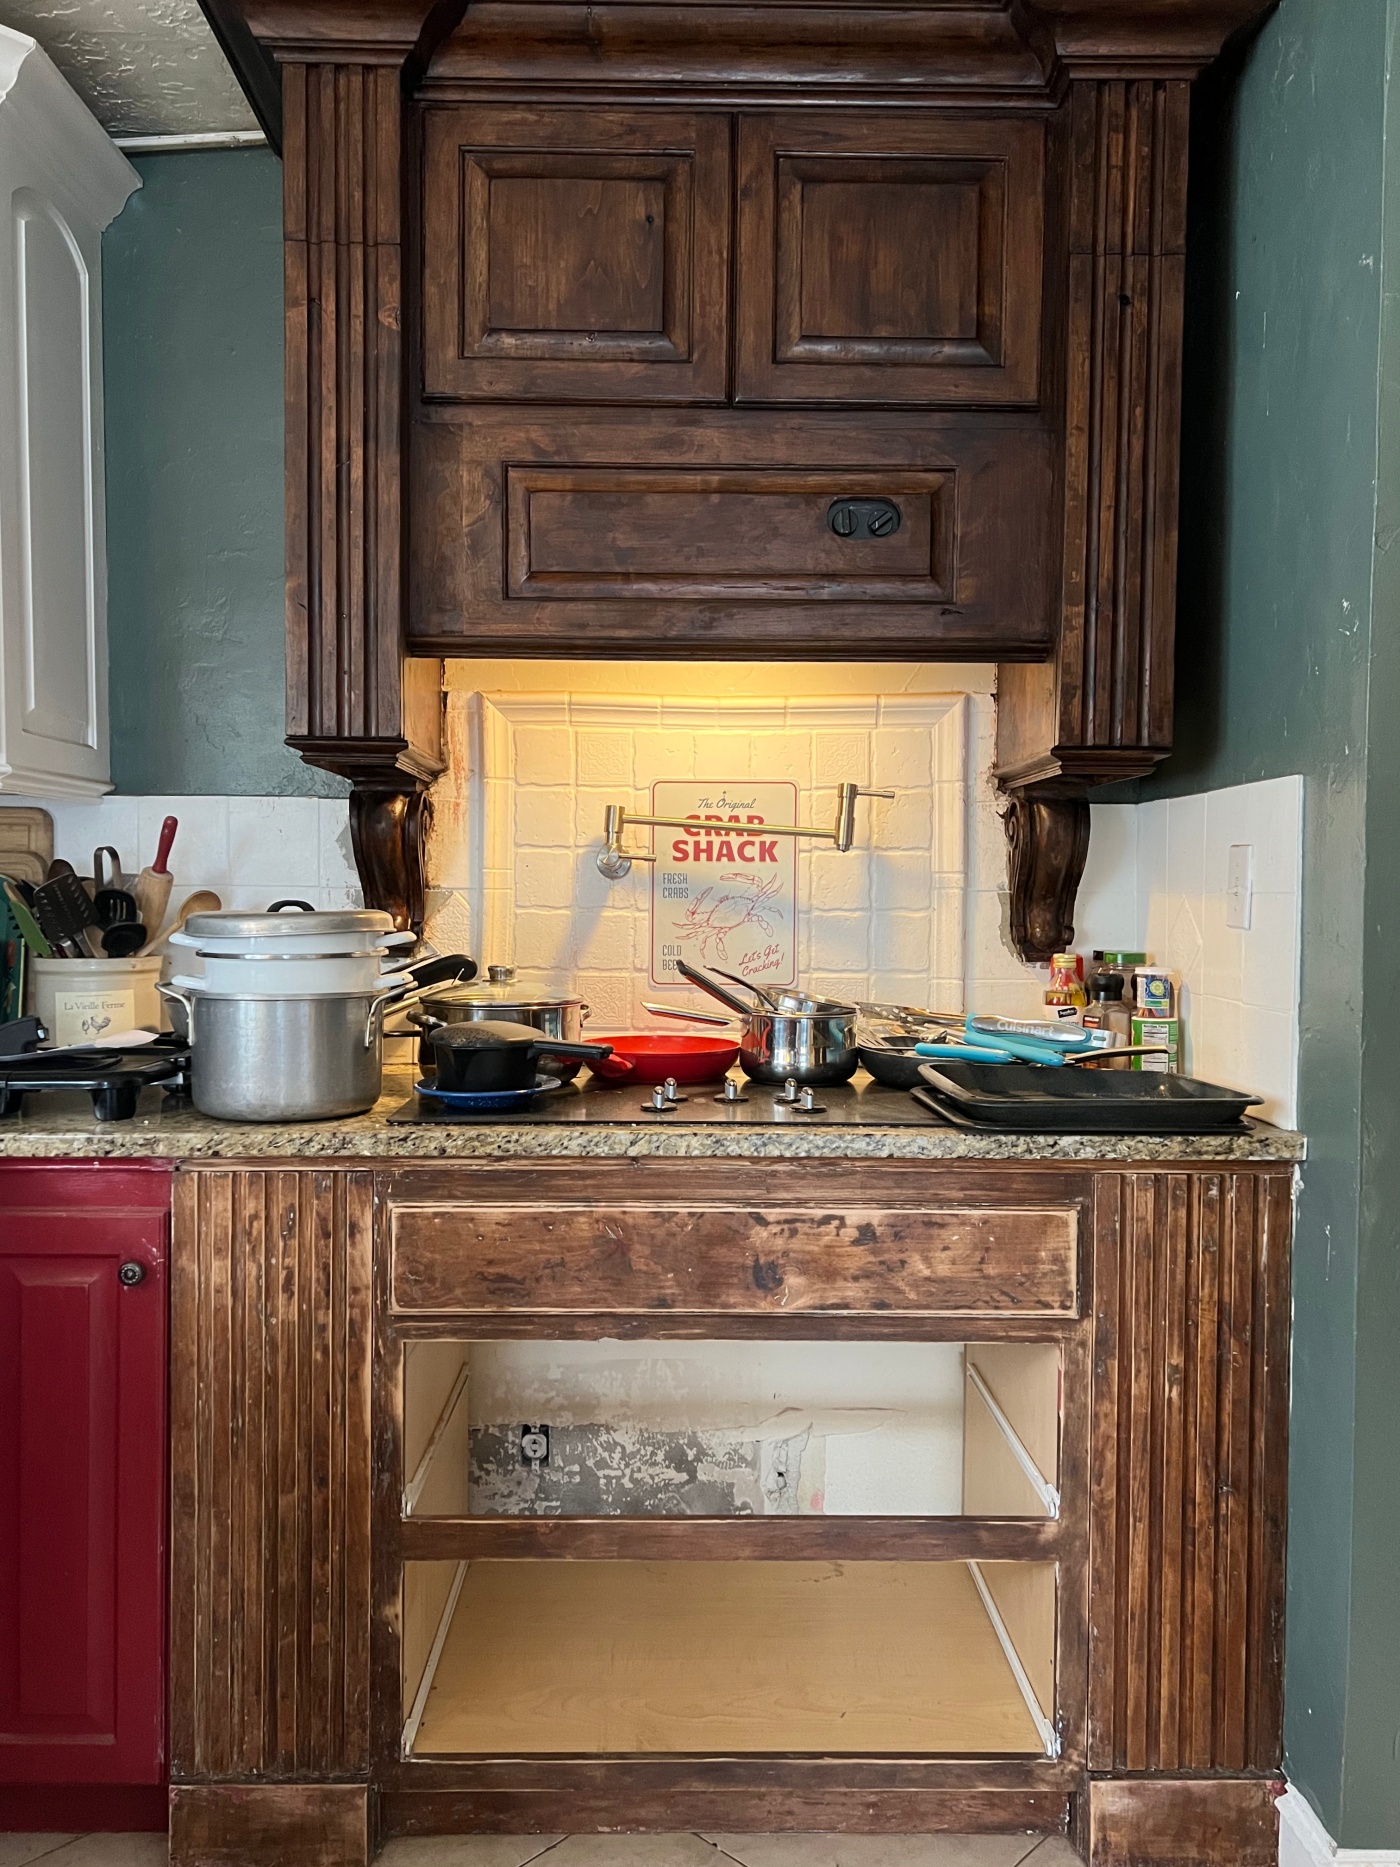
I was even able to remove the drawers to get to those hard to reach areas. Pictured above is how it looked after the bottom half was all stripped and sanded and ready for gel stain, and pictured below is the final results. I’m thrilled with how it turned out. I might still add a sealer, I’m not sure yet, but if I do I will just use the Minwax clear sealer.
Here is a list of products that I used.
- Citistrip
- Metal Scraper (I also found a butter knife to work well is some of those hard to reach areas)
- Rubber Gloves
- Paint Brush
- Mask
- Safety Glasses
- Gel Stain
- Hand sander
- sandpaper
*These are affiliated links which means that I receive a small commission for purchases made through these links.
Any Questions or Comments?
Please let me know below or email them to me at thewickerhouse@yahoo.com or come find me on Facebook and/or Instagram
And remember, you are welcome to PIN any of the Images from my blog on PINTEREST. Find a Pin It button by hovering over any of the pictures.
Thanks for stopping by,
Emily
Shop this Post:

