
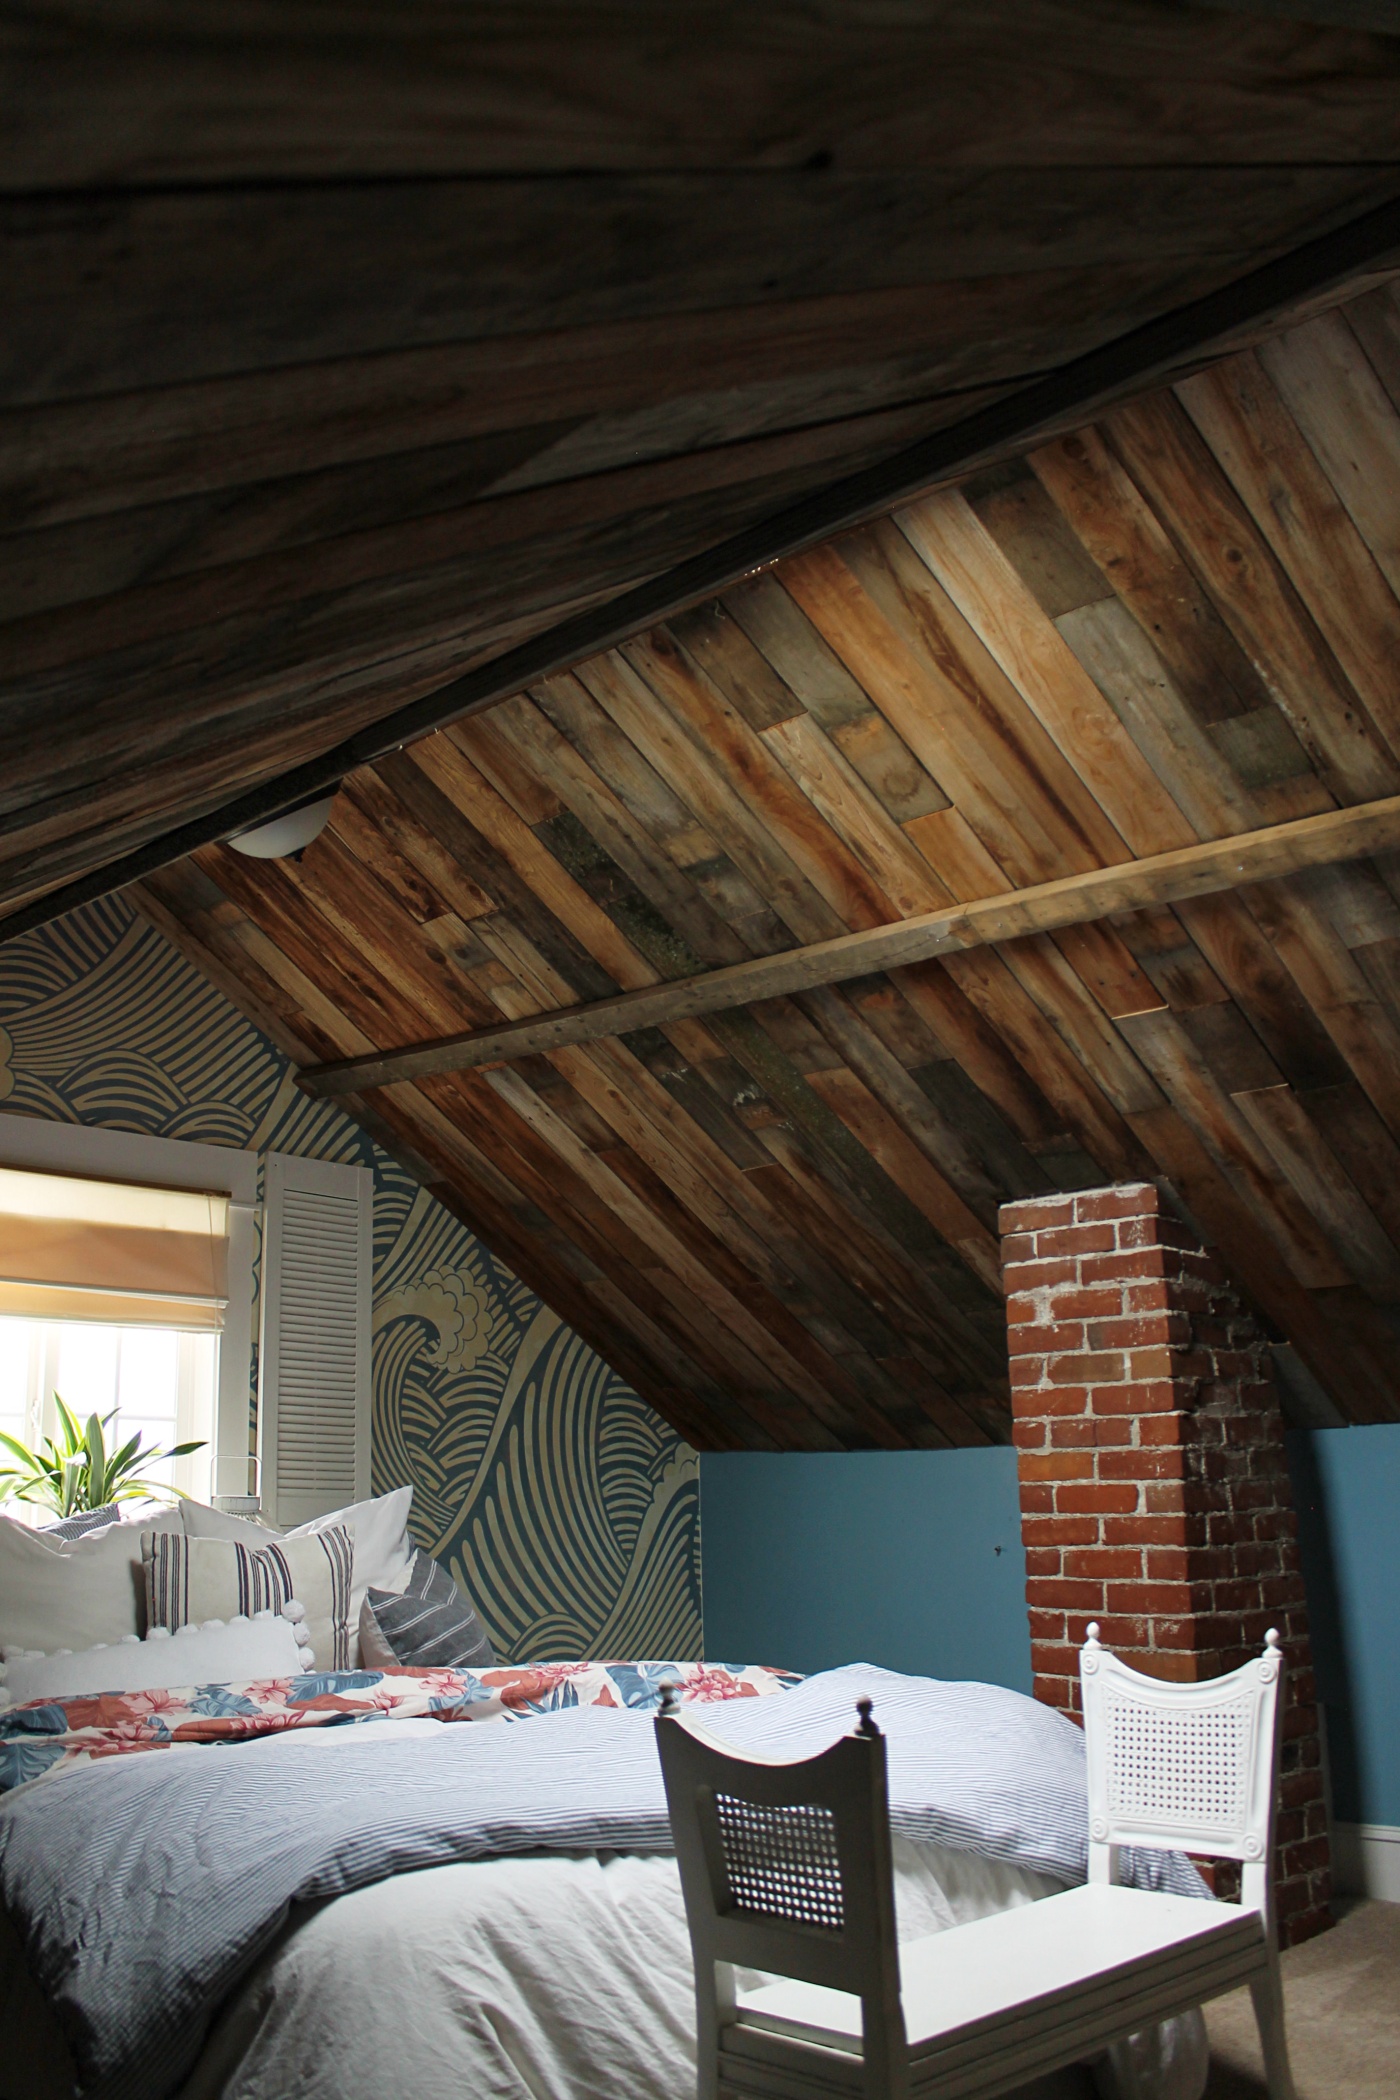
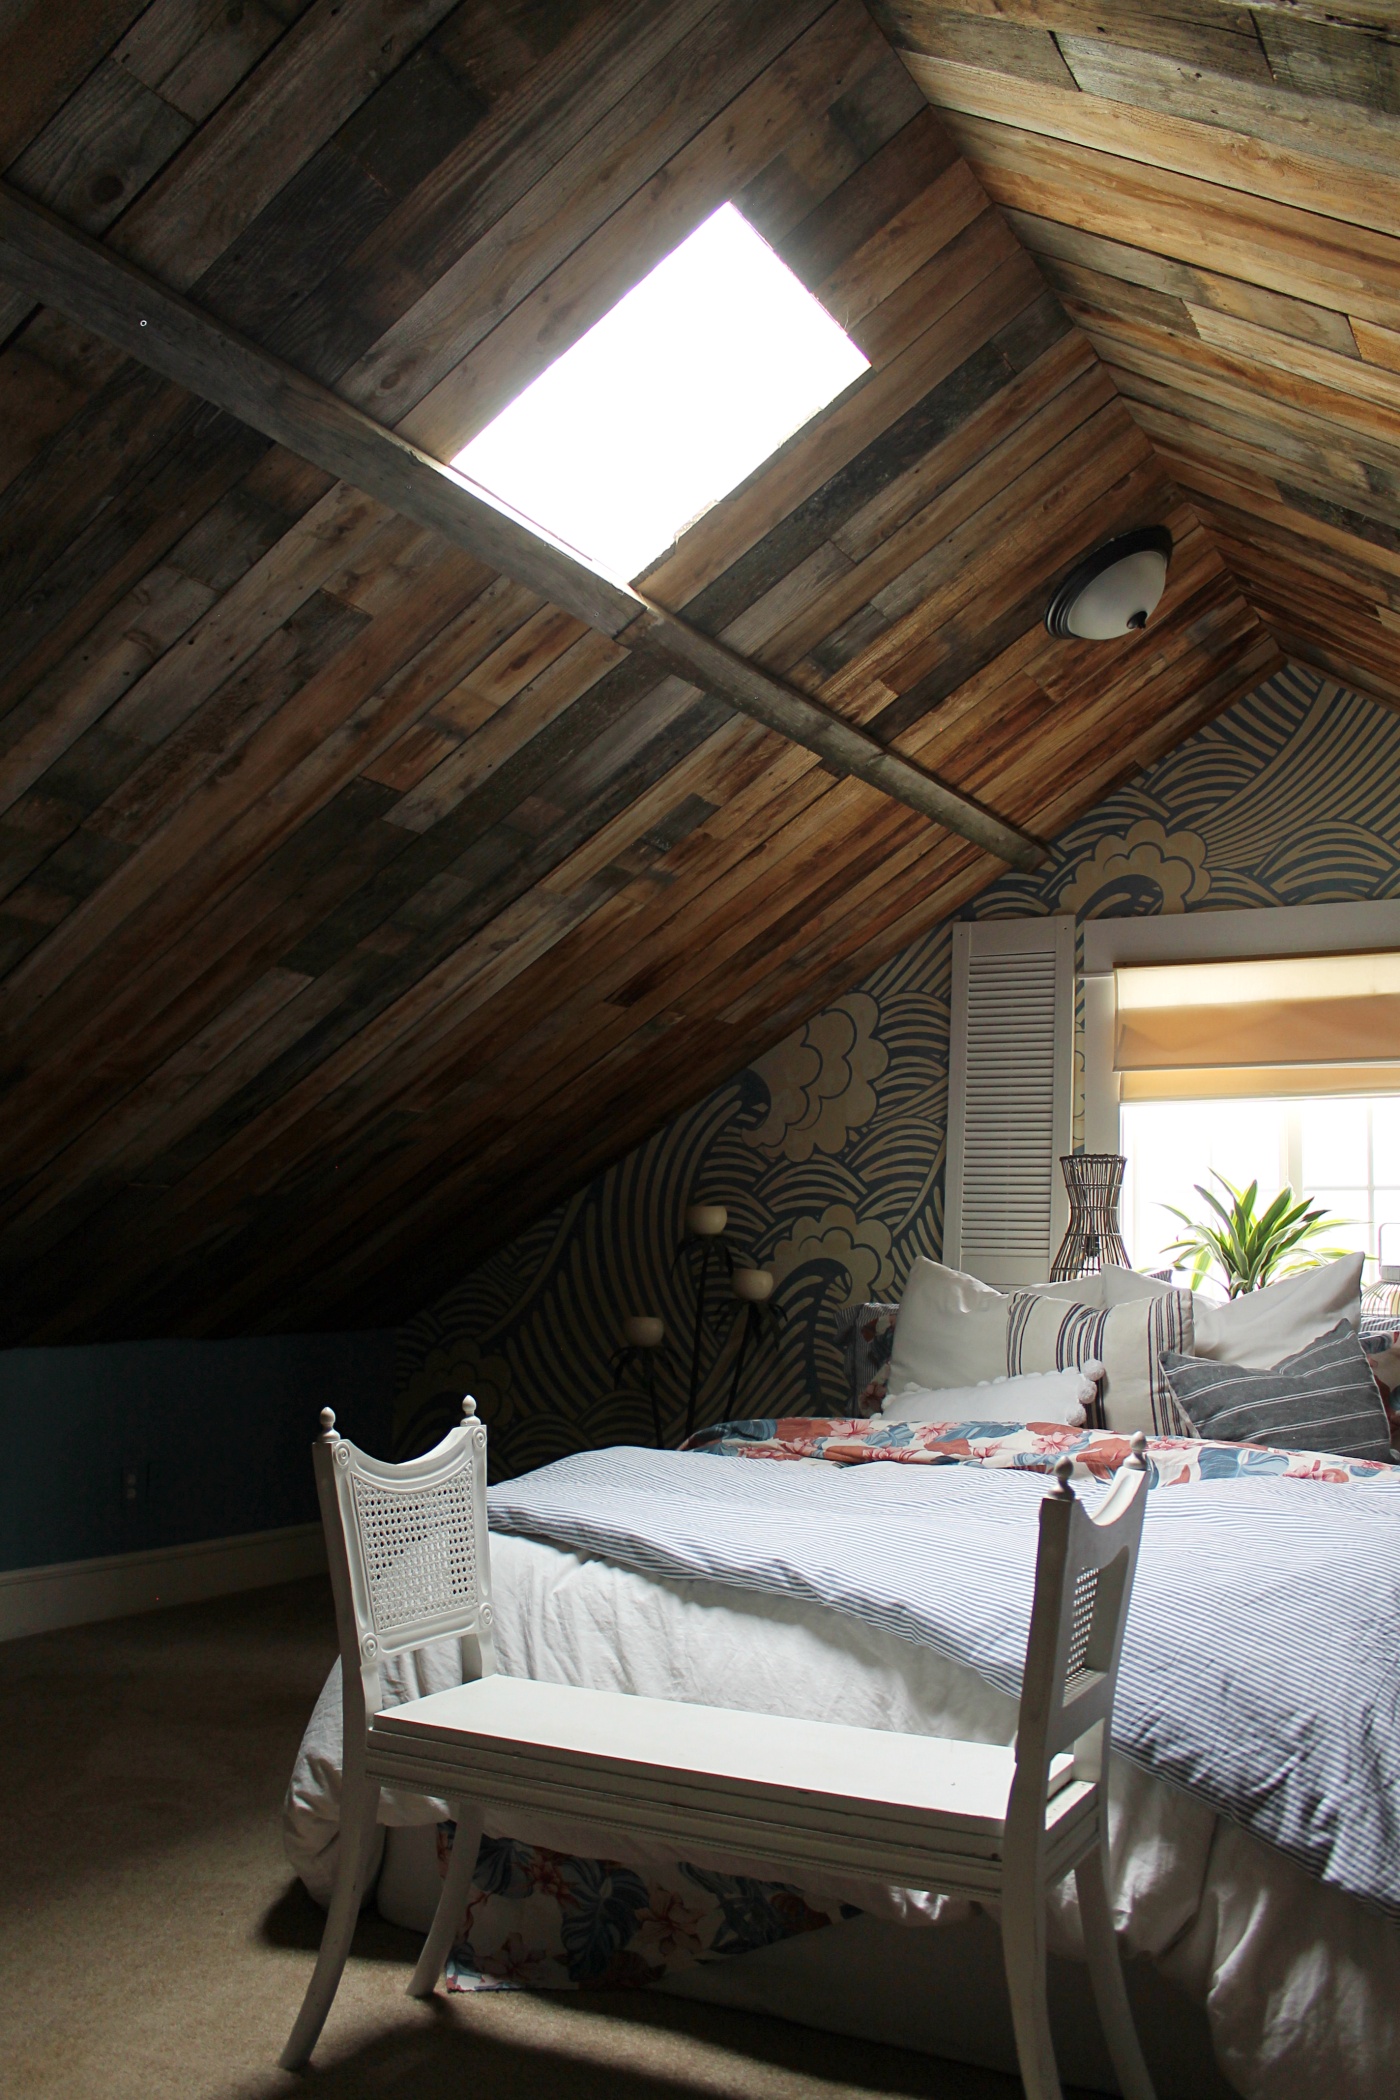
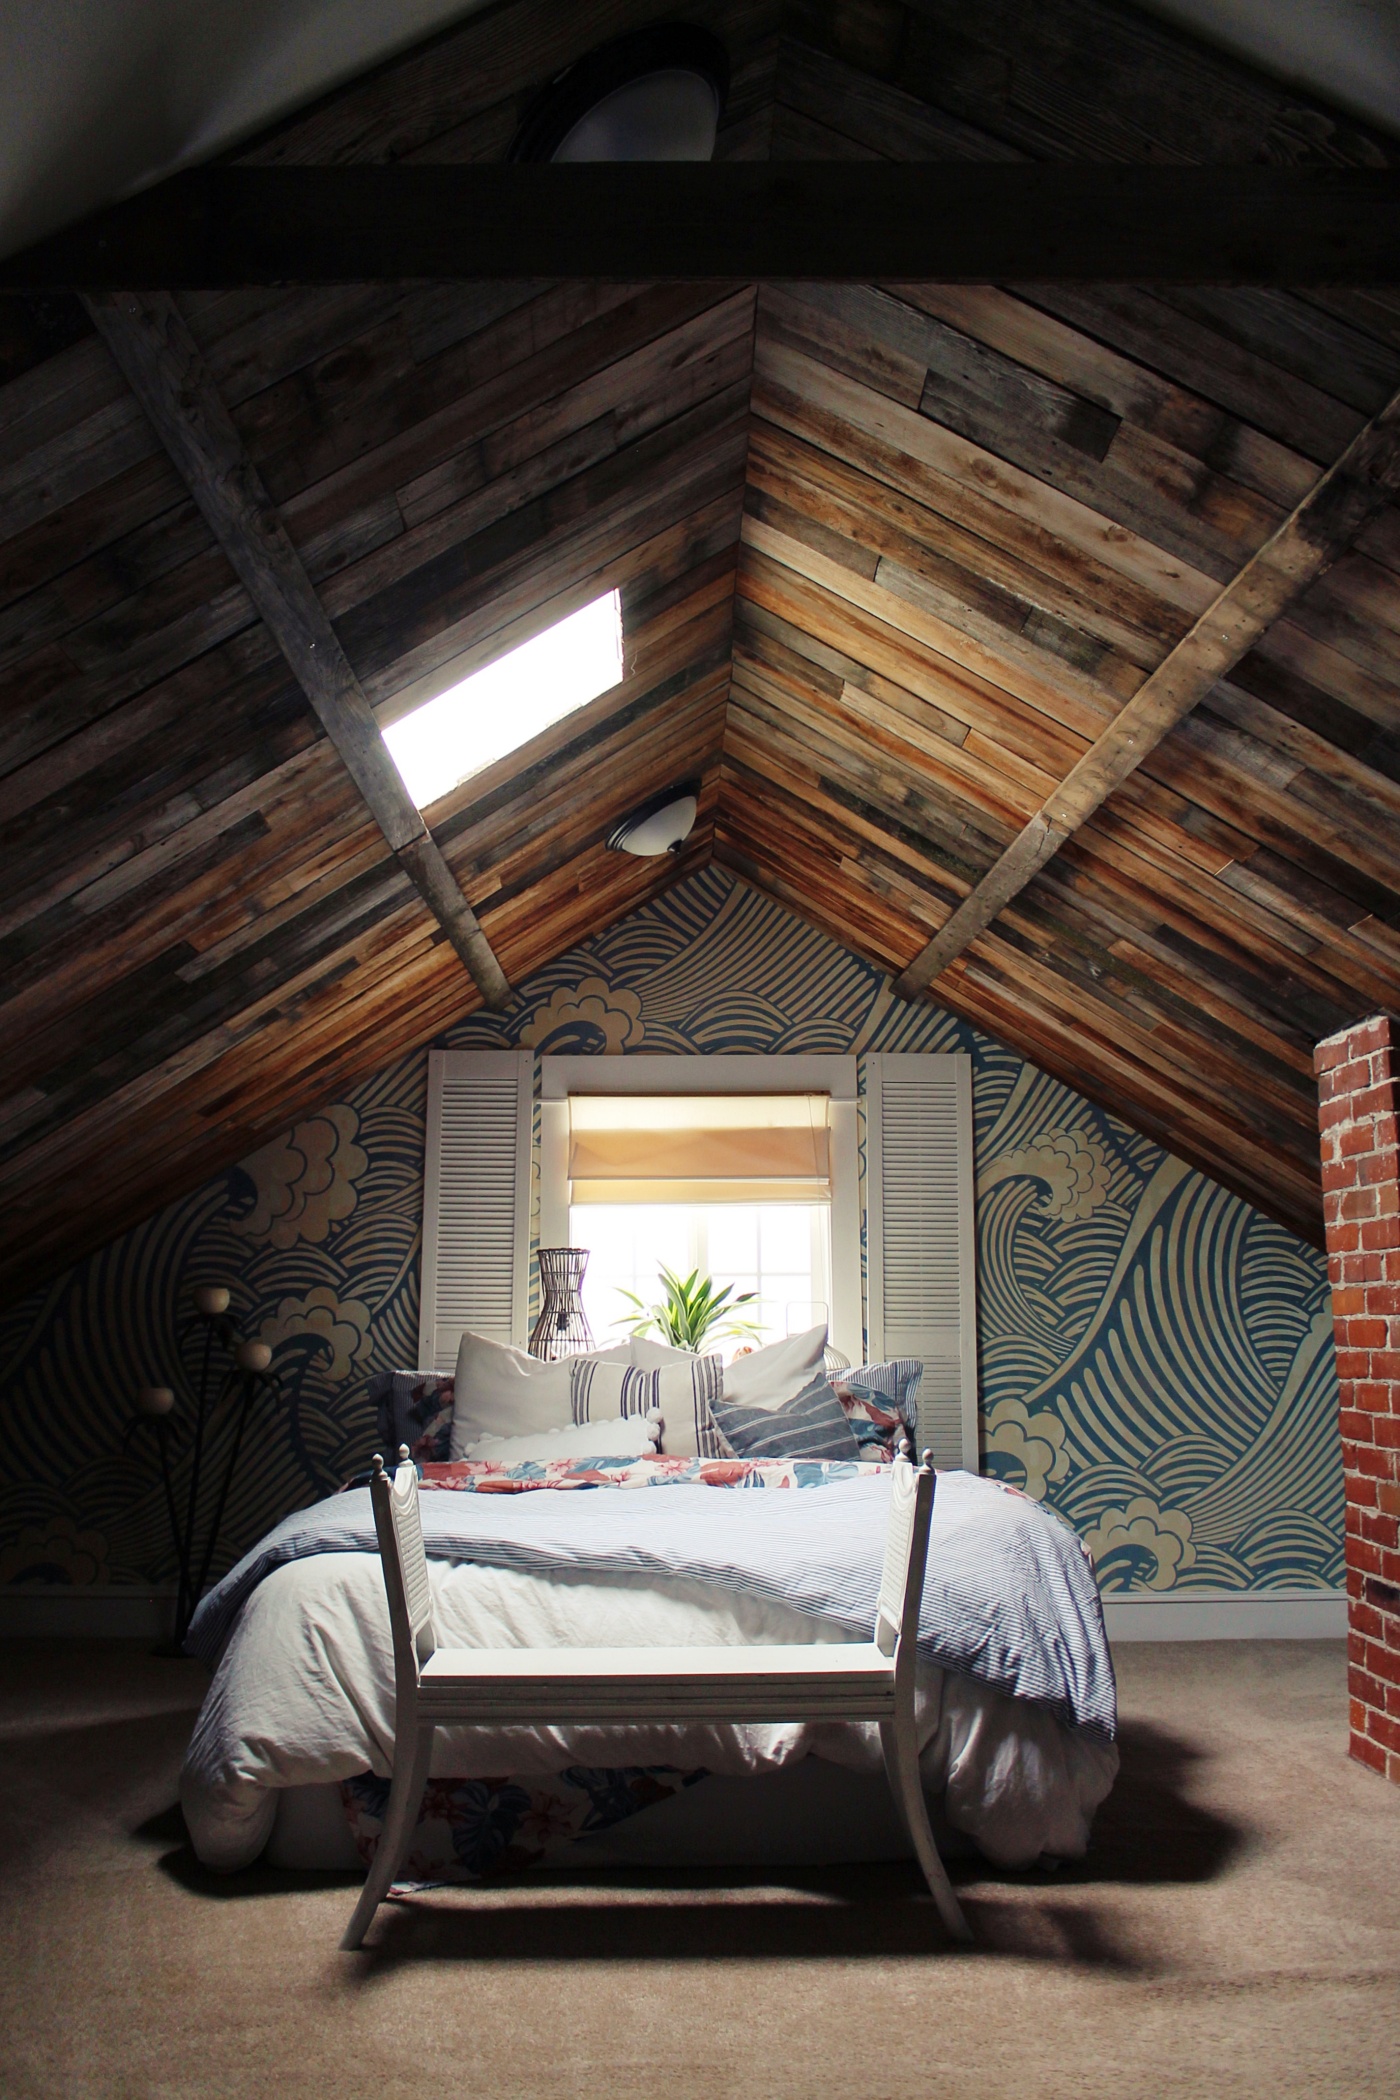
My husband Jake and I have been working hard at adding wood to our bedroom ceiling. We have been working on it for months now and so I am beyond excited to have this project all finished up and ready to share with you today.
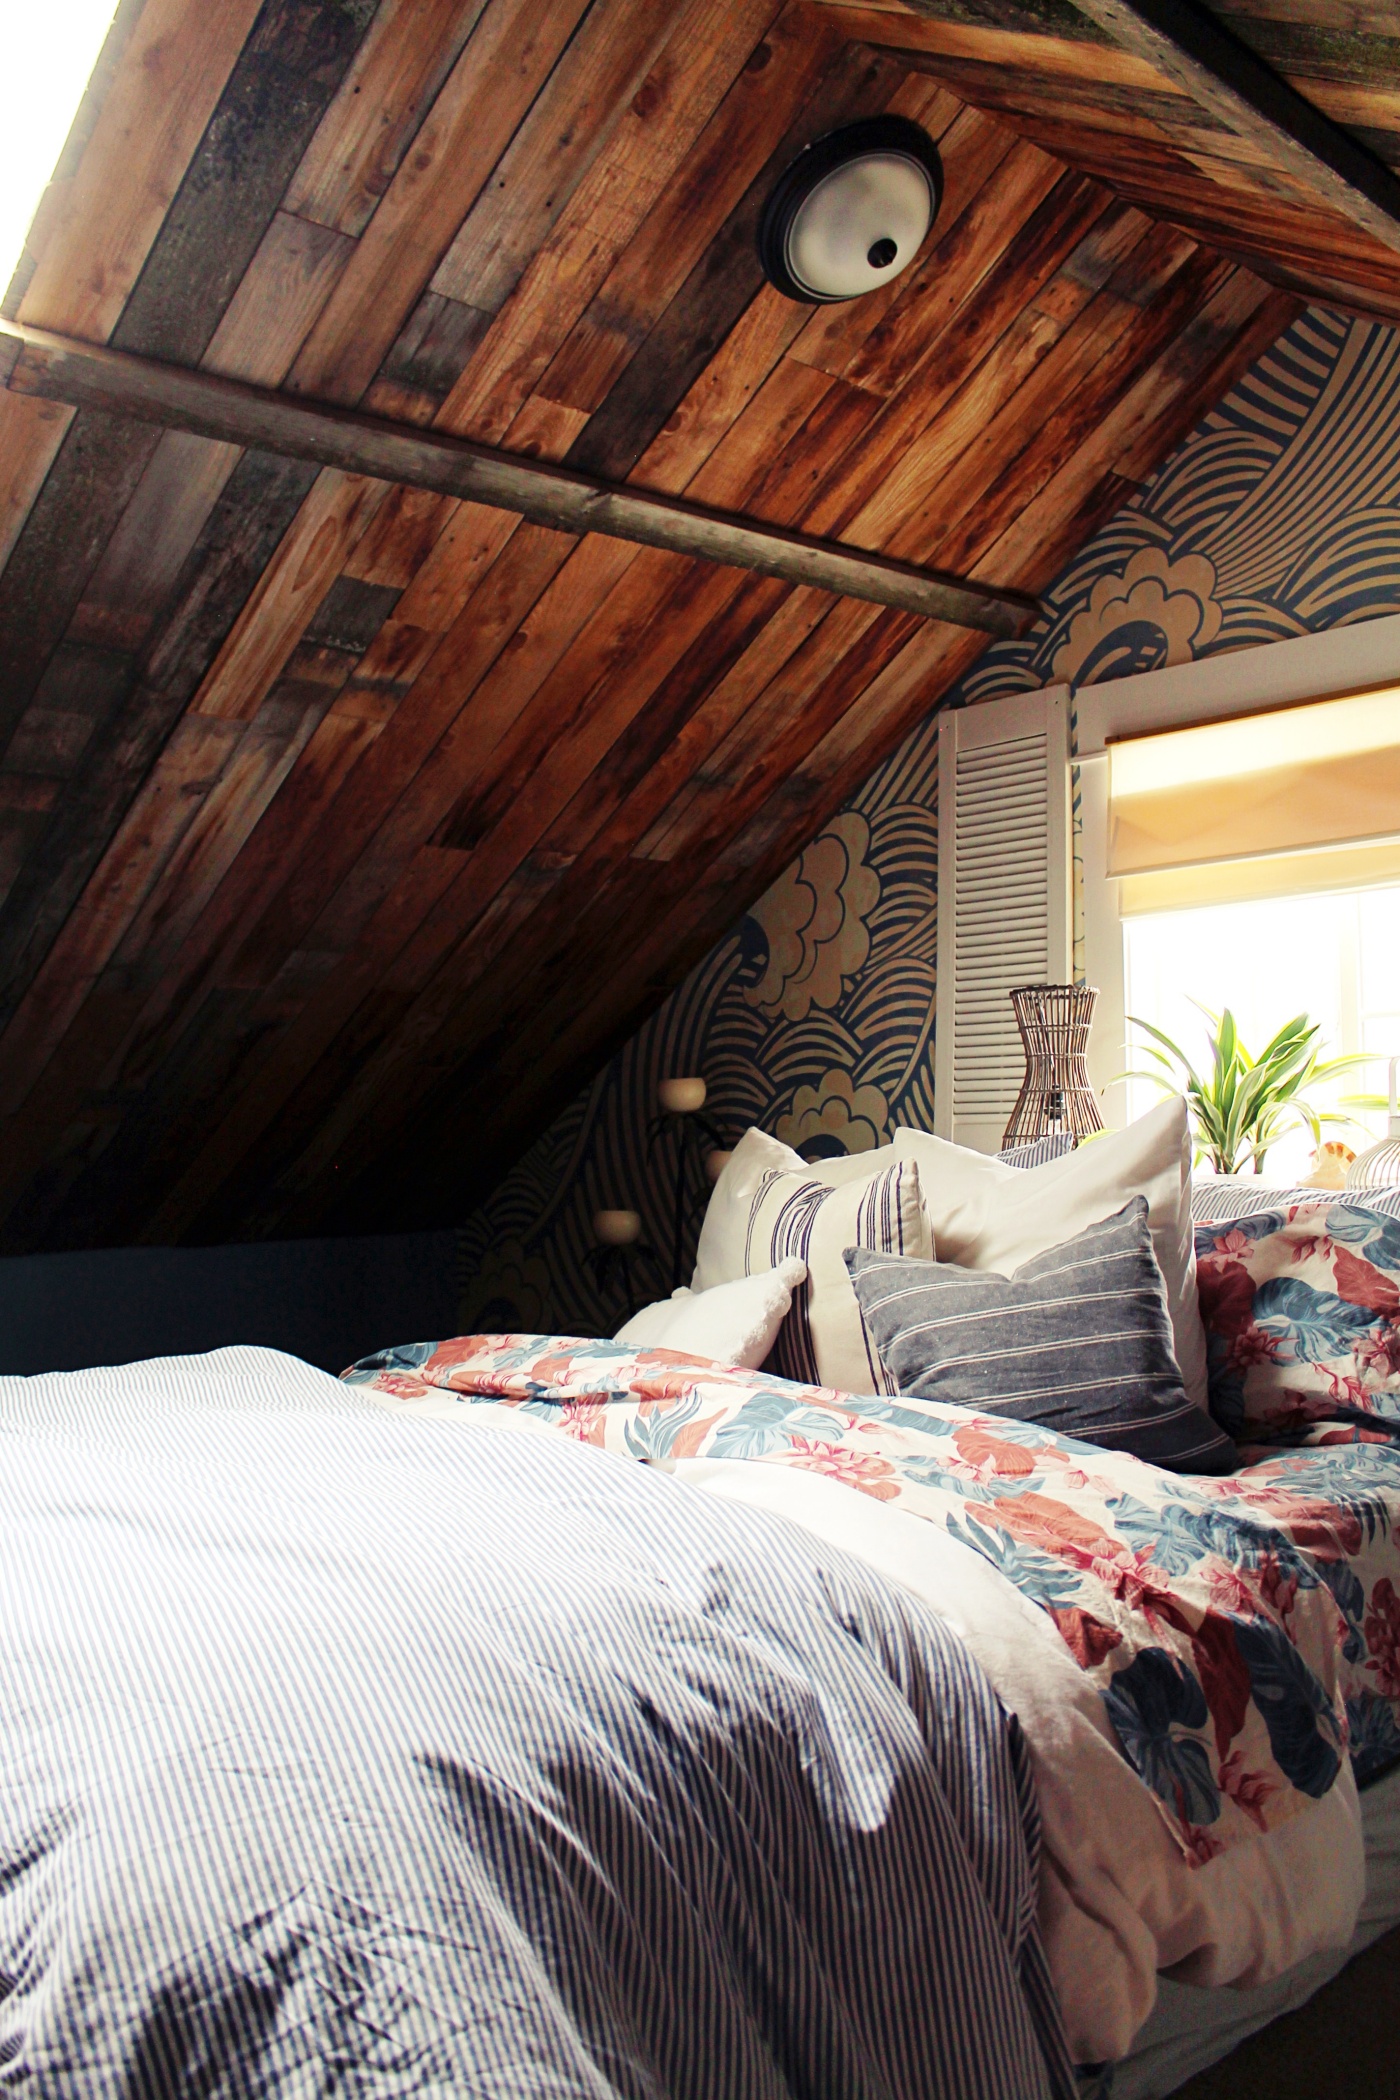
This has got to be the coolest DIY home project we have ever done. It turned out So good!
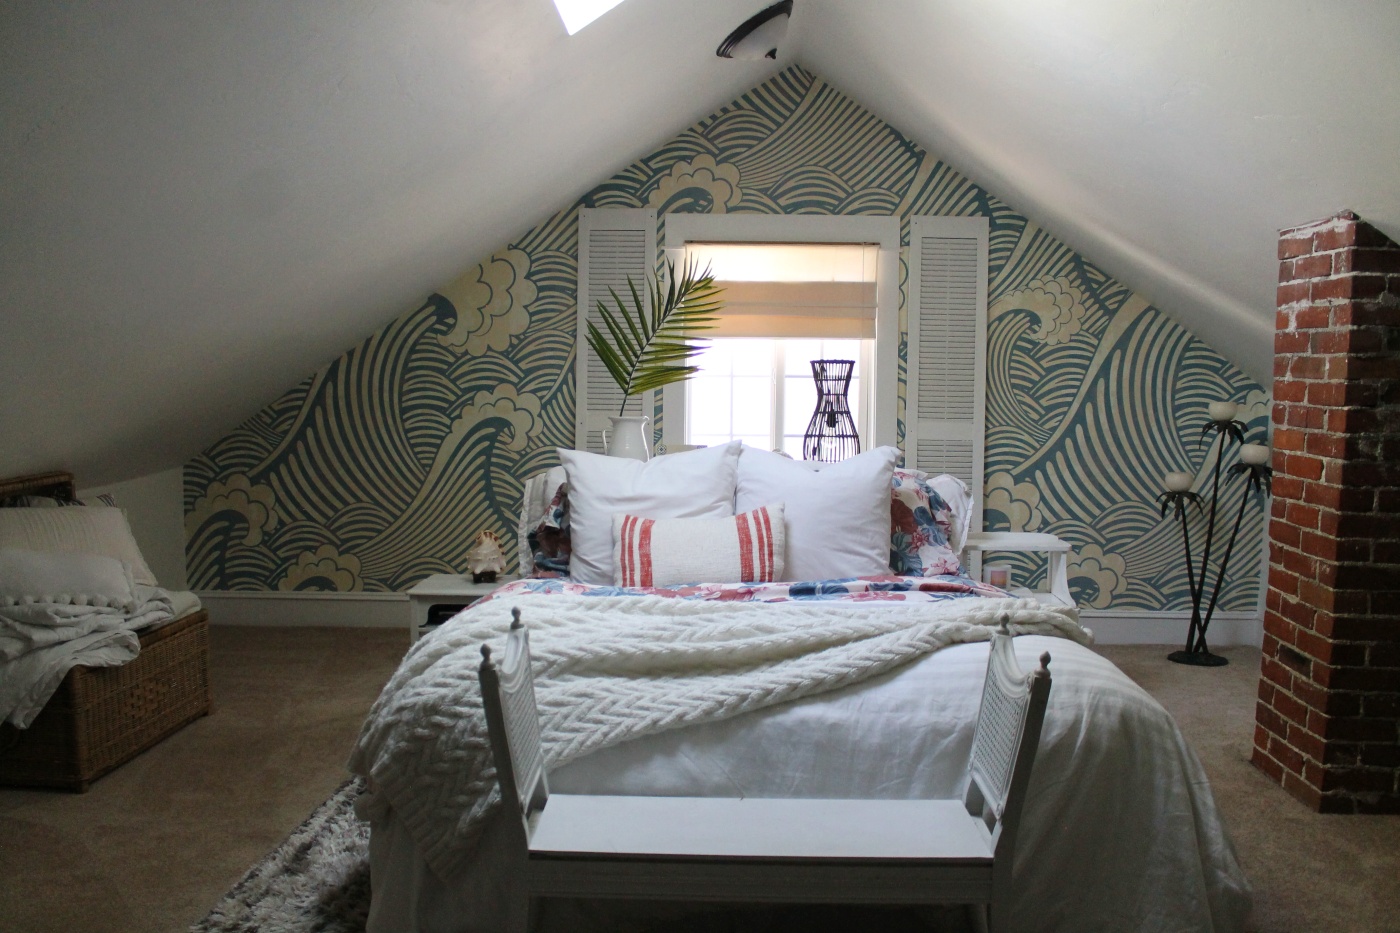
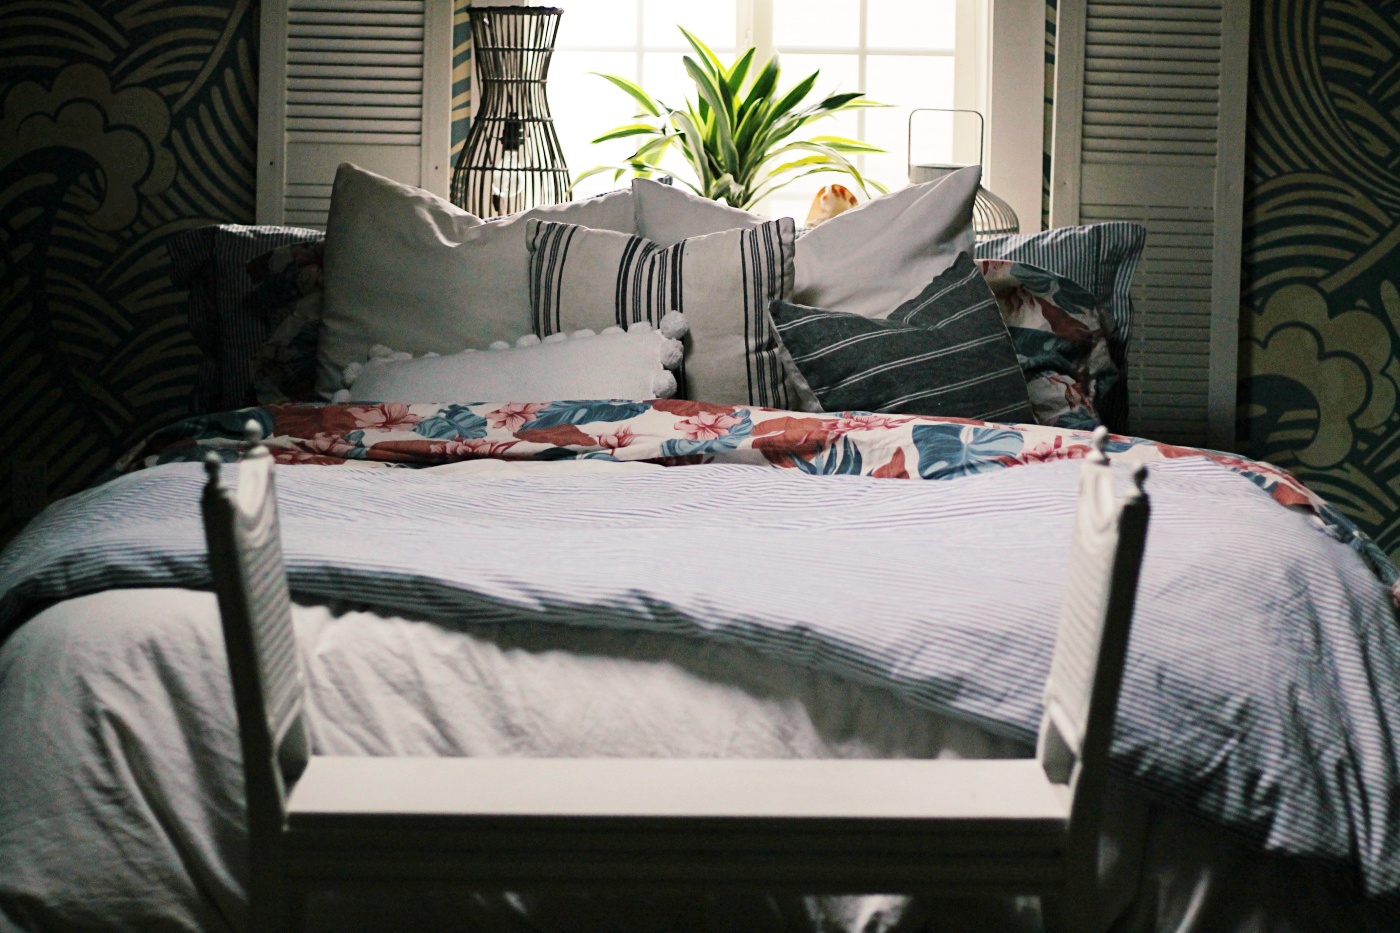
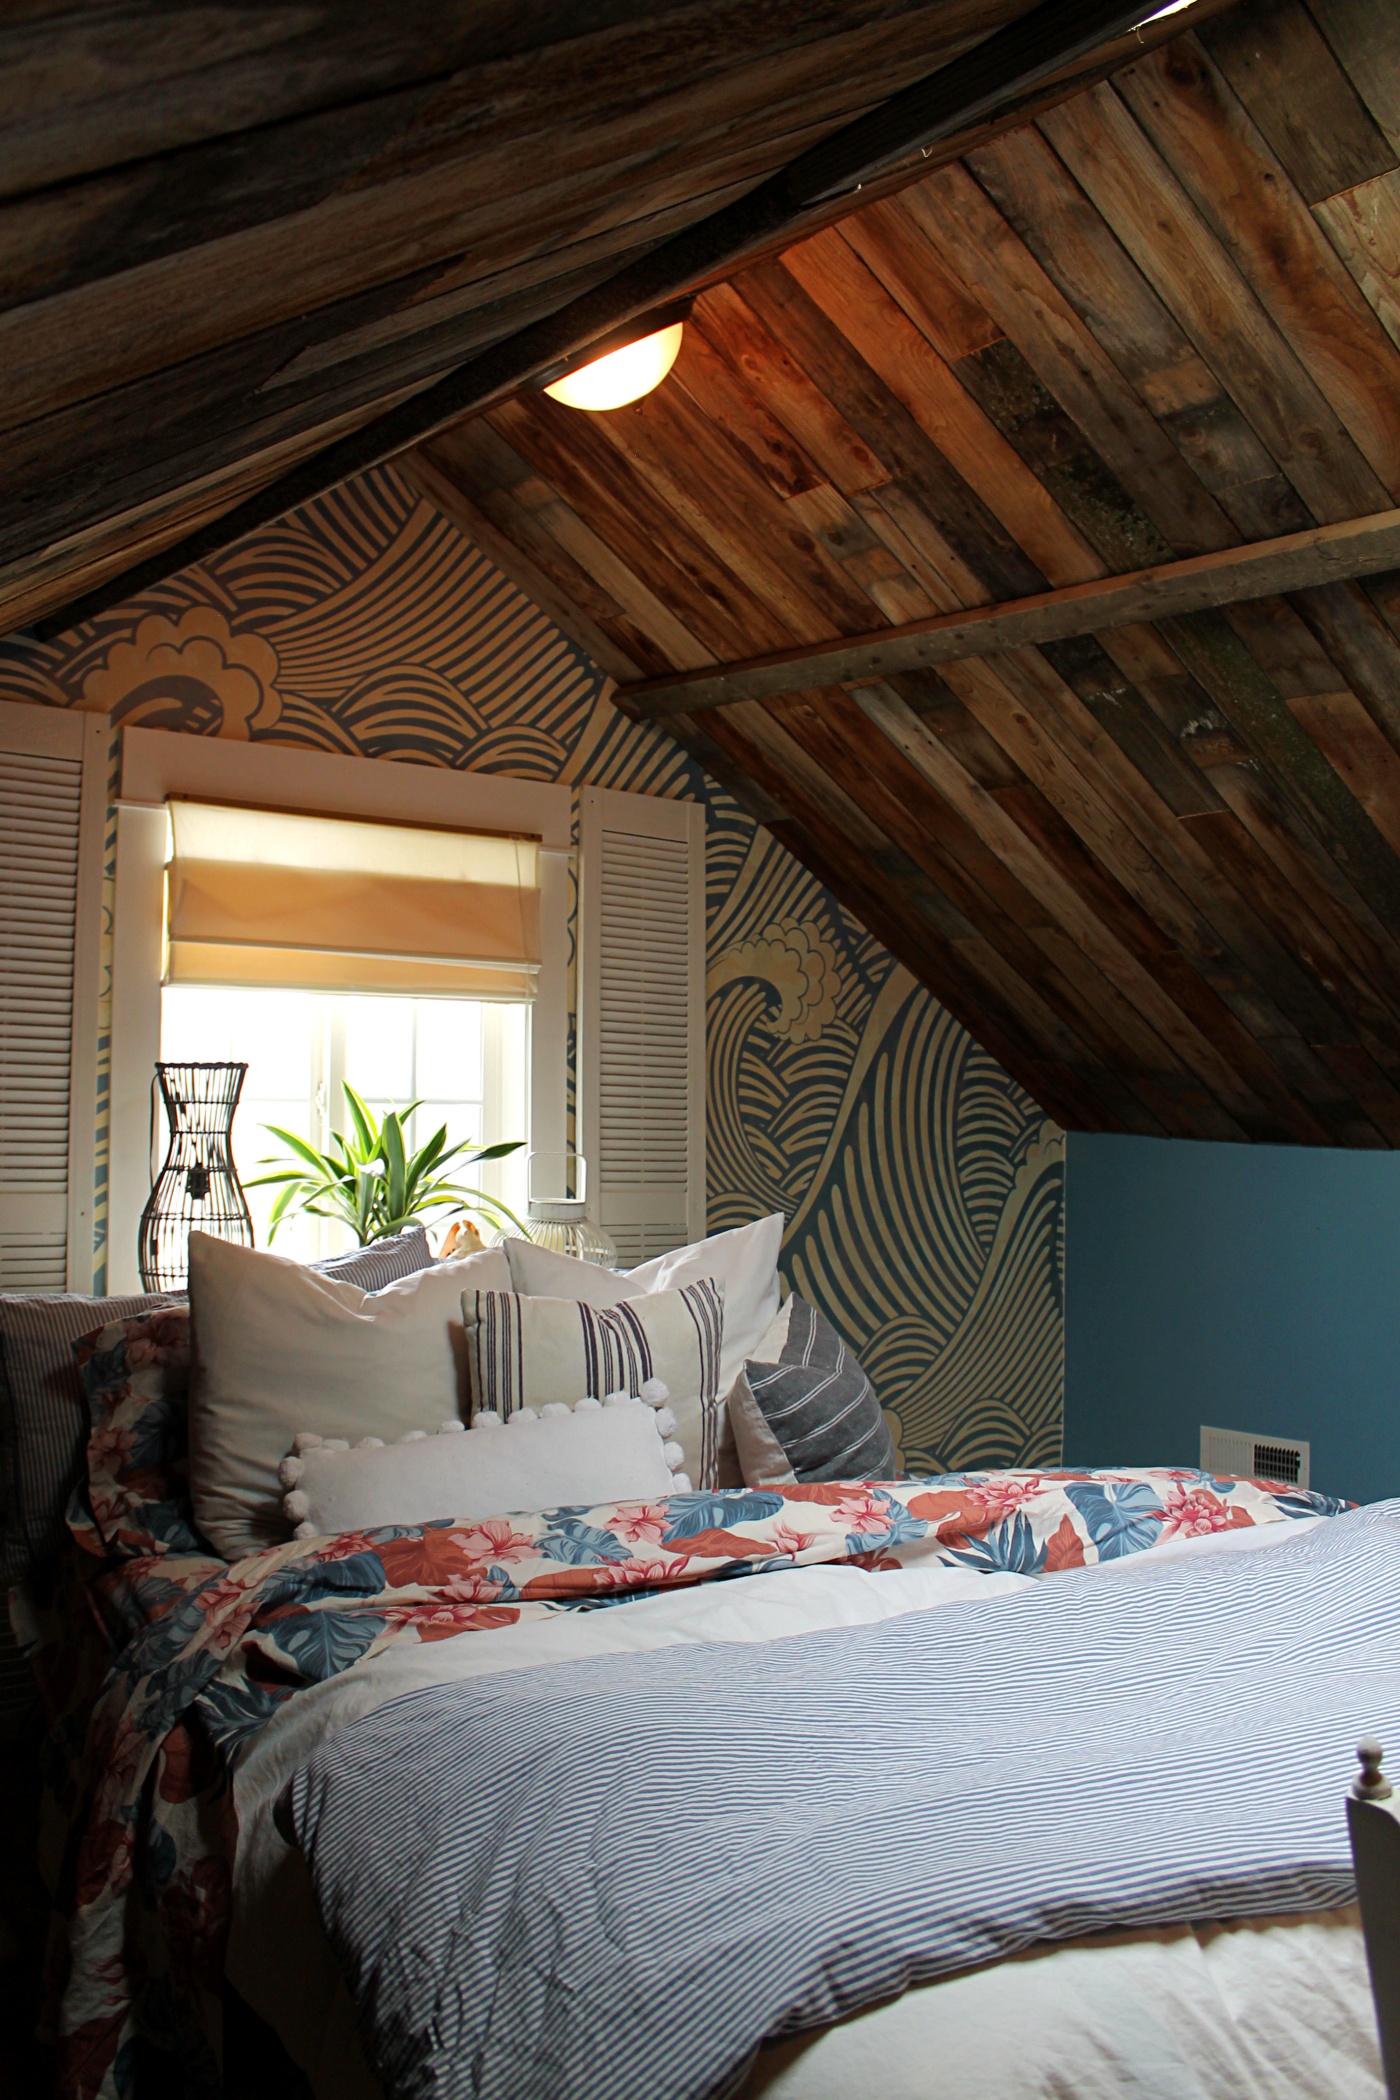
So the last time I shared our bedroom was when I had just added the wave wallpaper as seen in this next picture. You can learn more about the wallpaper in THIS BLOG POST.
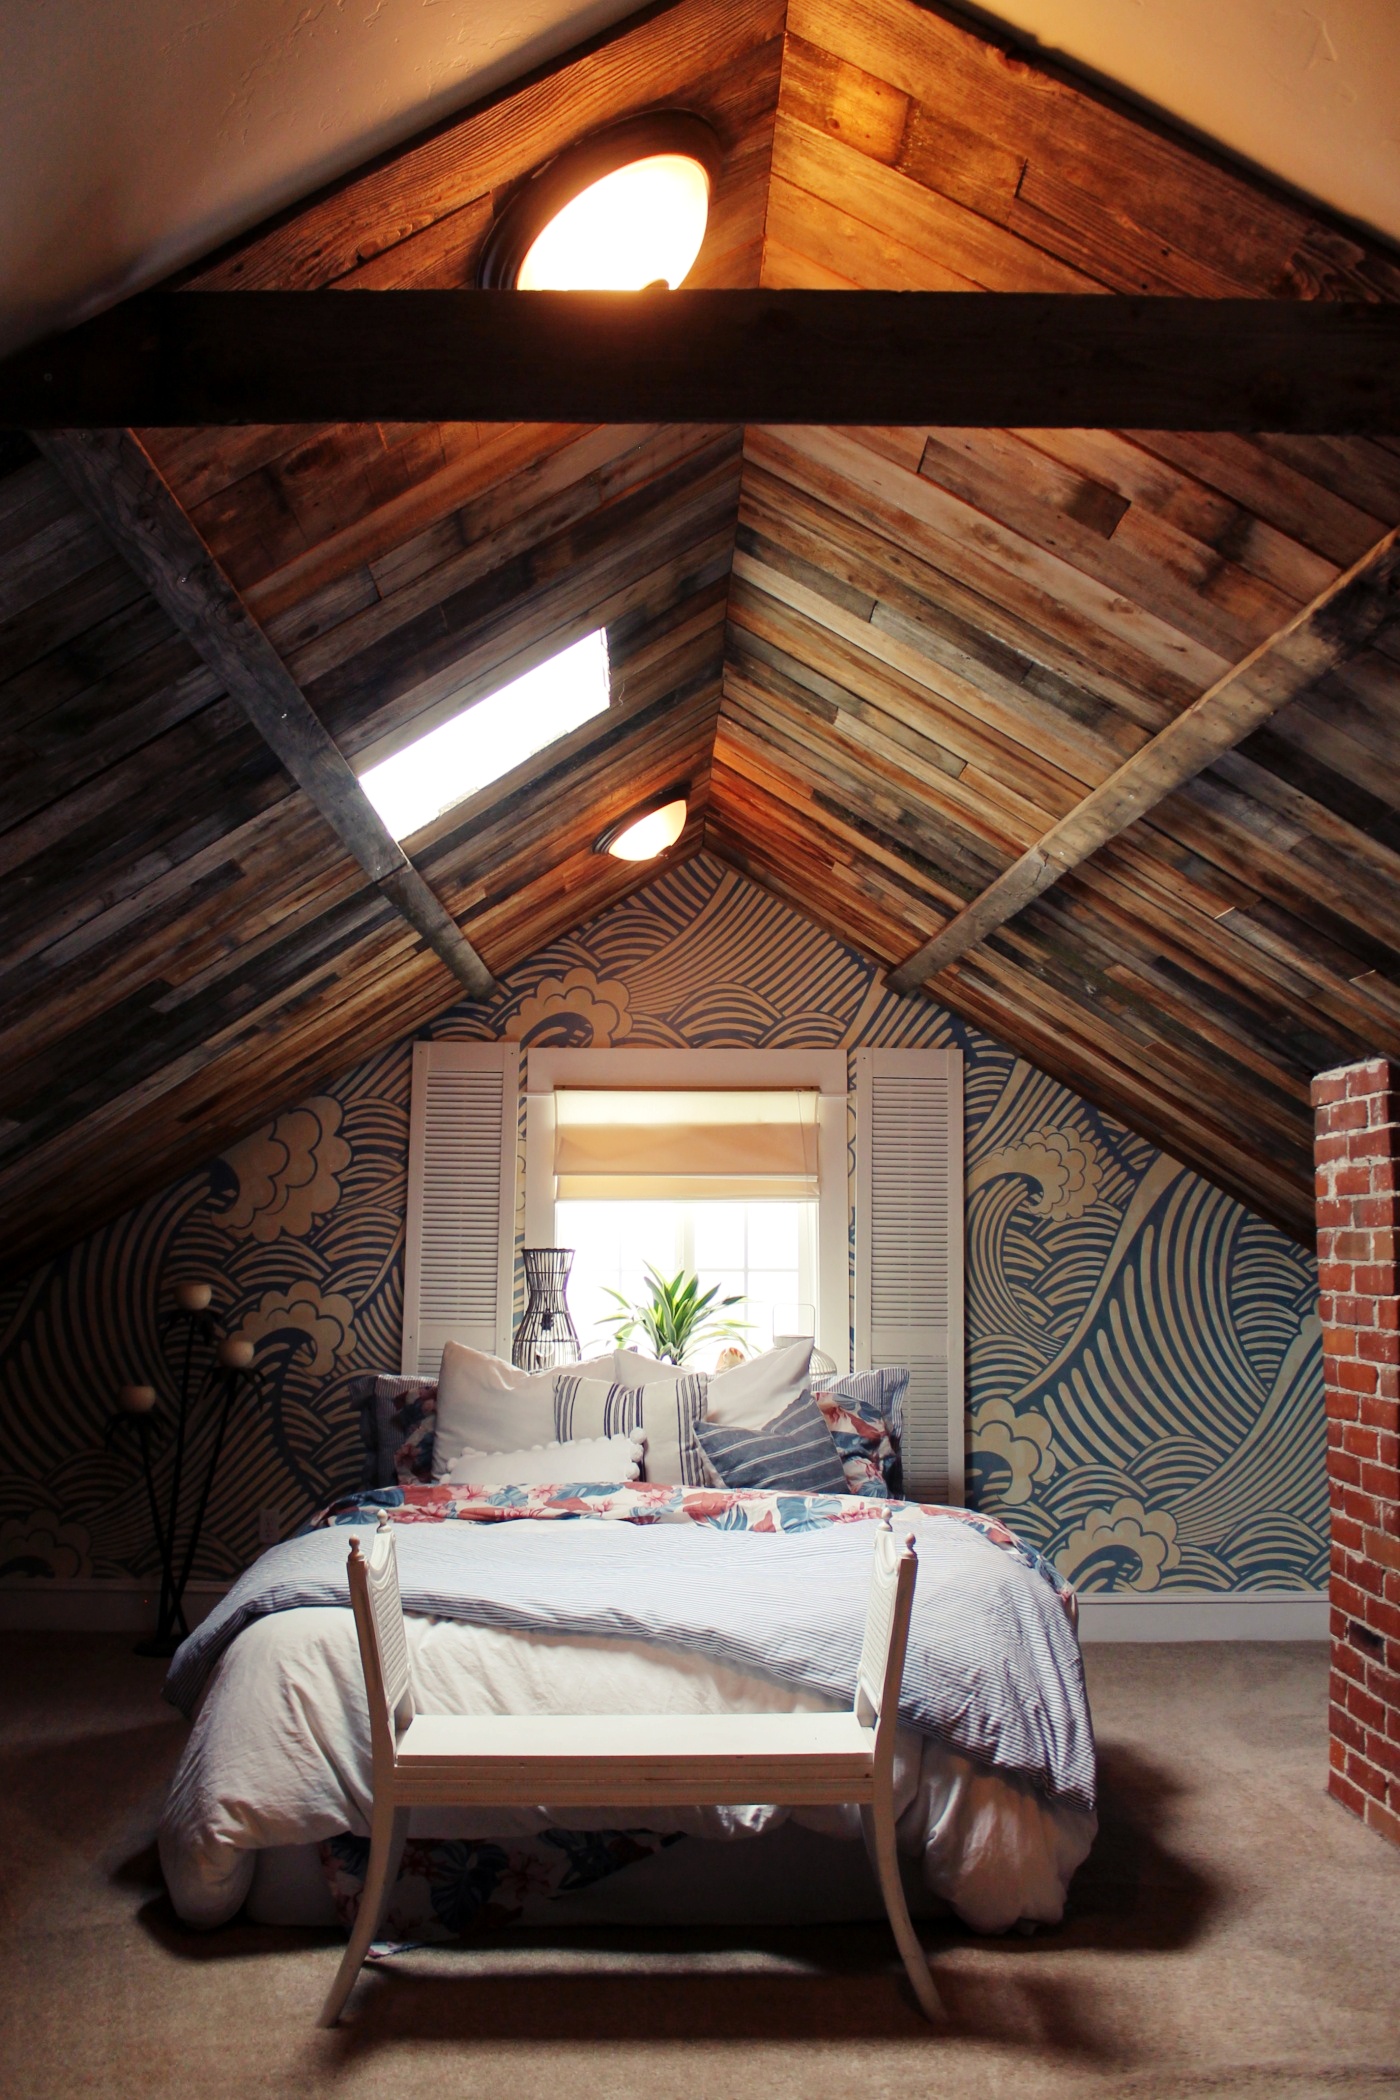
If you compare the above picture to this next picture you will get a good idea at what a Dramatic Change the wood made to our bedroom. The comparison is Night and Day.
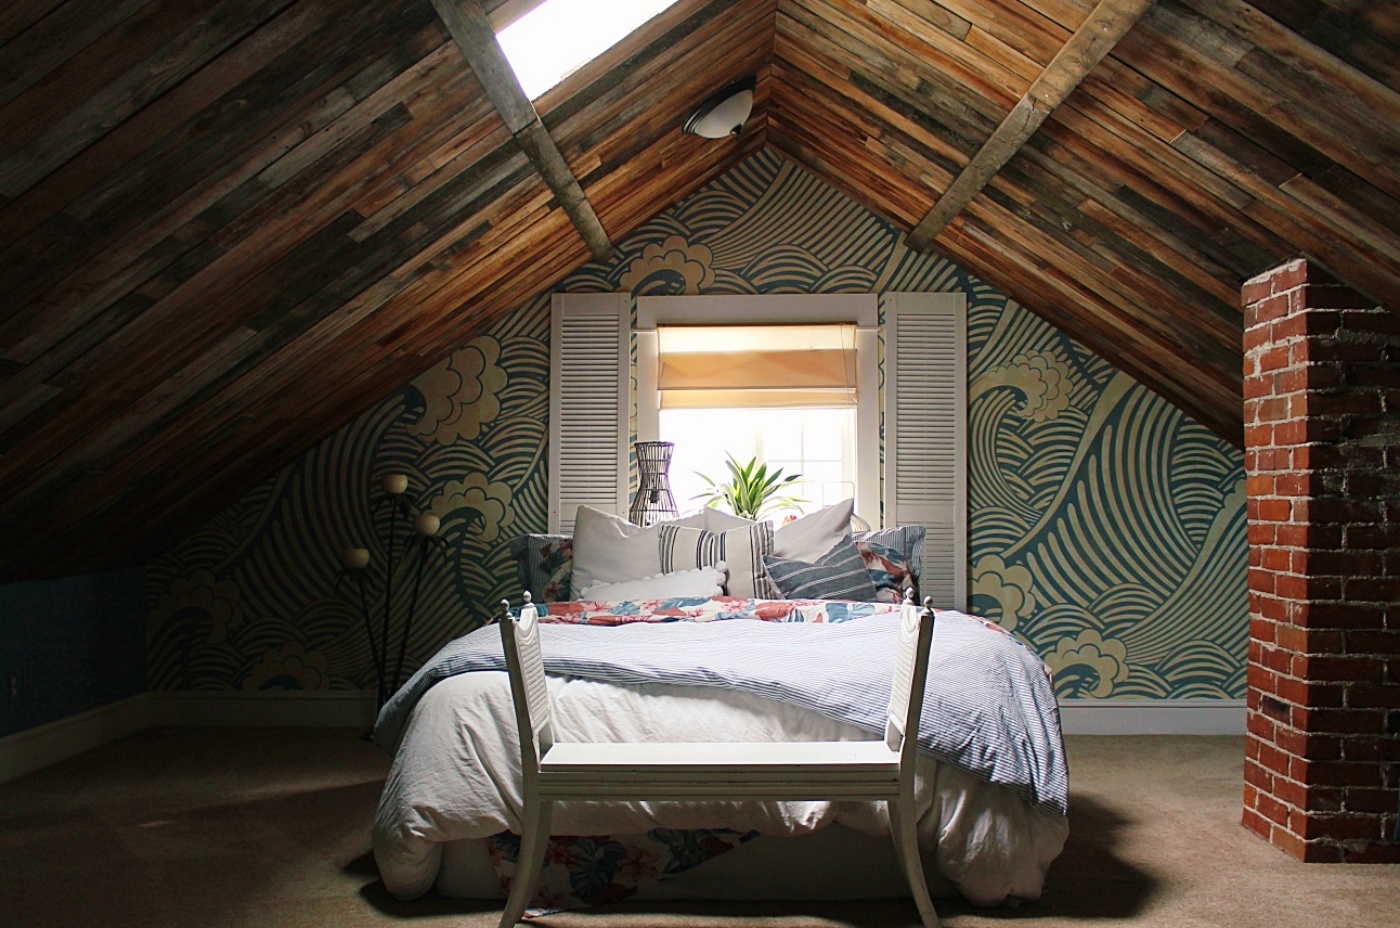
We are so happy with the way that the wood ceiling turned out. It feels like we have a brand new room.
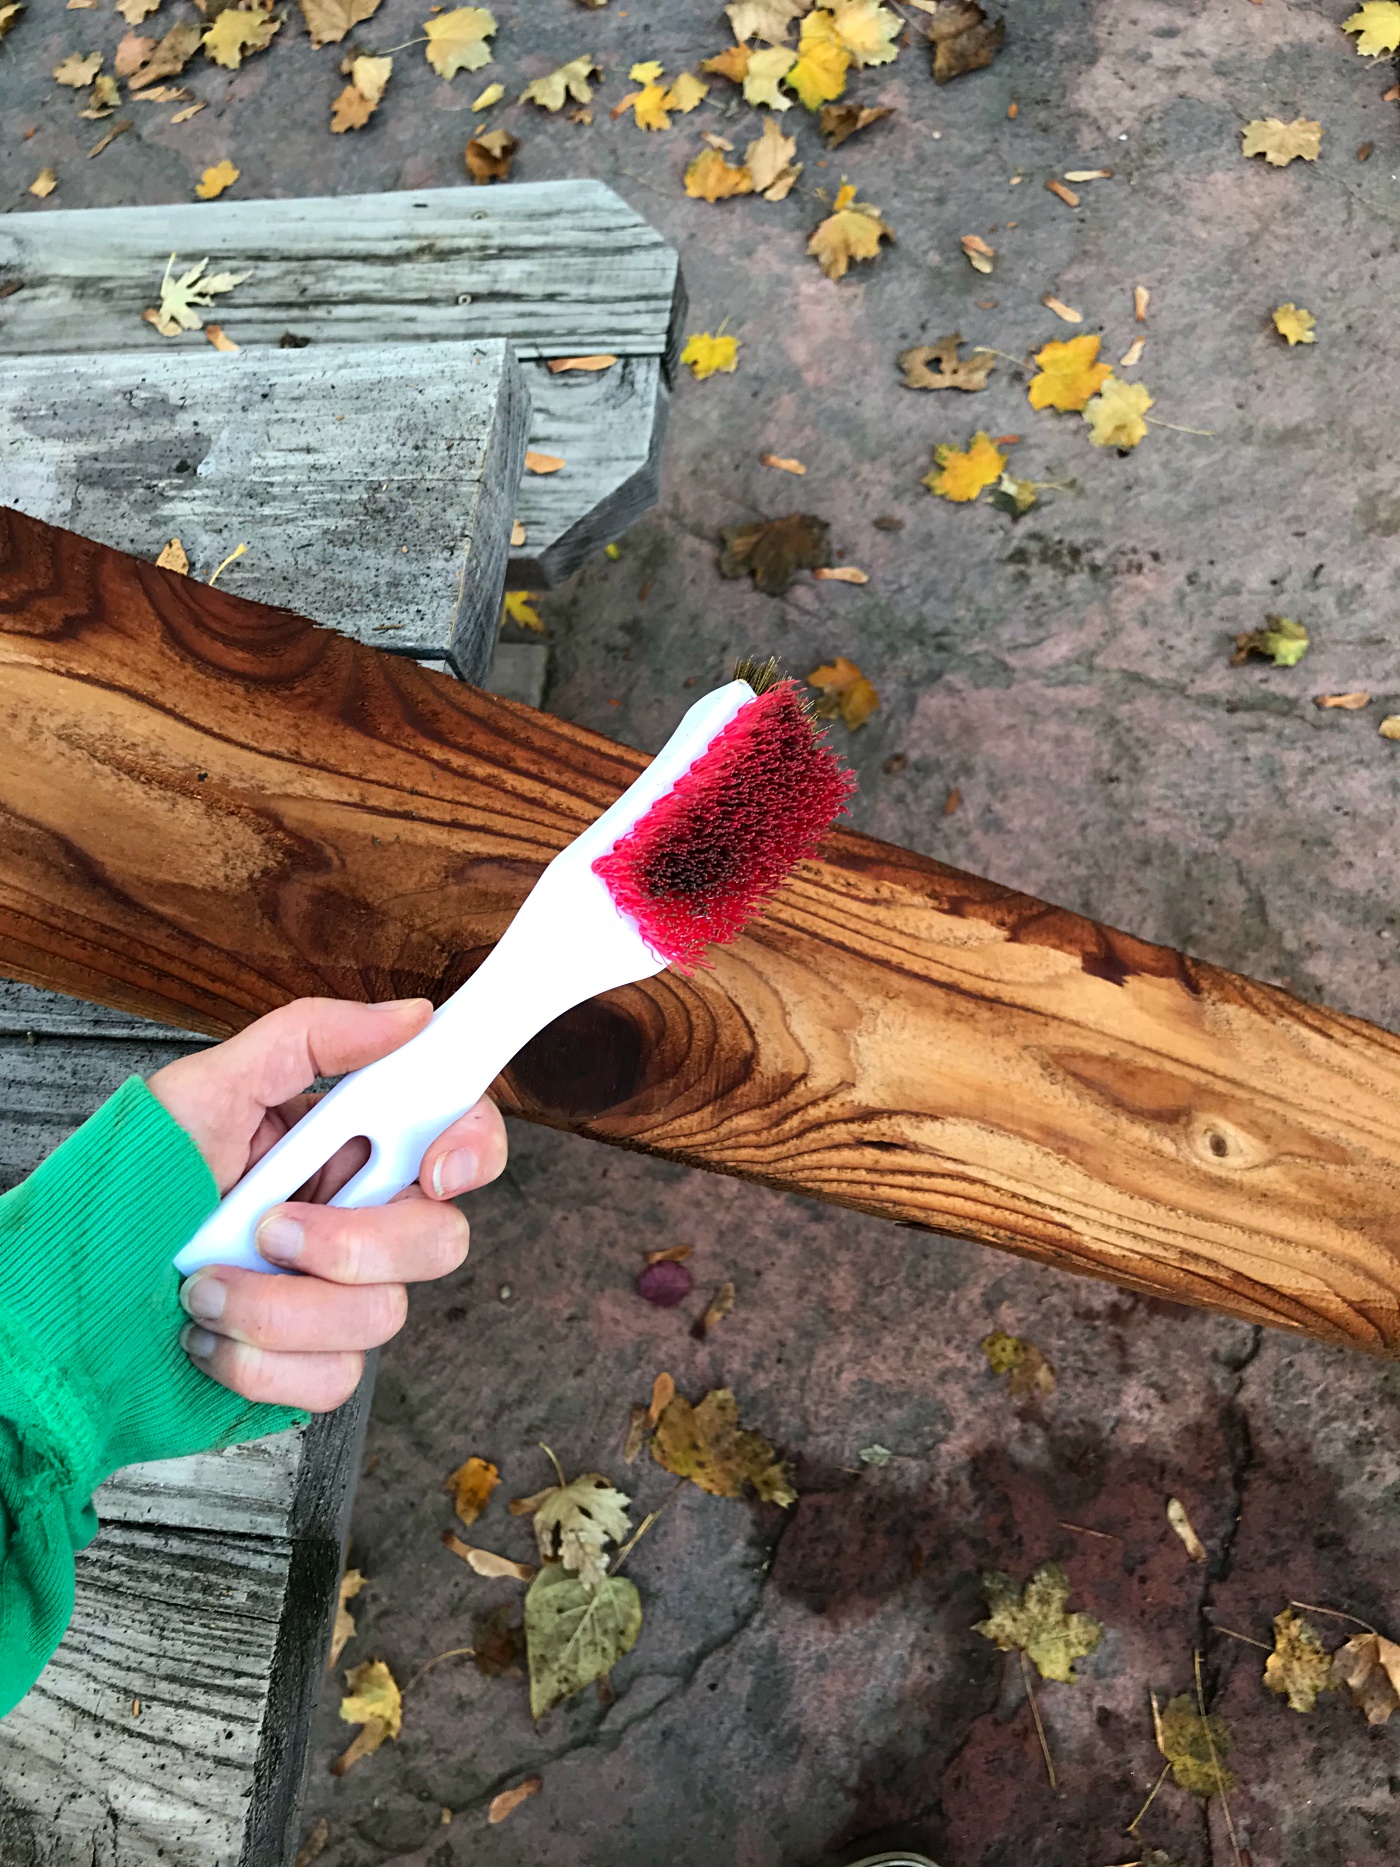
So I’m calling it “Barn Wood”, but in actuality this wood came from our old Fence. Yup, last Fall our neighbors came to us and let us know that they were replacing the fence, So of course we helped with the cost, but we asked if we could keep the old fence. The fencing company actually gave us a discount for taking the old fence. So this wood cost us nothing which was so Awesome, especially with the cost of wood these days.
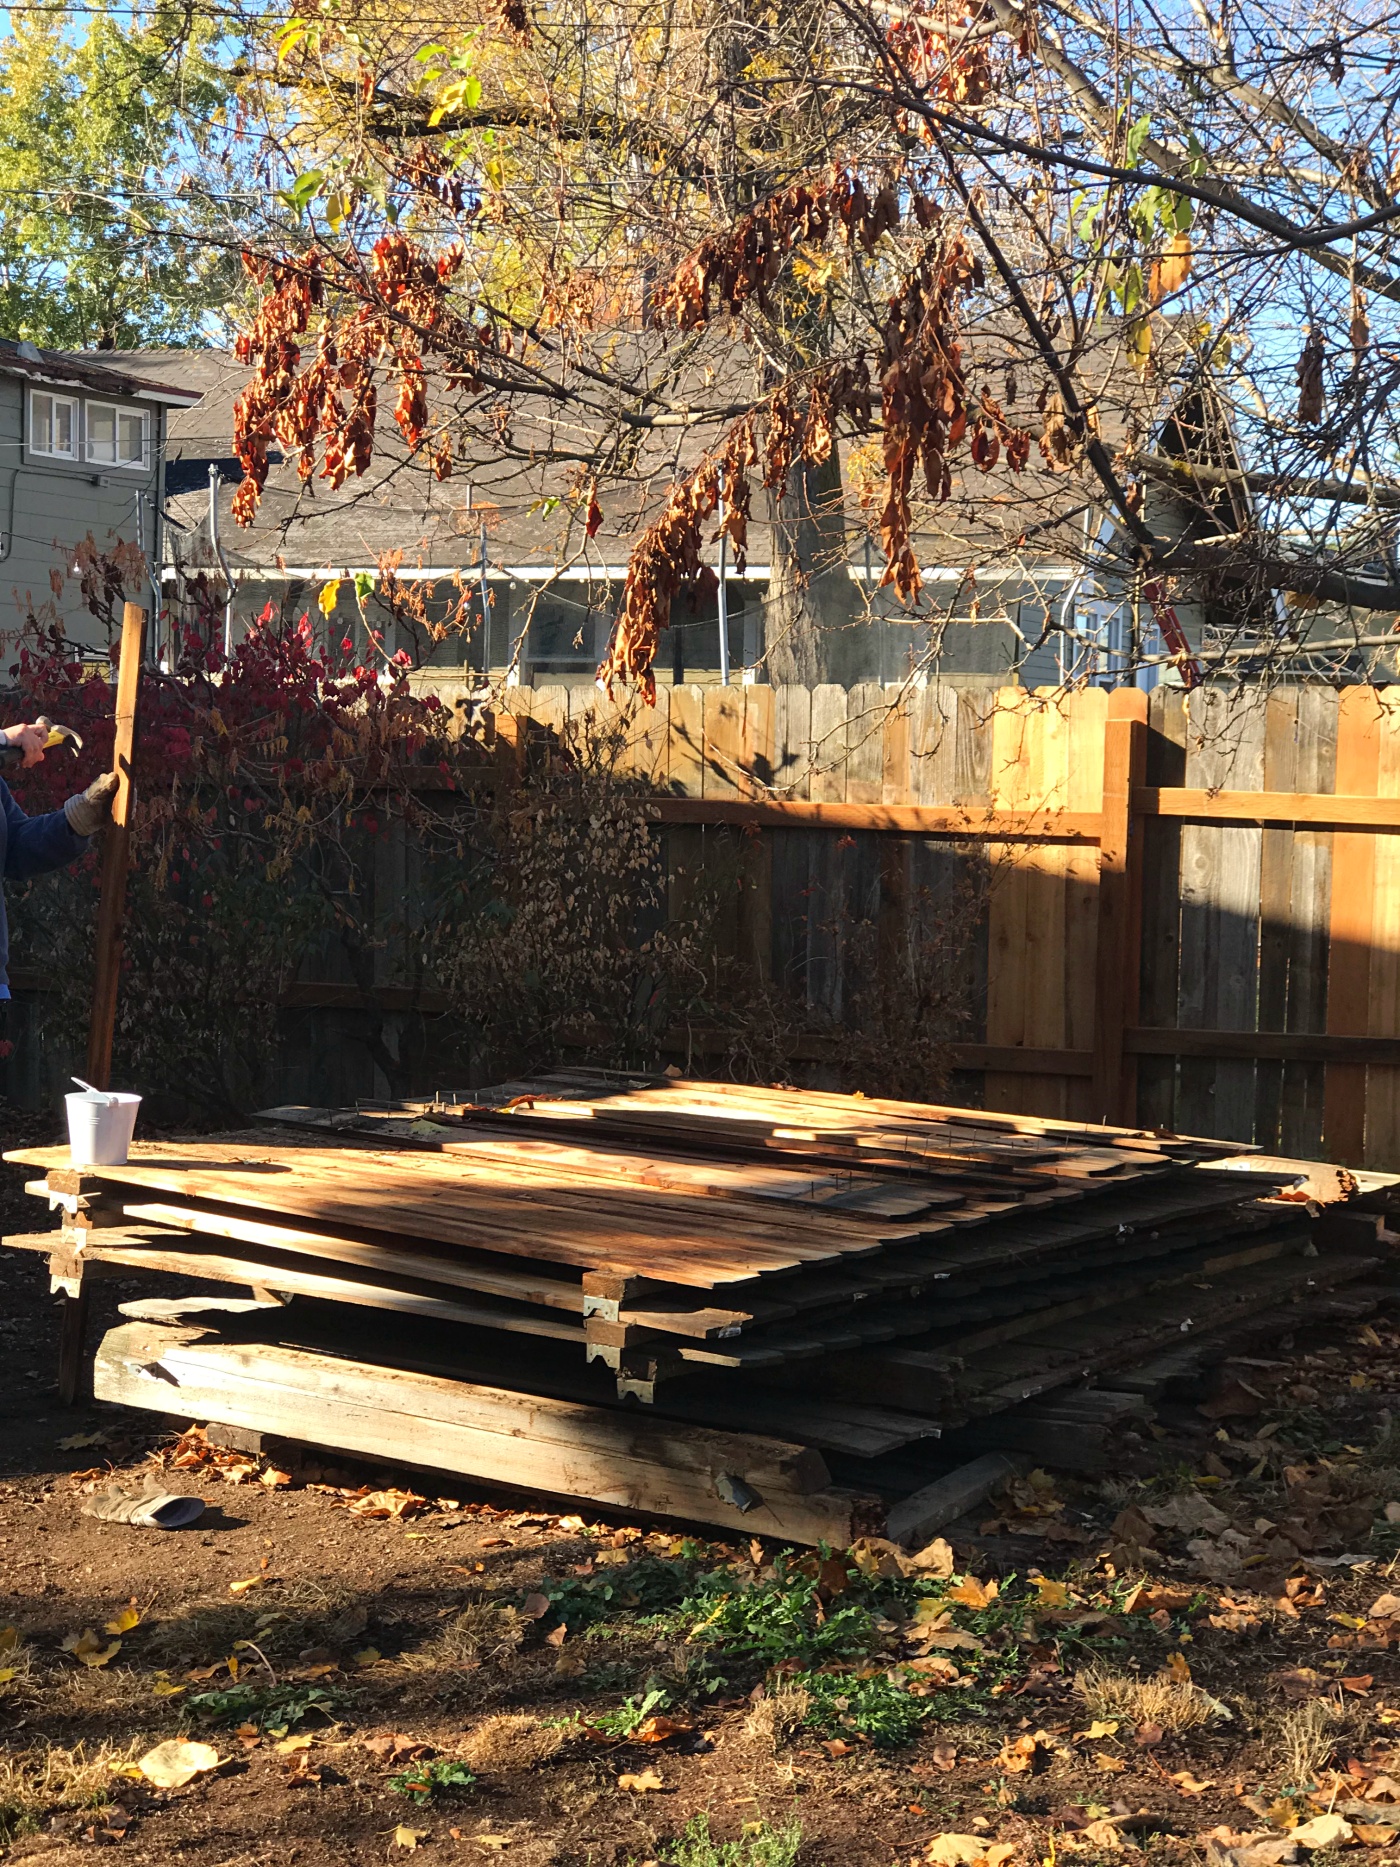
Of course it took some work to remove the wood from the post but we just did a section at a time. To clean the wood we just lightly brushed the dirt off with a scrub brush. We wanted to keep the wood as rustic as possible, so we really did just gave the planks a super quick brush down.
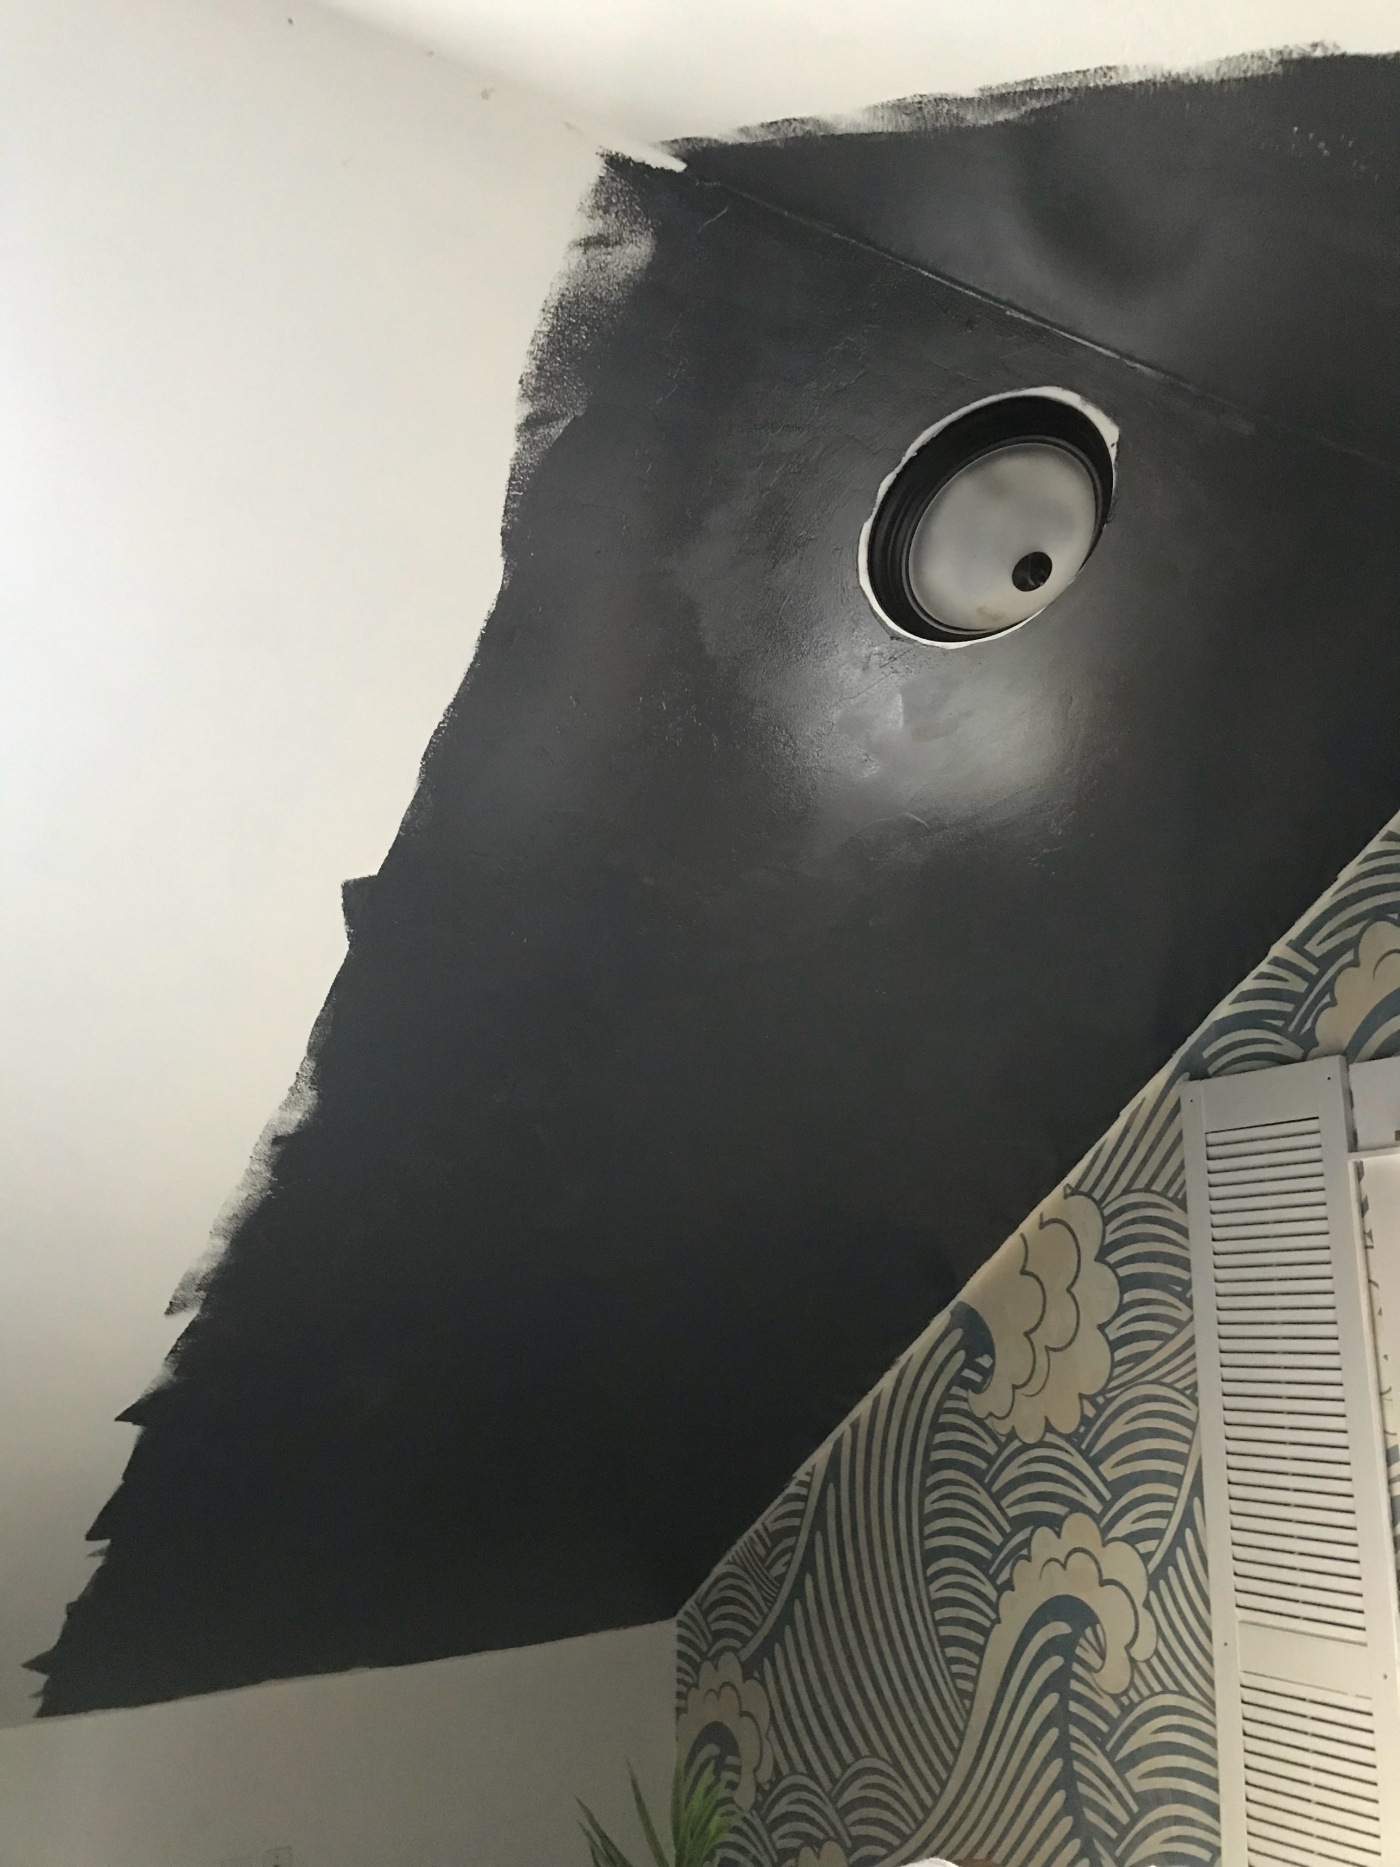
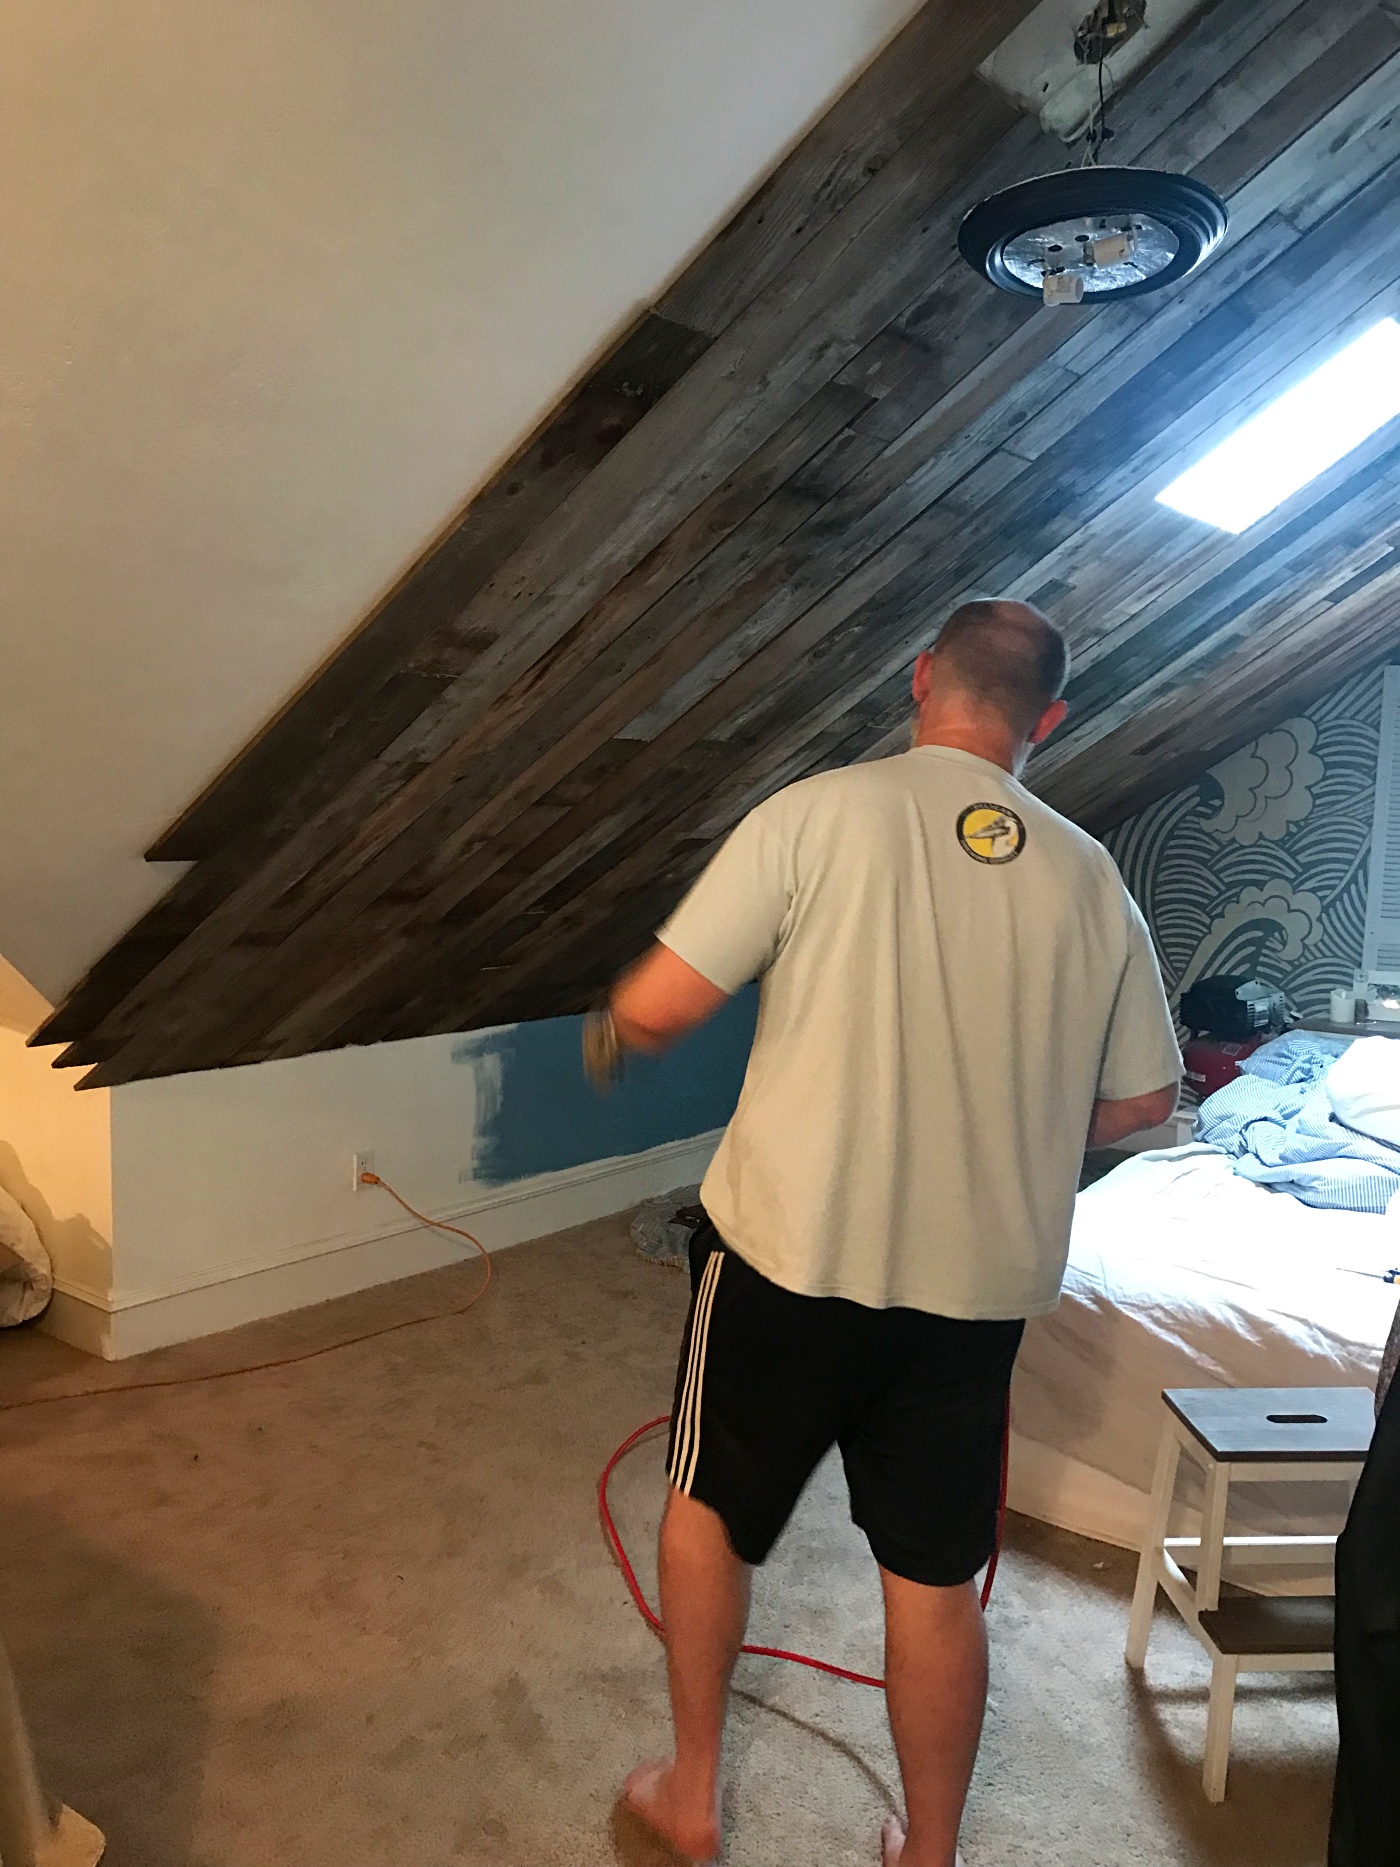
To prepare our ceiling for the wood, I had to paint it black first. I saw this done on another blog post, and it’s actually very necessary because there are cracks between the slats and if I had kept the ceiling white, it would have shown and not look good. The black isn’t noticeable at all and just looks like shadows between the planks.
Next we had to buy a Mider Saw. We went with THIS ONE mainly because it cuts at angles.
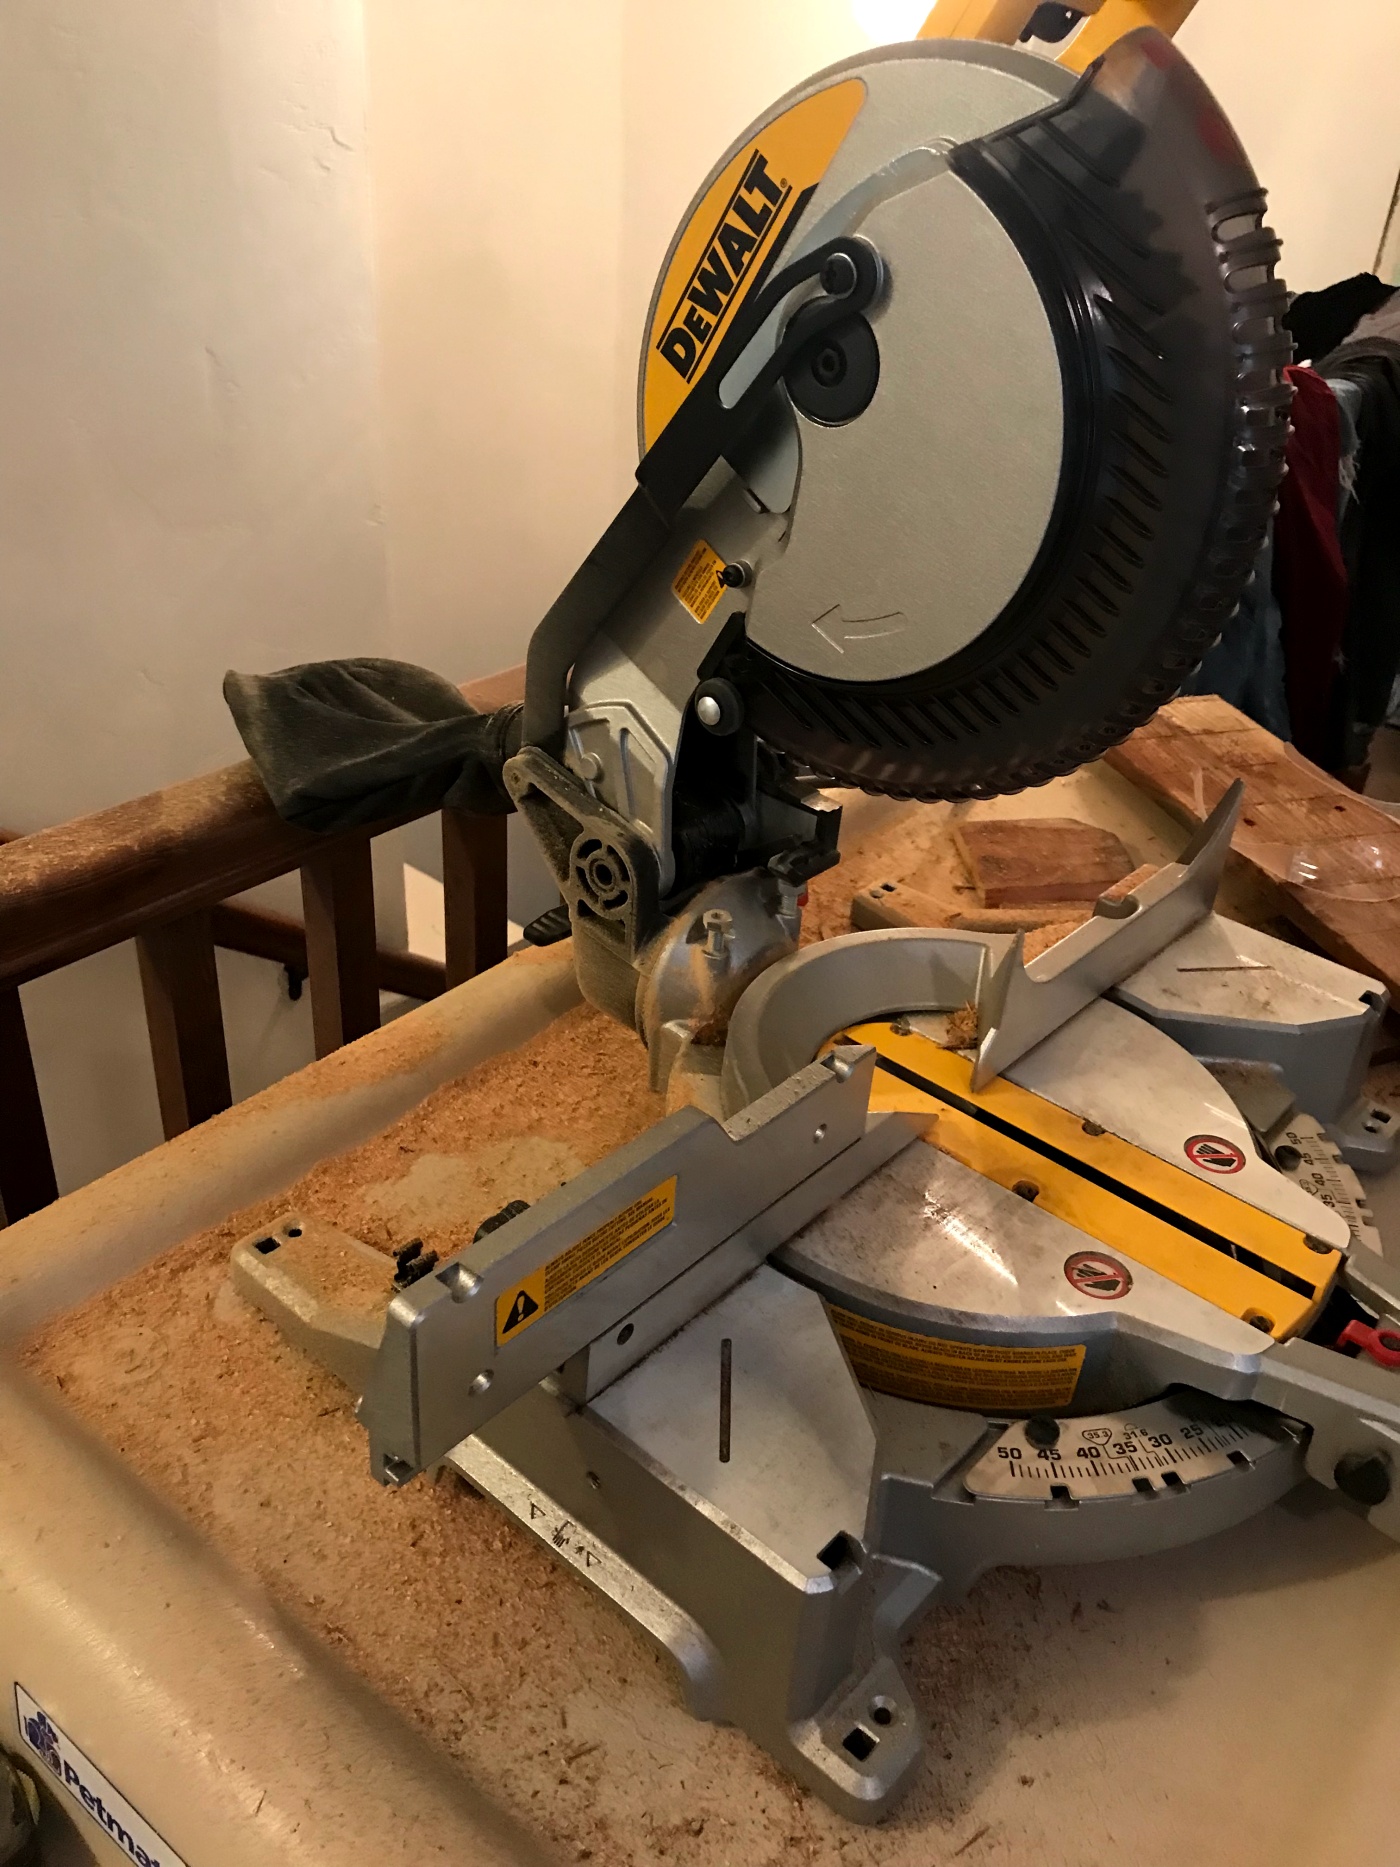
We set the saw up in our bedroom. Our set up however was pretty genius. We used our Large Great Dane size dog crate as a saw table.

The dog crate actually worked out perfectly. It was sturdy enough to not move around, and then we found a way to hang a garbage bag off to the side to throw the wood scraps in.
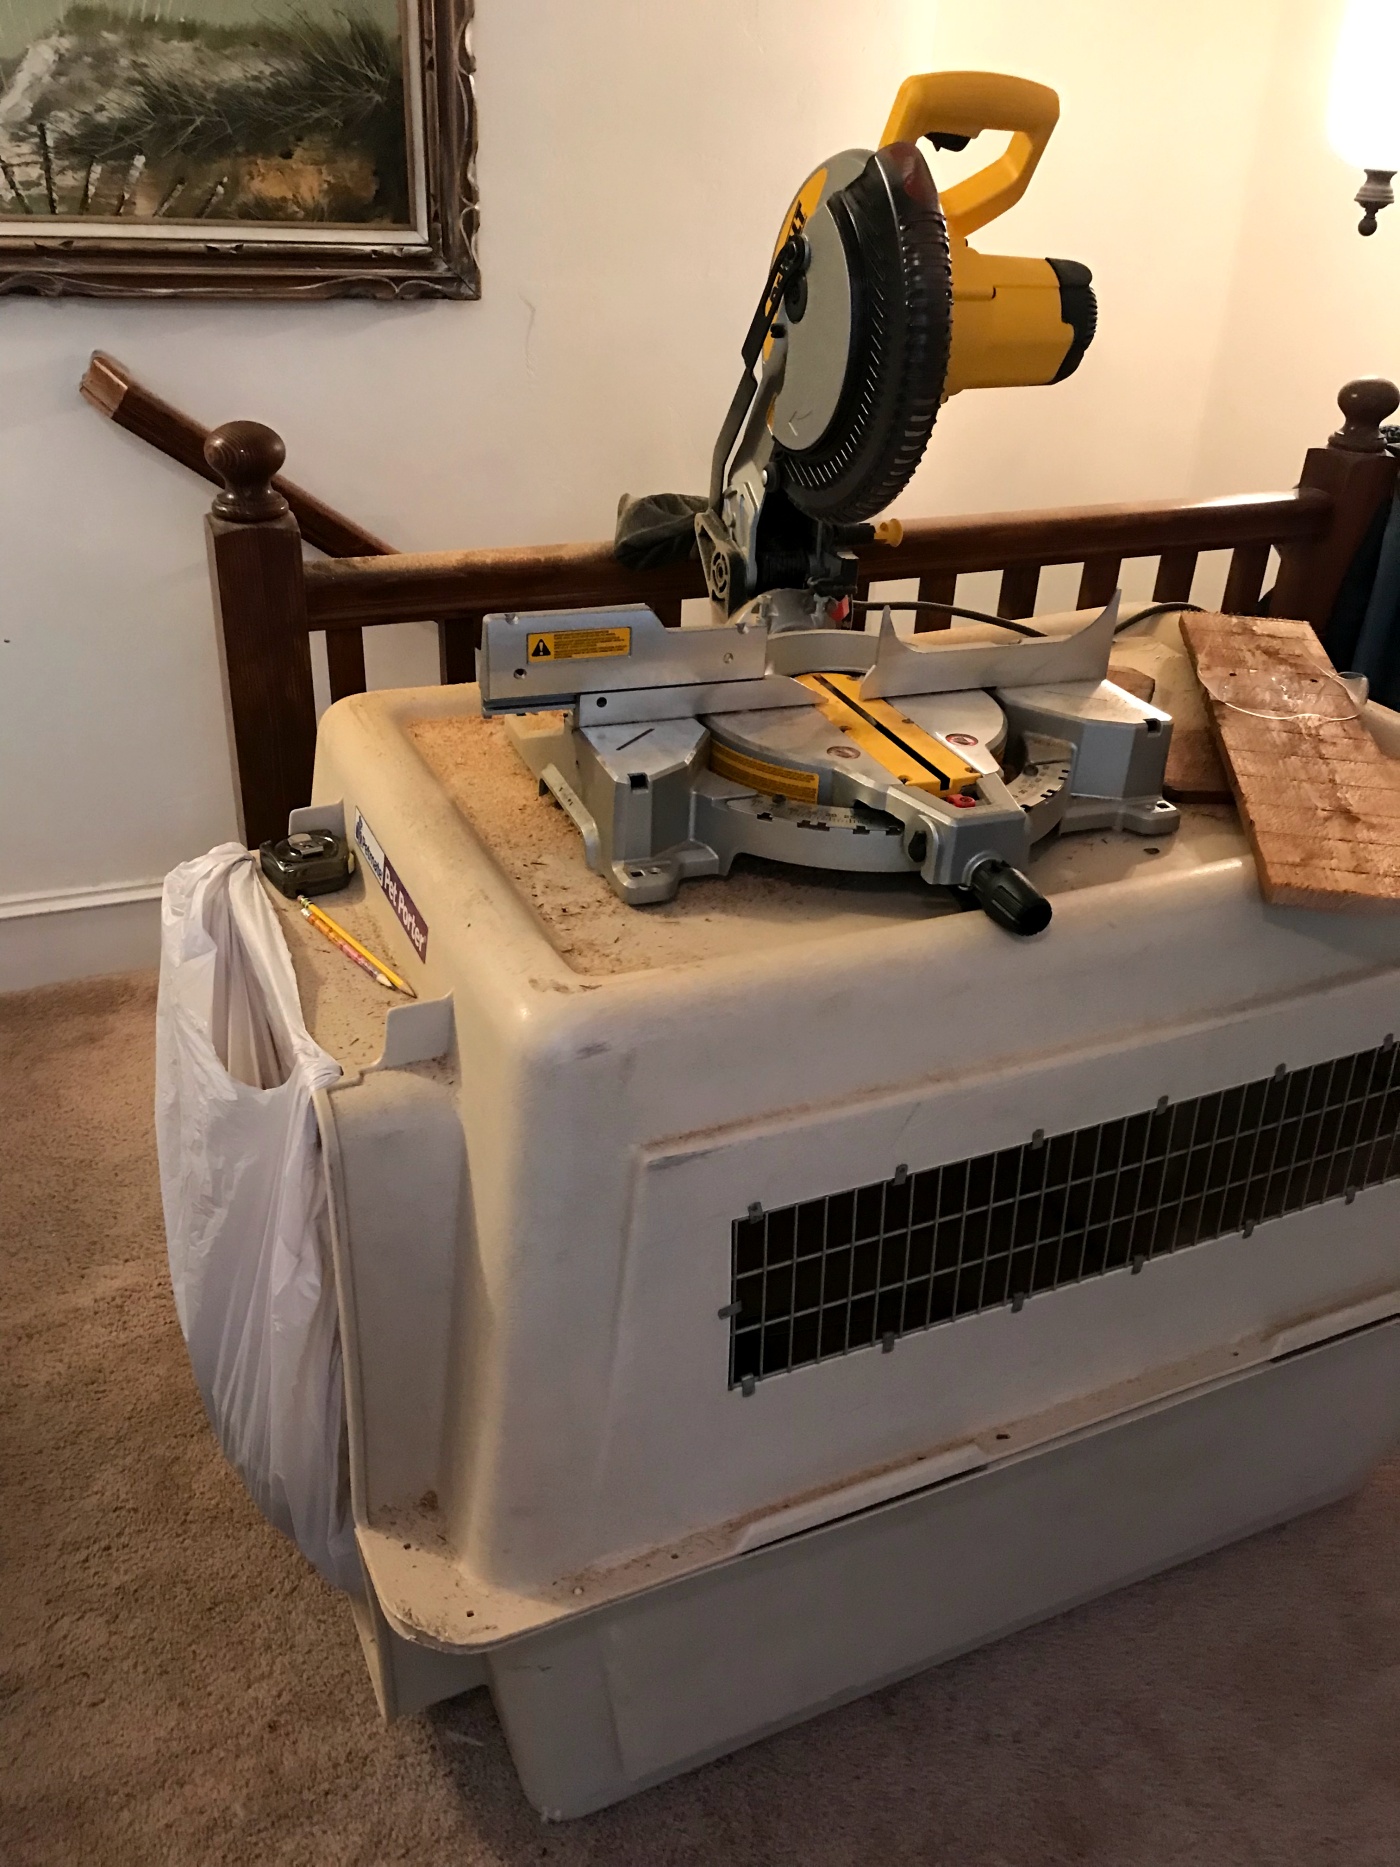
Other tools we used were a nail gun with air compressor. We already had the nail gun and air compressor, but if we were to buy a new one we would go with a cordless Nail Gun. And then we just used your other standard tools; hammer, screwdriver, level, triangle, measuring tape, and a pencil. Jake did most of the work, I was mainly his handy assistant. We make a great team.
We worked on our ceiling for about an hour every weekend and really just enjoyed the process. It ended up taking us quite a few months to finish this project but like I said, we were in No rush. We had fun working on it. It feels great to have it all finished up and now we get to enjoy our labor of love.
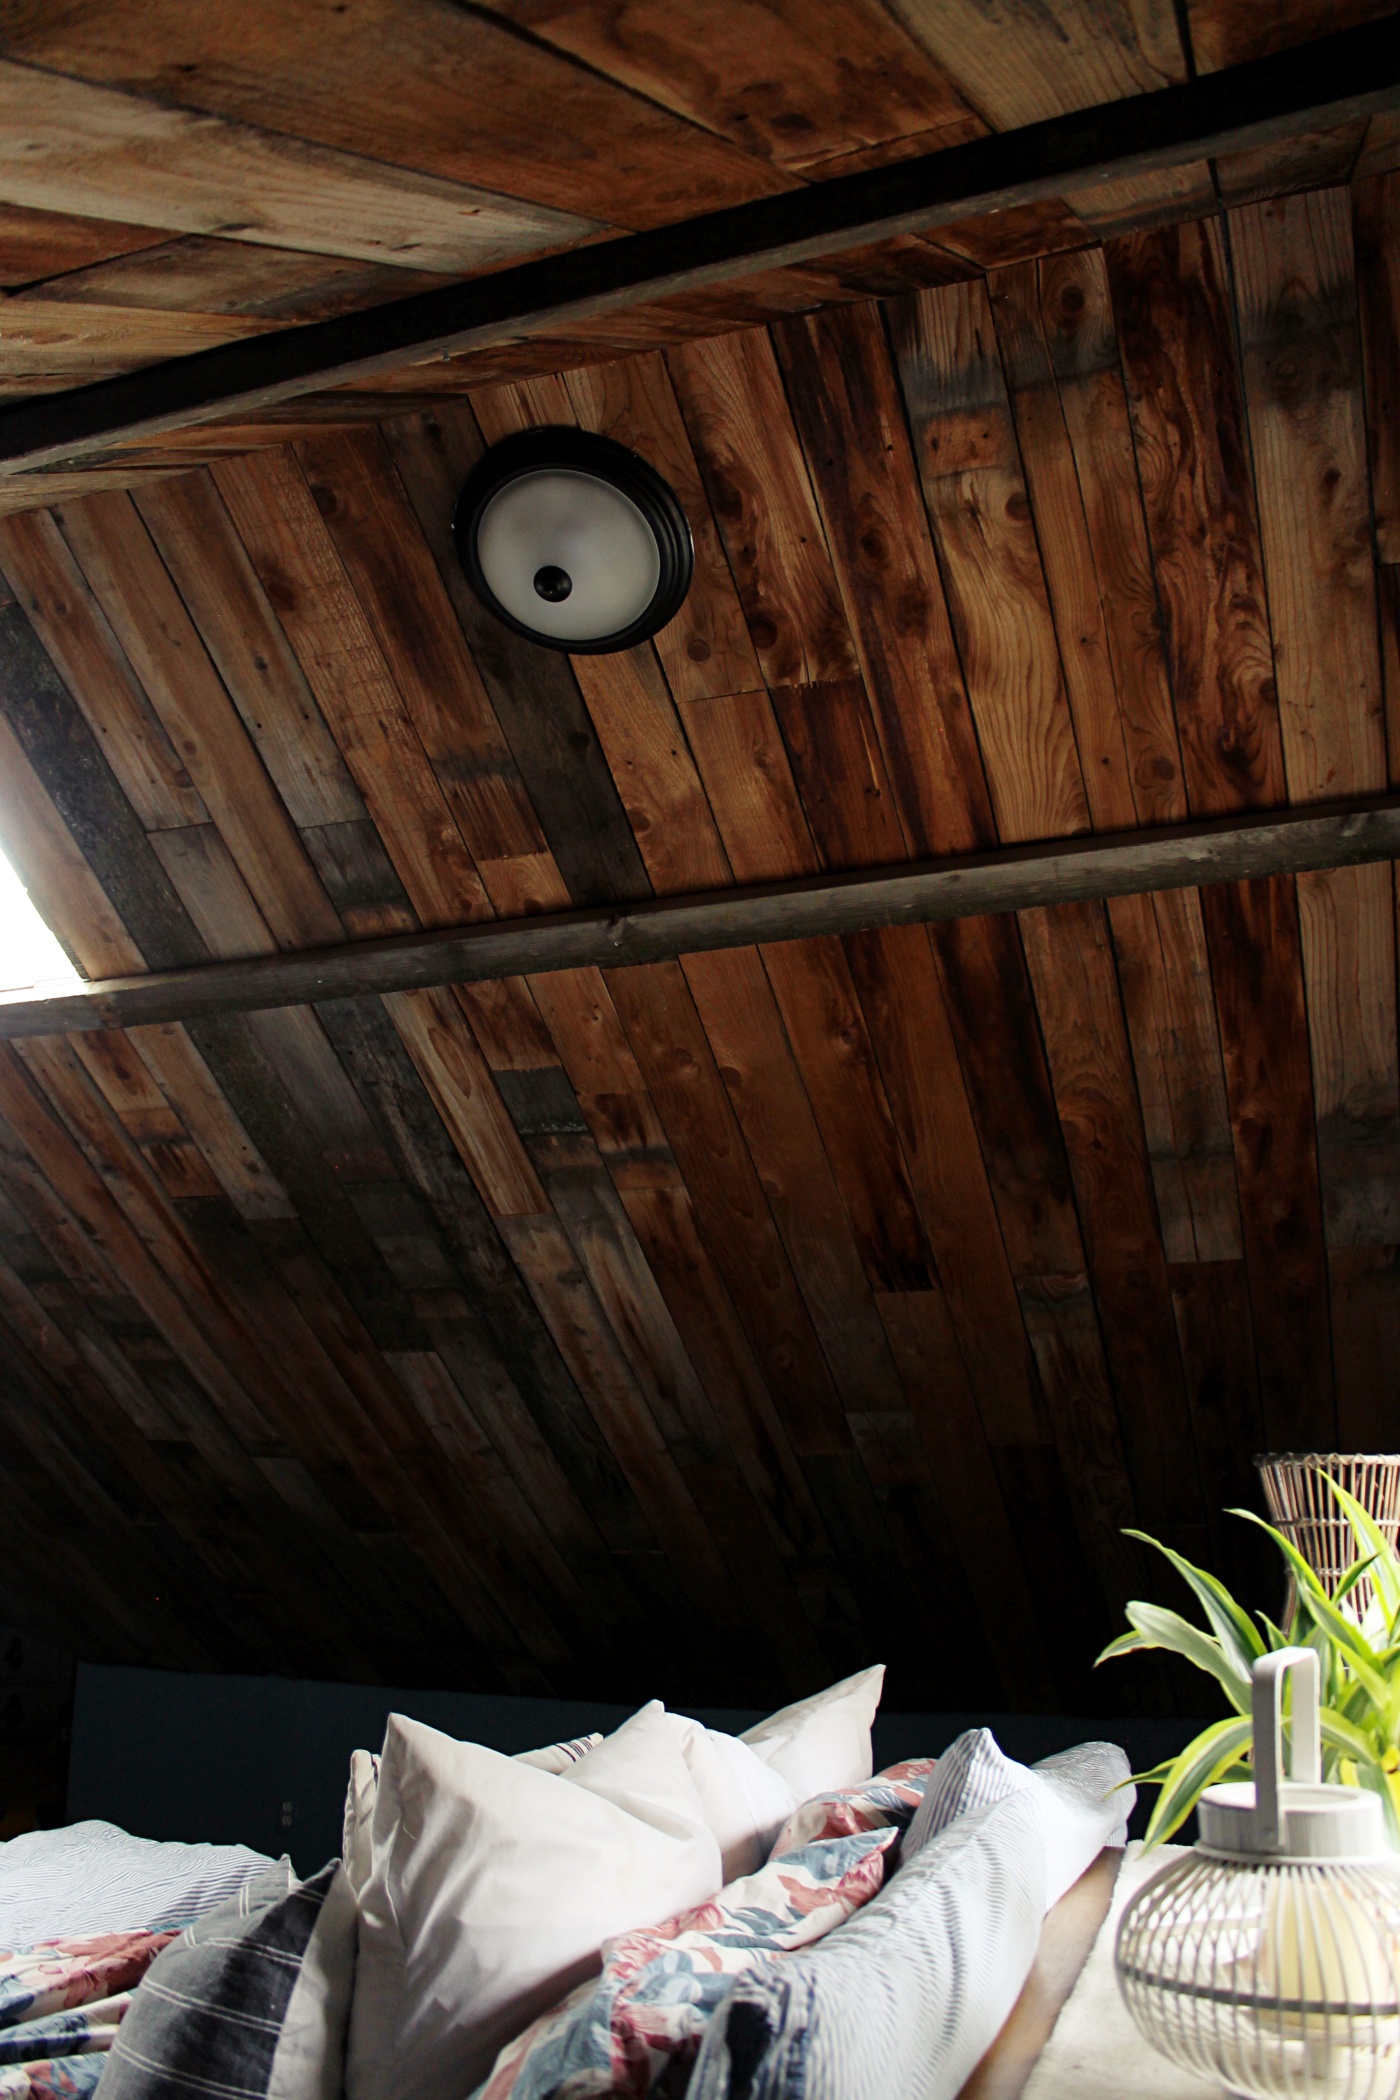
Jake cut the boards at an angle for the ceiling joints. Then we first added all of the boards vertically. We cut the boards at different lengths each time so that the seams weren’t all the same.
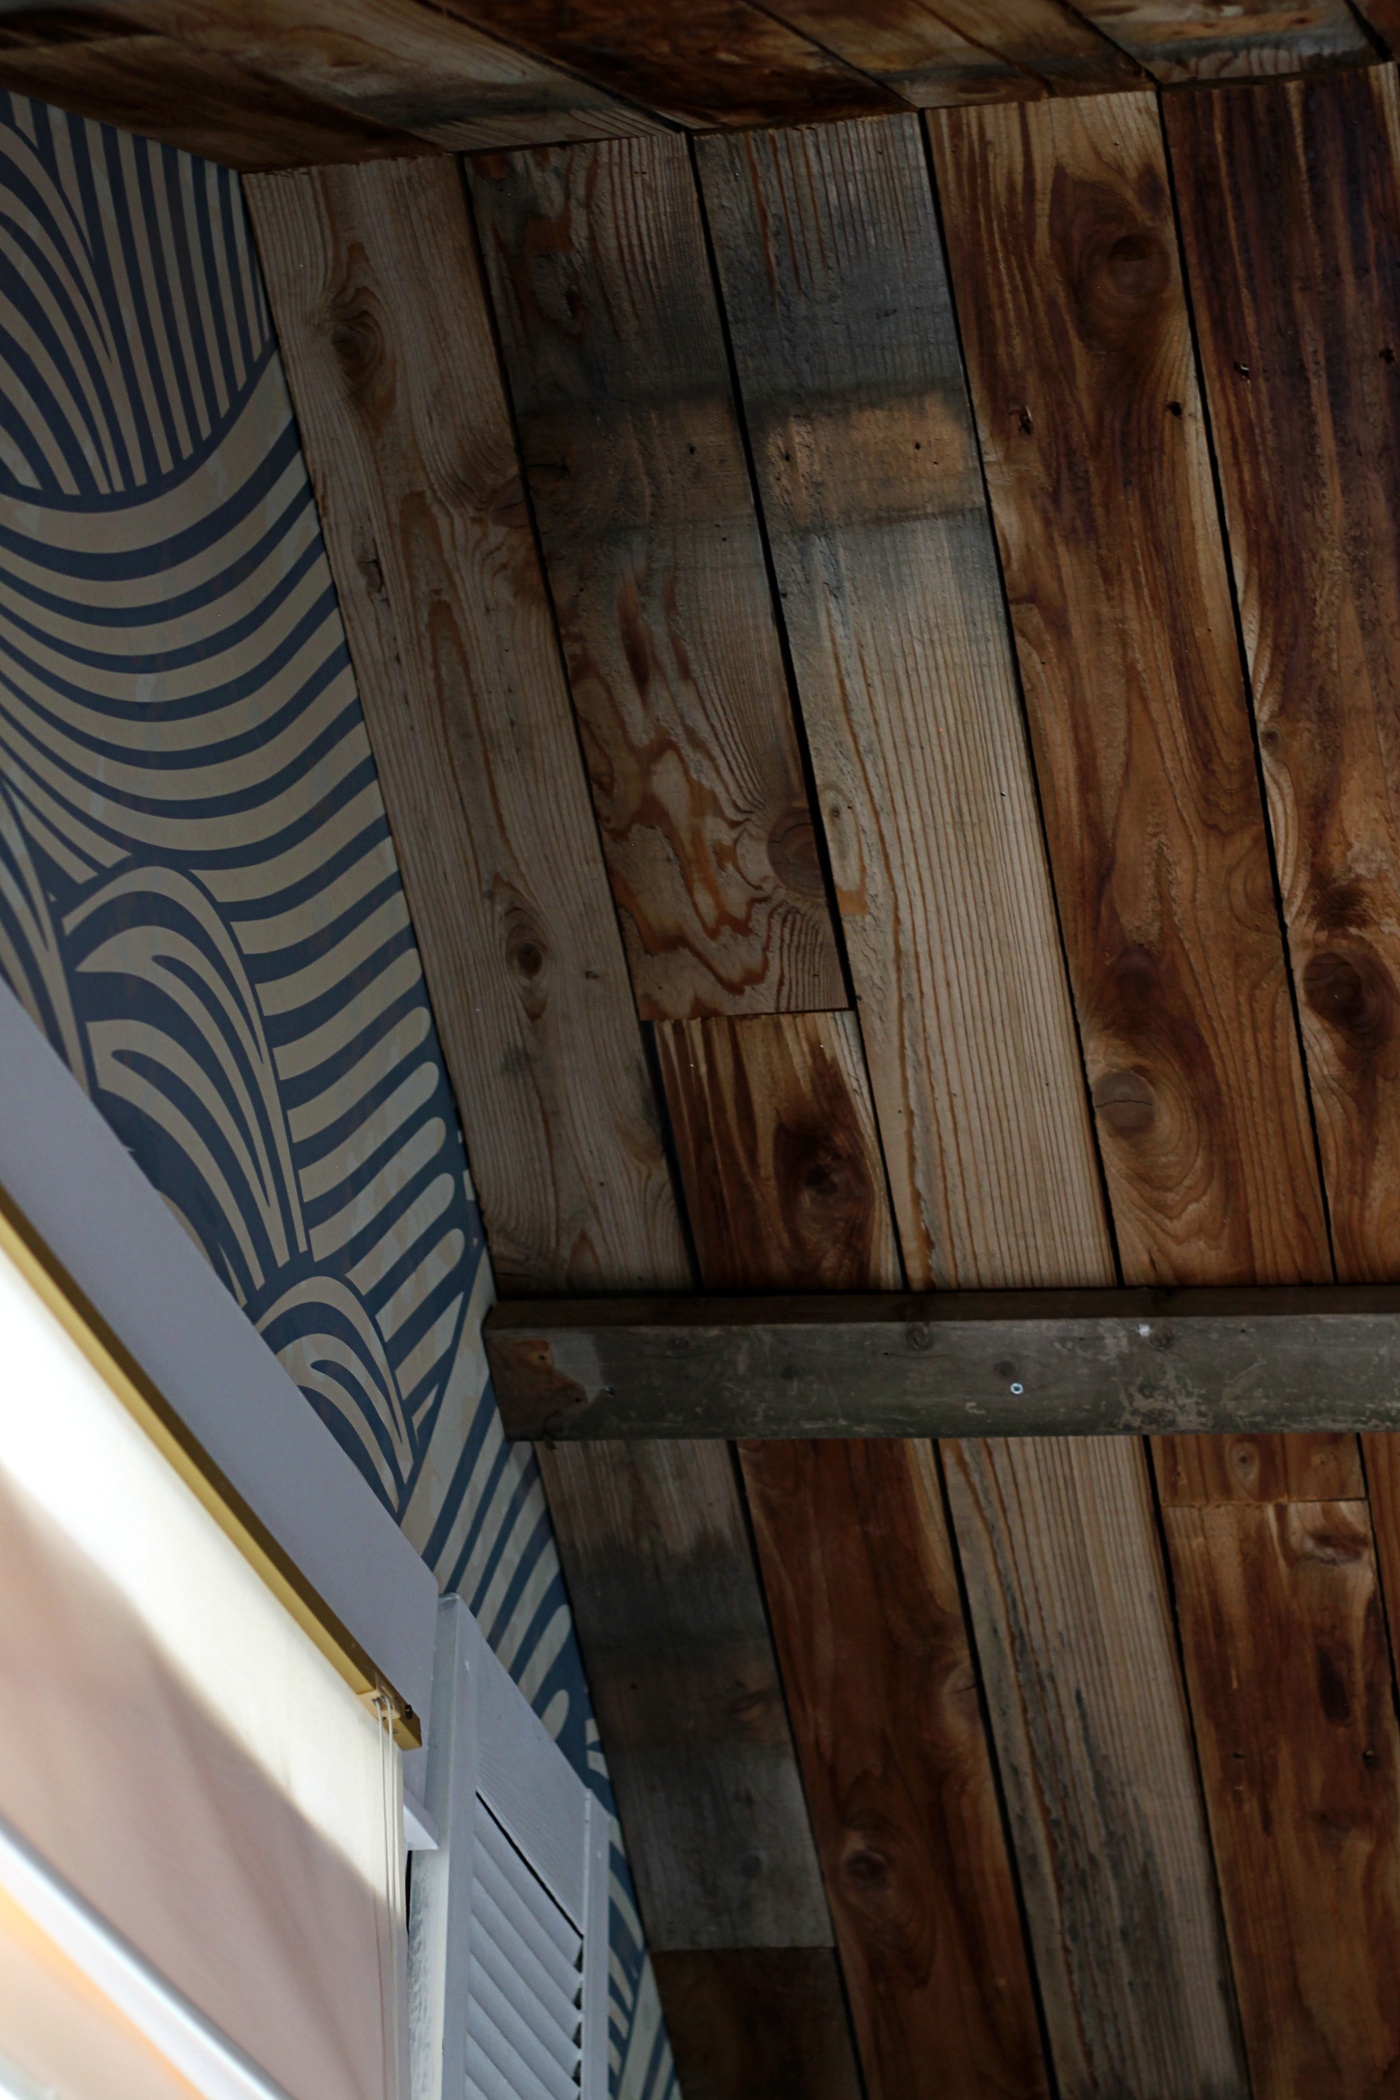
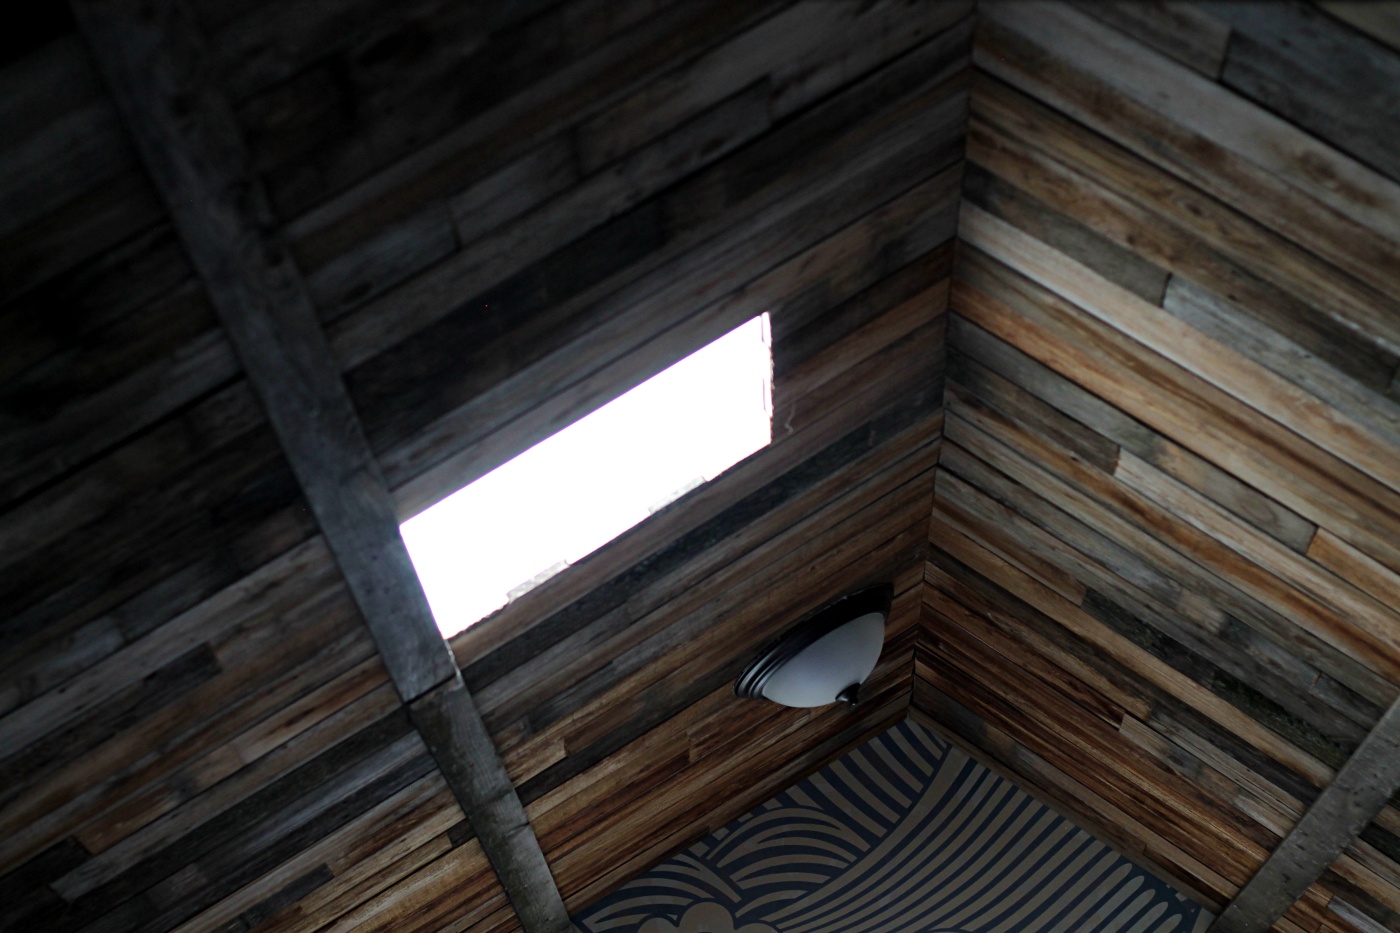
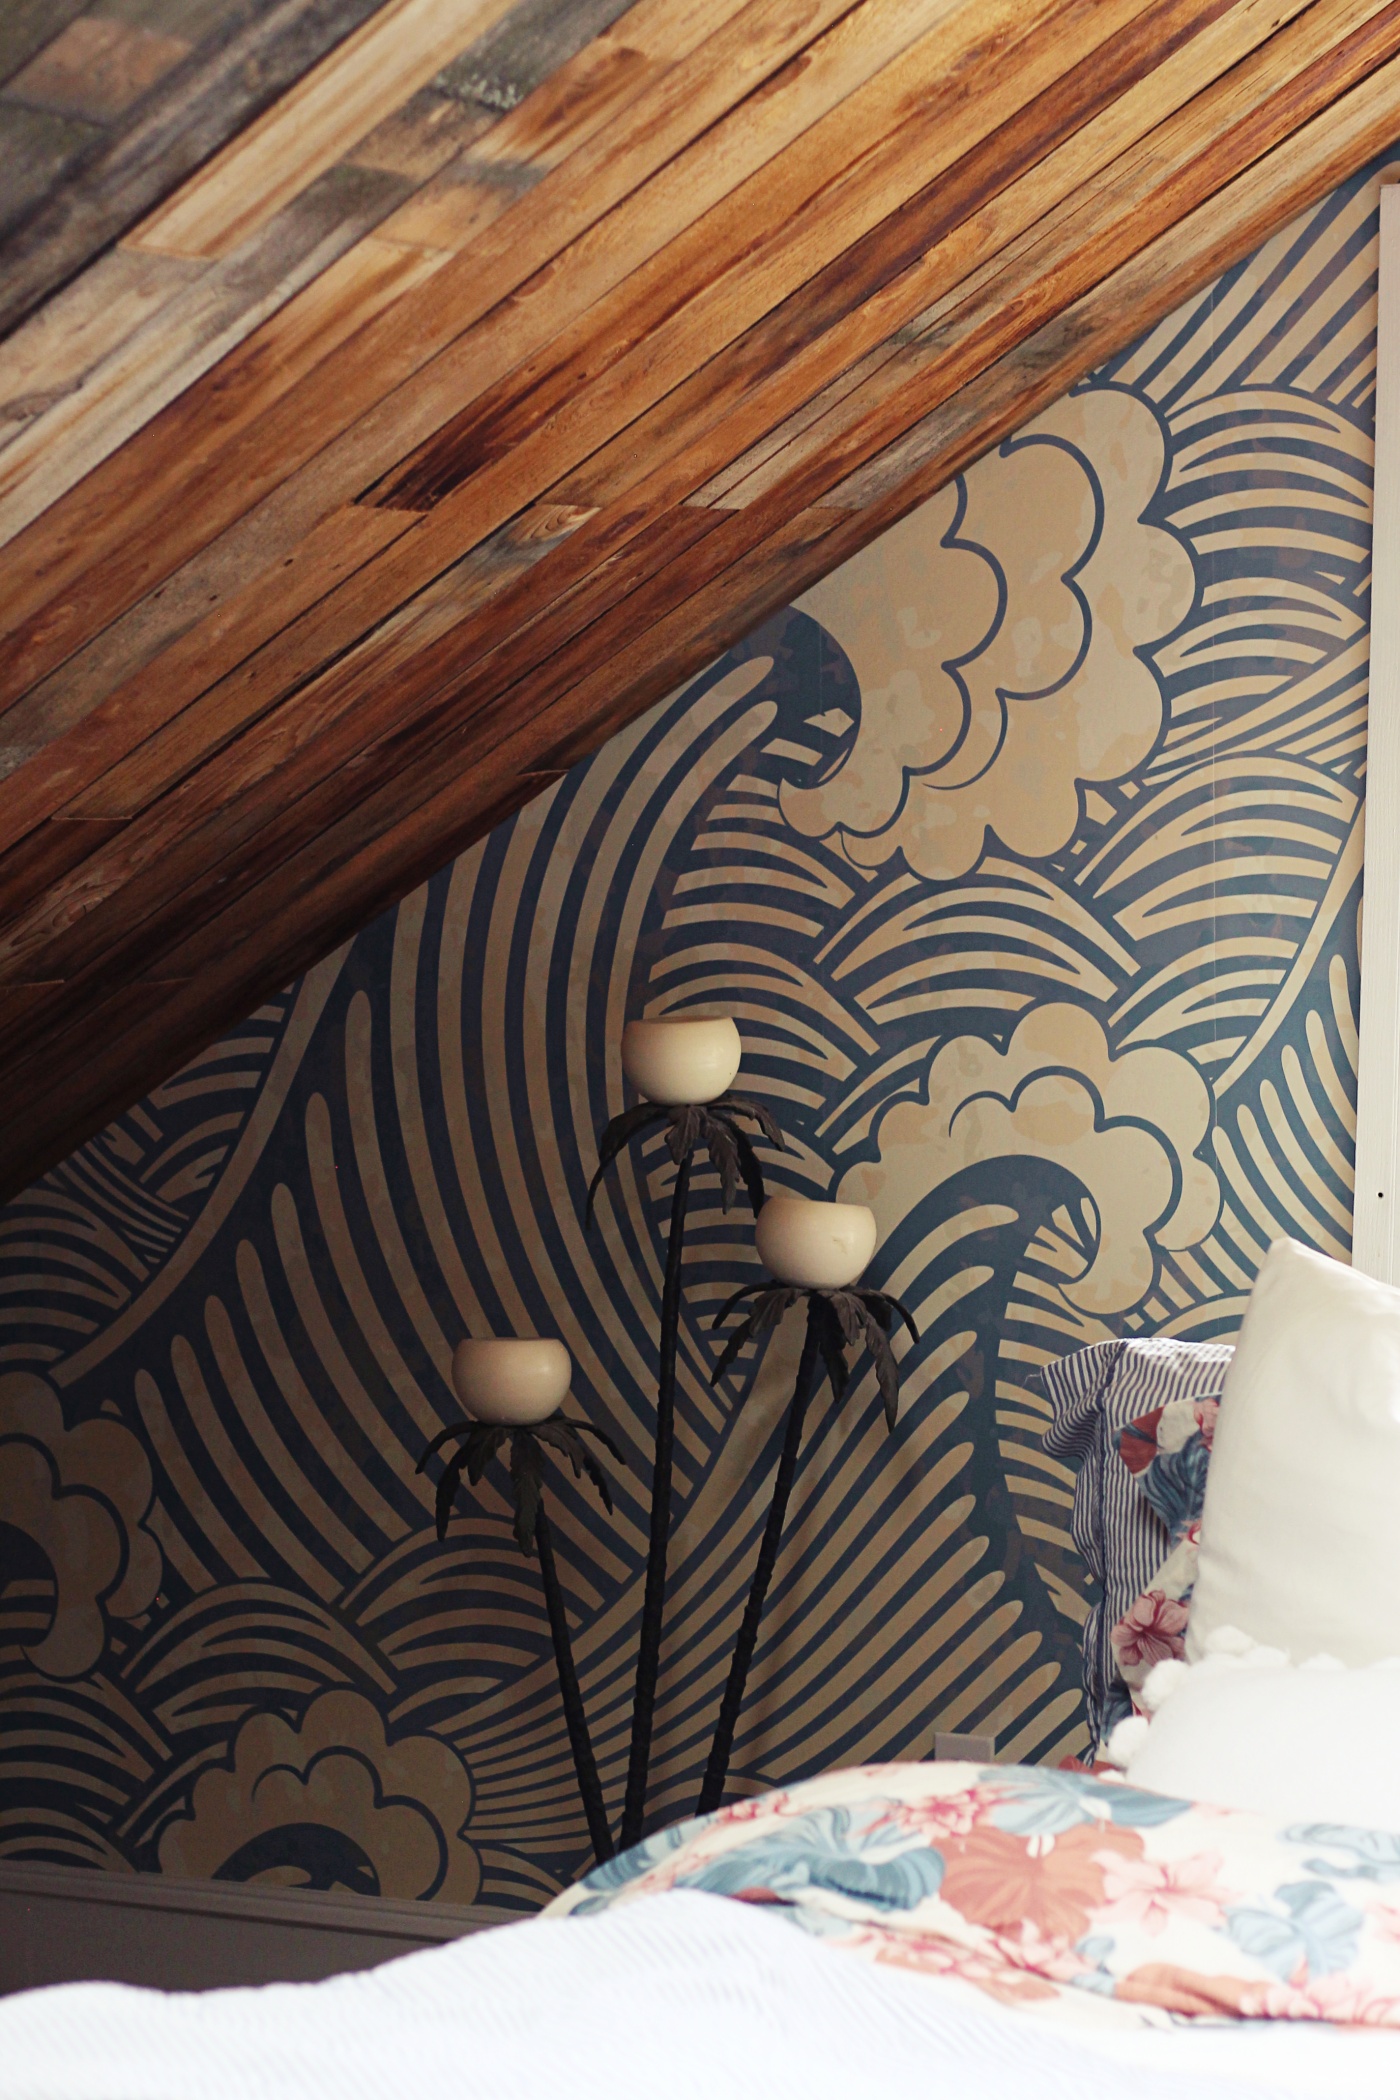
It was a little bit more difficult to add the wood round the skylight, light fixtures and brick chimney, we just had to make some specials cuts but it all worked out great.
So in the end after we had all of the vertical slats in, we decided to add some beams going horizontal just to give the ceiling a finished look.
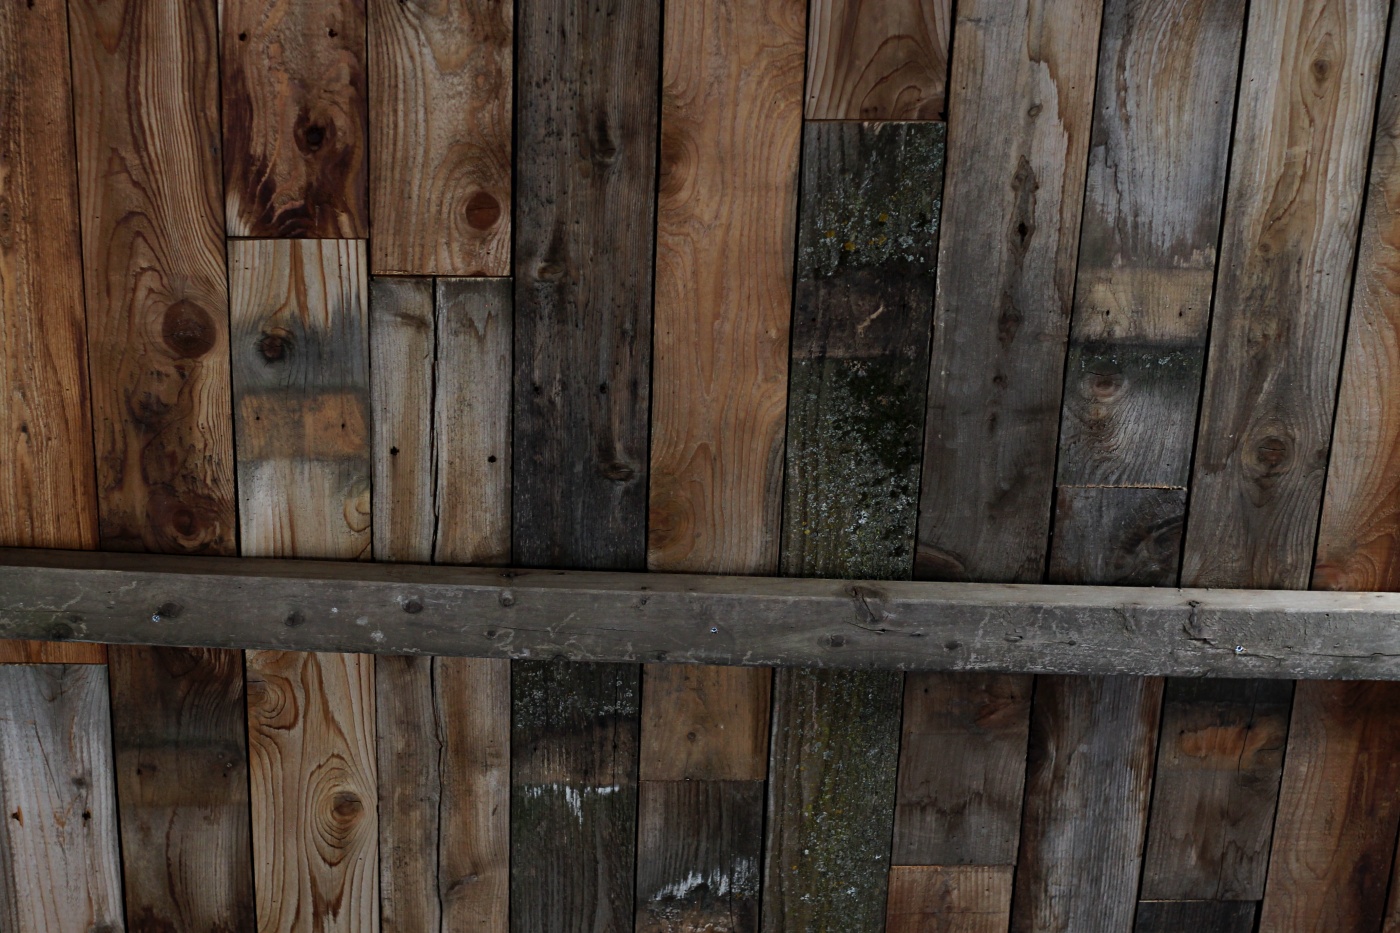
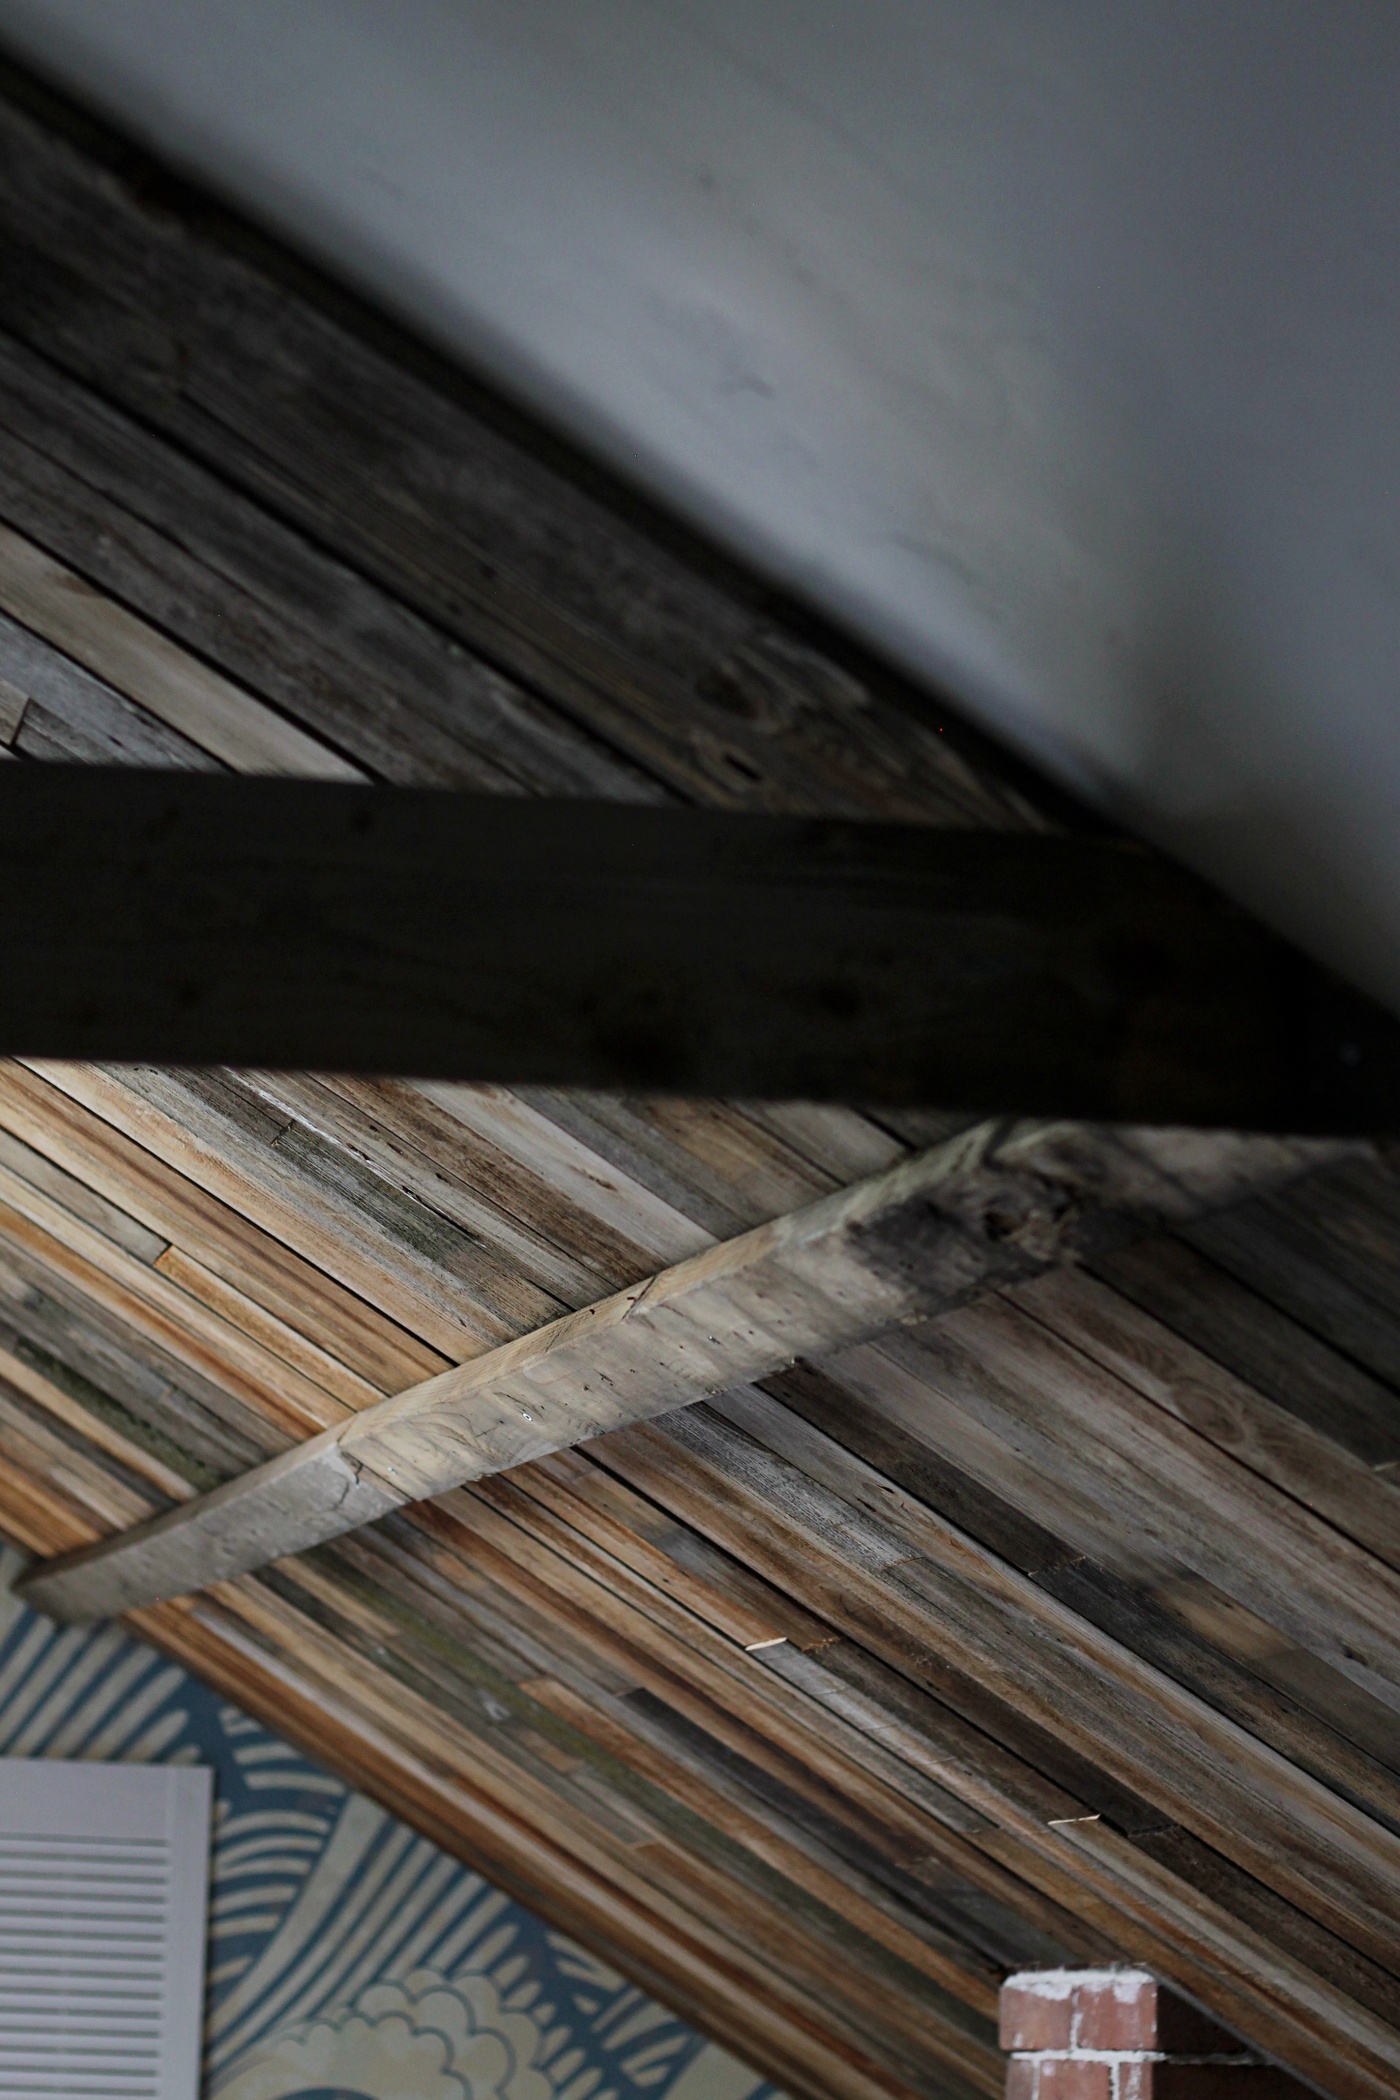
So remember how I said we just lightly brushed the wood off to remove the dirt because we wanted to keep the boards as rustic as possible? Well on some of the boards we purposely left some moss on them. This next picture is of my very favorite board. Isn’t that fun? I just love the character of it.
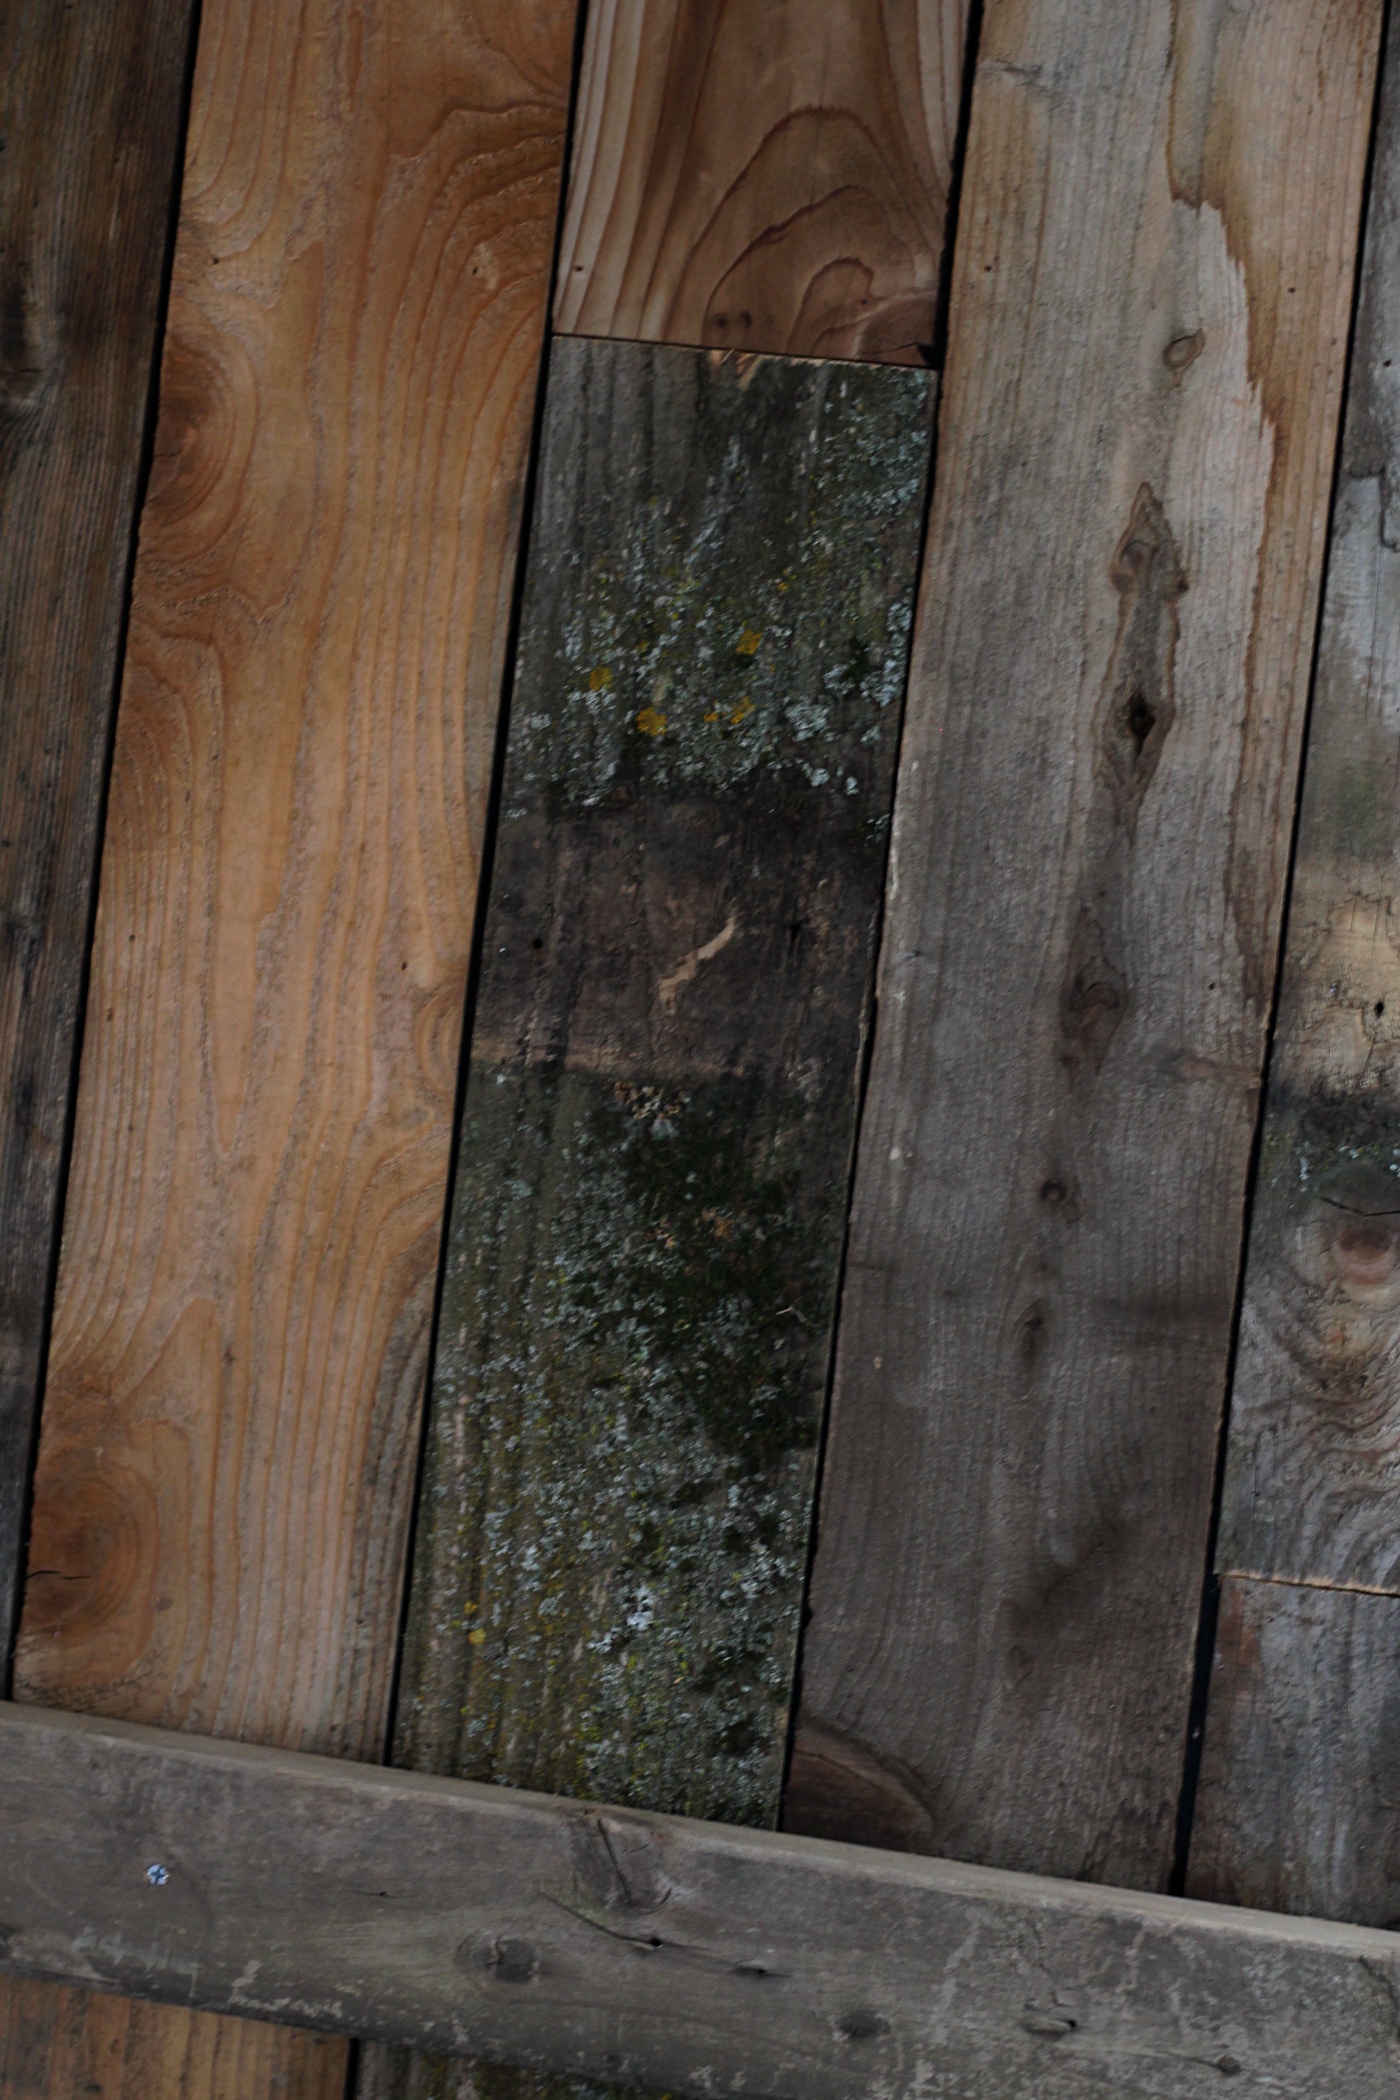
Actually, the whole ceiling has so much character to it. I love how the wood varies in colors and I love all of the cool knots and nail holes. It feels so rustic.
I think the added horizontal beams are fun, and I can picture myself hanging plants or string lights from them some day.
We also hung a board horizontally at the point where we had ended the slats to complete the look. I’m sure I’ll hang something from this board too some day. I like the idea of wrapping some old rope around it or perhaps I’ll hang a curtain or I don’t know, but I feel like I’m going to have fun playing around with it.
Here is a better look at that board as you enter in to our bed area.
I decided I wanted the lower side walls to be painted blue instead of white, so I matched my paint samples with the wallpaper trying to get the exact shade of blue in the wallpaper and I ended up with the color ‘Whipple Blue” by Benjamin Moore.
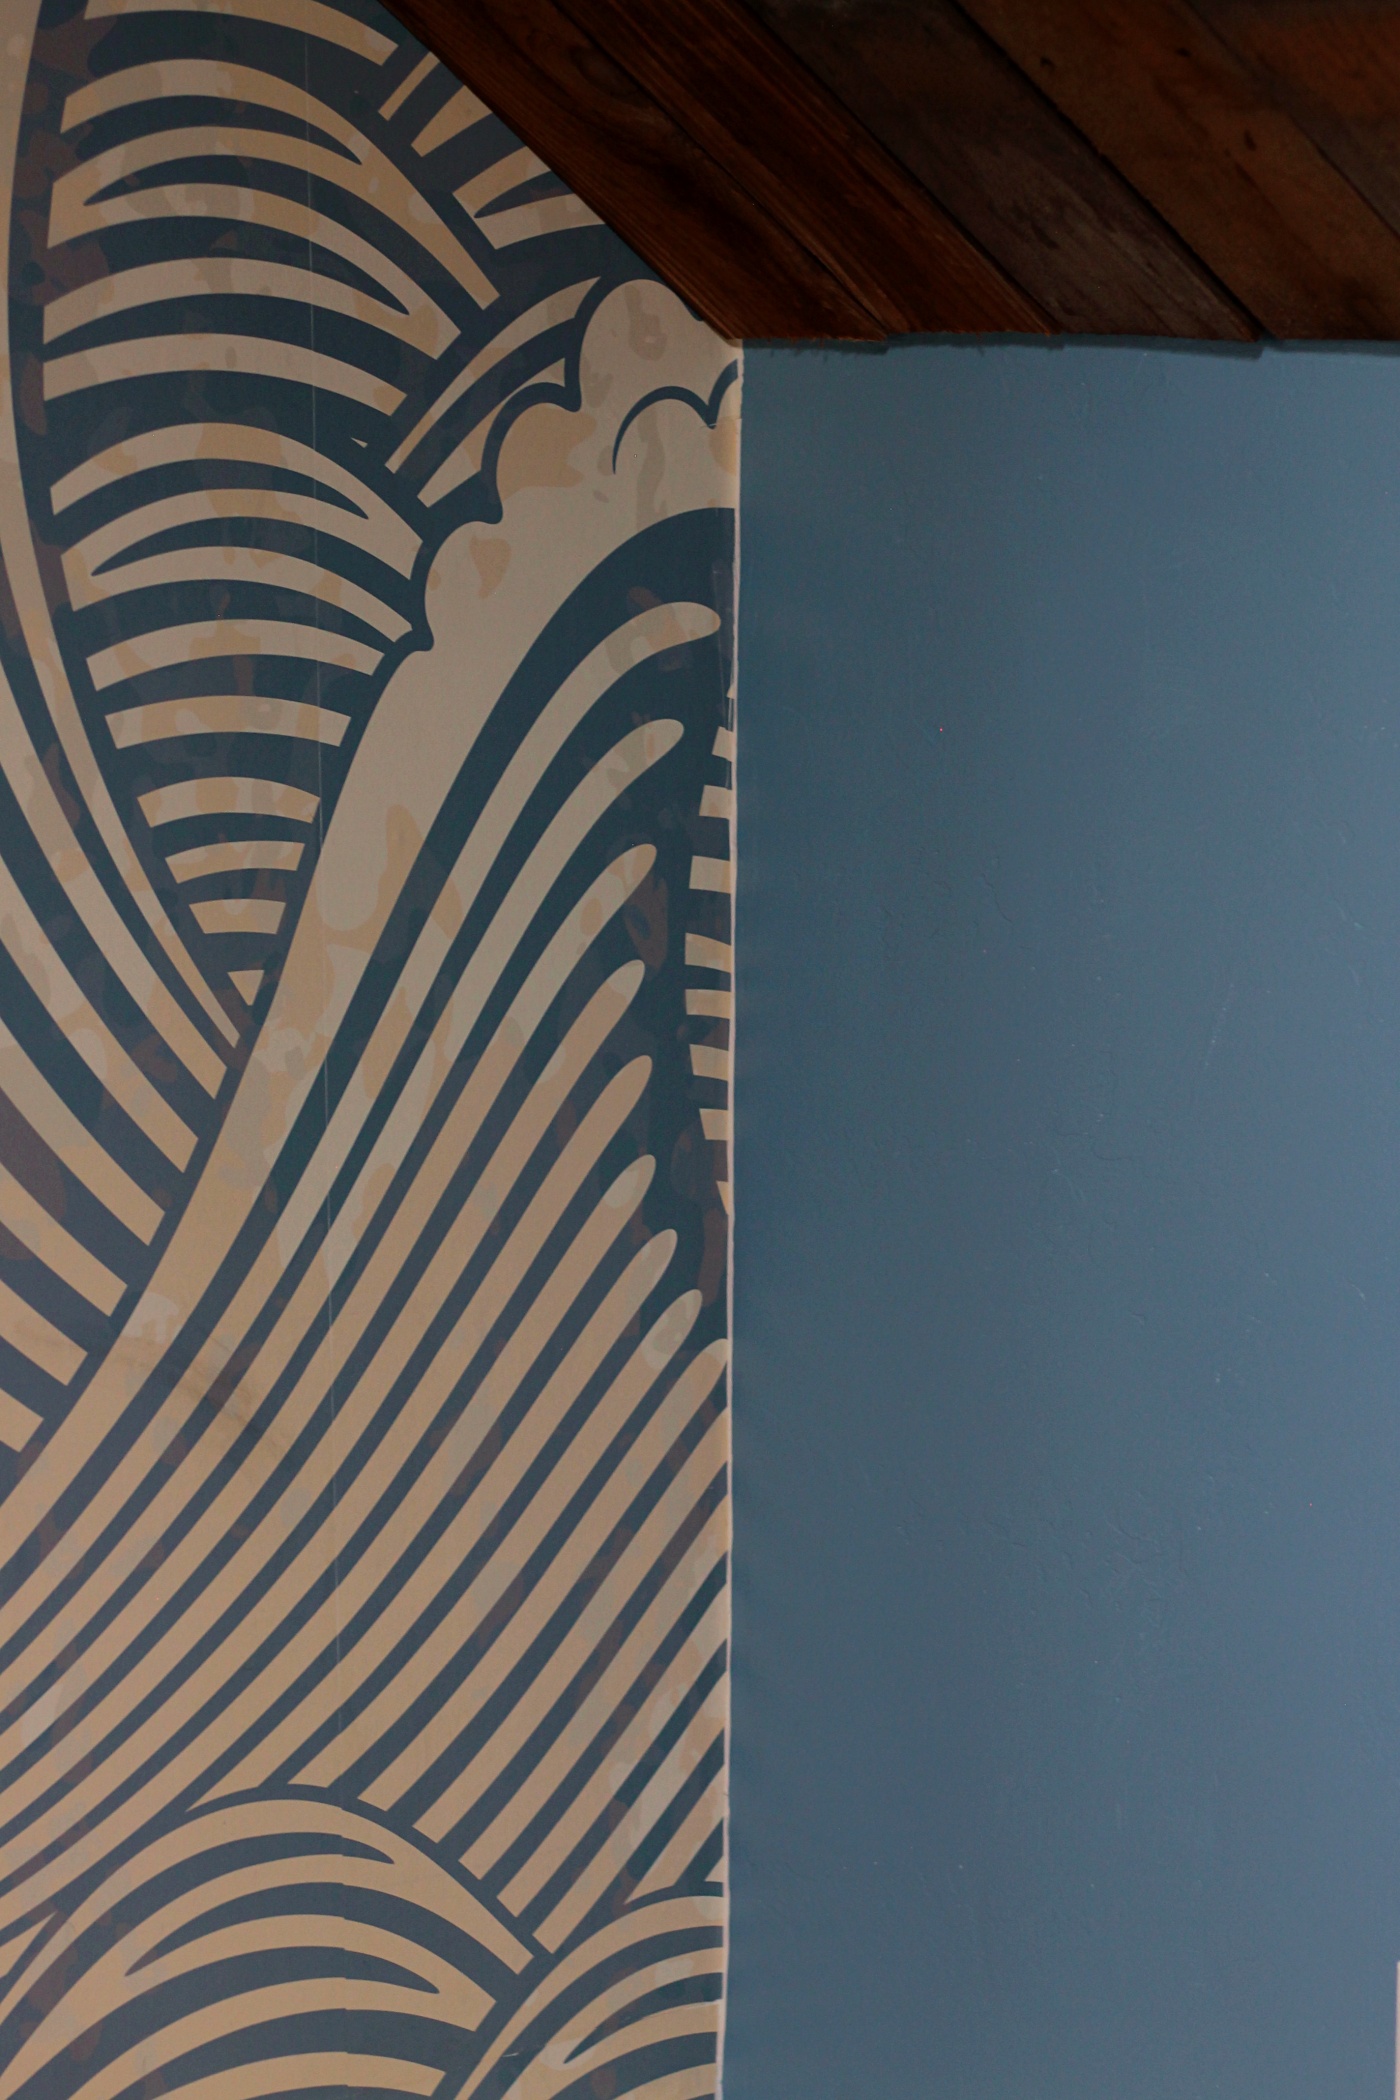
I only bought a sample size of this paint and it ended up being the perfect amount of paint. I love this color. I think that this color flows so nicely with the wallpaper, wood tones of the ceiling, and with the rust-colored brick on the chimney.

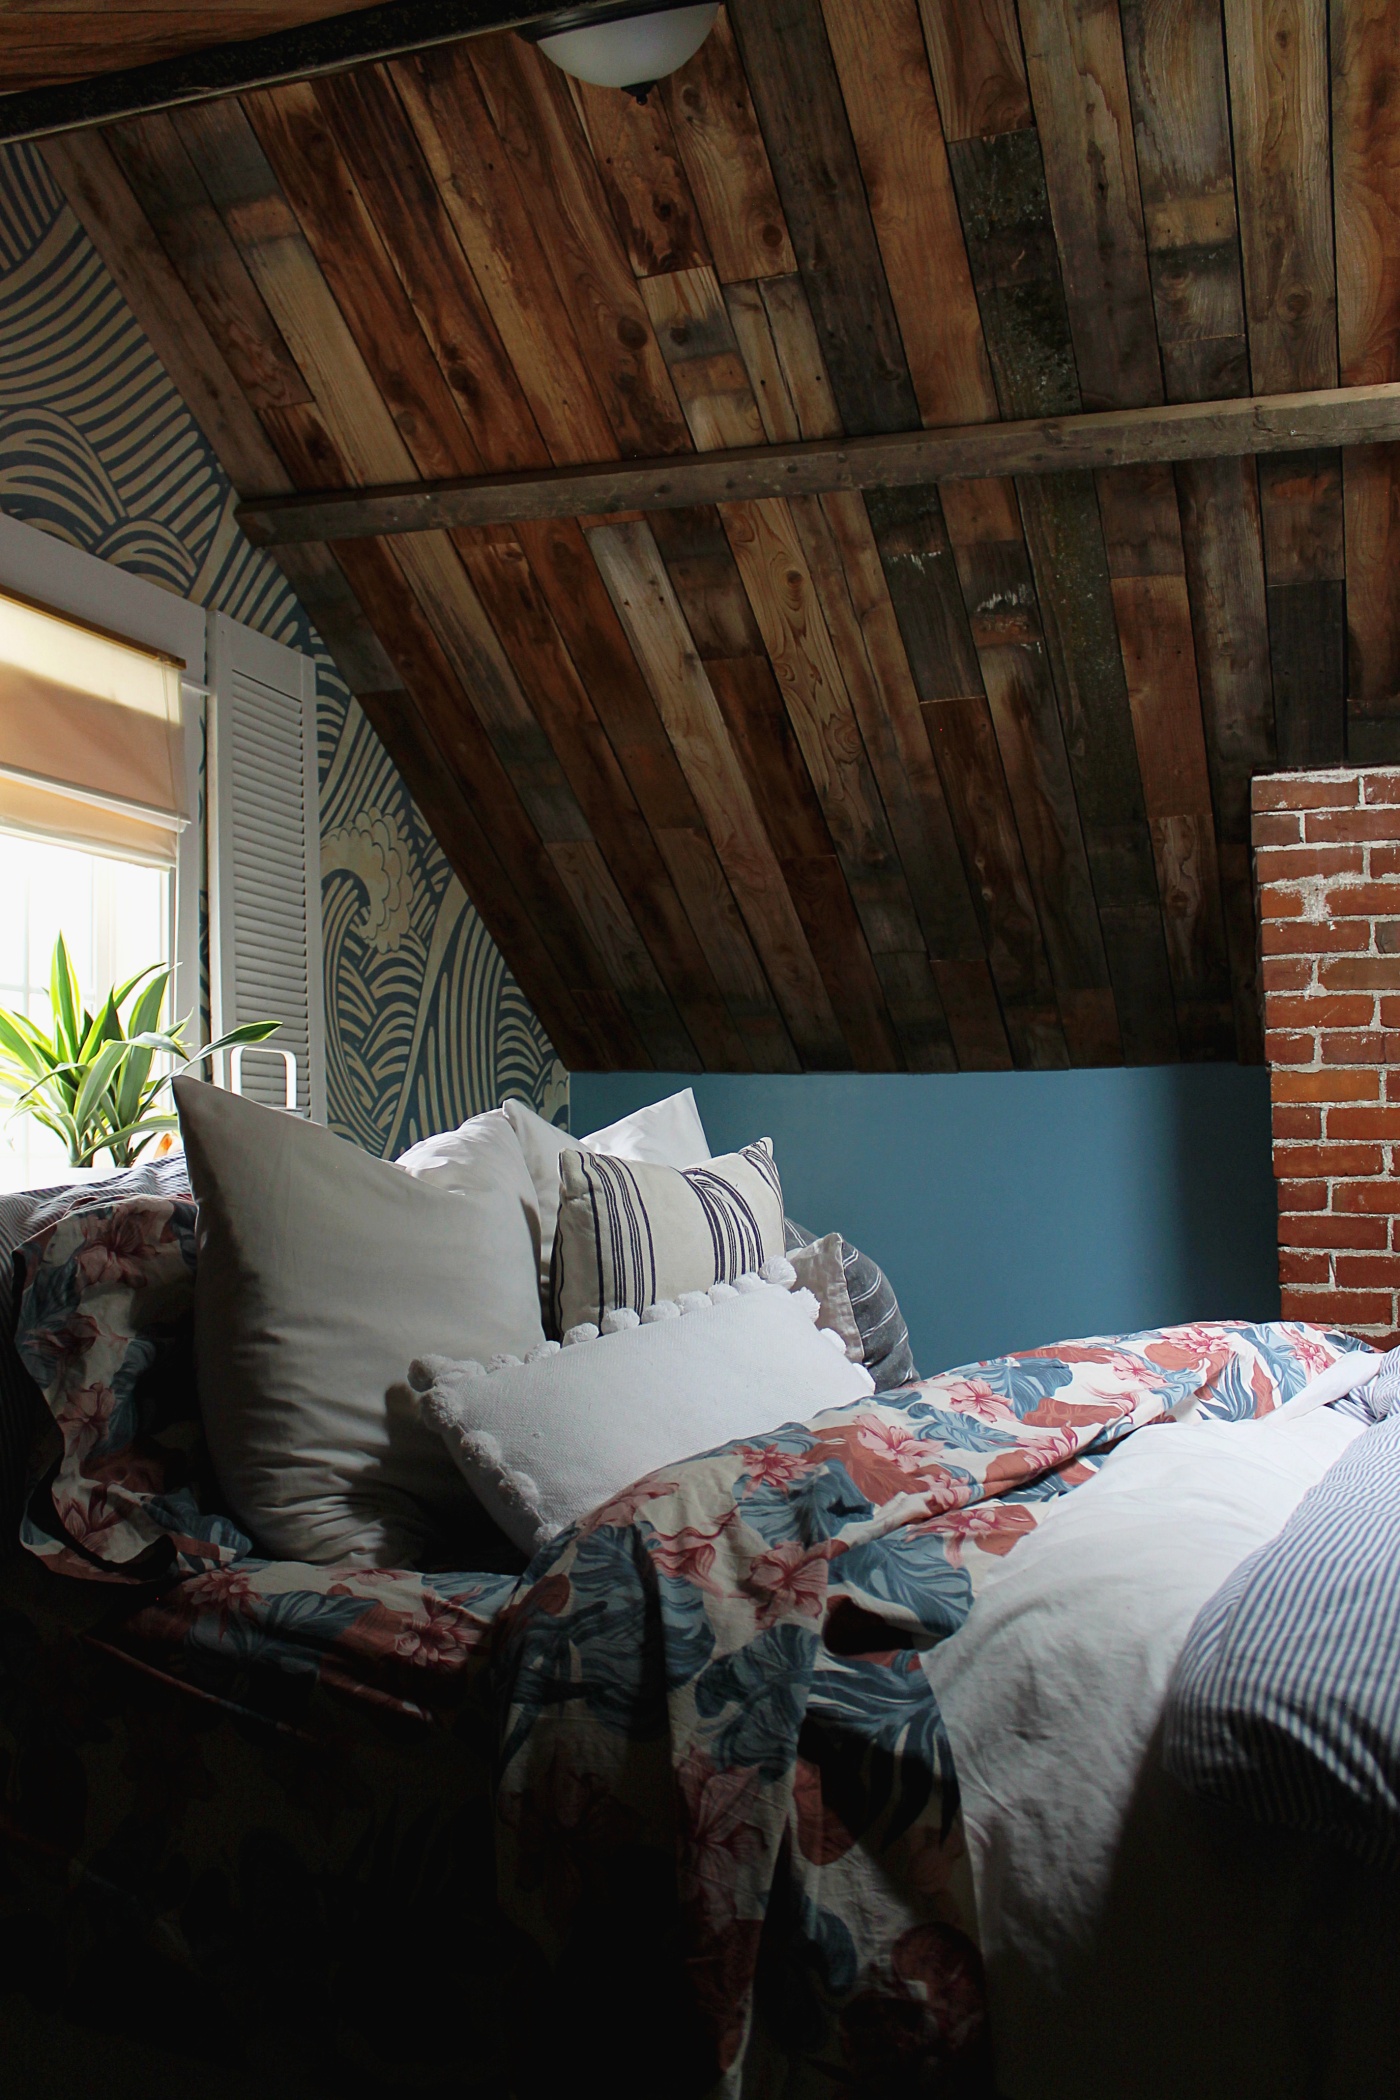
Jake and I have been calling our room a Beach Barn Bedroom. I like to pretend that there is an ocean view just outside of our window.
It’s just so awesome to lay in bed and look up at this view. It really does feel like we are in a barn.
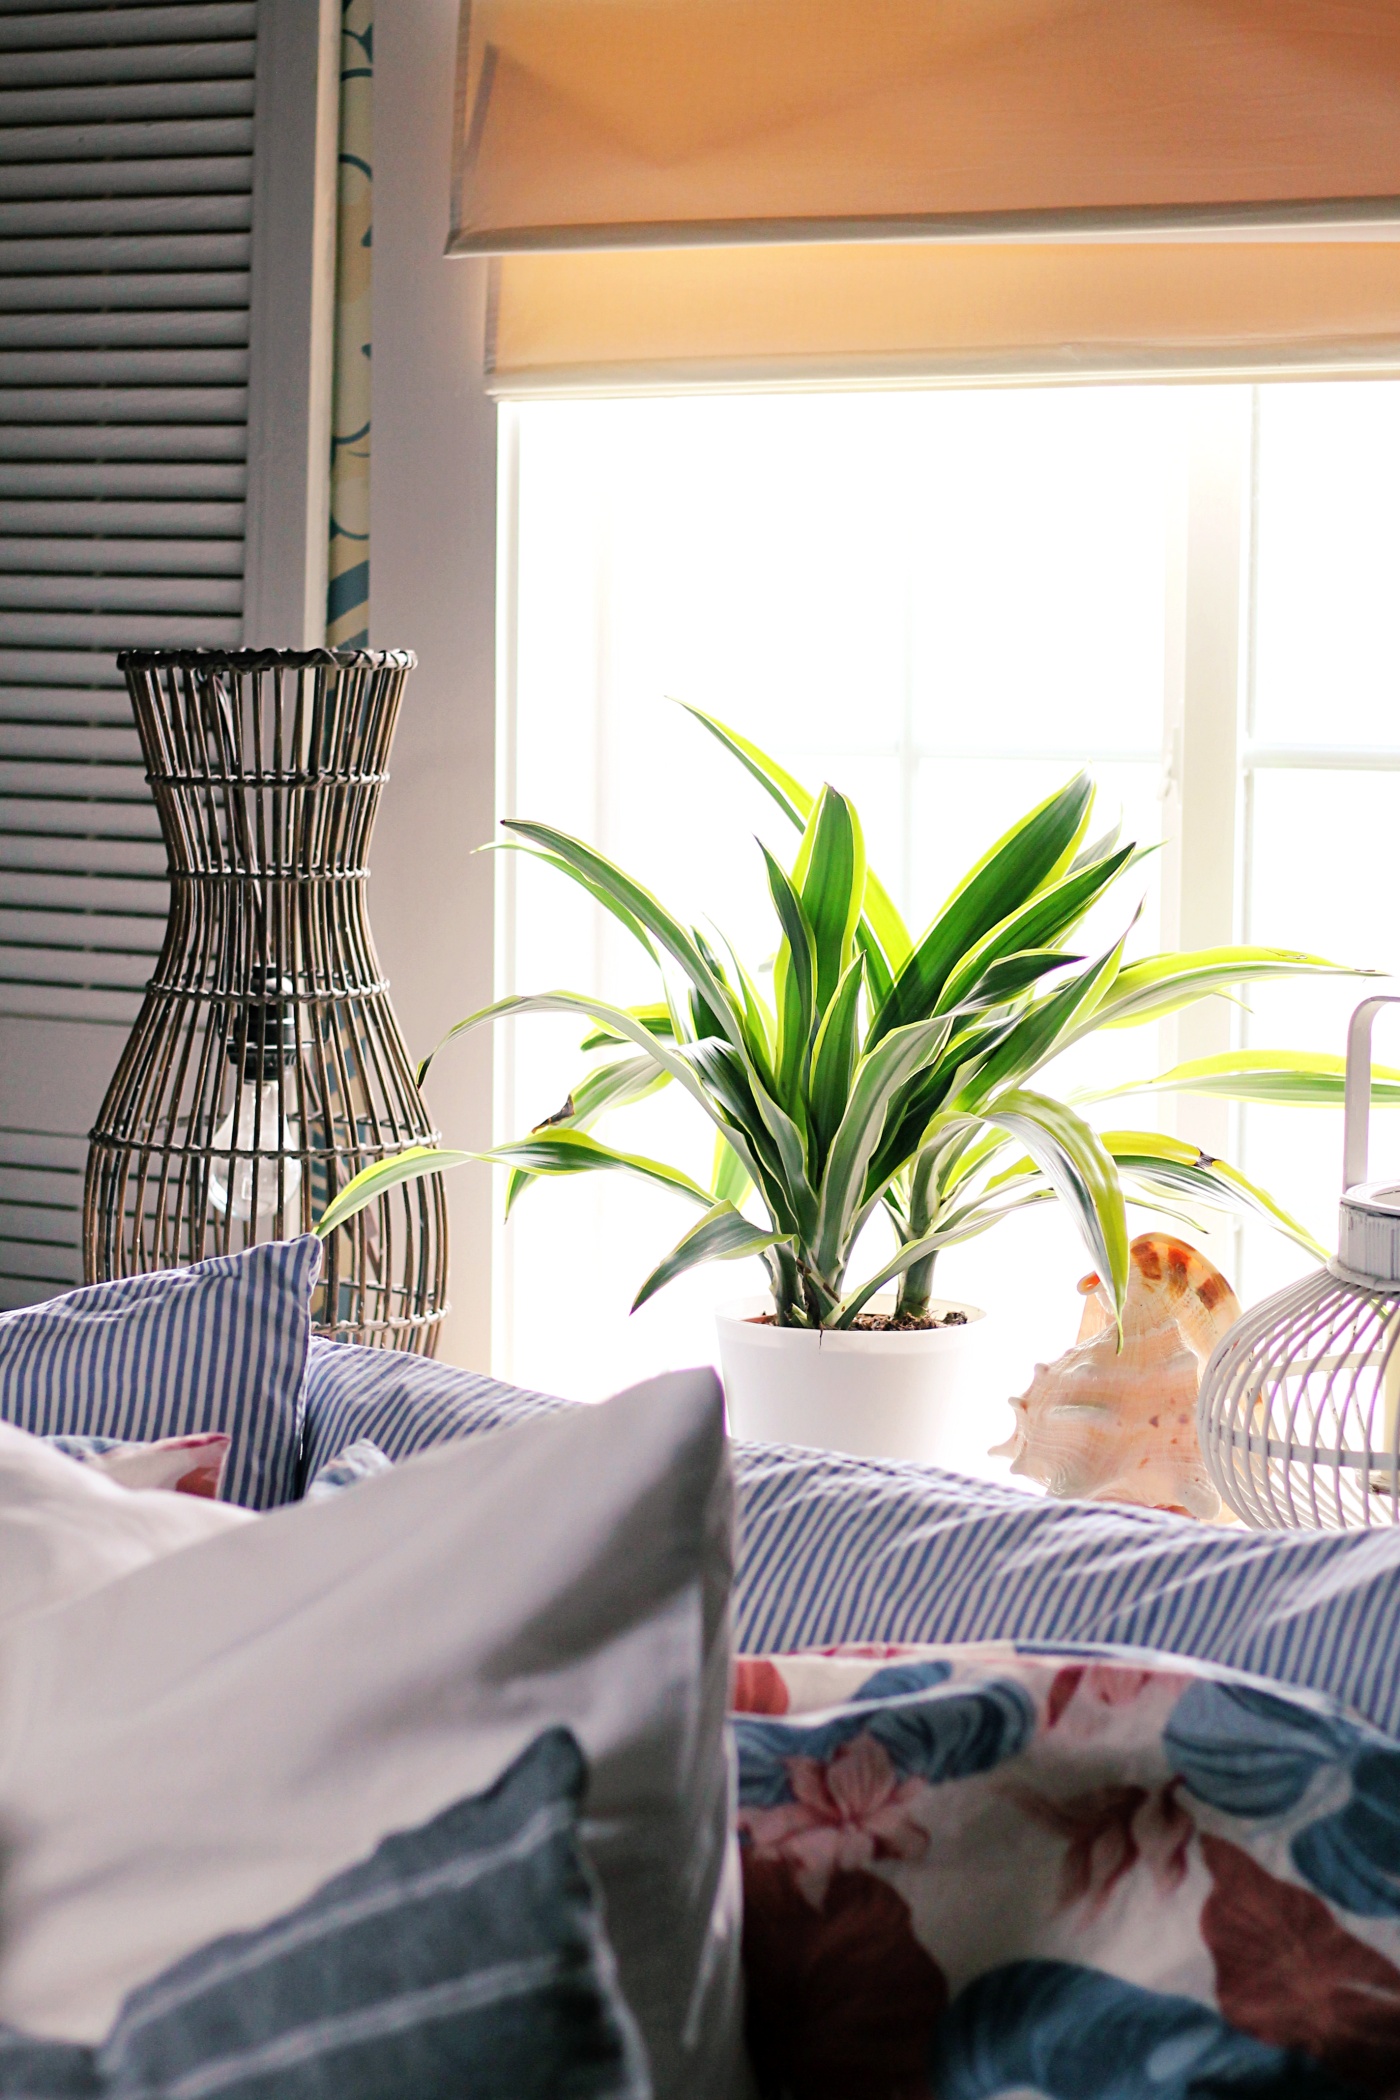
So as far as a headboard goes, we still just have an old dresser behind our bed. I like being able to place things up on the dresser, like a plant, lamp, and candles.
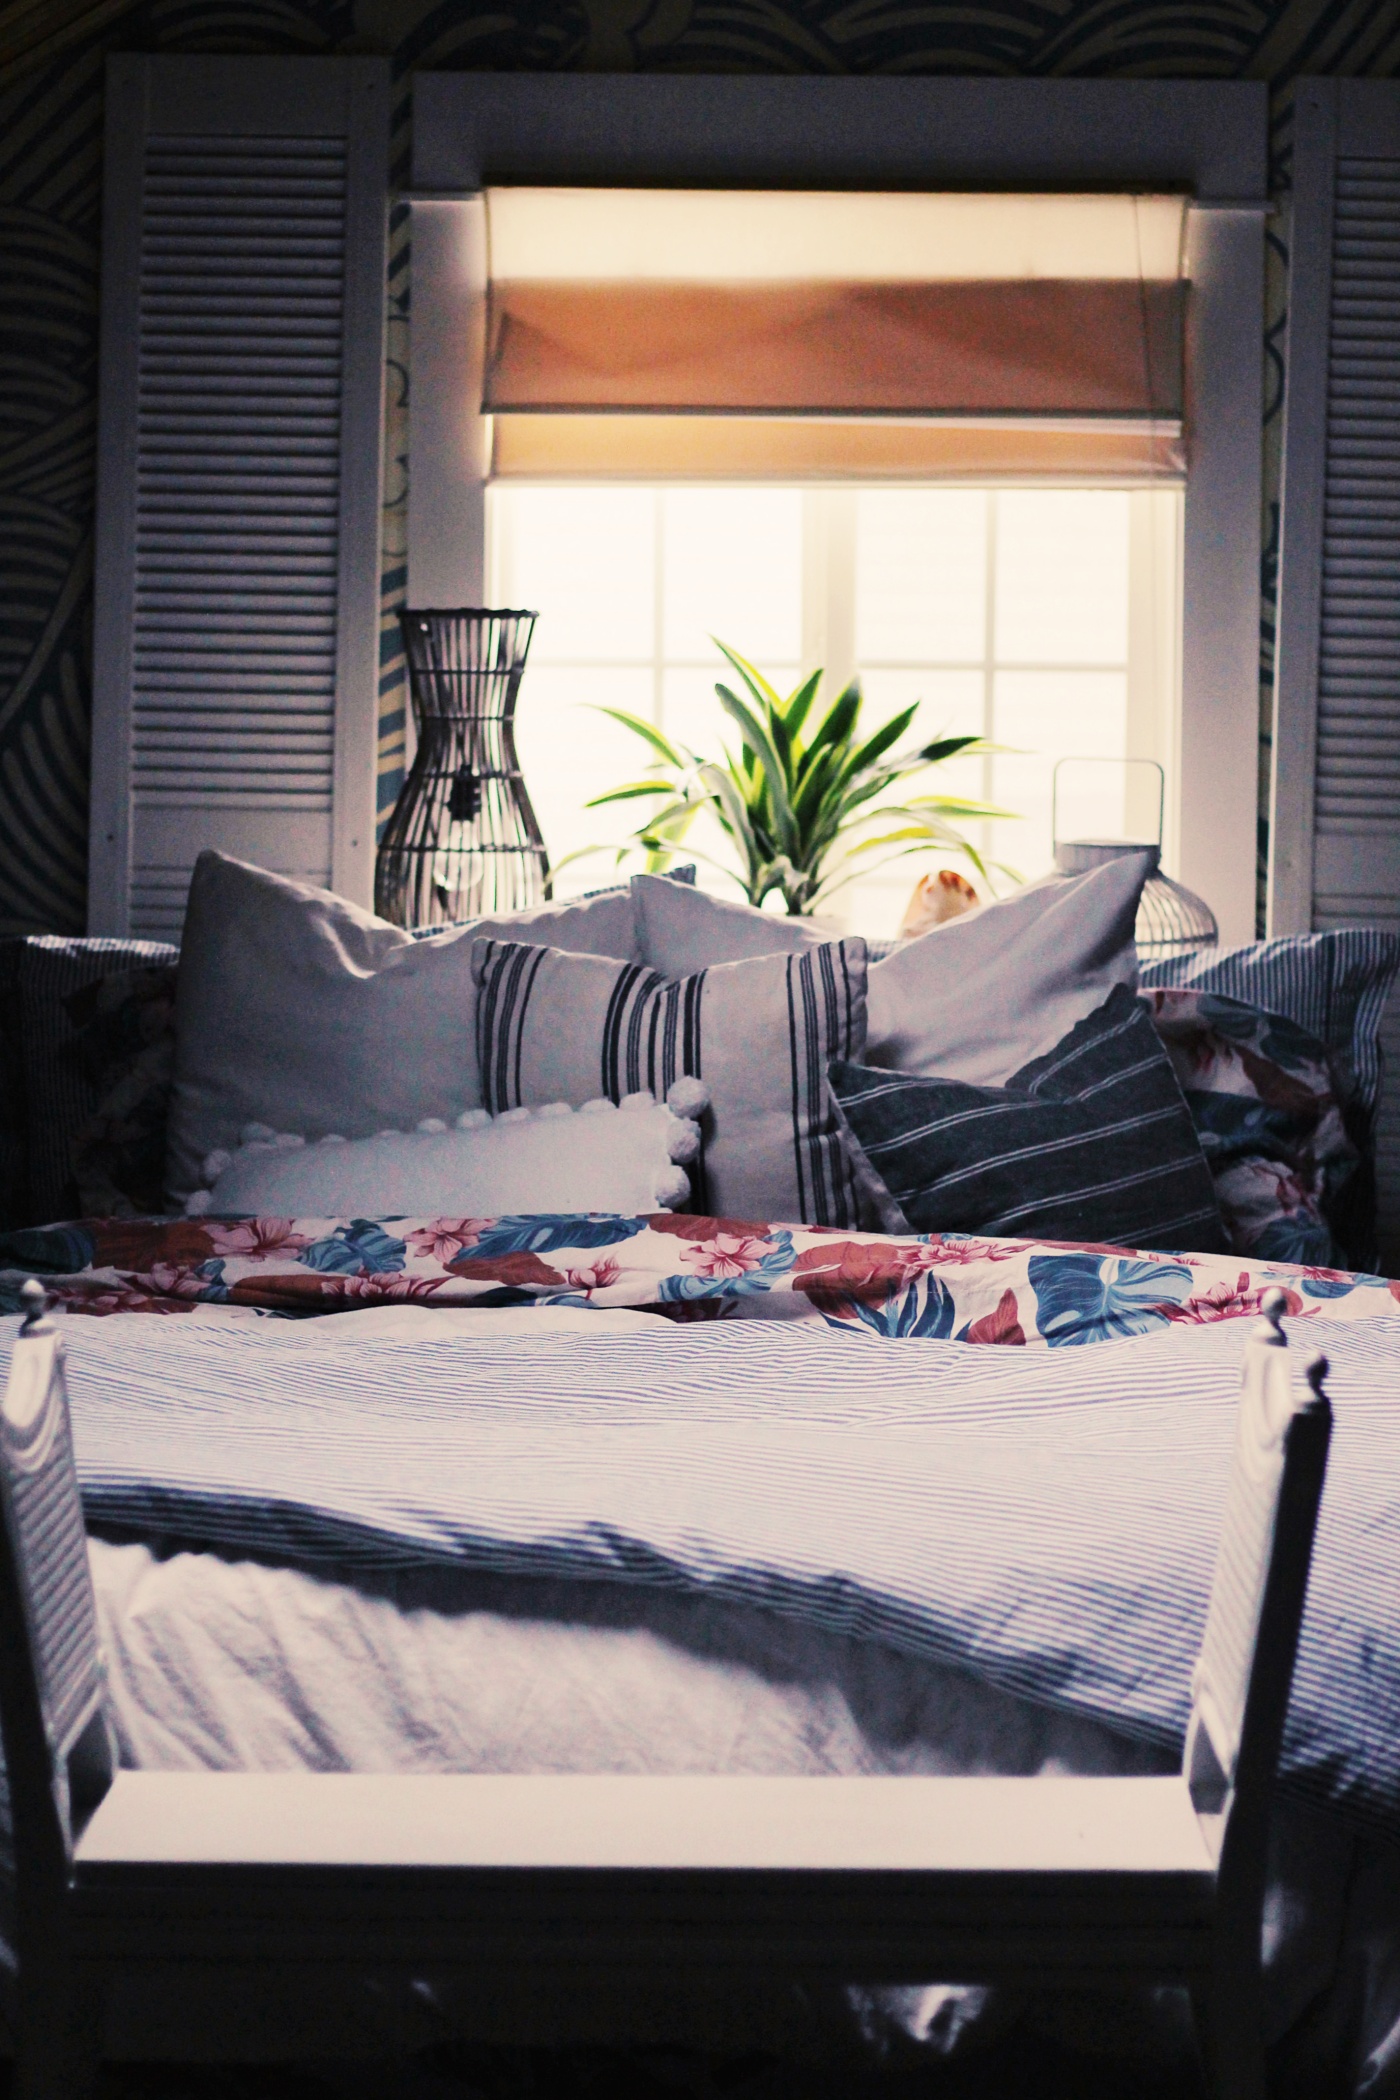
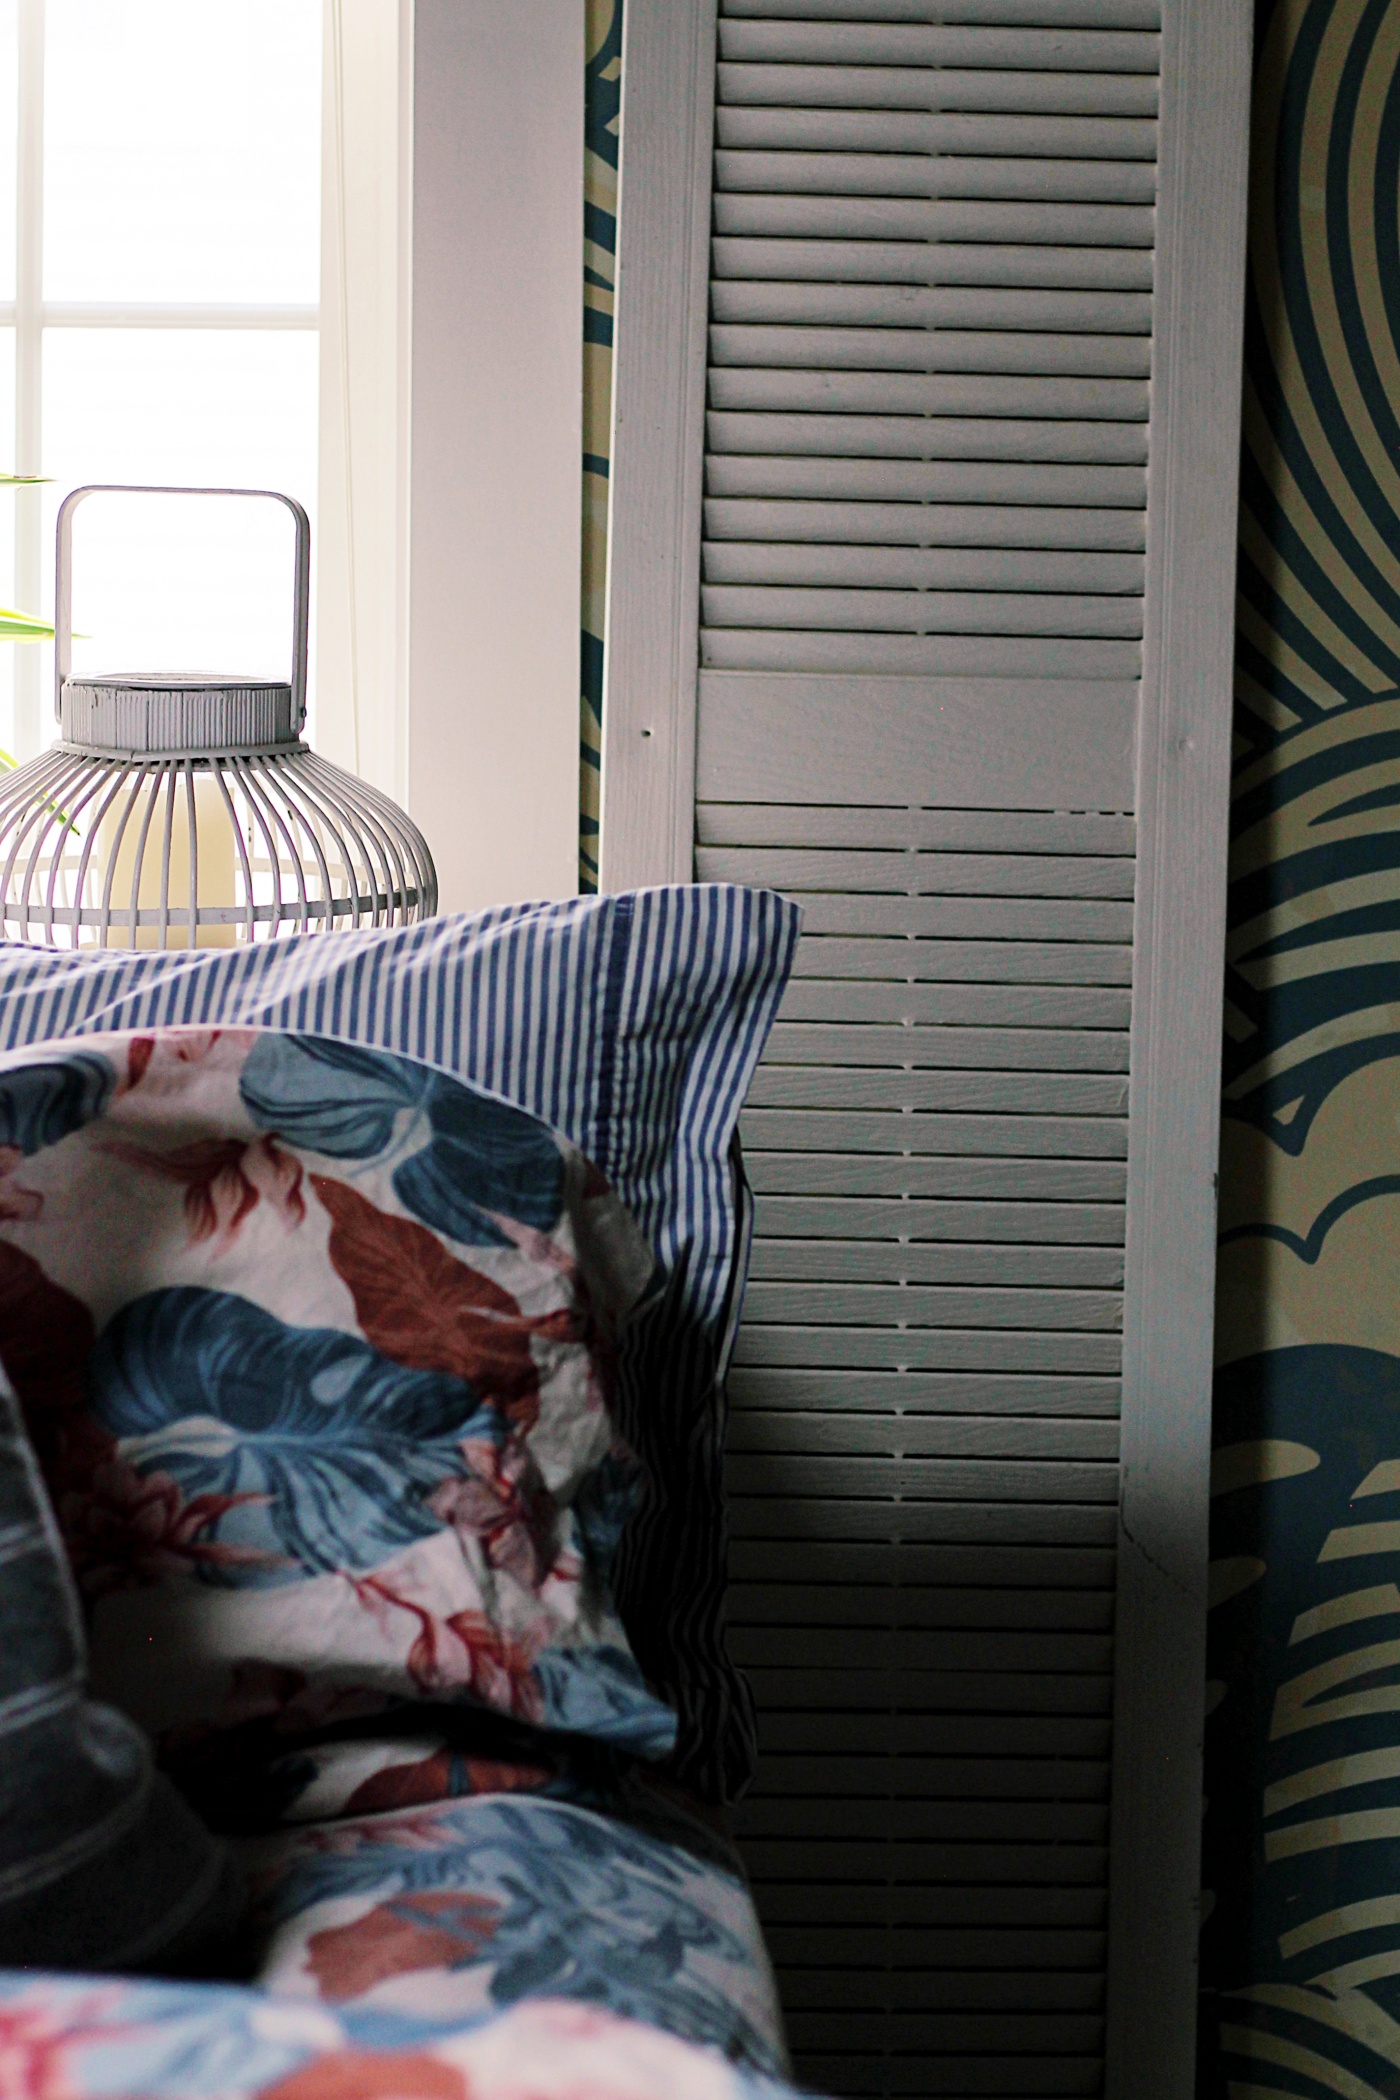
The white shutters planking the window are just some cheap ones I picked up at Re-Store one day, but I know you can buy these at Lowes and other big hardware stores. I have a thing for shutters, I just think they look so beachy.
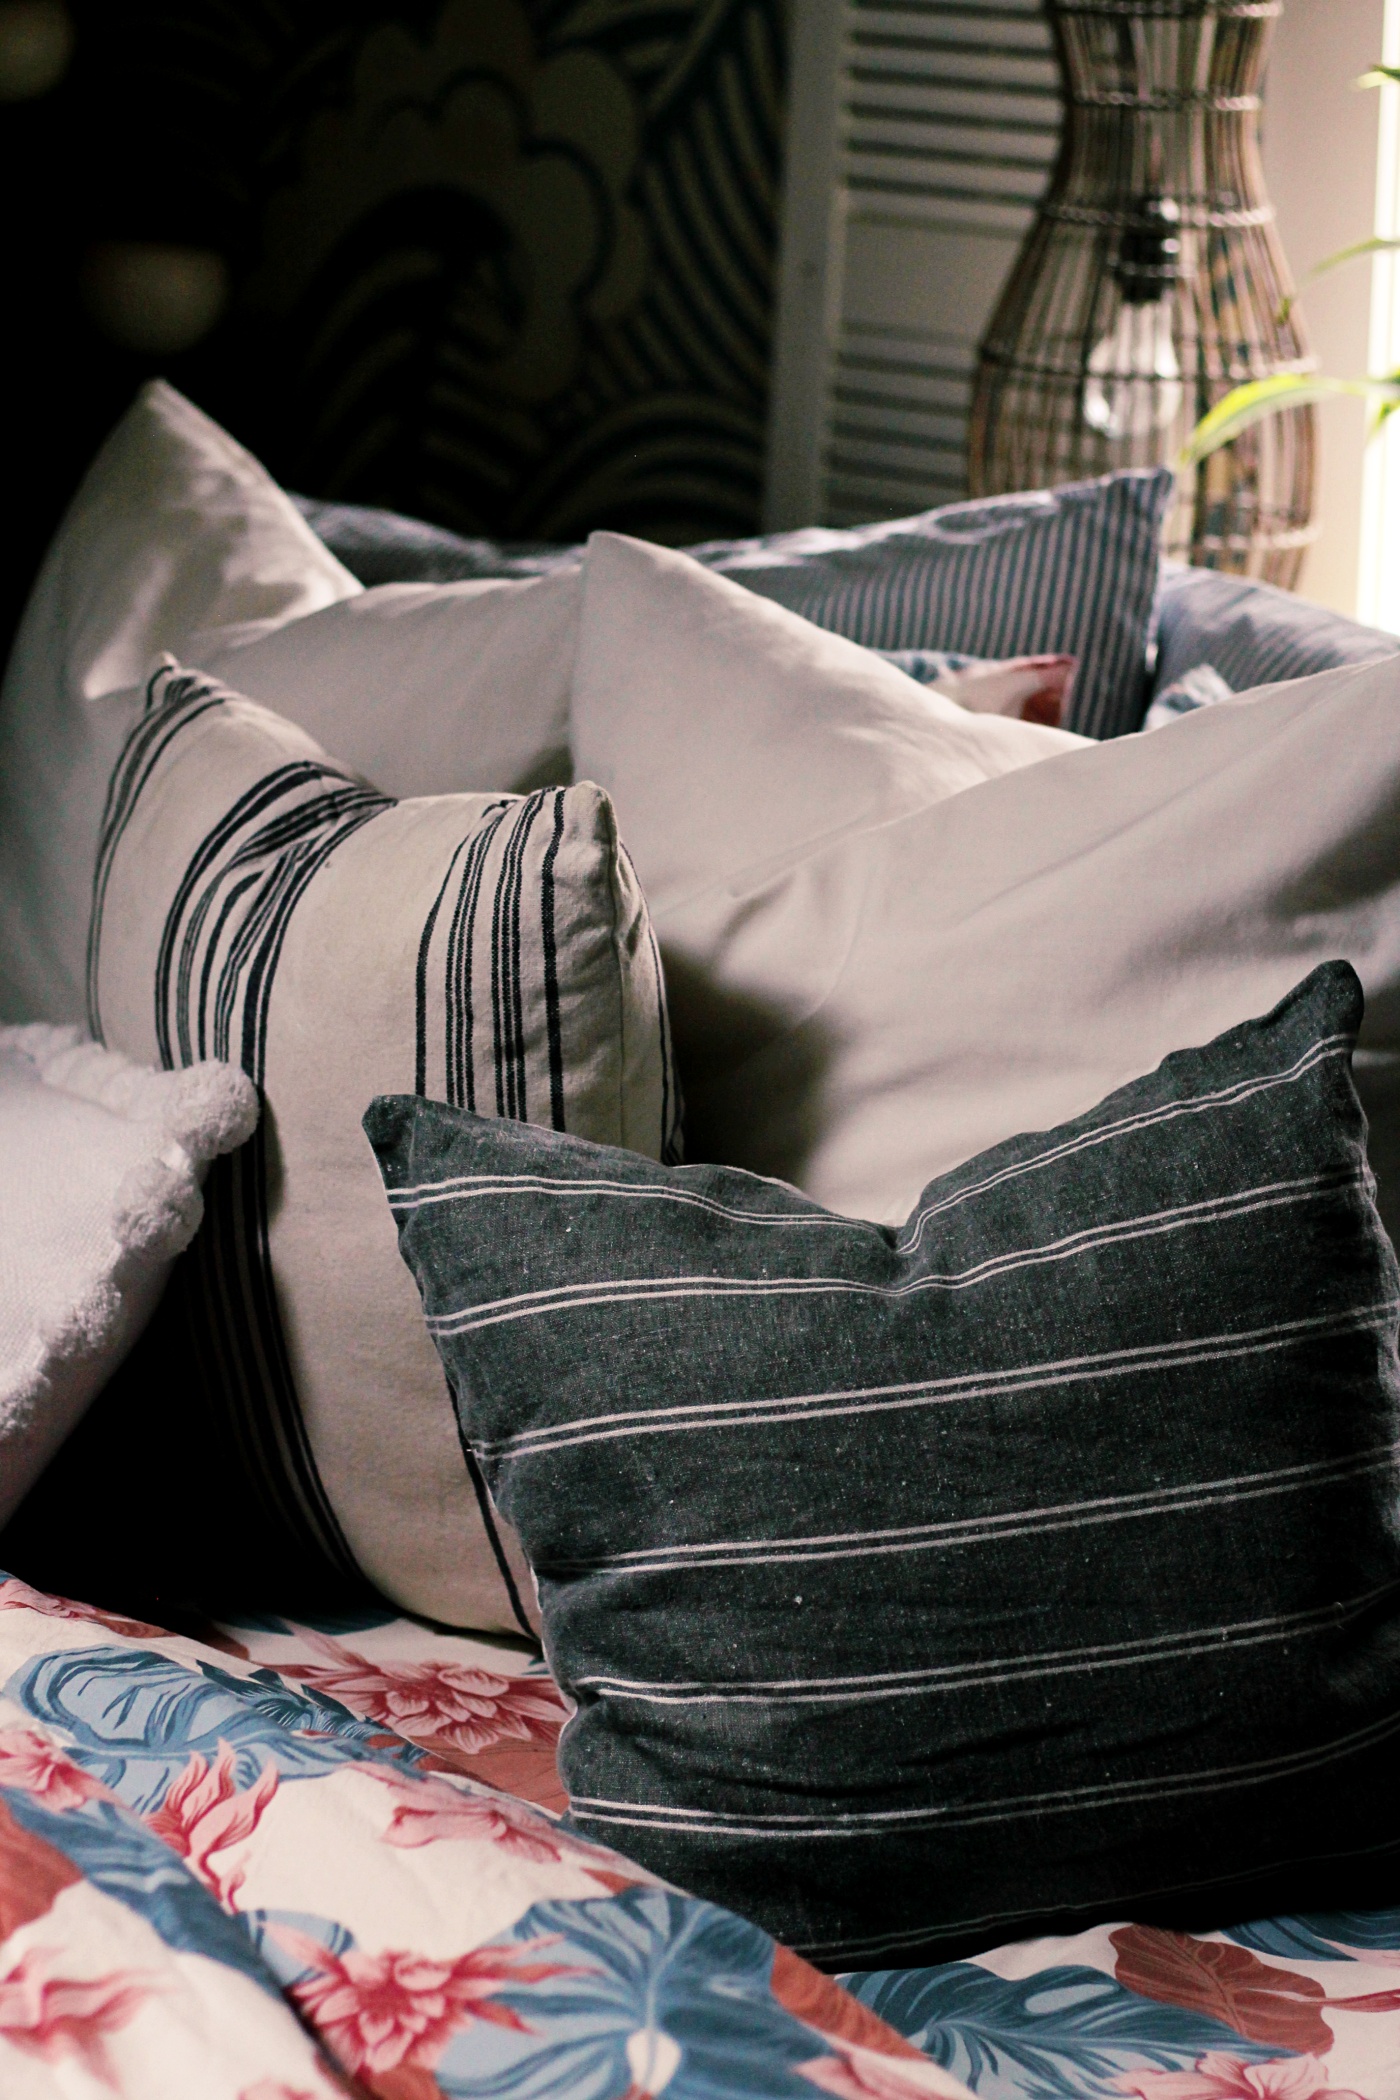
As for my Bedding. The Tropical print sheets and the white Pom Pom Pillow are from Pottery Barn Teen. The Blue and white striped duvet cover and shams, and the big white euro shams are from Ikea, The White with blue stripes throw Pillow is from HomeGoods, and the navy pillow with white stripes is from City Farmhouse and Co.
Please let me know if you have any questions about anything else in the room.

So What do you think about the Barn Wood – Fence Wood on our bedroom Ceiling? Are you planning on replacing a wood fence anytime soon? If so be sure to keep this idea in mind and give it a PIN for Later.
And remember, you are welcome to PIN any of the images from my blog on PINTEREST. Find a Pin It button by hovering over any of the pictures.
Please leave me a comment and let me know if you have any questions, or come chat with me on Facebook and/or Instagram.
Thanks for stopping by today,
Much Love,
Emily


Wow I am beyond impressed! Your bedroom ceiling looks amazing! It must’ve been a lot of fun doing the project with your hubby.
Author
Awwww, Thank you Darlene! 😊 Yes, Jake and I had a lot of fun working on our wood ceiling and were both so pleased with how it turned out.
Thank you for stopping by the blog. Have a lovely Day!
Holy shmoly I eould never have thought of trying that with a fence! So clever! I love your fearless approach to decorating….and am jealous if your skylight!
Author
Hi Laura, Thank you for stopping by the blog and leaving a comment. We are loving our fence wood ceiling. It’s awesome to lay in bed and look up at it…….and out the skylight. That is also fun to look at 🙂