*This post was sponsored by Worx Tools. All opinions are my own.
I originally shared this post on Hometalk, but I wanted to share it again here on the blog in case you missed it.
I love the way this project turned out and so I’m super excited to show you how you can turn a simple log into a really awesome side table. I made this log side table for our living room and I think that it turned out so stylish. Plus it was super fun to make. Continue reading to see how to make your own log side table.
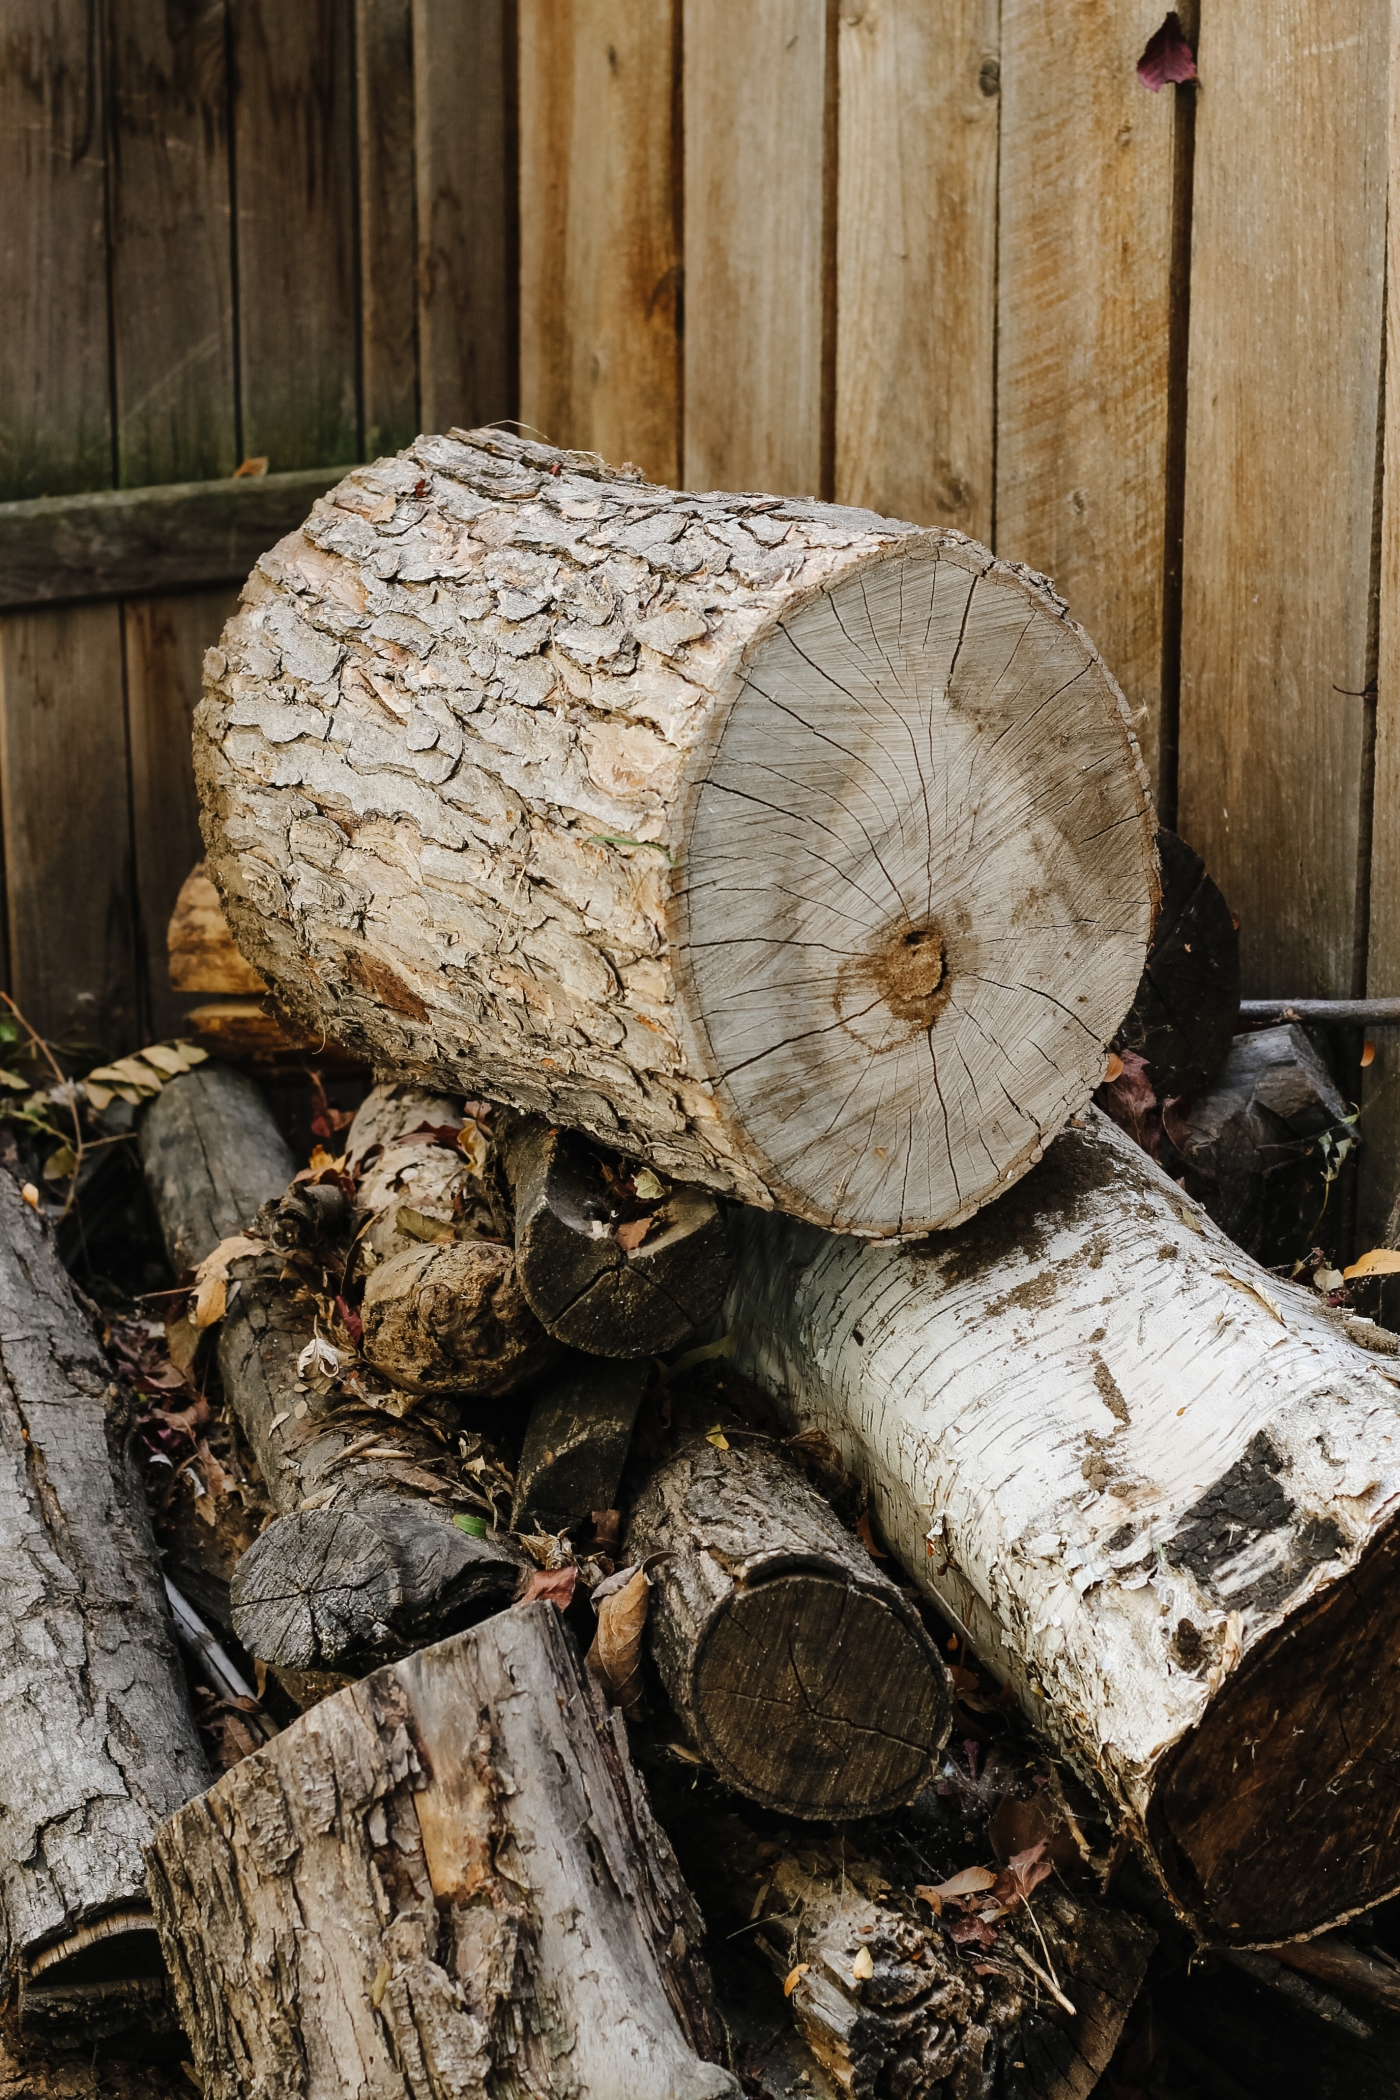
Step 1. Find a Log
If you have a wood pile then there’s a good chance that you may already have the perfect log in your own backyard. But if not, you can usually find someone who is selling firewood and you should be able to purchase a log through them.
You’ll want to look for a log that has a clean even cut so that it sits evenly and doesn’t rock.
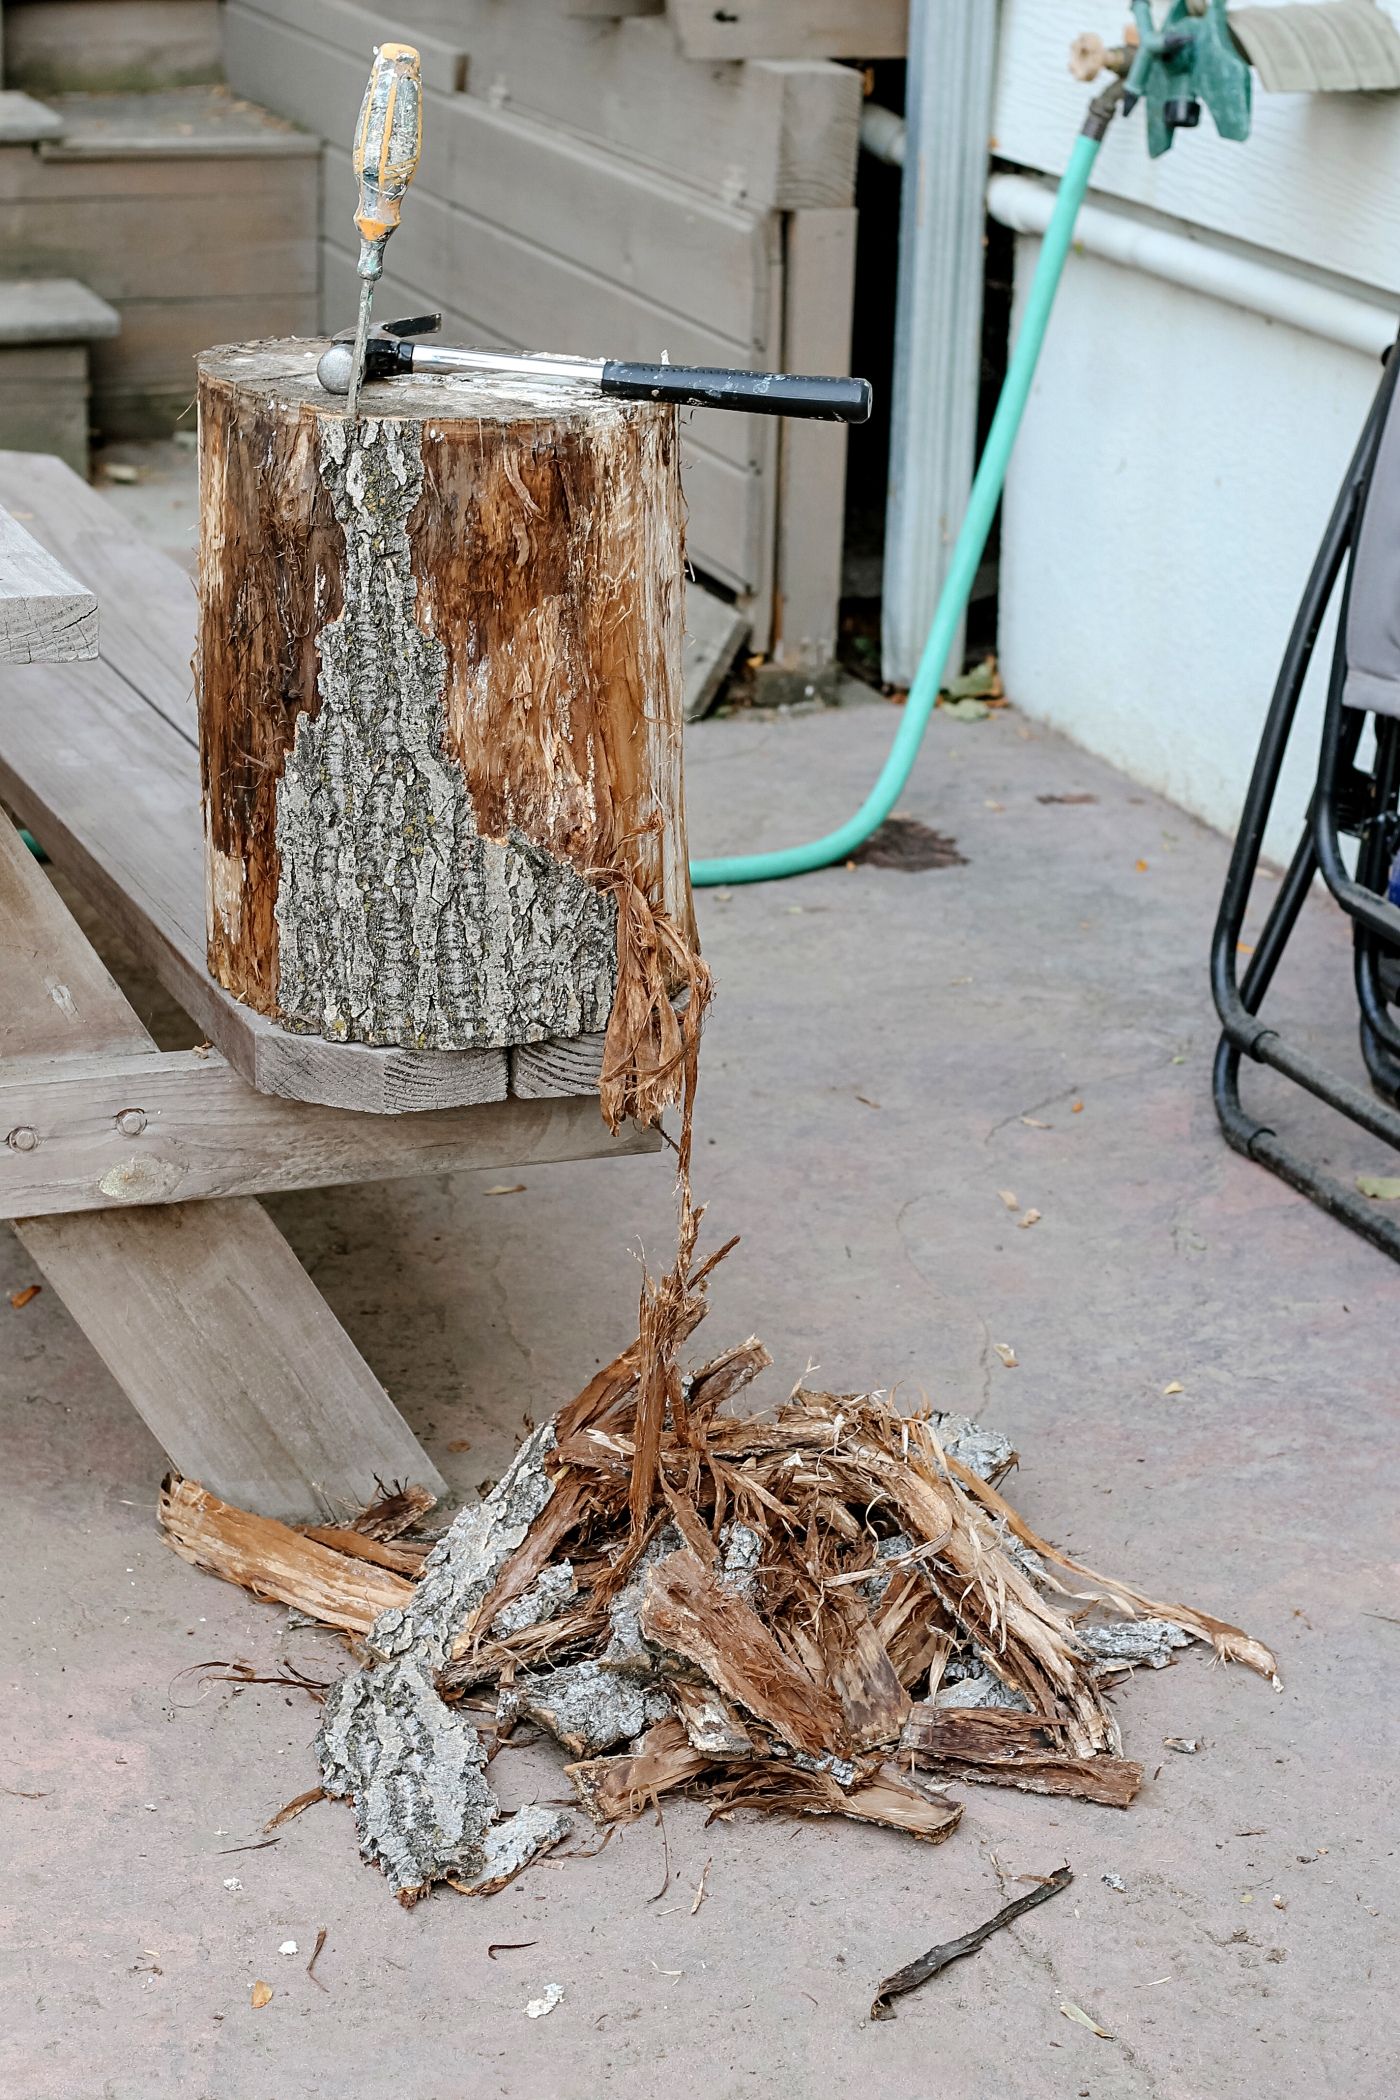
Step 2. Remove Bark
I found that using a large flathead screwdriver and a hammer worked well for removing the bark from the log. I just wedged the screwdriver into the bark and then hammered the back end of the screwdriver which allowed for the screwdriver to easily peel off the layers of bark.
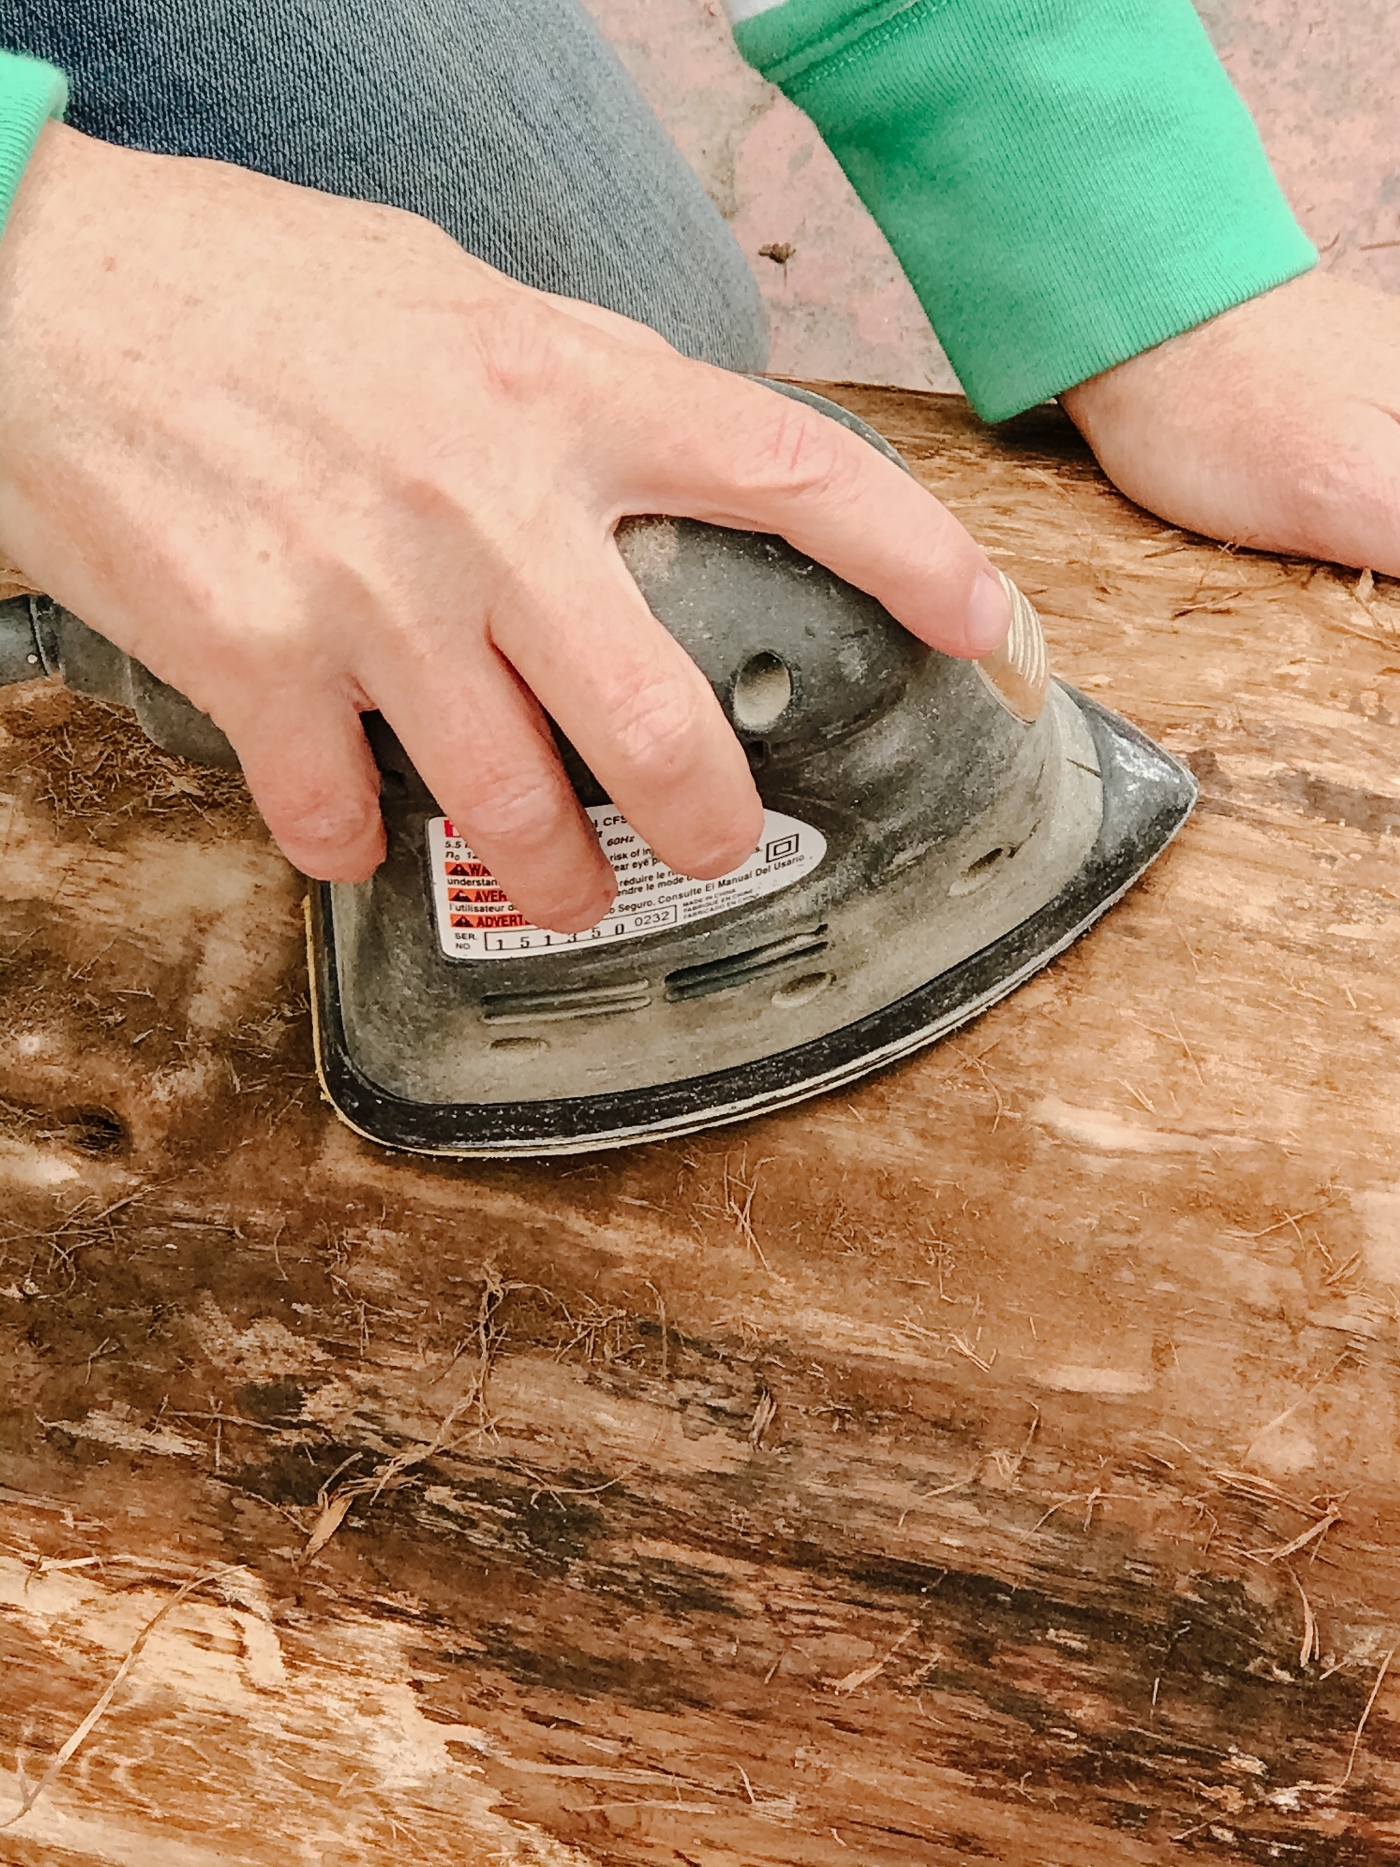
Step 3. Sand log to get a smooth surface.
I used a small hand held electric sander for this and it work great at achieving a smooth surface on my log. If you don’t have a hand sander, just use a sheet of sandpaper, it may be a little more work but it will get the job done.
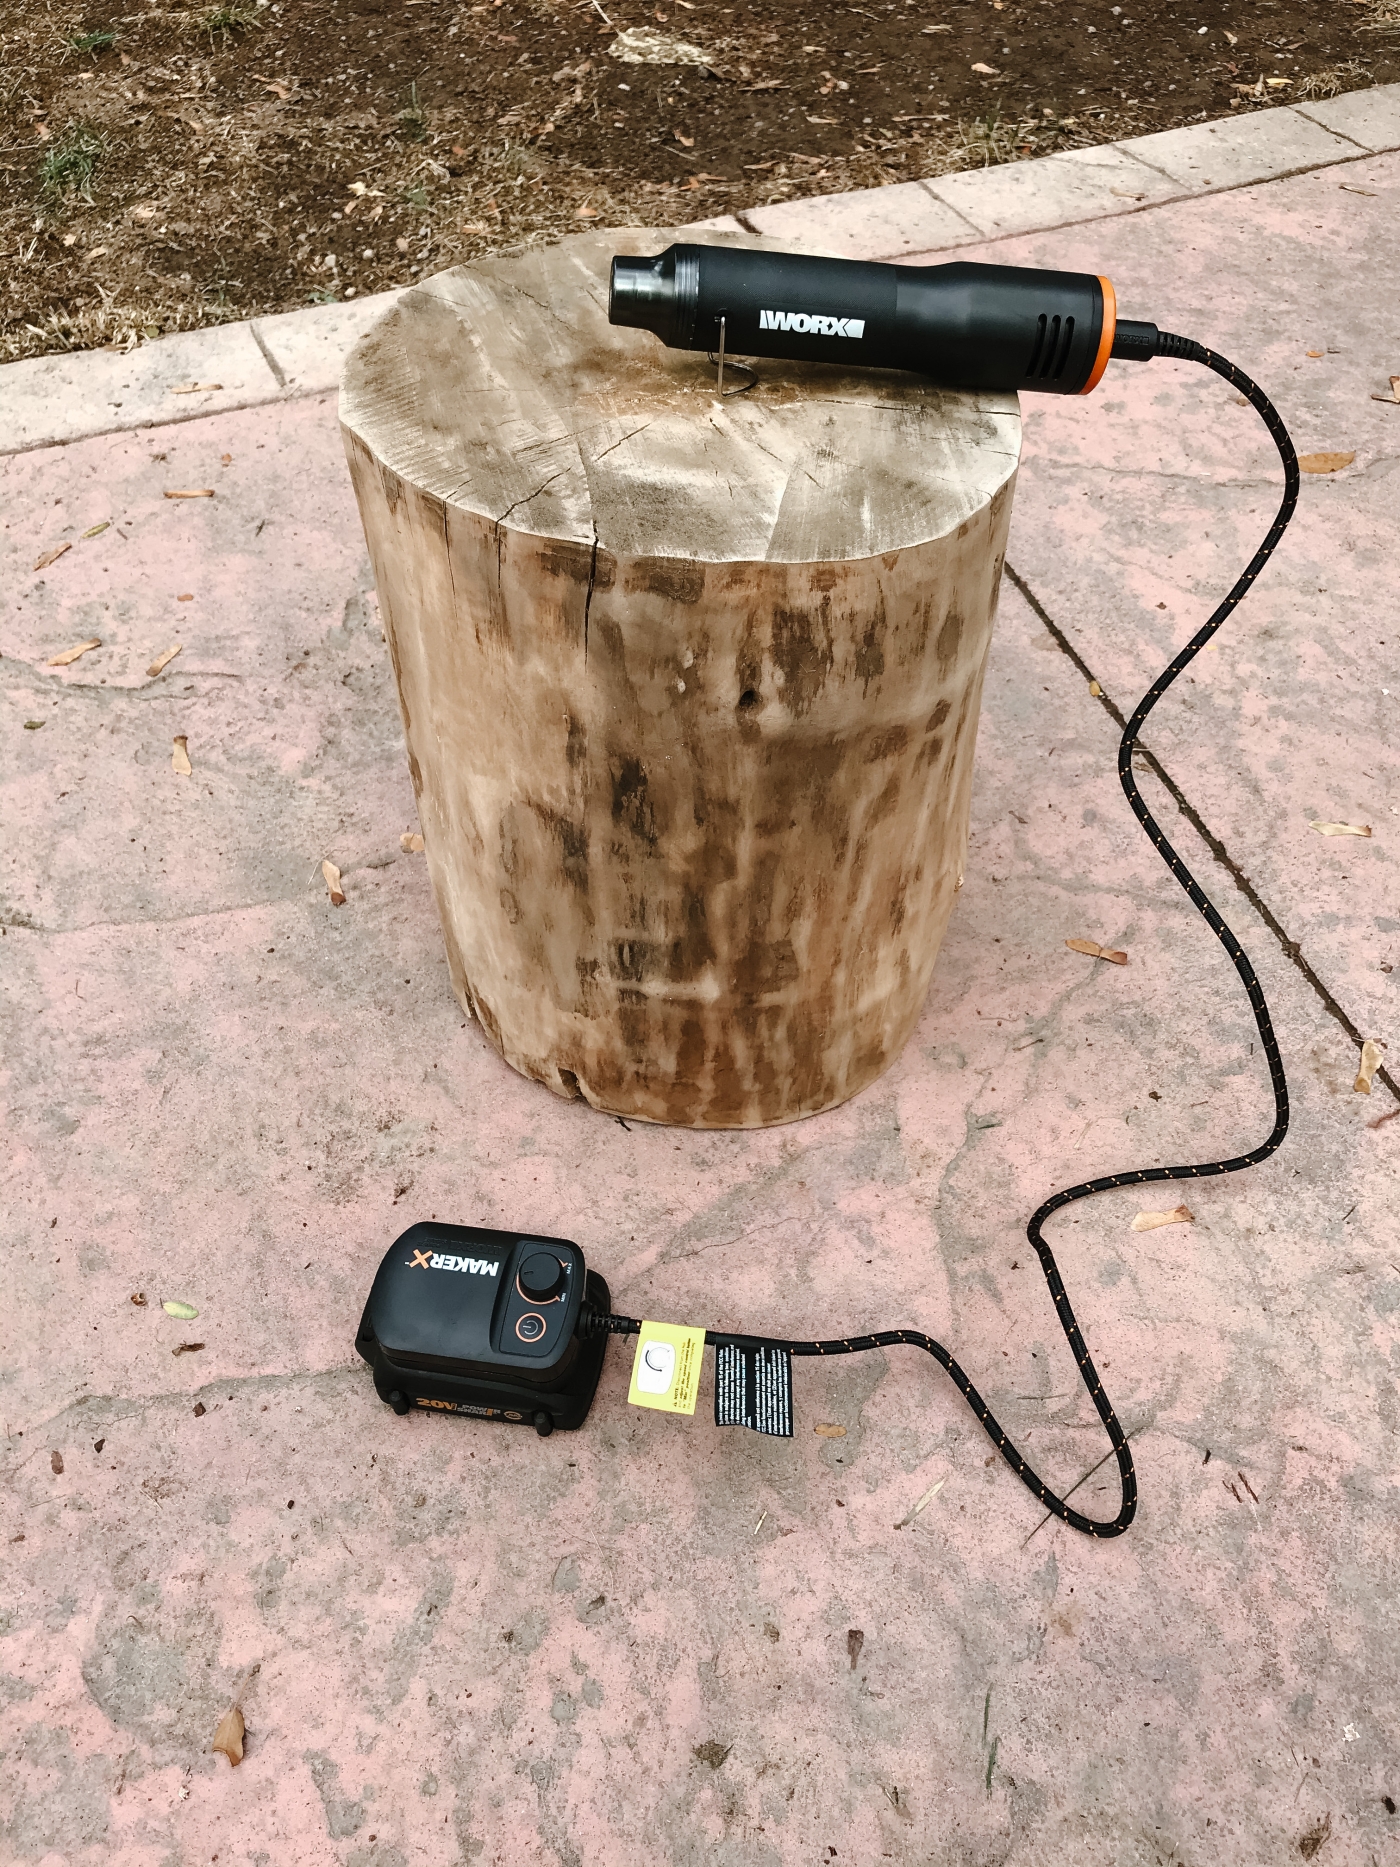
Tip: If your log is wet, use a heat gun to dry it.
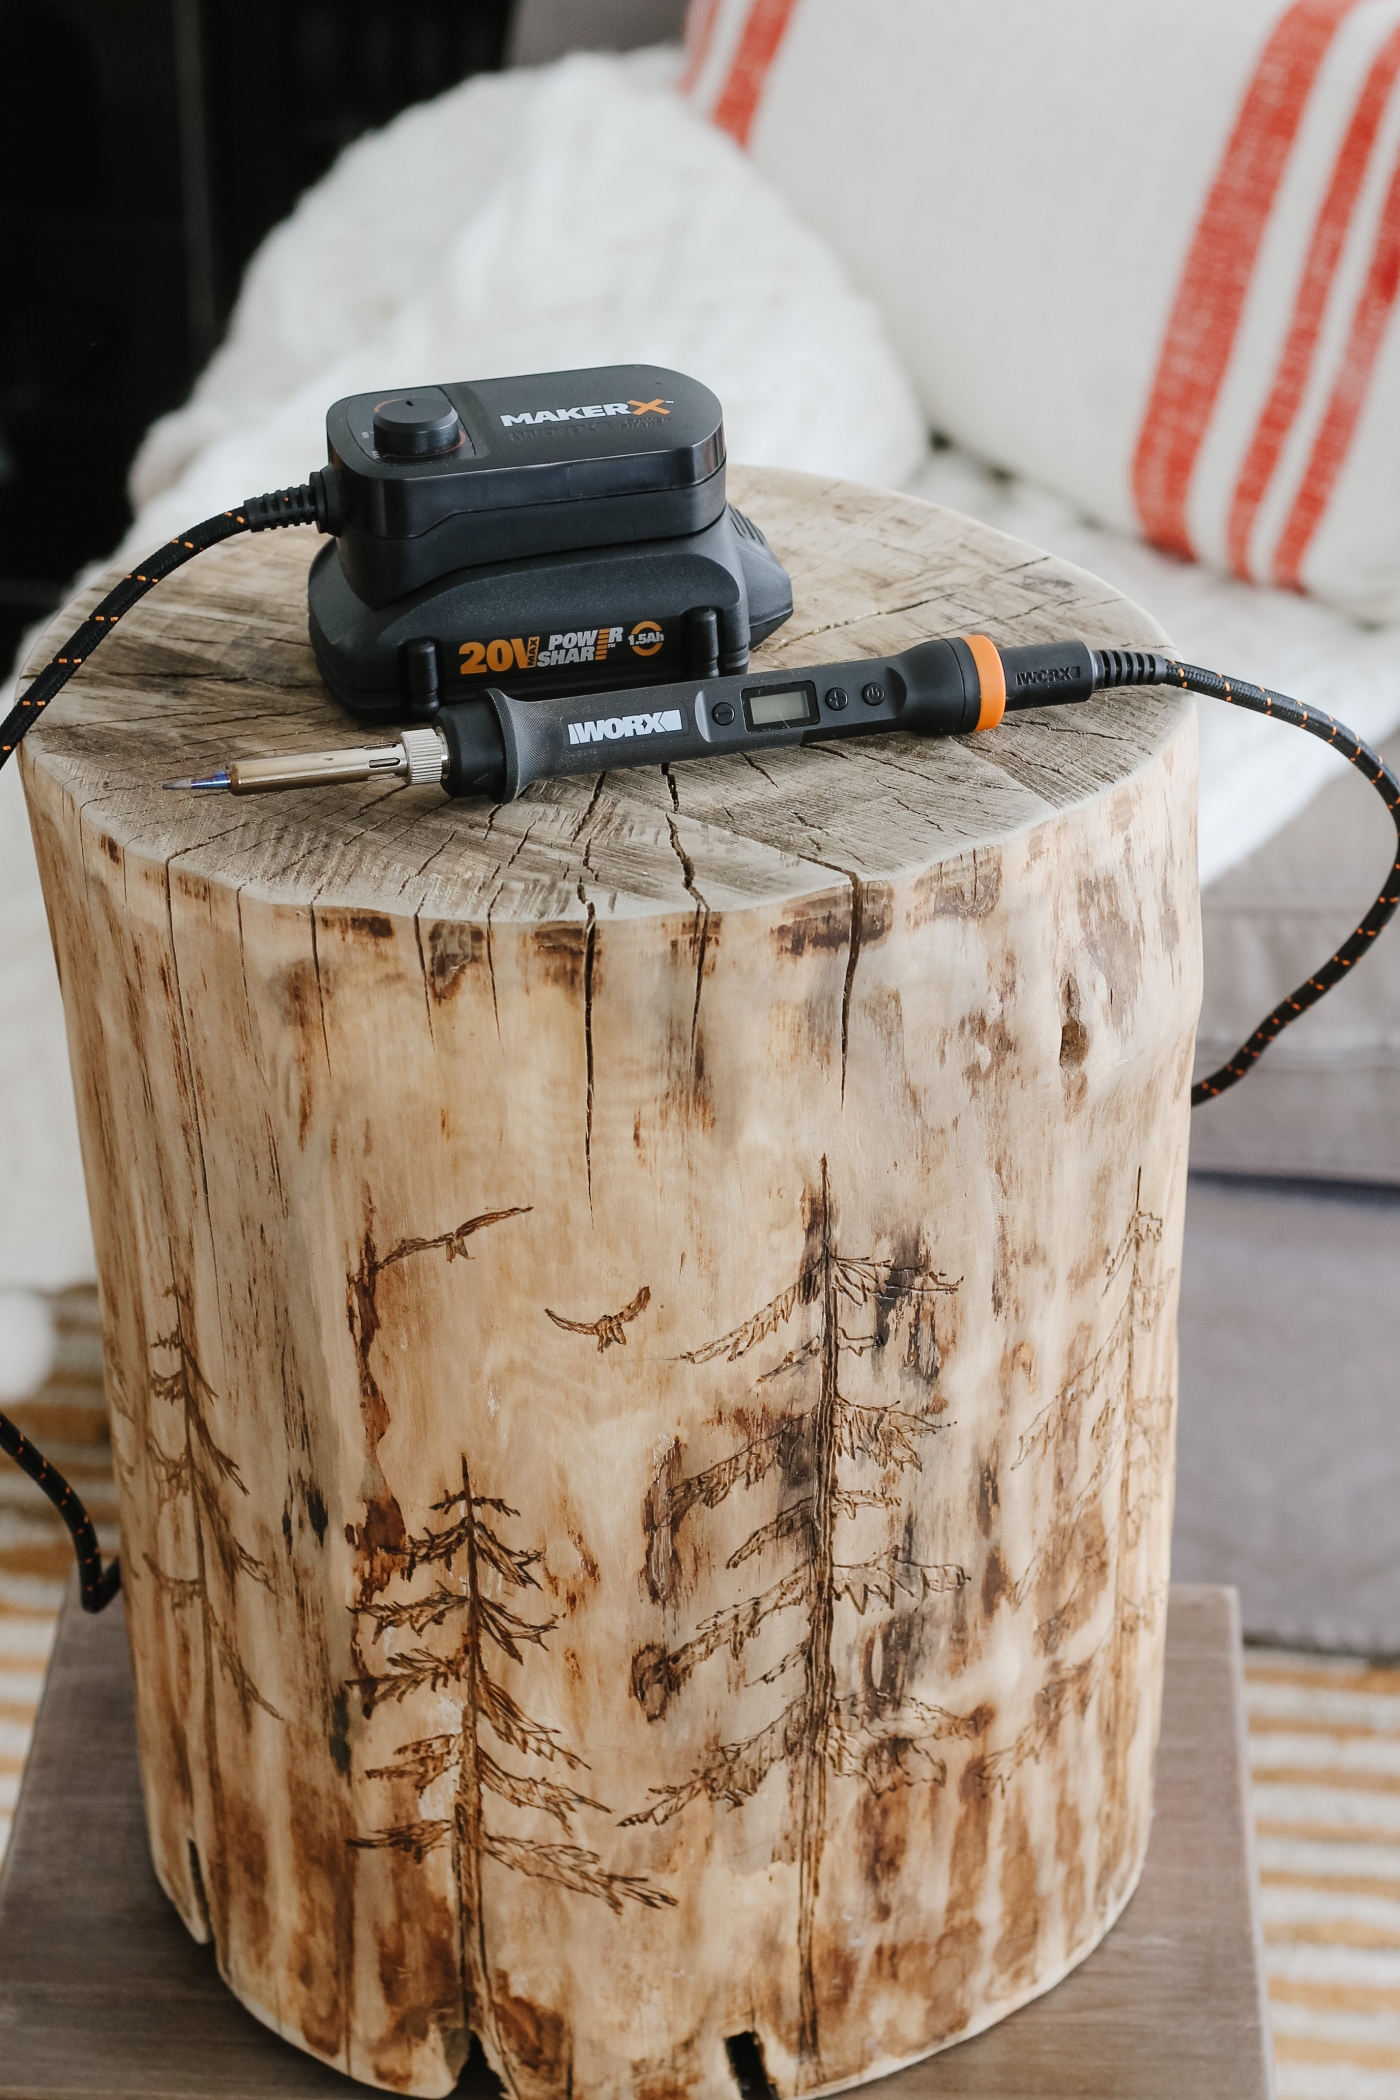
I was working on my log table outdoors and one evening it rained and my log was left uncovered and so it got wet. I did a little research and found out that you can use a heat gut to dry the wood. So I used my new MakerX heat gun from Worx brand and it dried my log in no time. The nice thing about this heat gun is that it comes with a 20V battery and so I was able to work on my project outdoors. This new MakerX system is so versatile, there’s a whole lot of different tools that you can switch out, while using the same portable battery. I’ll share more on that in a minute.
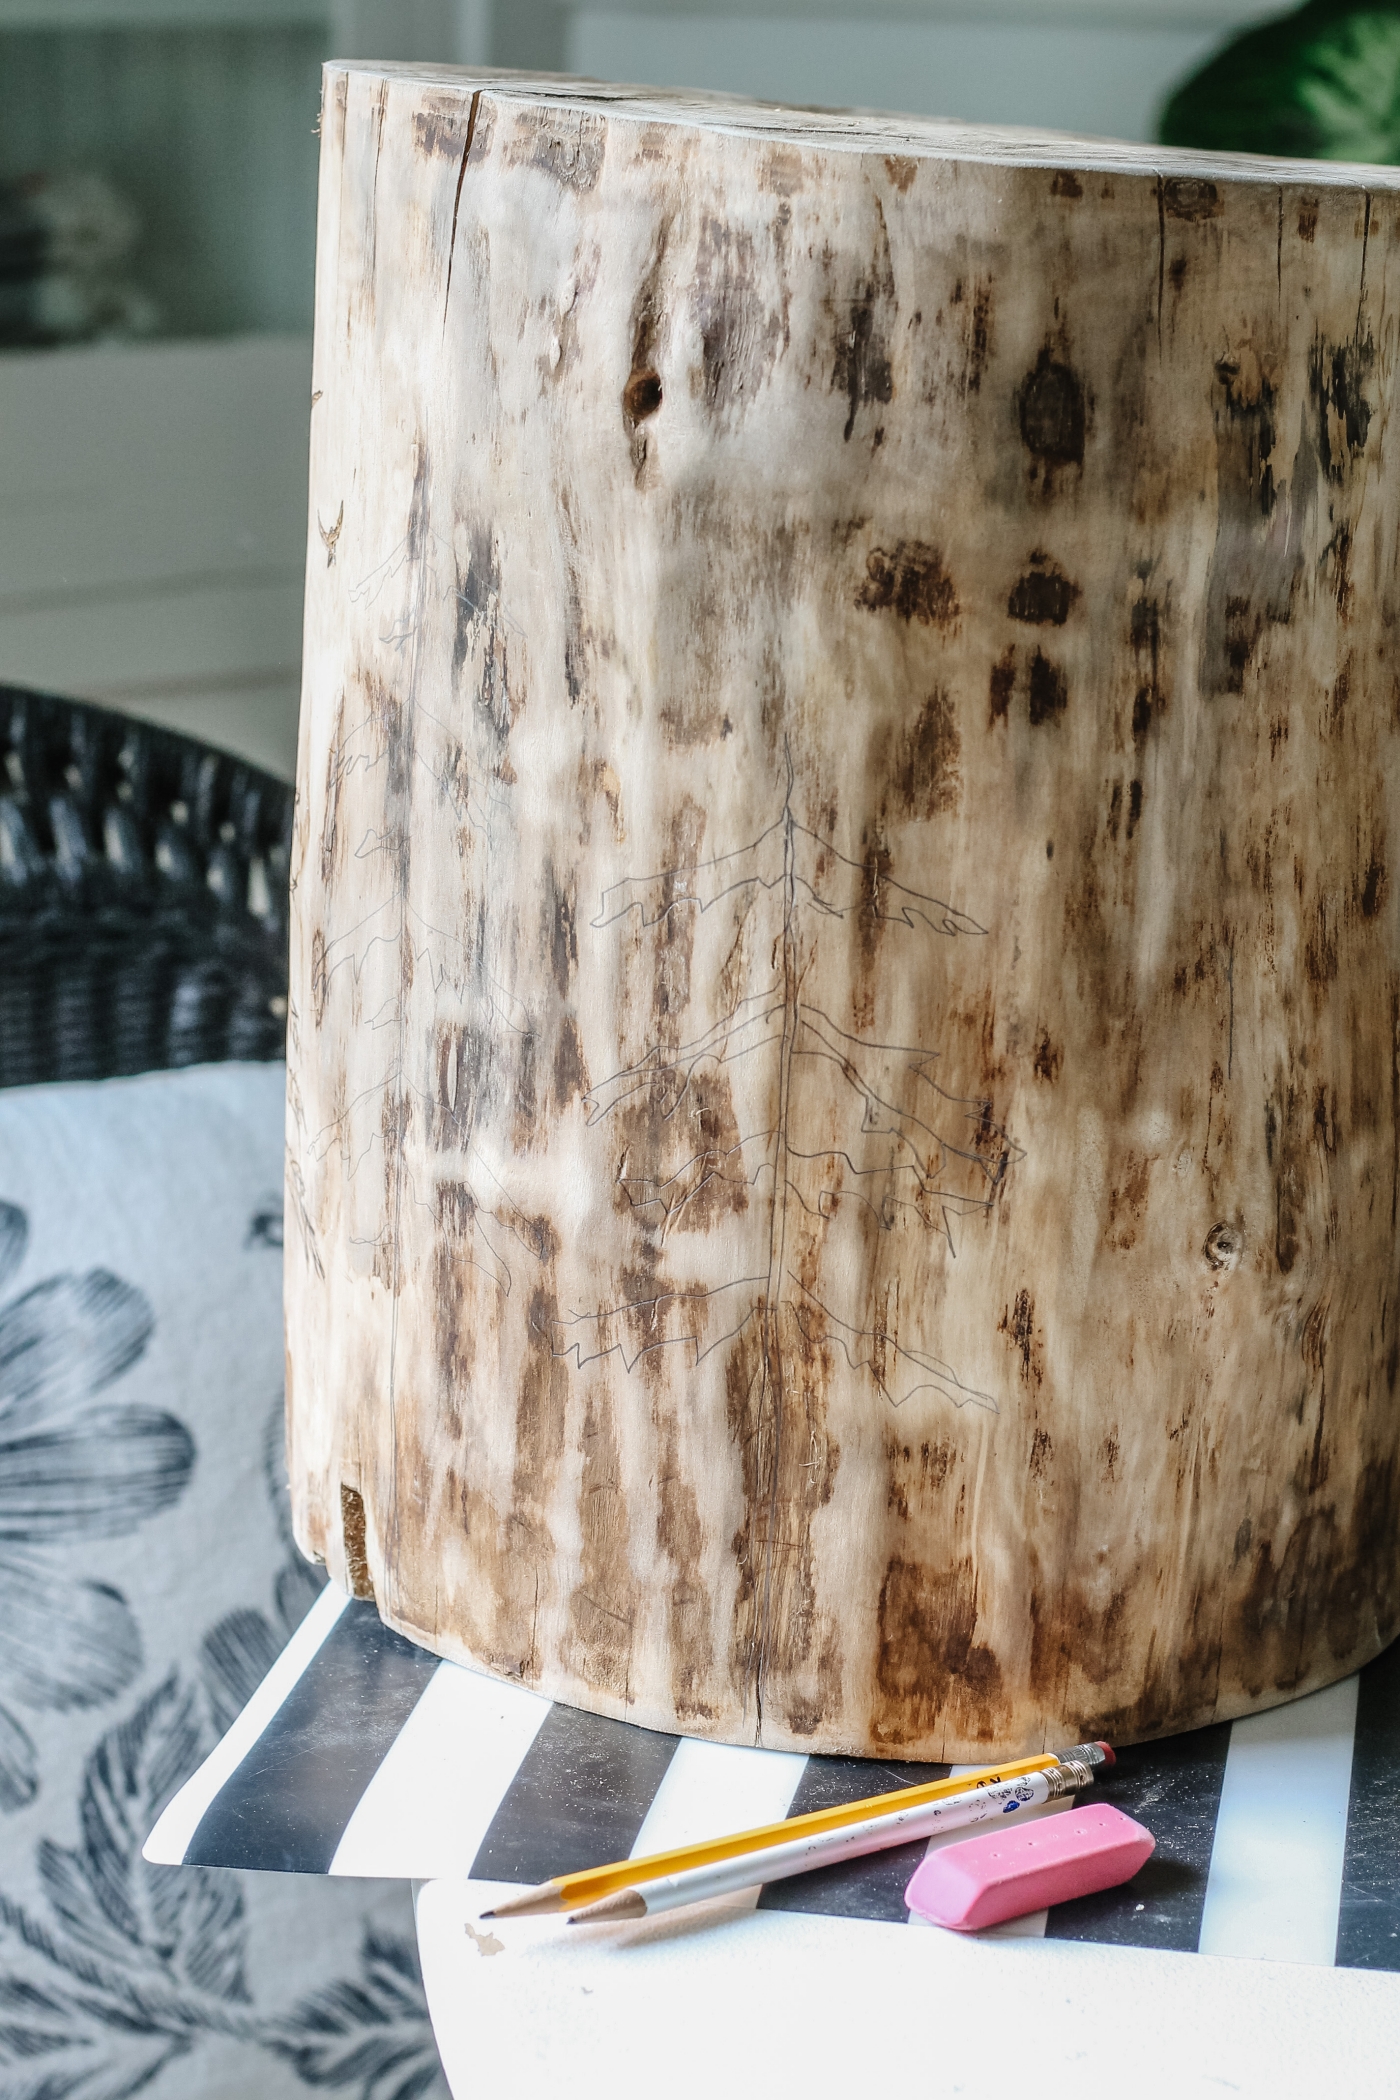
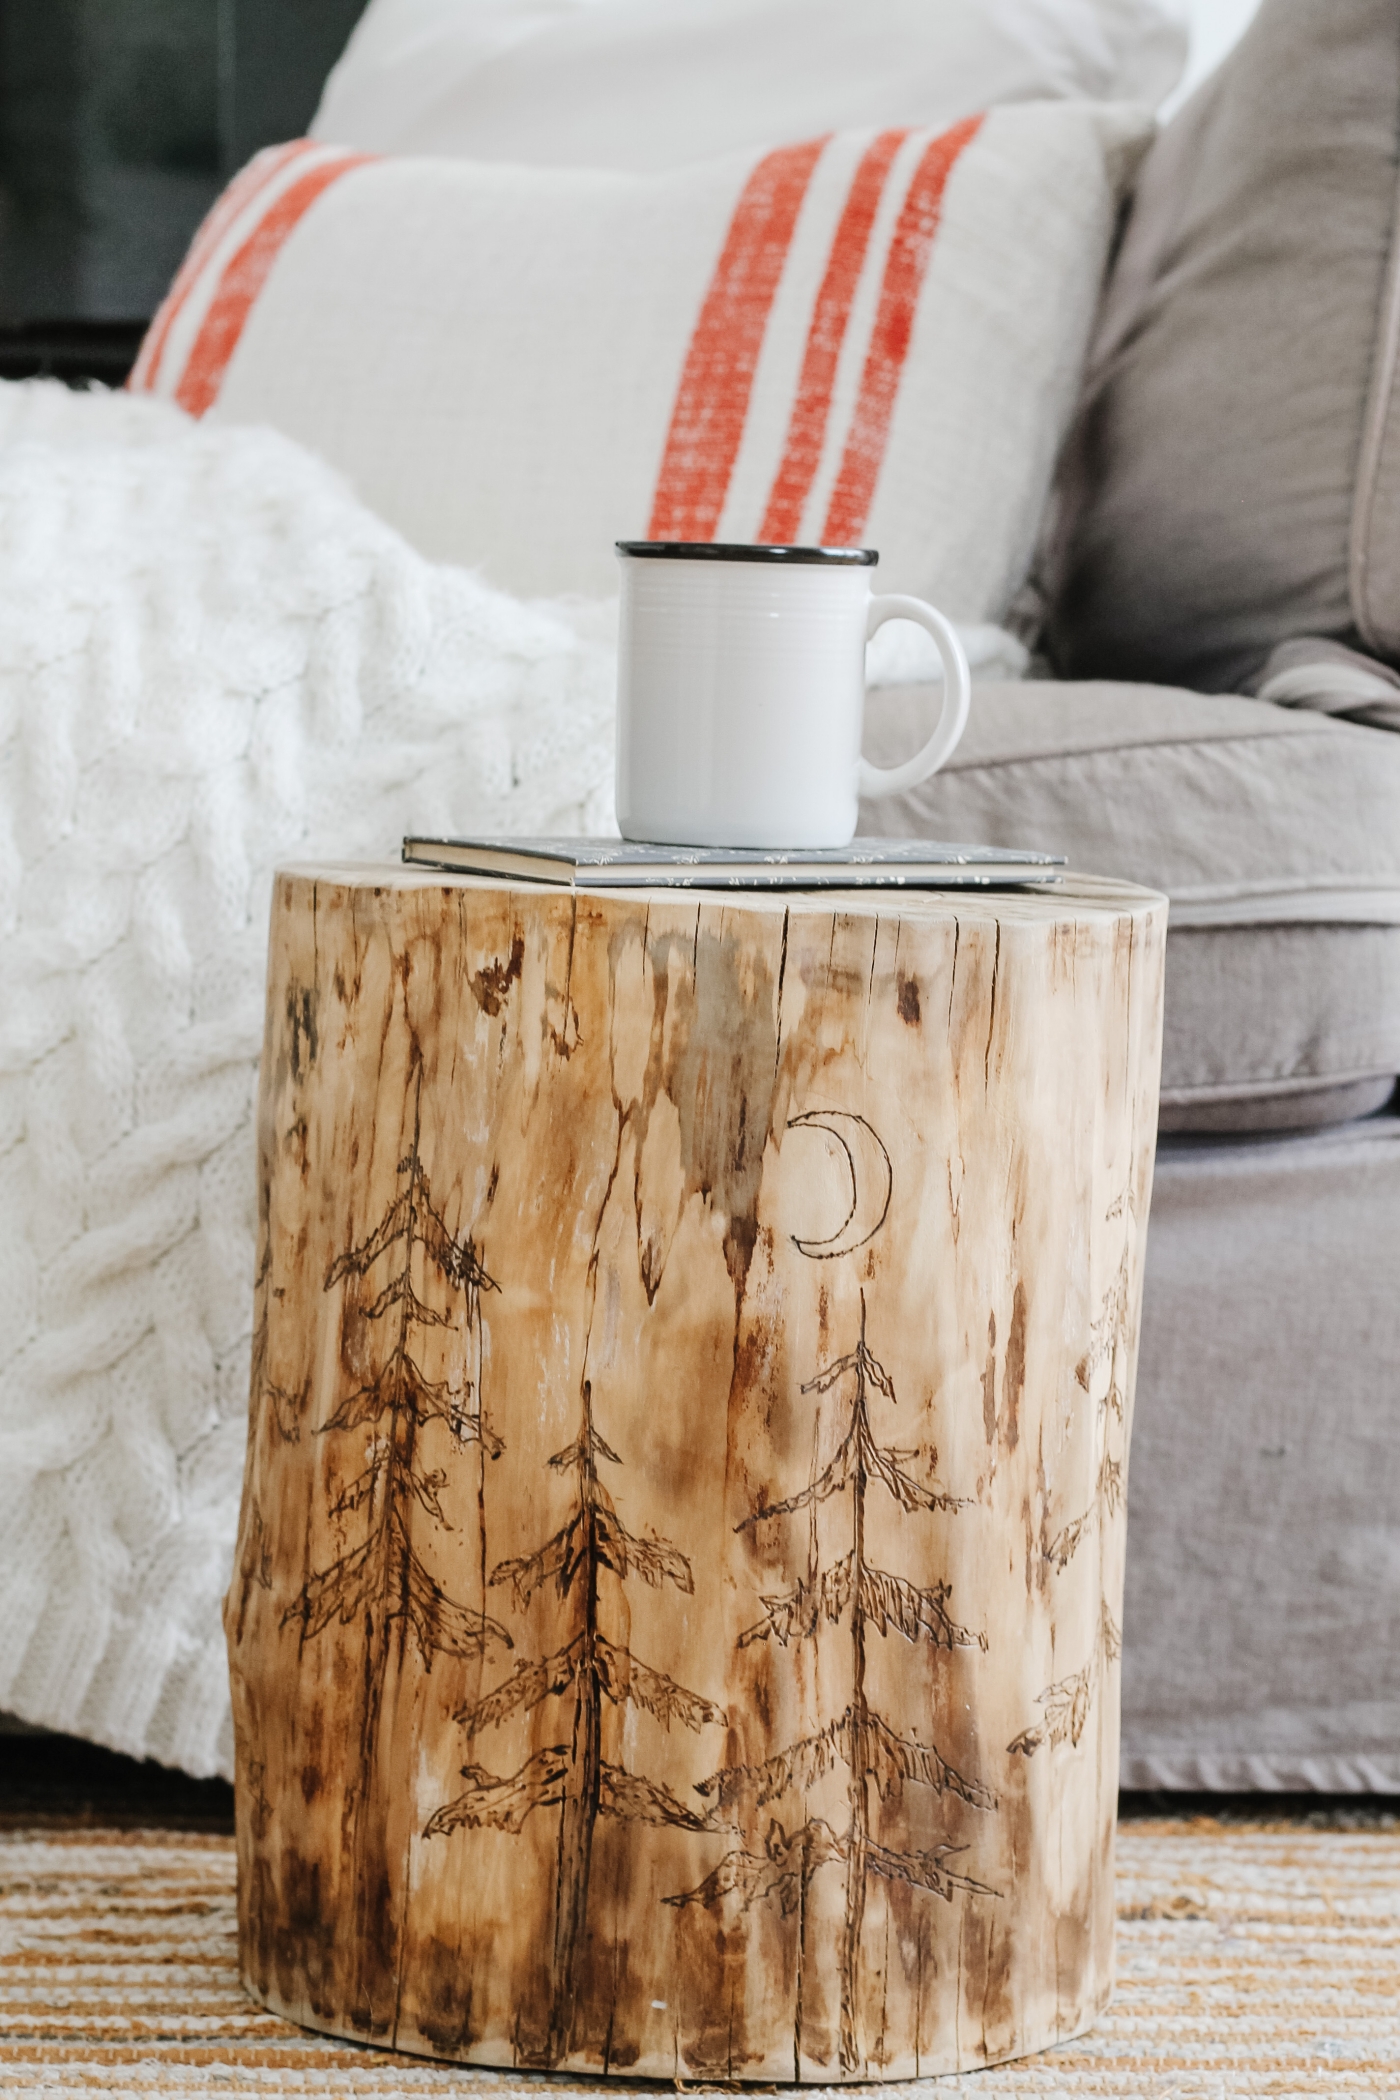
Step 4. Draw image on log
I knew from the beginning that I wanted to burn images of trees all around my log. I just had this idea in my head and I knew that trees would be fairly simple to draw since I’m not much of an artist. Using a pencil I just sketched out my design onto the log.
Step 5. Burn image into log
I used the MakerX Wood Crafter tool from Worx brand. This little baby heats up to 900 degrees! Although I didn’t need it to be quite that hot for this project so I kept the temperature around 700 degrees and just slowly and carefully I traced over all of my pencil lines with the wood crafter.
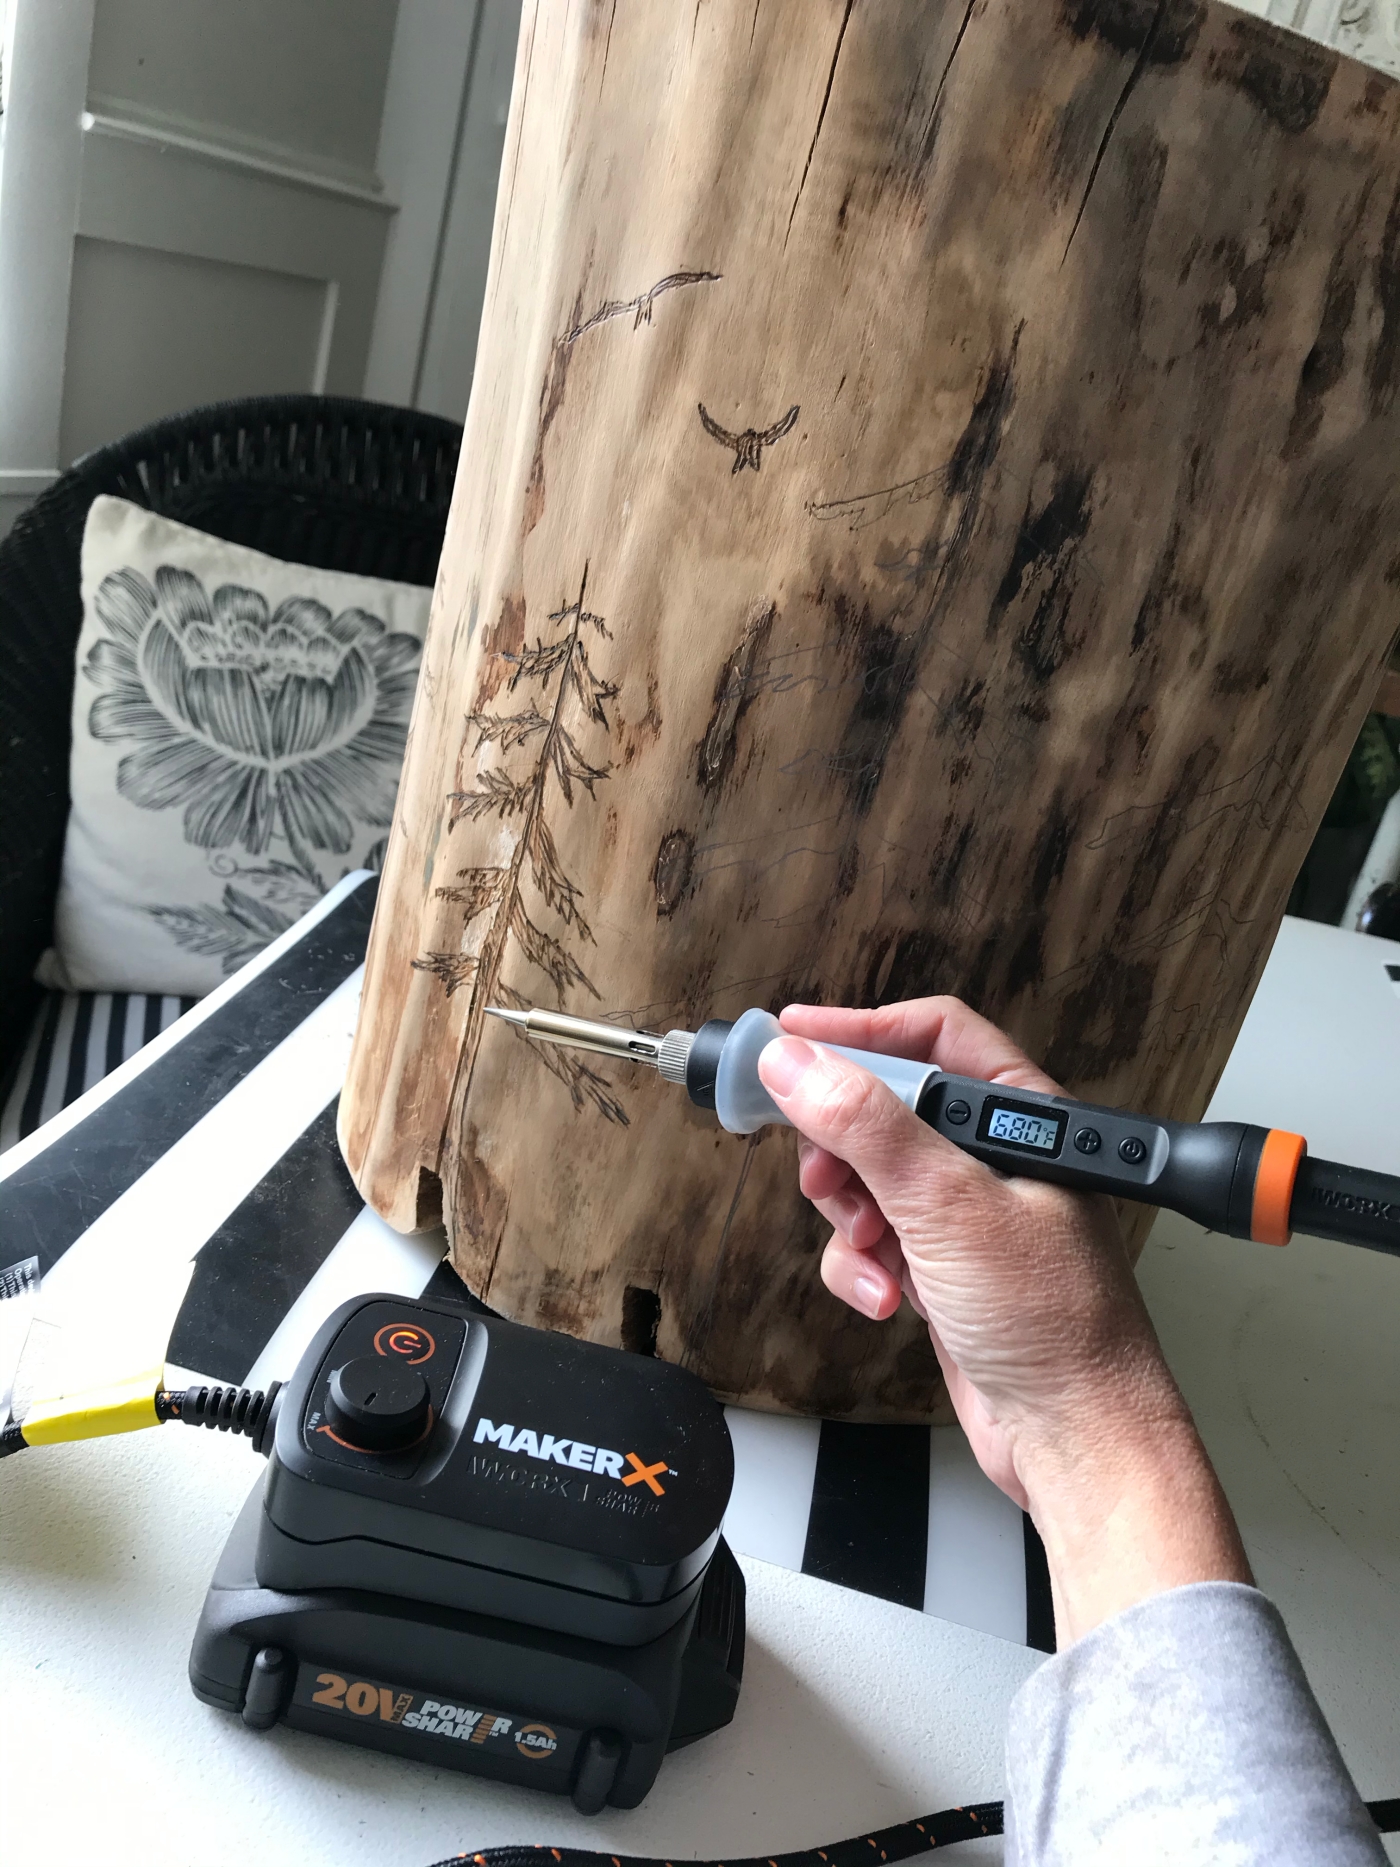
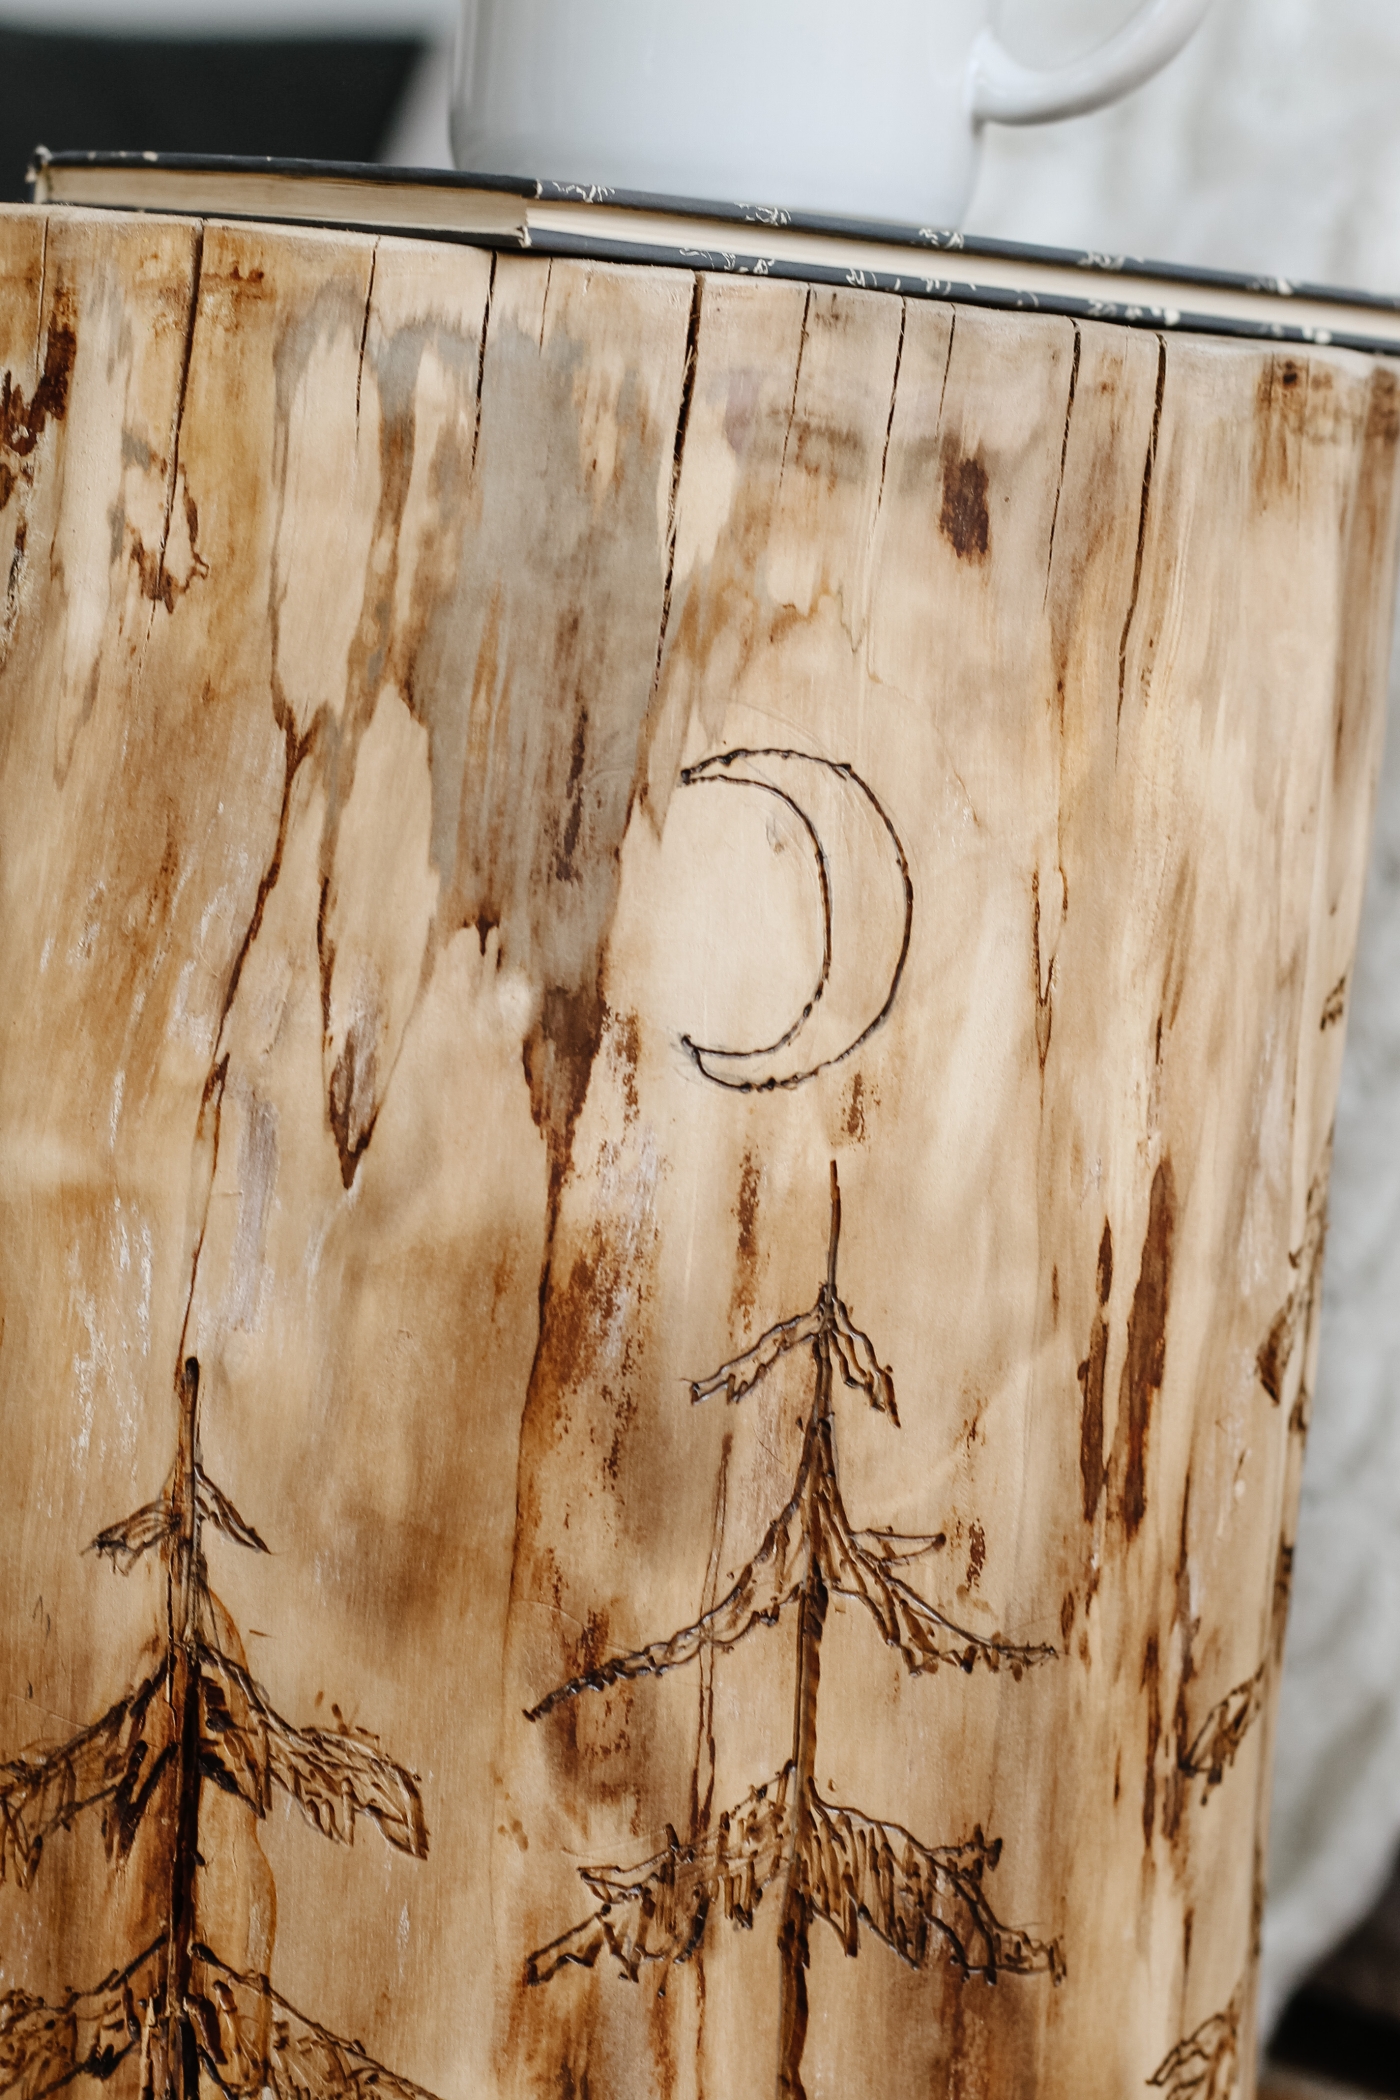
I also added a crescent moon and some birds to my design.
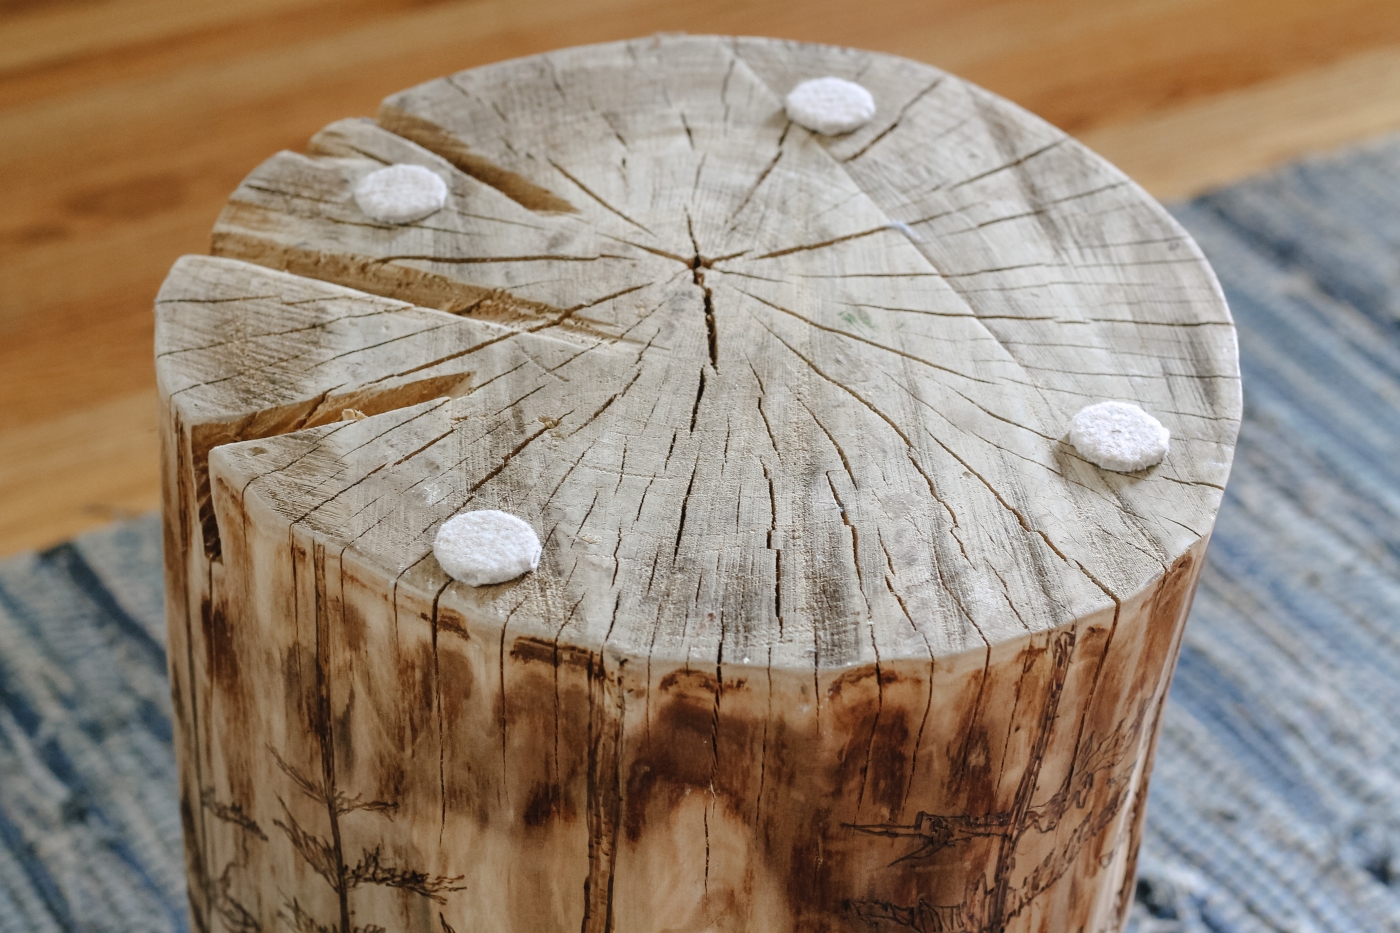
Step 6. Add felt stickers
We have hard wood floors and so I was worried about the log scratching the floors and so I just stuck on some felt furniture pad stickers to the bottom of the log.
Tip: You can use a sealer to give the log a protective surface.
I still may add a Polyurethane sealer to my log, especially on the top where I may spill my drink, But I just haven’t gotten around to it yet. Sometimes sealers change the color of the wood a bit and I happen to like the raw look of this log so I’m still deciding if I want to add a sealer or not.
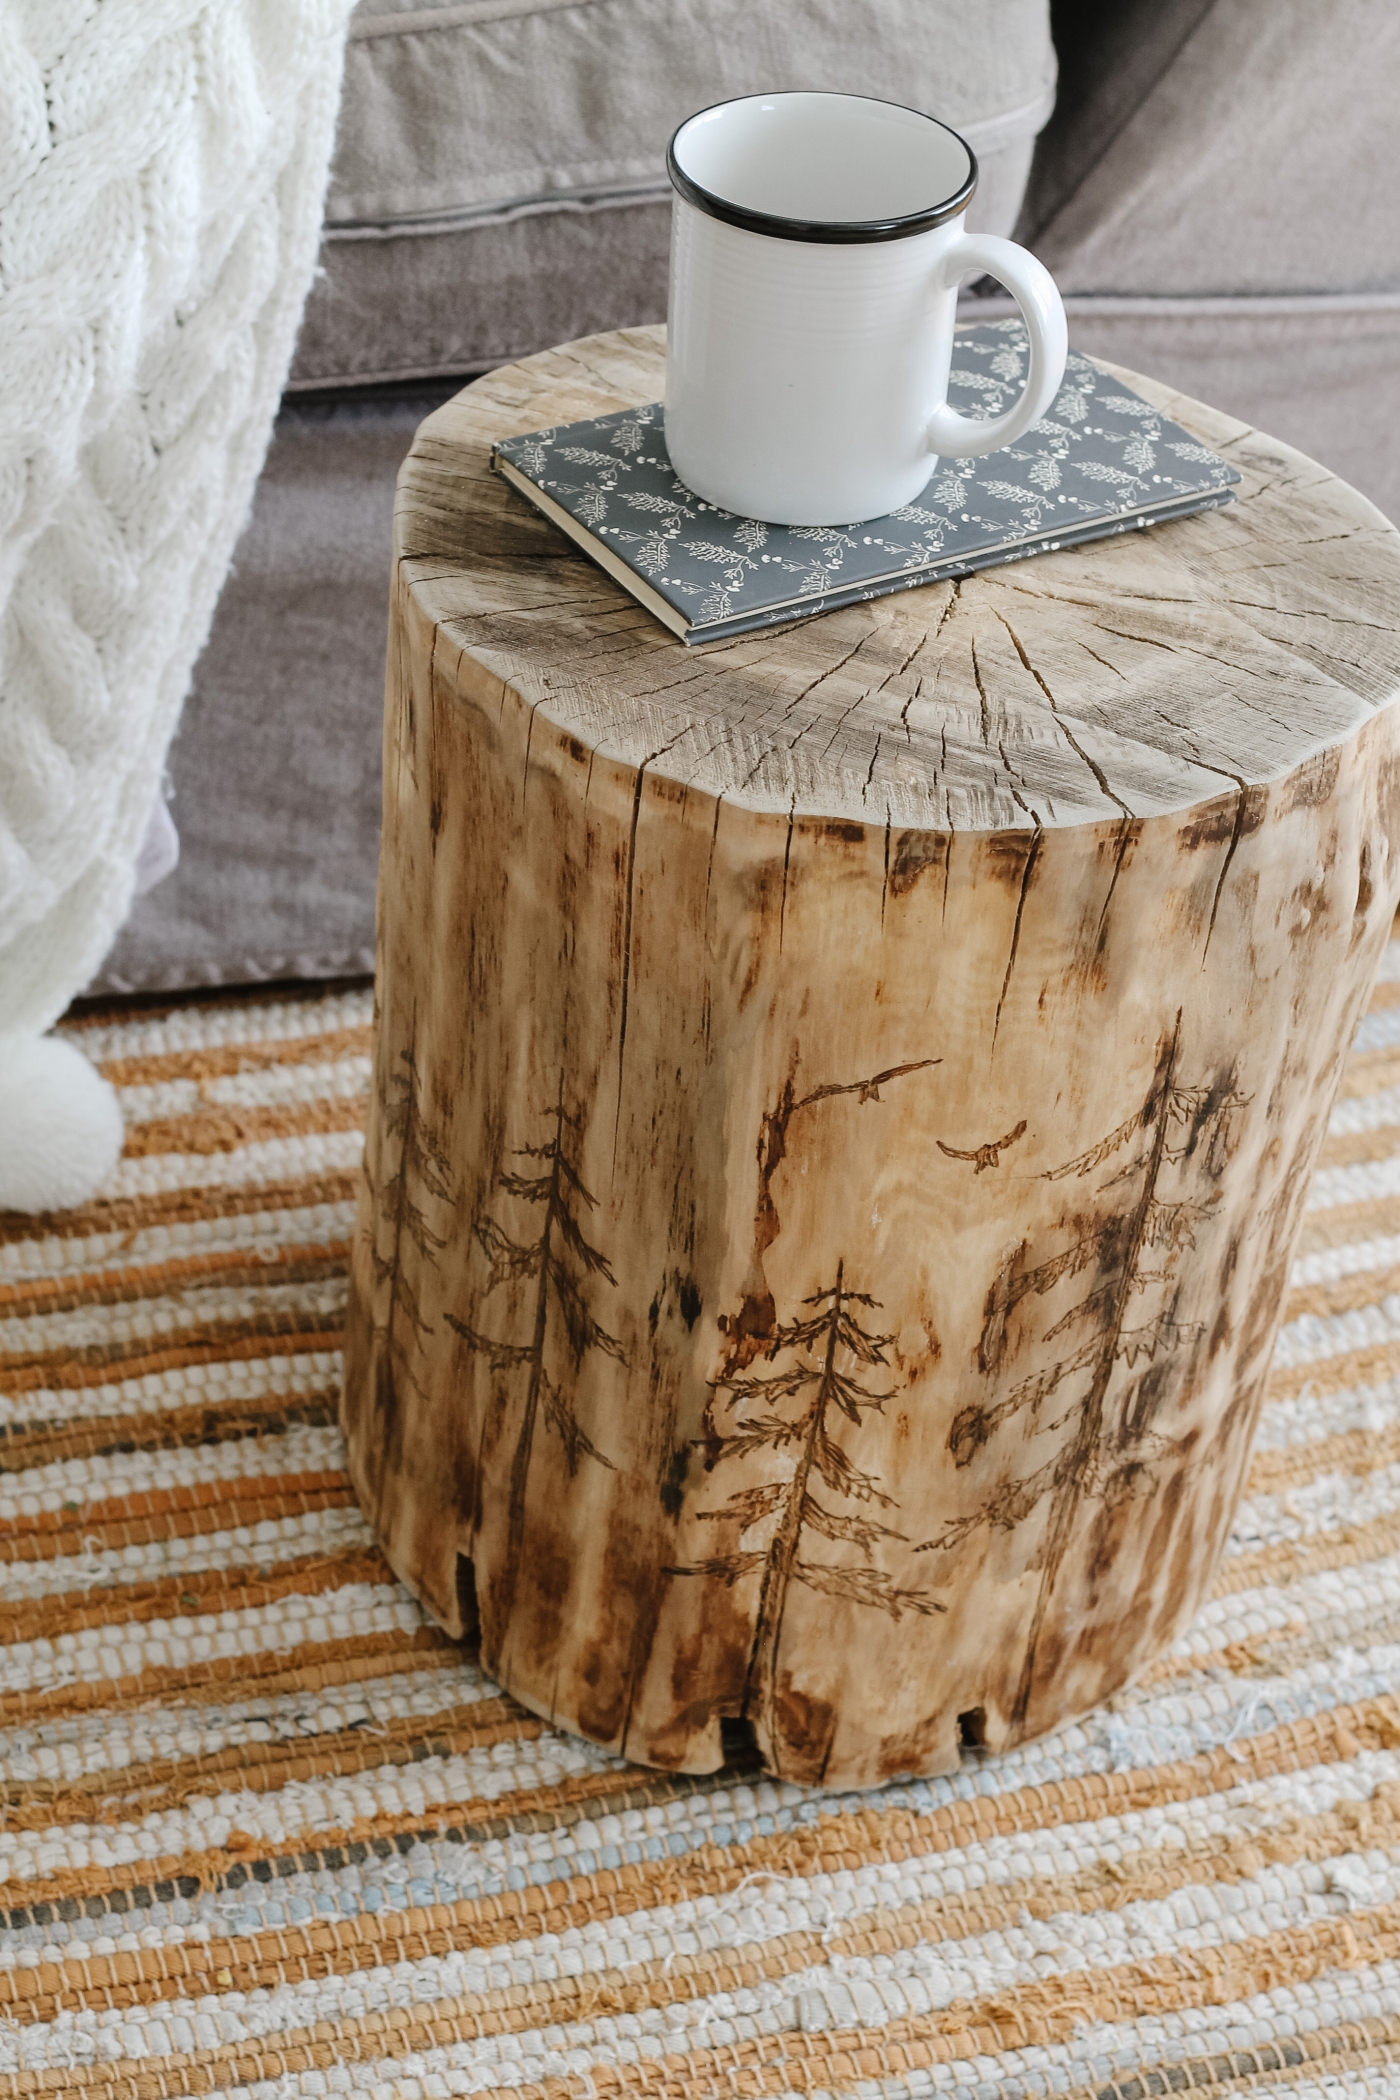
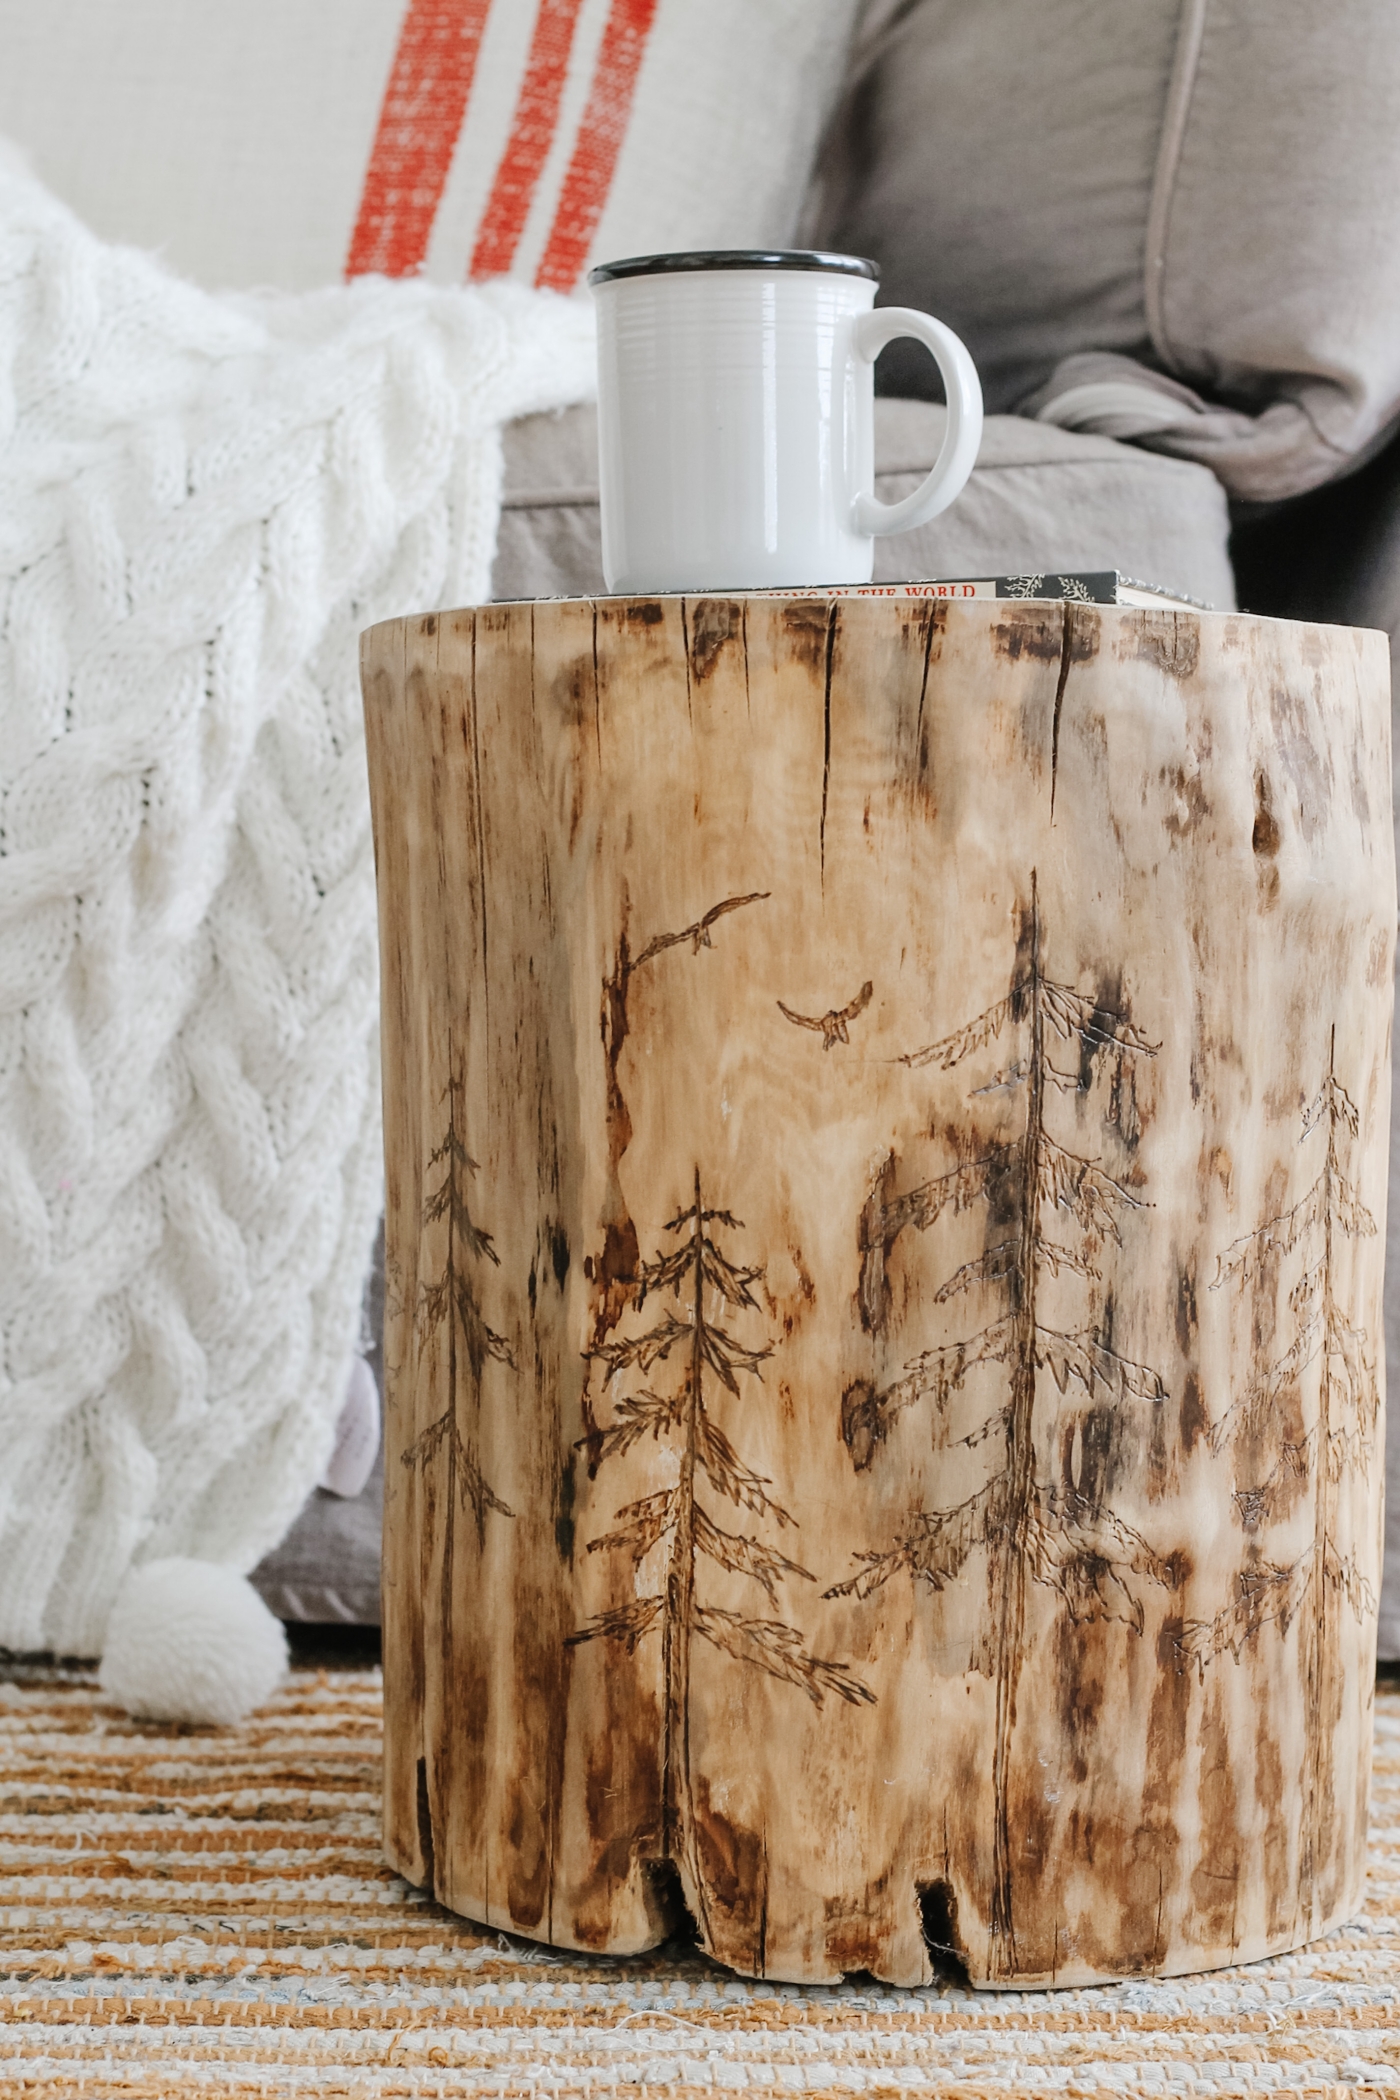
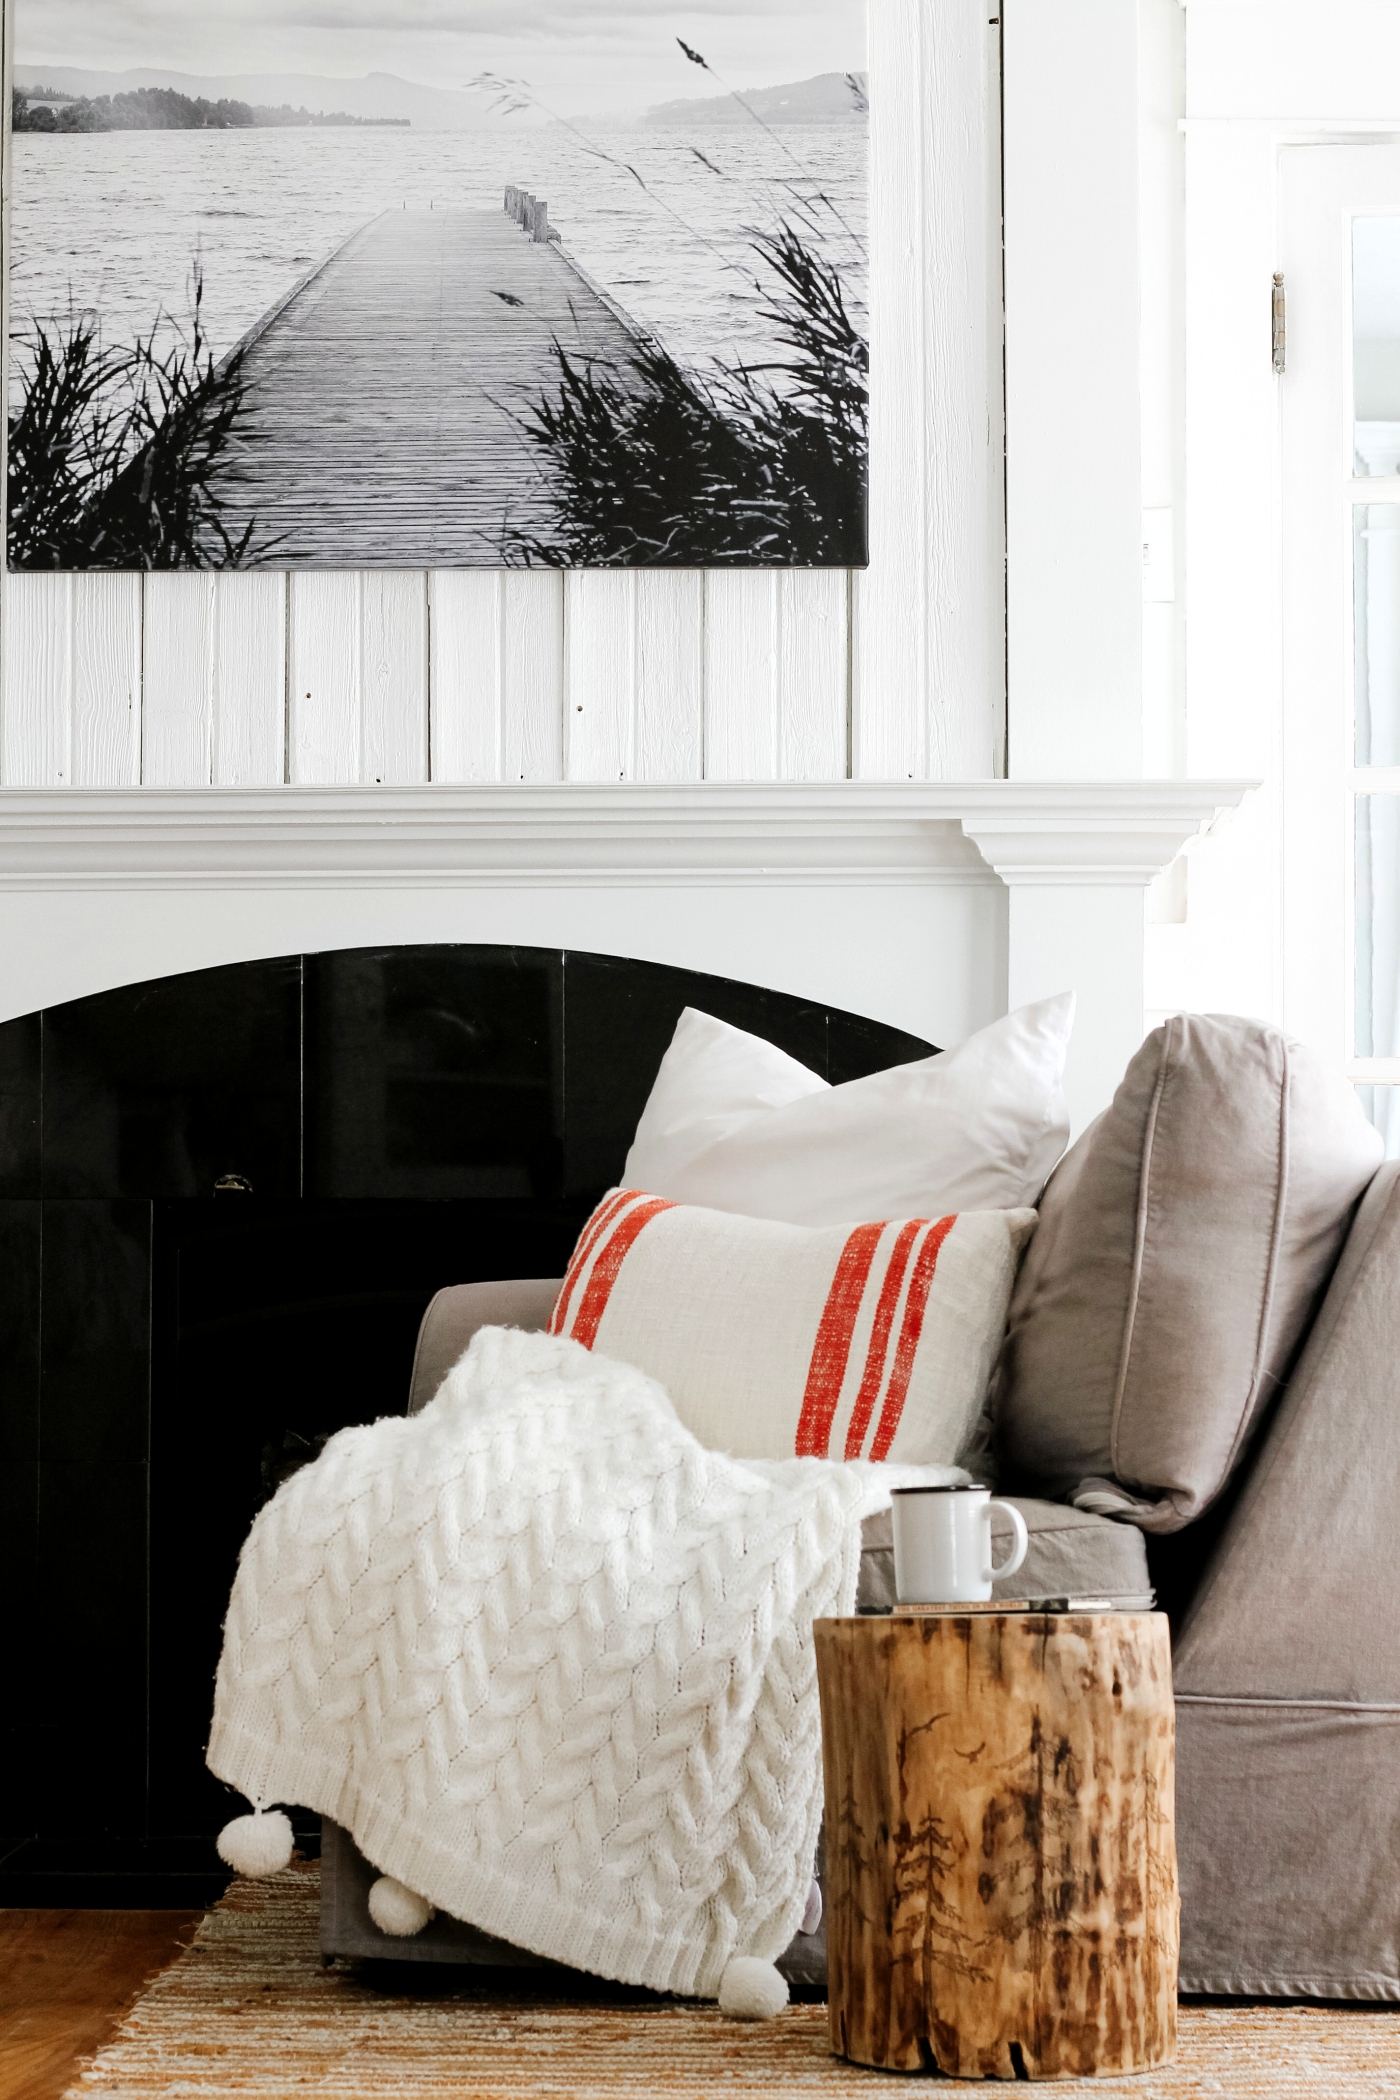
The finished look
I’ve placed my new log side table next to a comfy chair in our living room. The log side table is now a really convenient place to set down my book and cup of coffee.
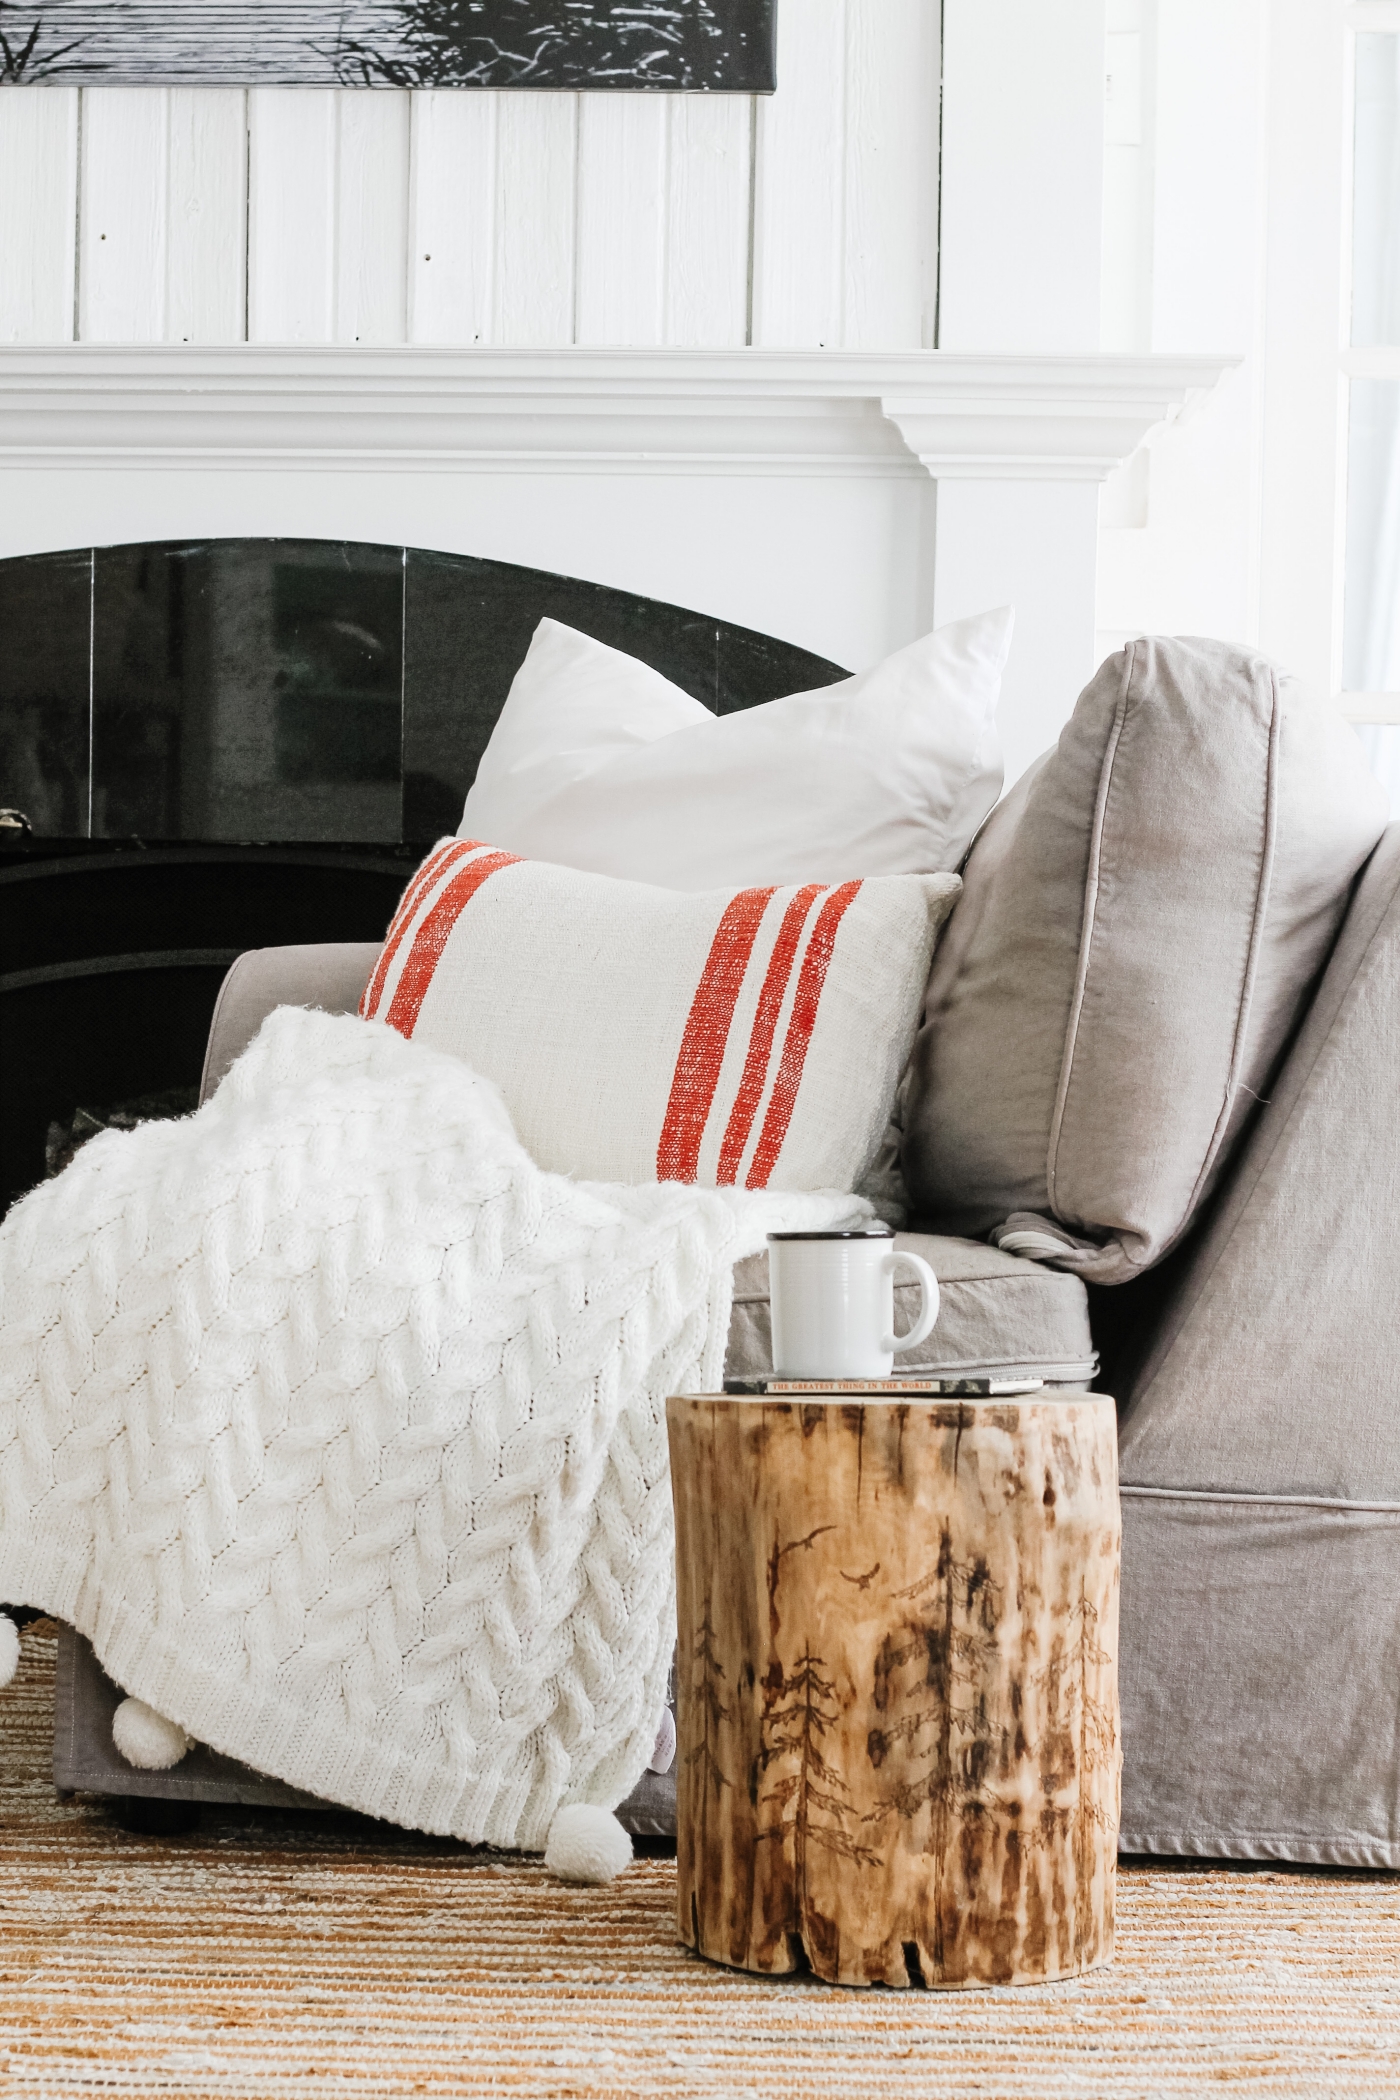
My son also mentioned that this log coffee table could also double as a stool. It might not be the most comfortable place to sit, but I suppose he is right.
More about MakerX
So a little more about the new MakerX tools by Worx, like I mentioned you can easily switch out different tools while using the same 20V battery hub. Some of the other tool options are an Airbrush, Angle Grinder, Rotary Tool, The heat gun that I shared above, and then this Wood Crafter that also works on Metals. MakerX is very versatile and so perfect for crafting and working on projects round the home.
And then I’ll leave you with one last picture of the log side table in our living room. You can read more about that amazing canvas art in this Post.
So what do you think of my new log side table? Is this something that you would like to create too? If so, then I say go for it!
Here are the tools you will need:
- log
- hammer (This looks like a good one)
- flathead screwdriver (similar)
- hand sander (similar)
- wood crafting tool (I used this one)
- felt furniture pads (similar)
- polyurethane (I like this one)
Please let me know if you have any questions.
Be sure to Pin this Post for later, You can find a PIN IT button on the top left corner of each of the pictures.
Thank you so much for stopping by today,
Emily


This project is beautiful. You are very creative. Thanks for sharing your ideas.