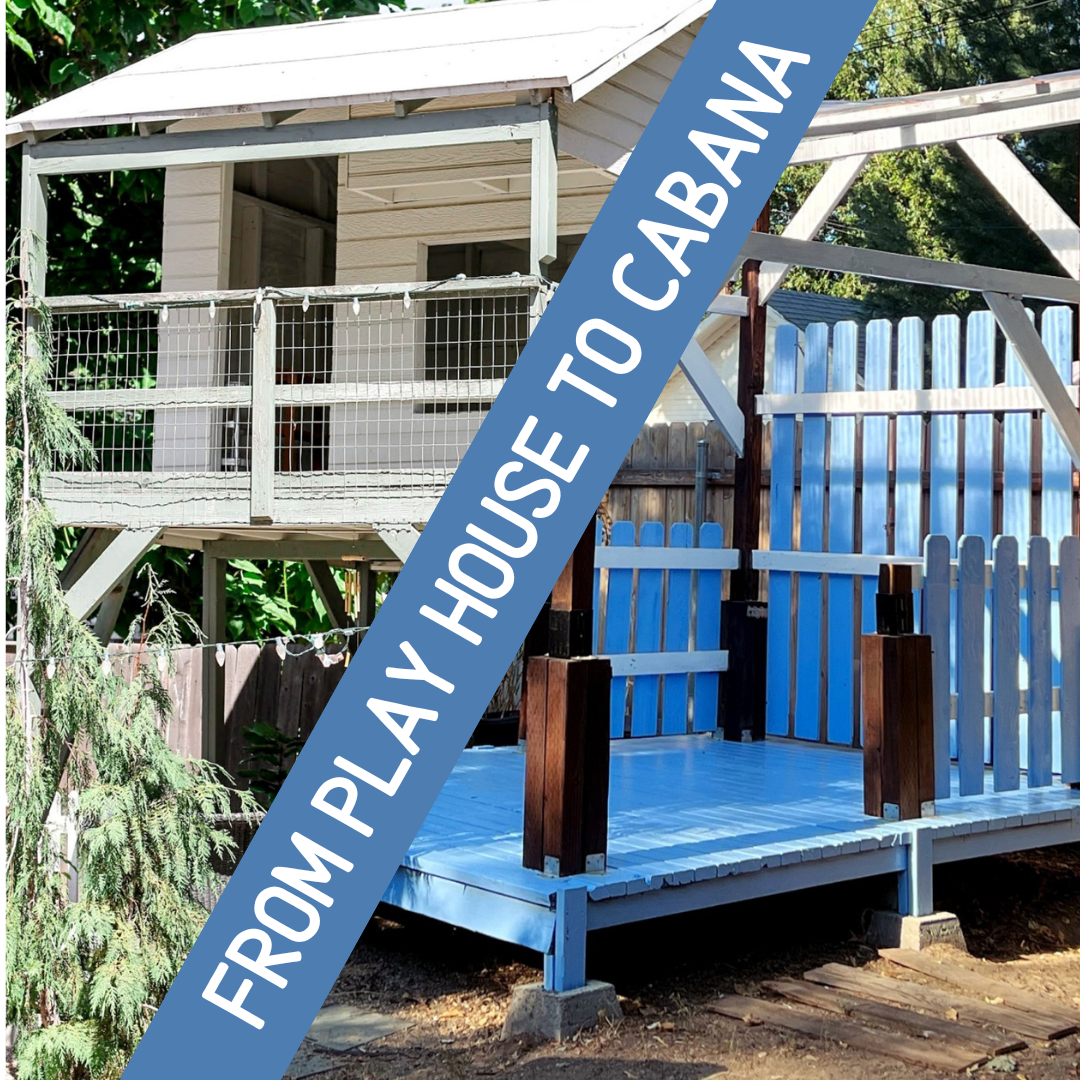
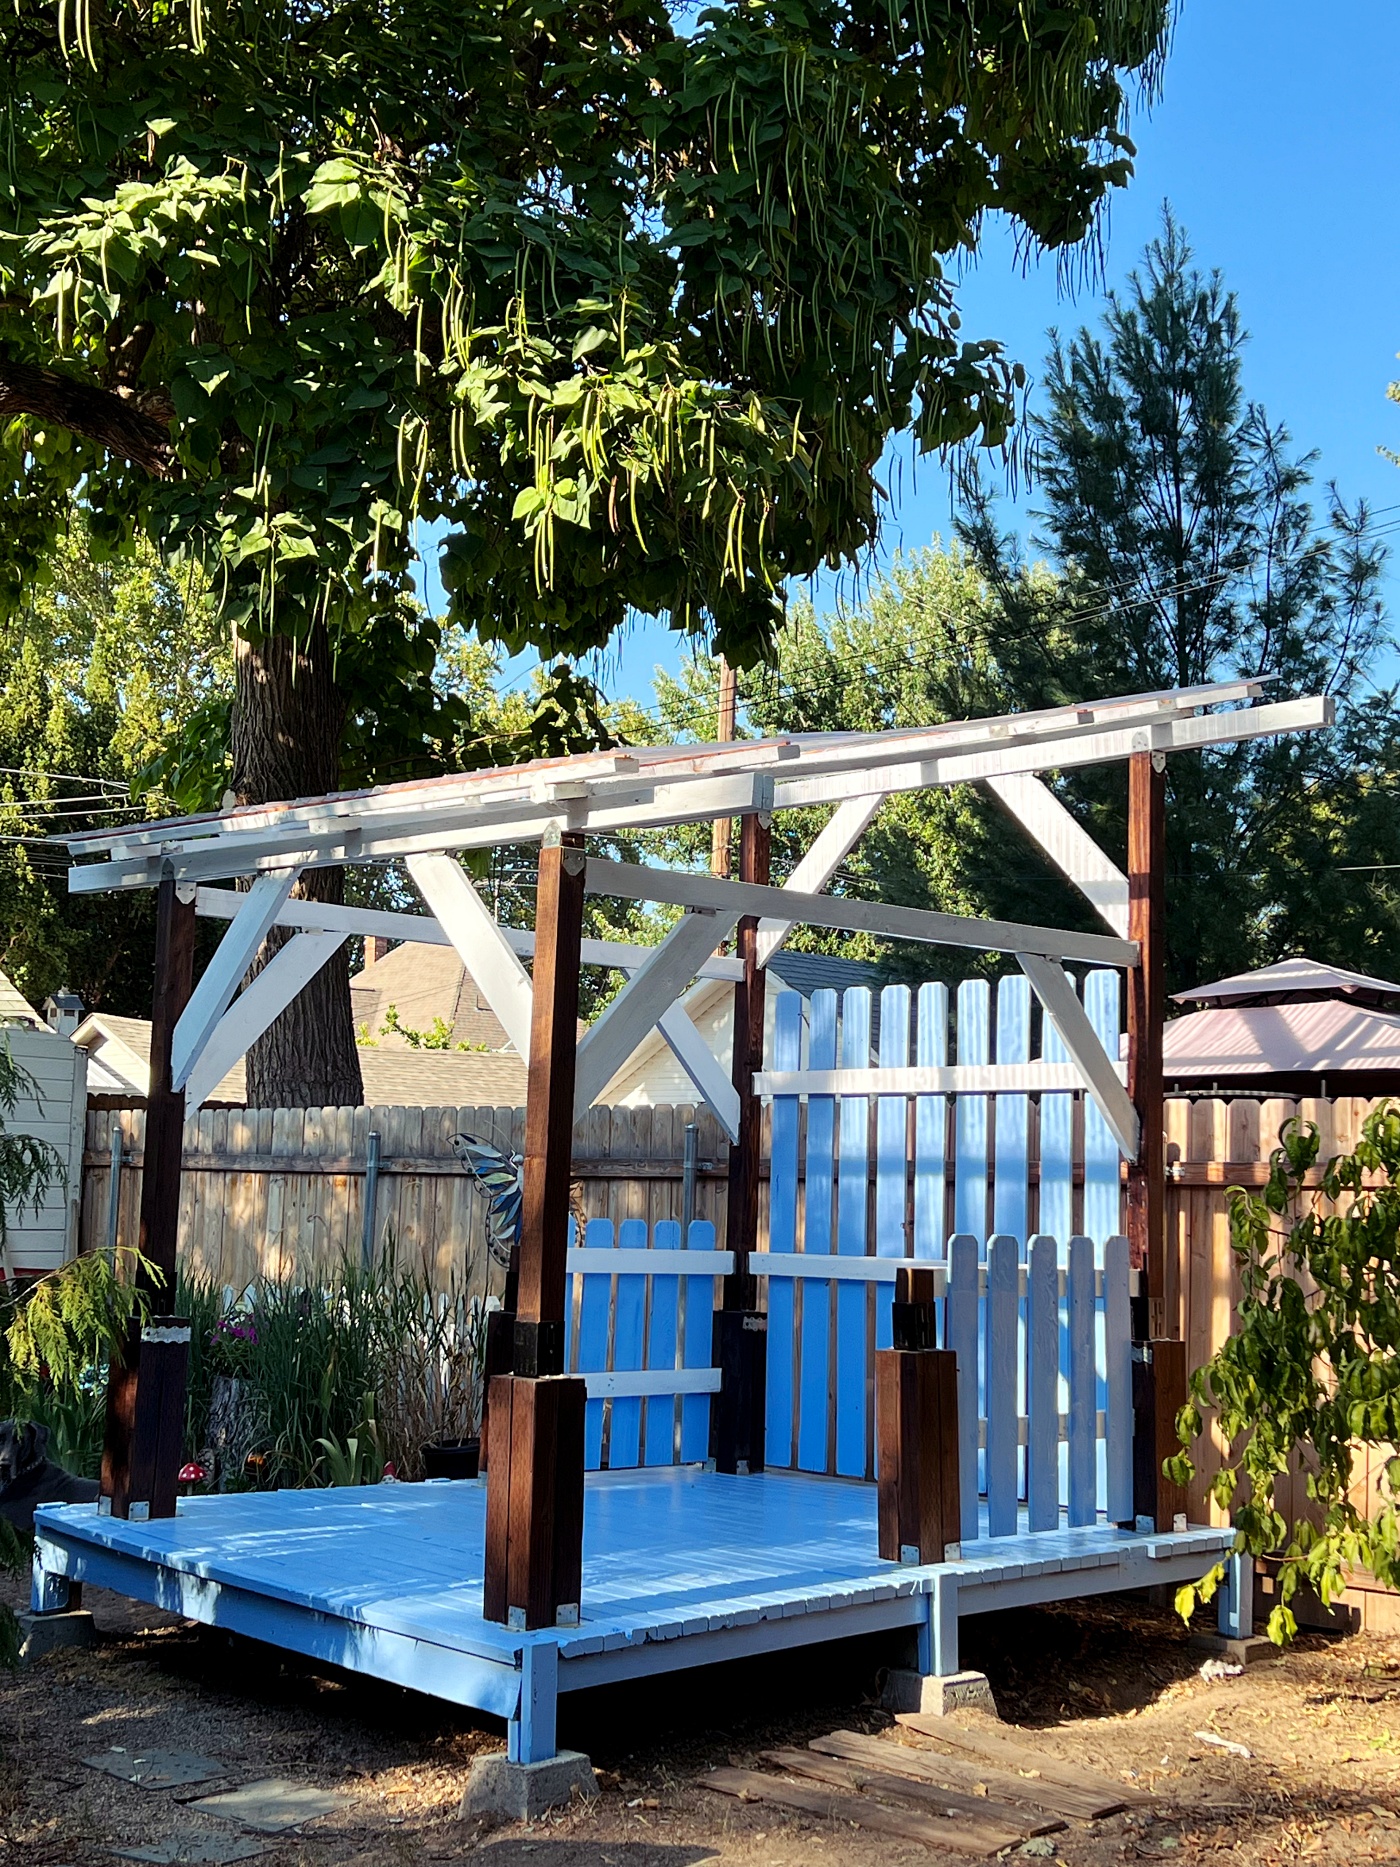
Jake and I have been working hard on this project in our backyard for the last few months and I am now beyond excited to get to share it with you today!! We turned our unused backyard playhouse into a fun Beach Cabana that the whole family can now enjoy.
*This blog post contains Affiliated links which means that as an Amazon Associate I earn a small commission for purchases made through these links.
Some of you may remember this play house in our backyard. It came with our house when we bought it 10 years ago. In fact, this play house was a selling point for us buying this house since at the time we had two little boys ages 4 and 7.
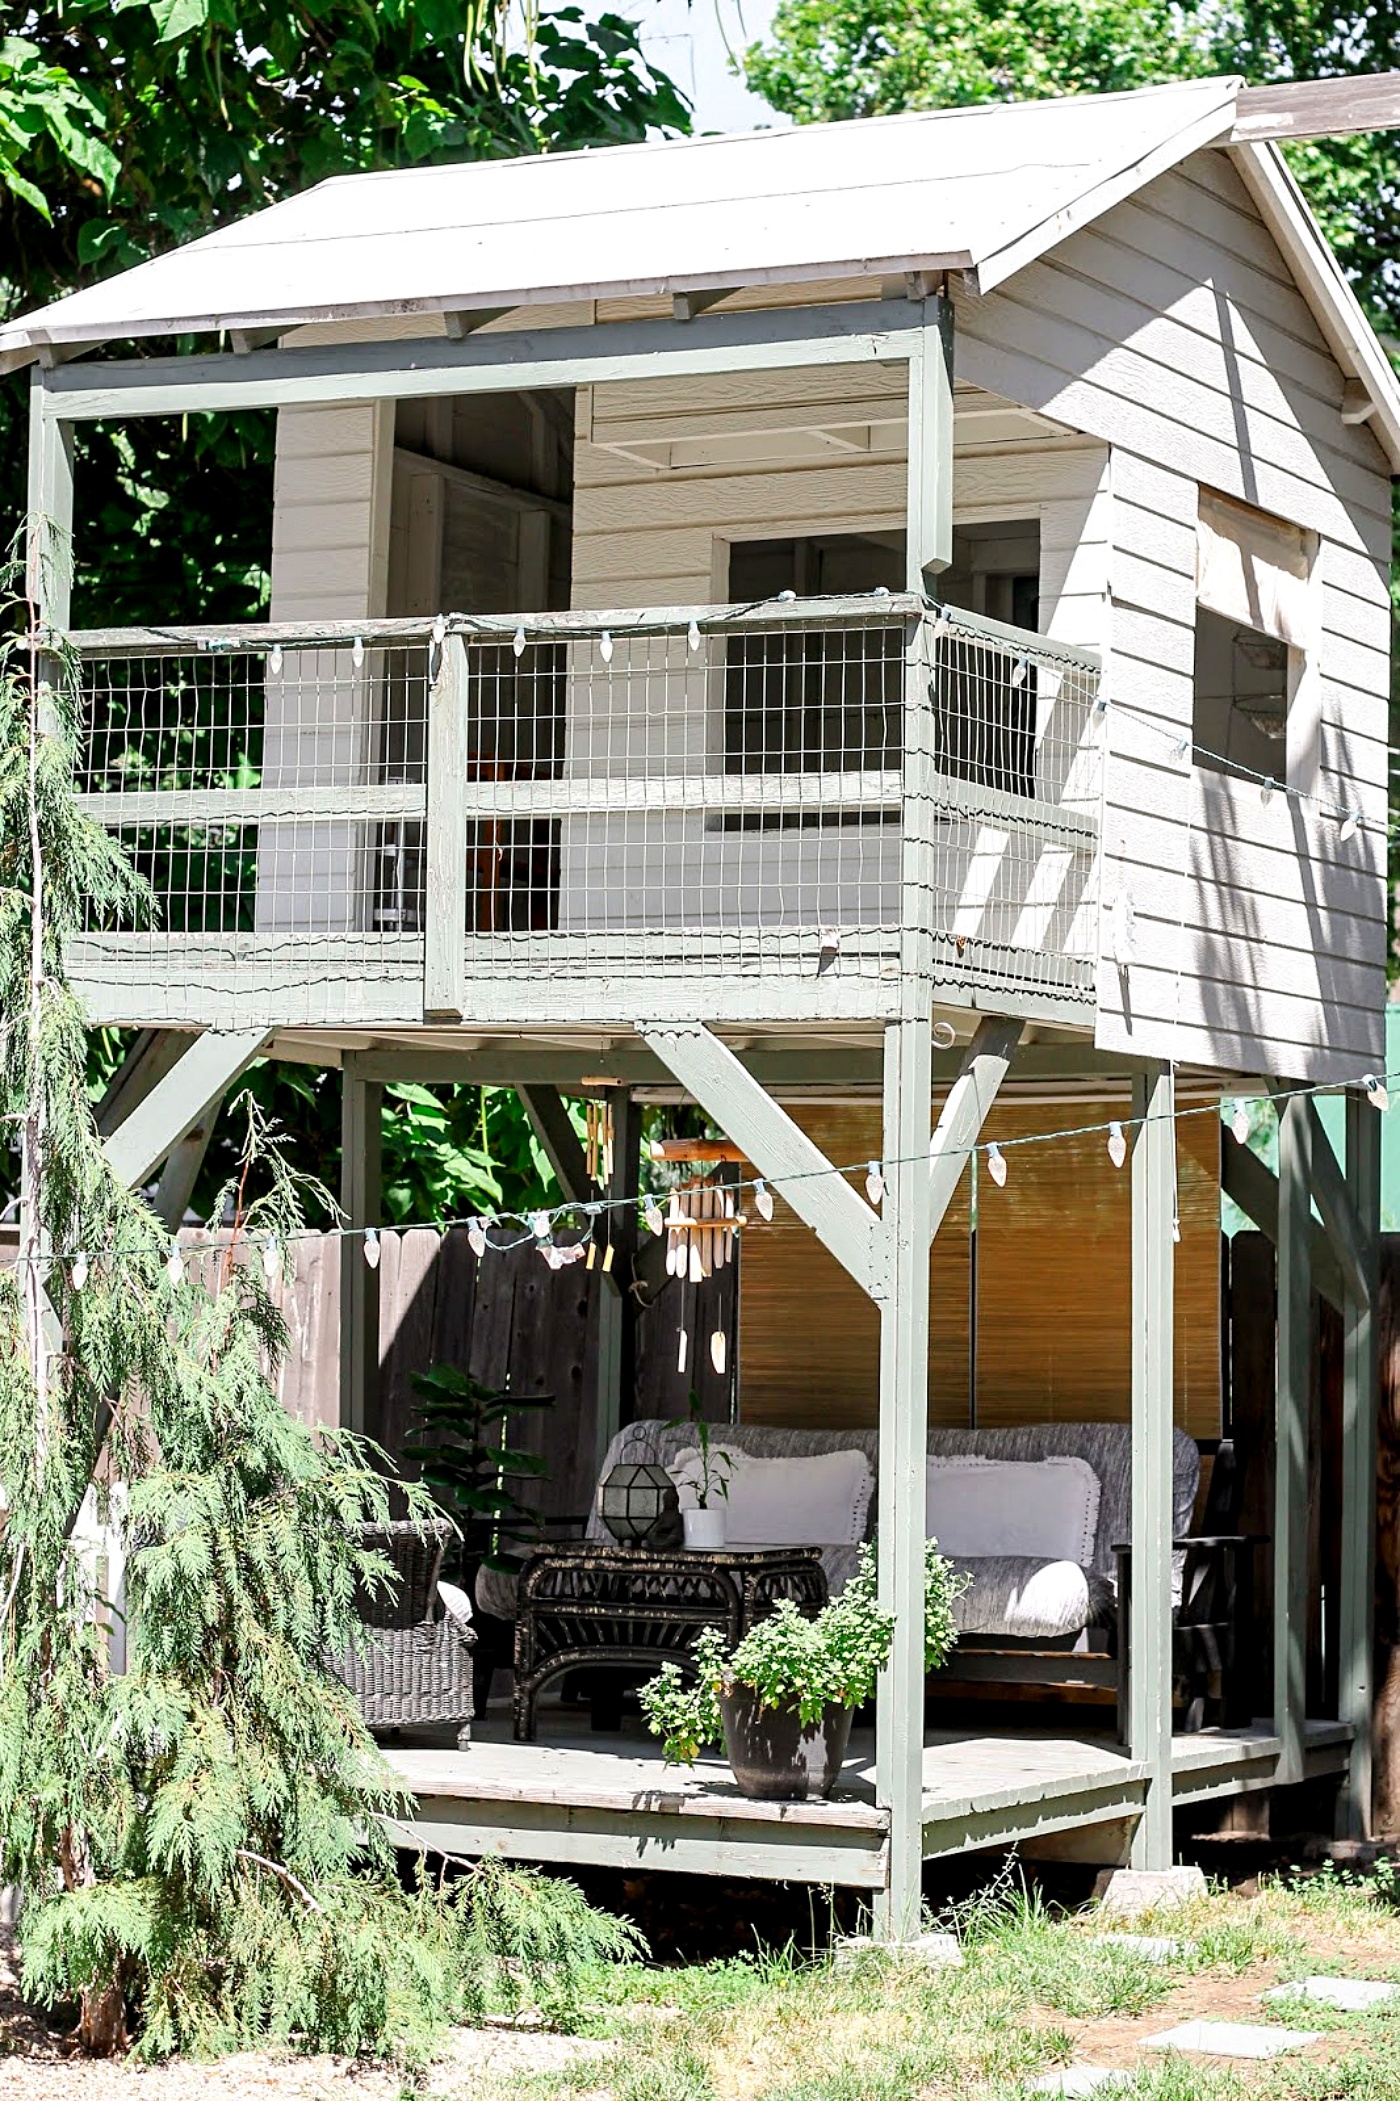
Our boys did have fun playing in this playhouse but now they are teenagers so it was no longer being used. Plus it was starting to get wobbly and felt unsafe to go up it, and then on top of that, I was basically the only person using the lower section of the playhouse as a sitting area since I’m short, the ceilings were too low for my husband and boys to use. So when my husband came up with the idea to turn the playhouse into a Cabana, it just felt like the best thing to do…….but I’m not going to lie, I was sad over the fact of the playhouse that my little boys once played in was going to be torn down, but now I can happily say that I’m 100% over it. 😊
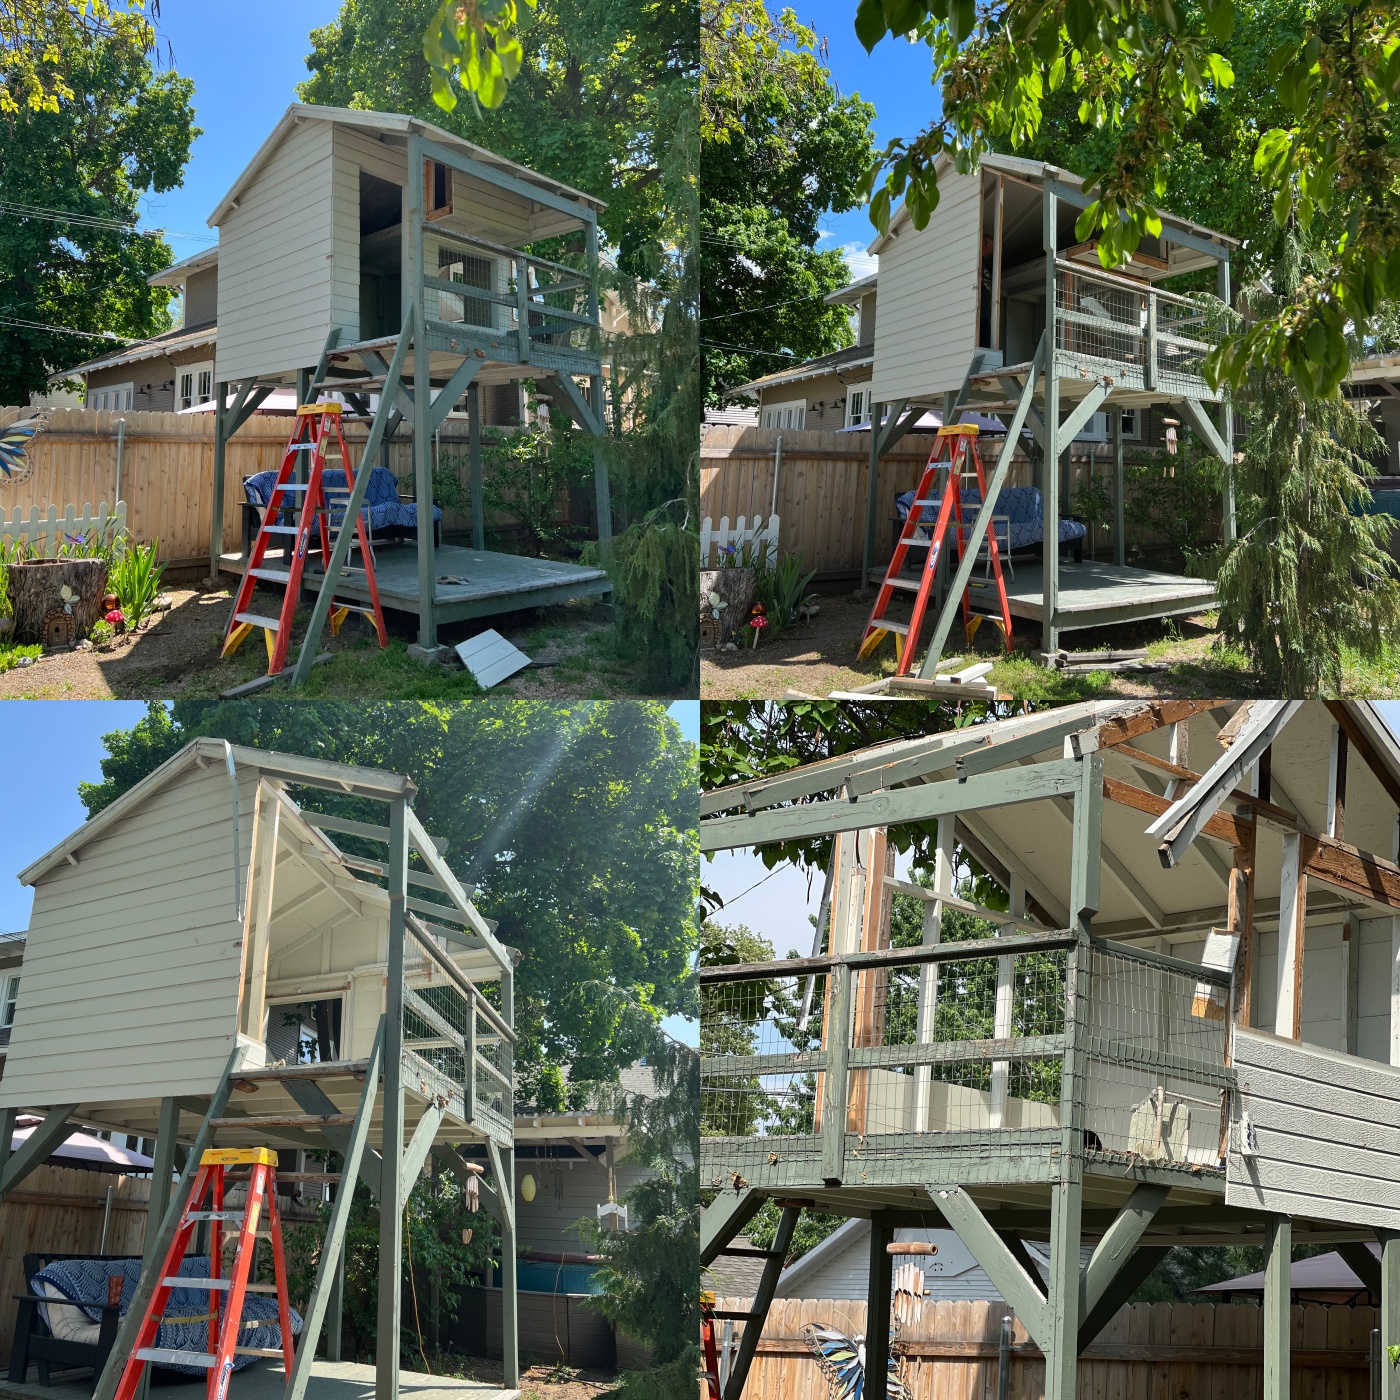
Stage 1: Demo
I now wish that I was sharing the progress weekly on Social Media, but honestly, I did not think it would happen so quickly. Jake kept telling me that this was probably going to be a slow going project and that we would work on it when we could and that it would just take time. But then every weekend we would both be shocked at how much progress was being made. For Stage One, we bought a circular saw and Jake started taking down the walls and roof.
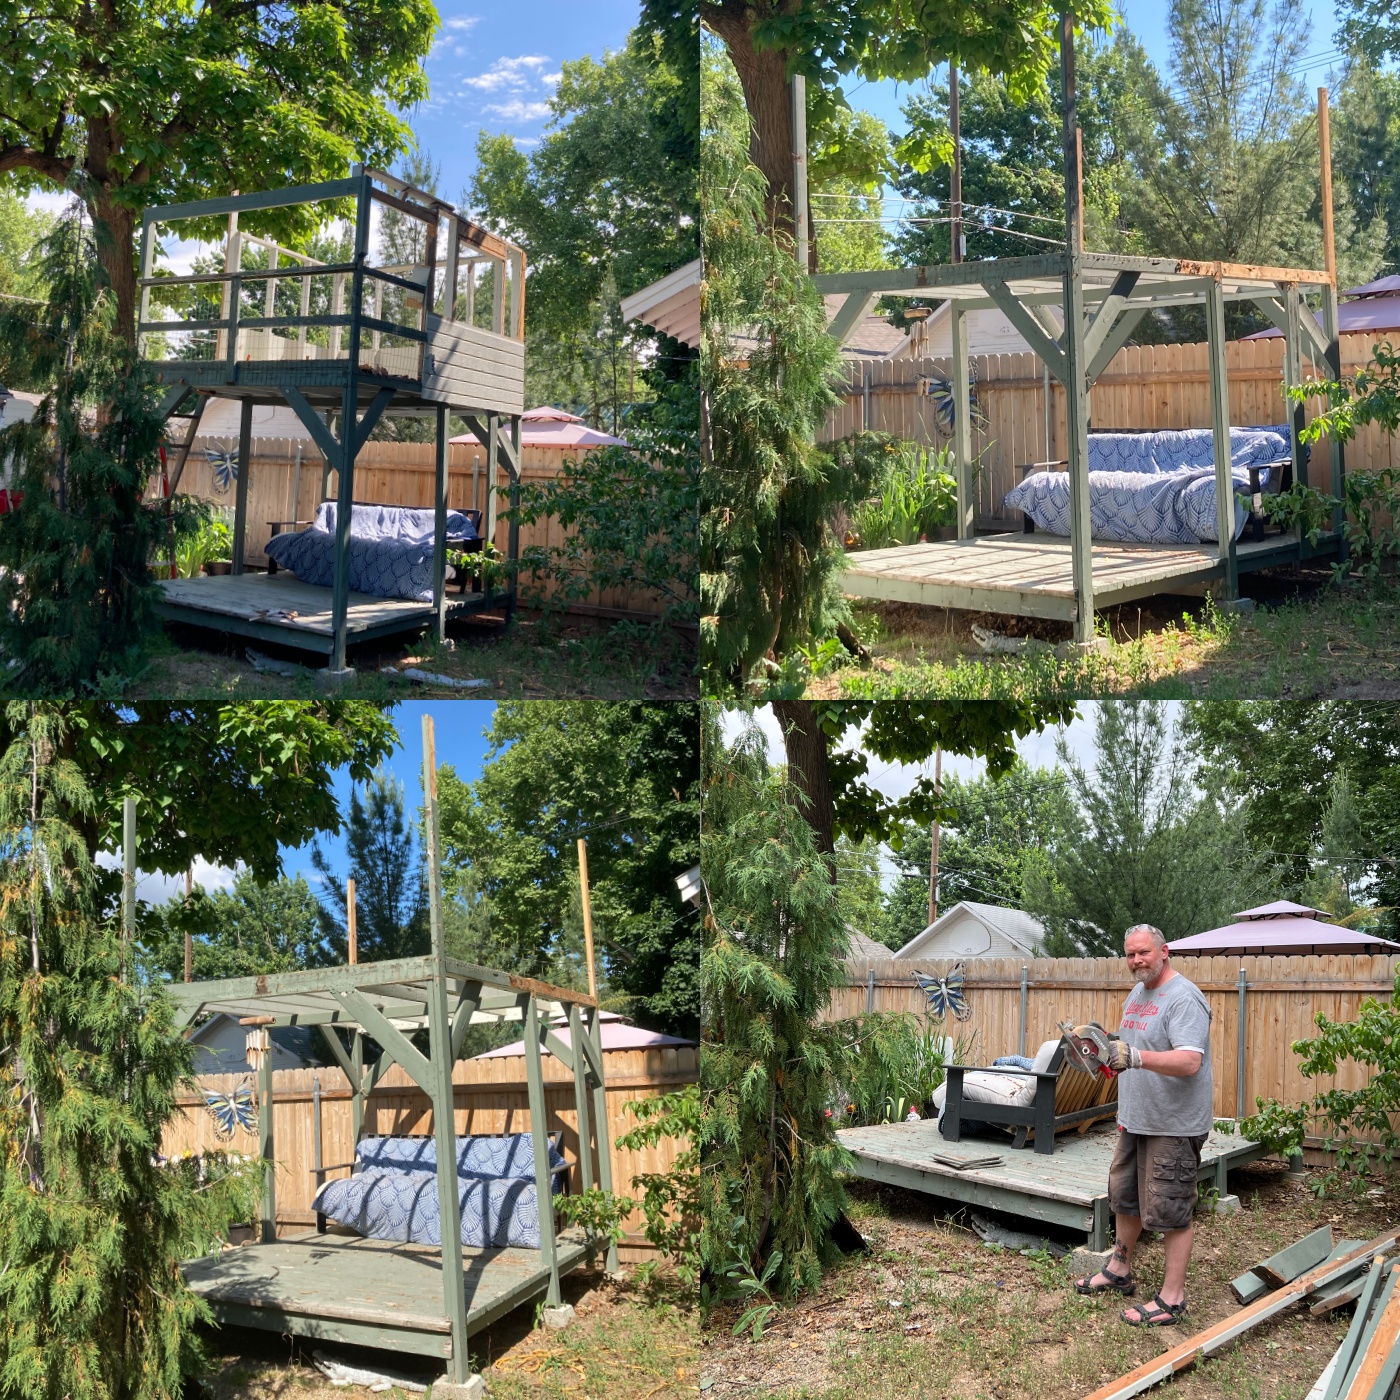
Stage 2: Continue Demo down to the base.
Jake would lay in bed at night and think about how to build the cabana, some of his ideas would change as we progressed. At first I think he was thinking of using some of the existing frame work, but then he decided to demo it all the way down to the base and then build fresh.
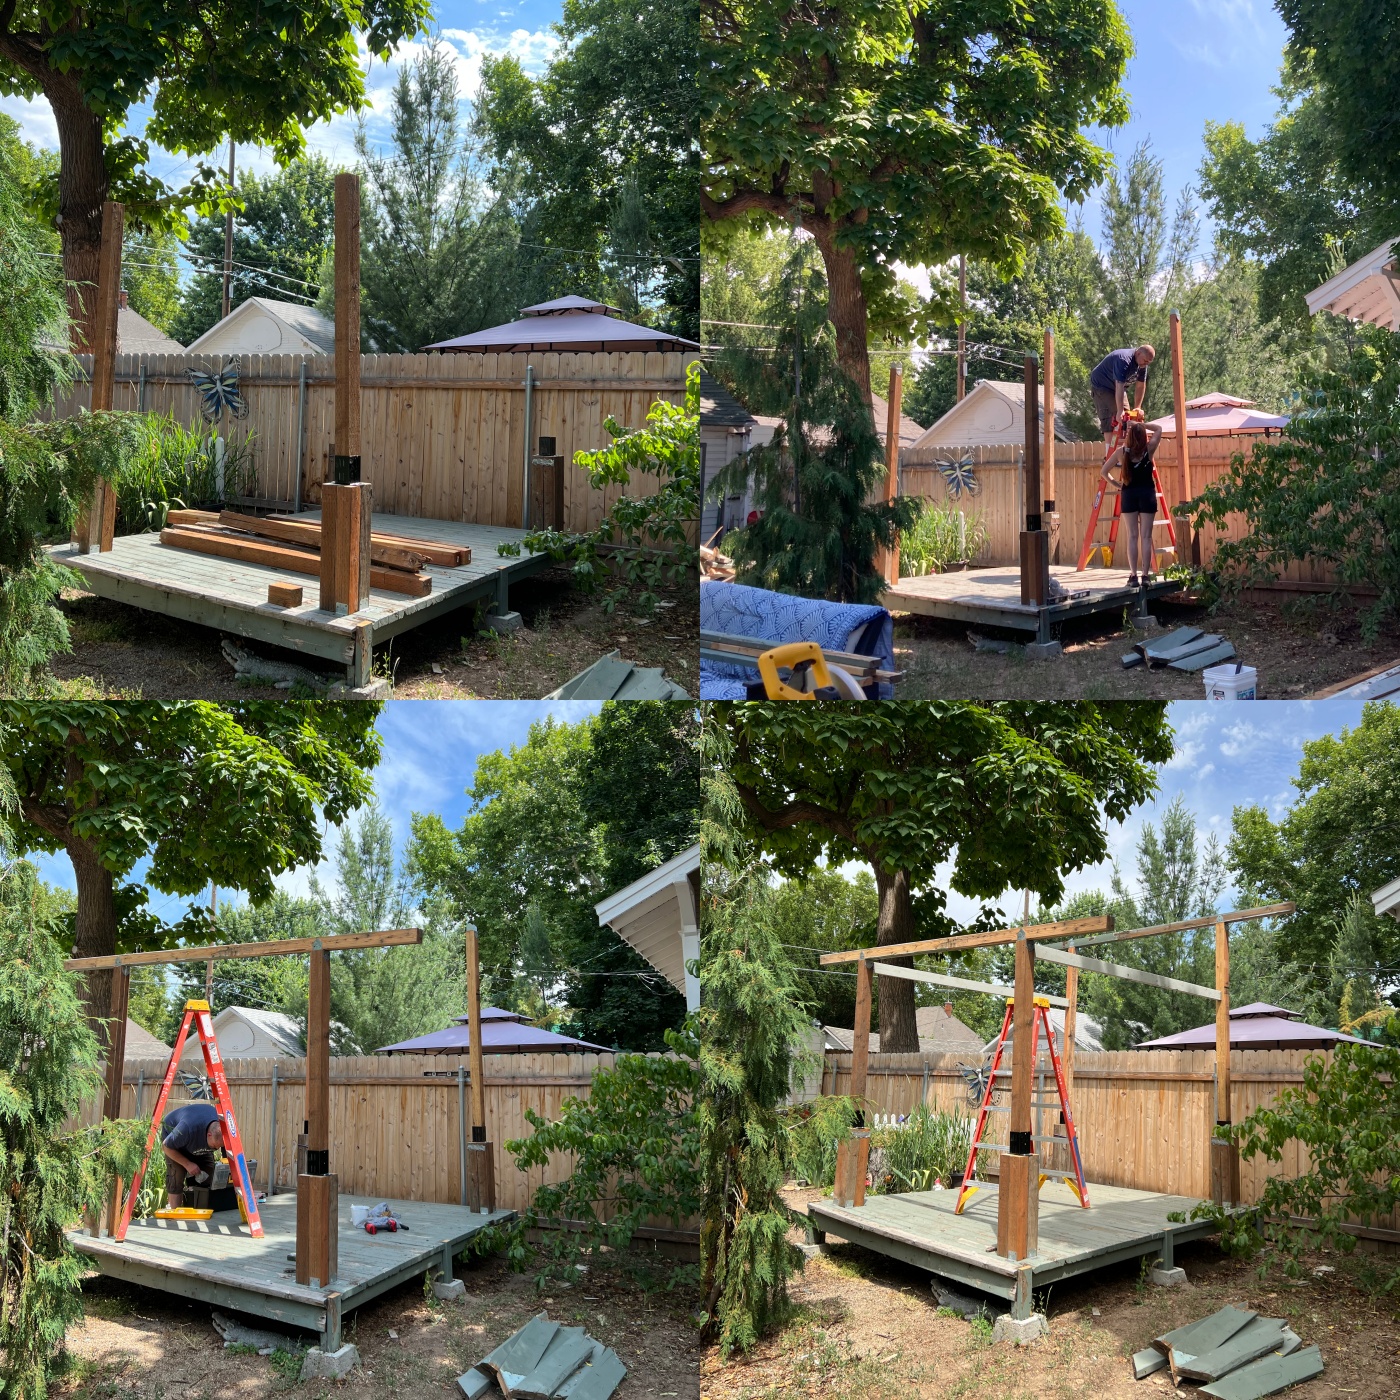
Stage 3: Build 4 Corner Bases and add beams.
I love how these corner bases turned out. Jake cut four beams to be 2 feet tall and then used brackets to hold the four beams together to build a base. These bases went into each of the four corners. From there he used a pole pocket bracket to attached the tall poles.
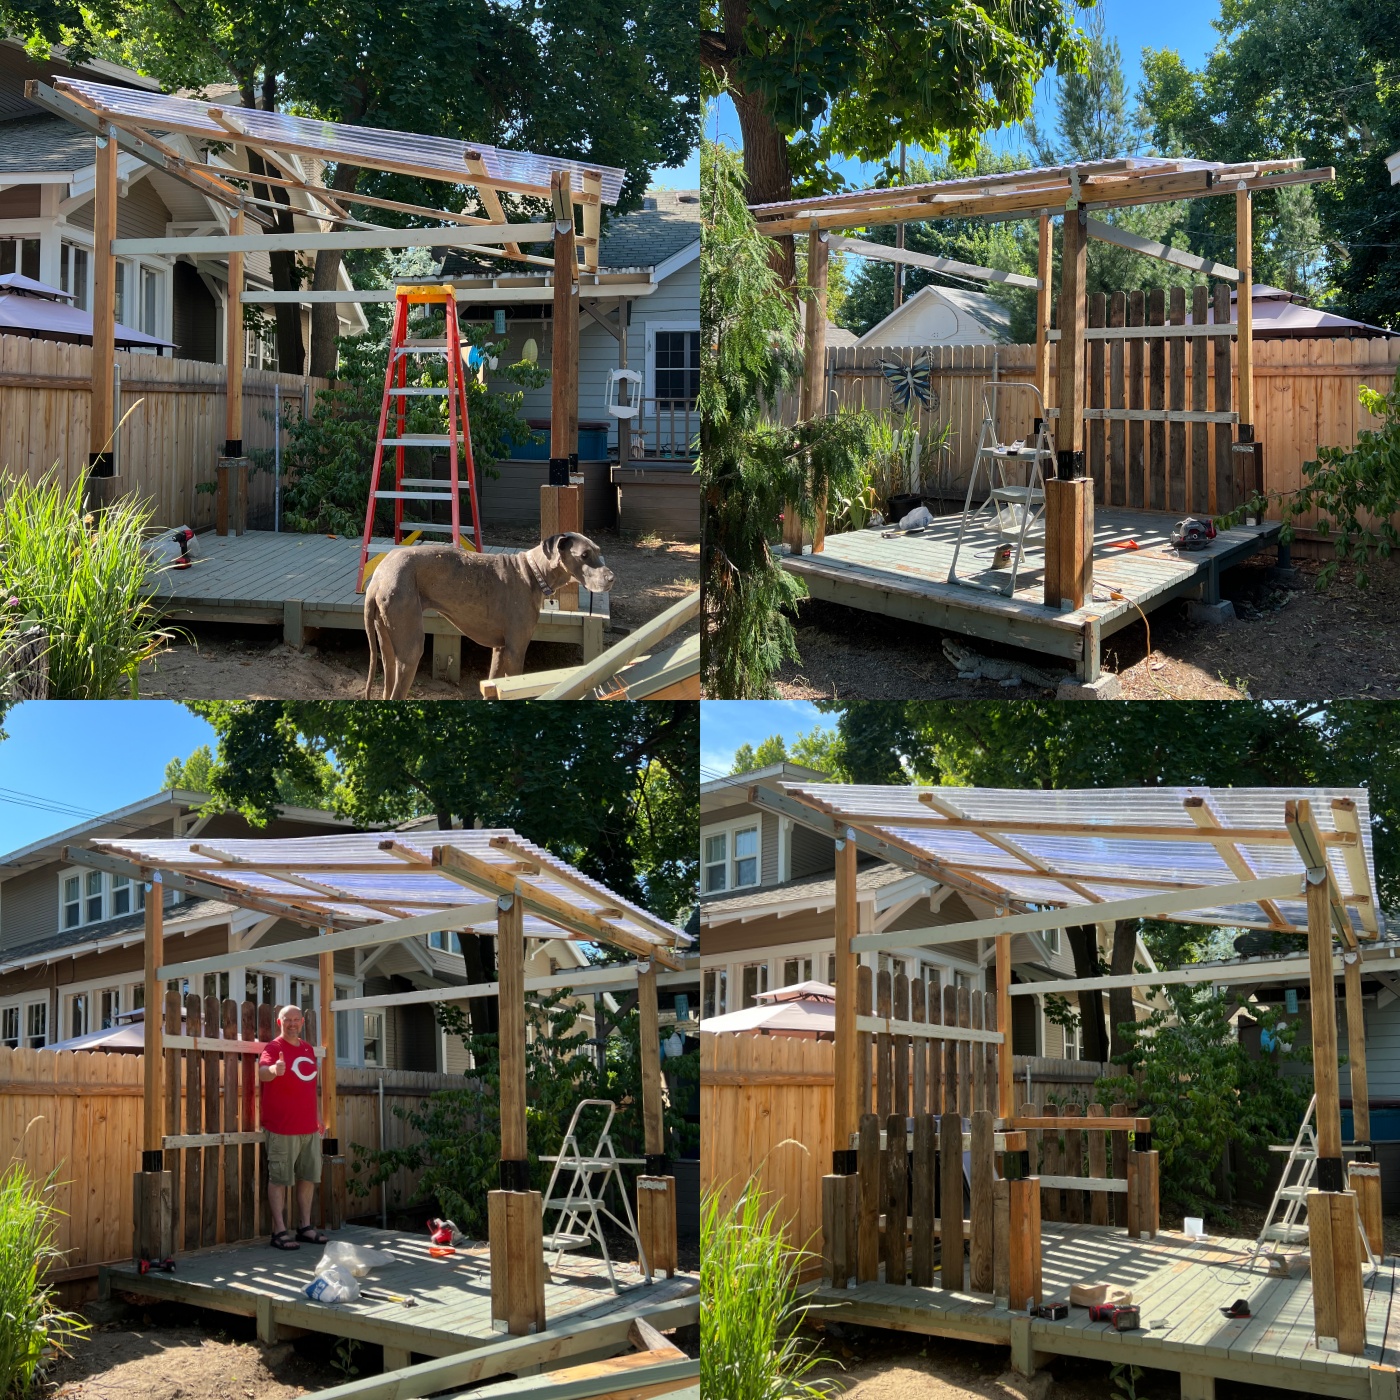
Stage 4: Add roof, fence walls, and two more bases.
For the roof we knew all along that we wanted to use clear corrugated panels. We picked these up at Home Depot along with the corrugated wood trim that you use under the panels to brace it. We had to cut some of the panels and then overlap them to get them to fit perfectly. We love the roof, it feels like you’re in a green house.
We recycled wood that we had leftover from the old fence, and the wood from the playhouse to build this cabana. We did have to buy the two tall poles in the back, but otherwise all of the other wood used was wood that we already had on hand. So that was really nice.
For the back wall we added the old fencing and spaced it out. This added a little extra privacy to our cabana. From there, we kinda went back and forth if we wanted to add sides, but in the end we decided to and it made such a huge difference. Jake had to make two more bases out of beams which I was happy about because they are one of my favorite parts. We added more of the fencing to the sides. The side walls just finished the whole look and made it feel cozy and complete.
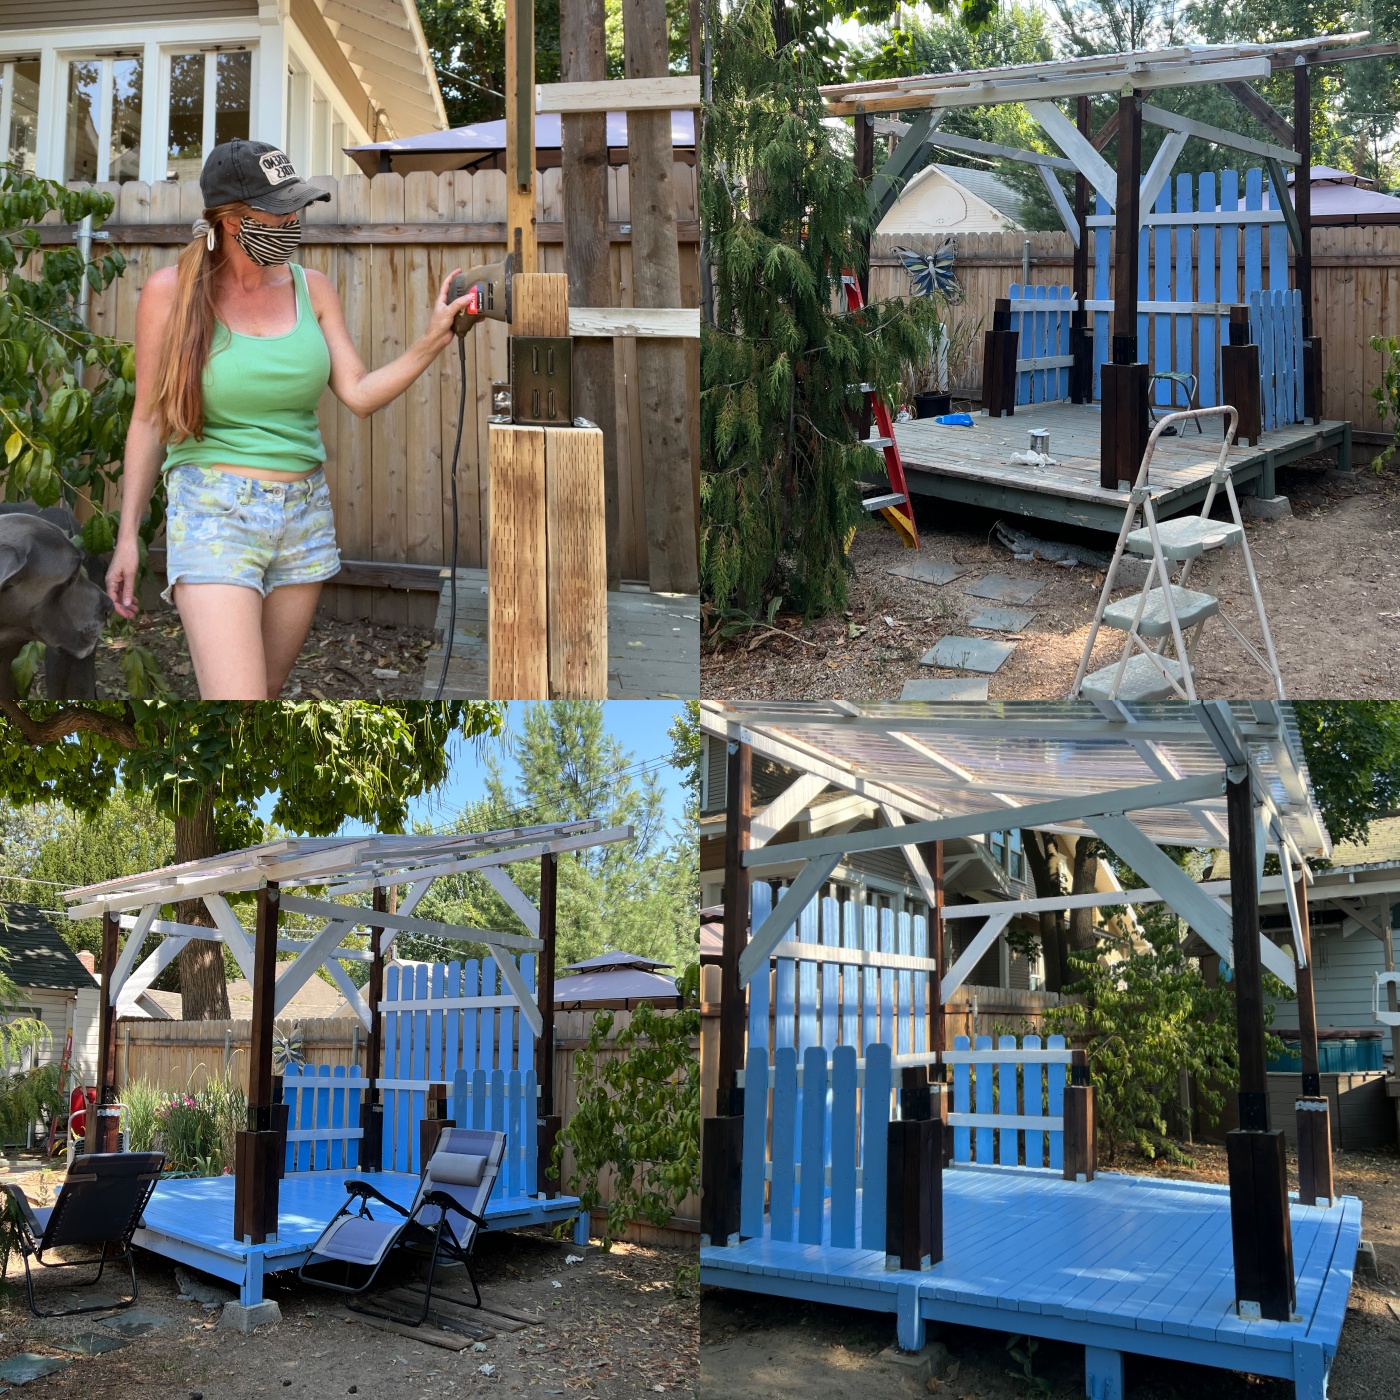
Stage 5: Sand, Stain, and Paint
I started out doing the sanding, but then I pulled a muscle in my back so Jake had to take over. Jake basically did all of the work here, I joked that I was his Tool Belt, because I just handed him things when he needed them. Ha! We Do make a great team. But I did take over when it came time to stain and paint, because that’s my thing. I love to paint! I wanted to keep the beams wood, and so out came my favorite, Dark Gel Stain of course! I have used this dark Gel Stain on soo many projects now. This Gel Stain is the Minwax brand, color Aged Oak.
We wanted the Cabana to feel Beachy, so we picked a beachy blue color to paint the fence slats and also the floor with. This Paint Color is from True Value and is called, Riverbend. We actually matched this blue to the Disney Beach Club Resort that is in Disney World that we stayed at last year. I loved that hotel, and took lots of pictures of it so it was easy to match. And then I added fresh white paint to all of the remaining wood.
Actually hold on. There was one more stage in there. We also added the cross slats / Angle wood corner pieces. Not sure what they are called. They were leftover from the playhouse as well and THEY are what really gave the cabana a finished look.
Stage 6: Add Misters, Lights, and Steps.
We bought the solar string lights a few years ago at Costco and we can now finally put them to use. Not sure if Costco still caries them, but these ones are very similar. Jake also ordered THESE misters from Amazon. We are still deciding on them. They work great, but maybe too Great. The Misters get the cabana really really wet. For now we turn the misters on, but only for a couple minutes and then turn them right back off. So we’ll see, we may want to get something like this instead. We can always use the misters we bought in the garden.
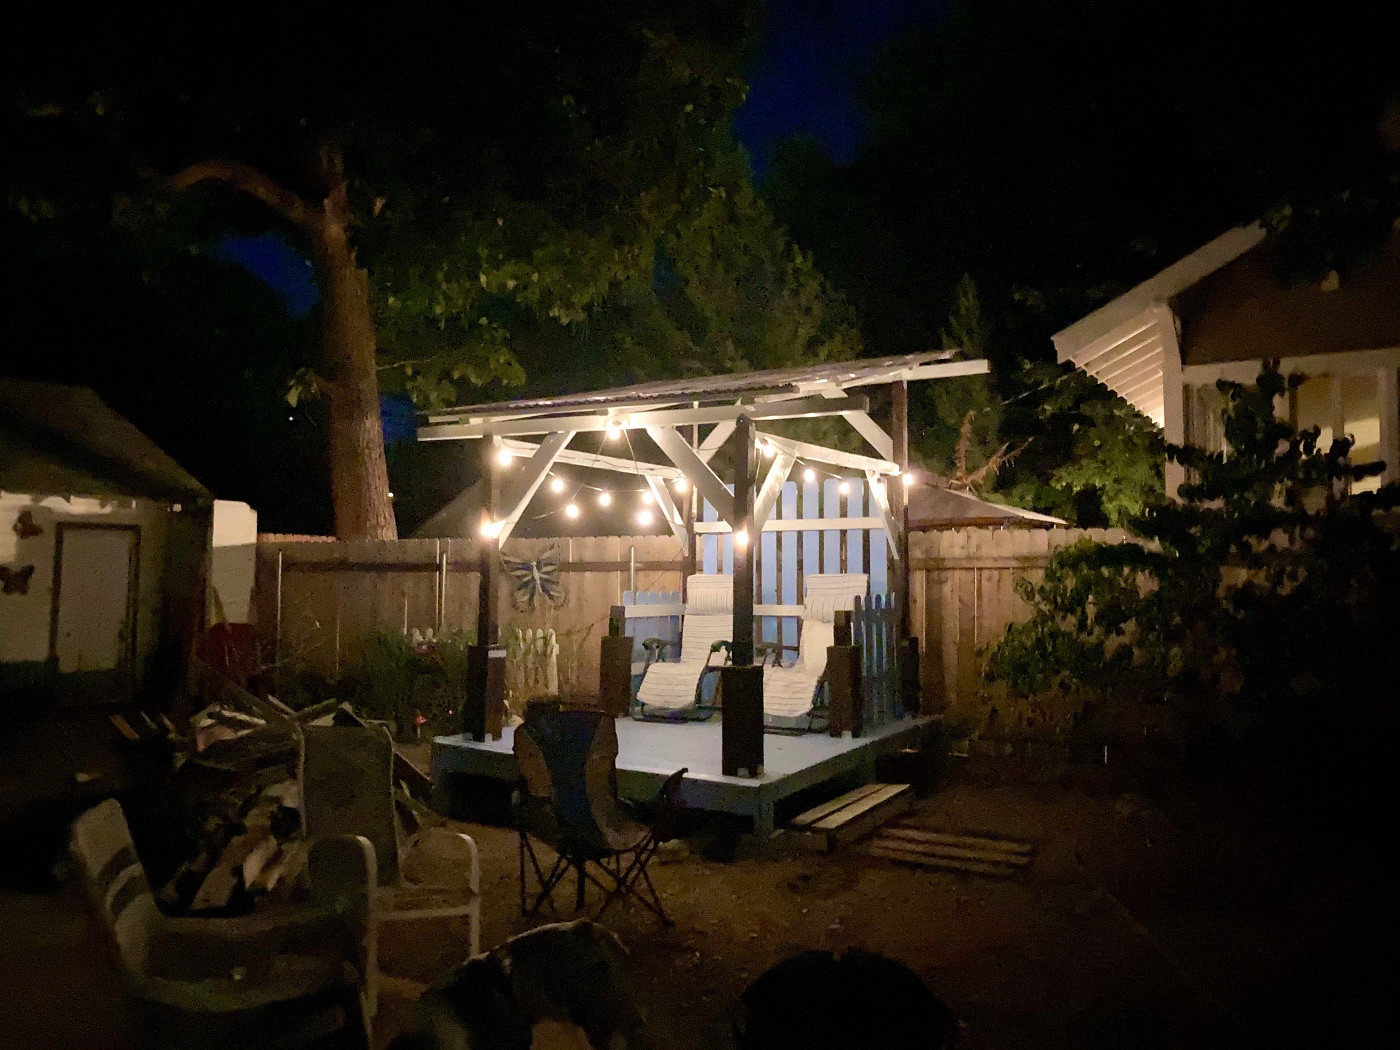
I love this next picture that my son took of the cabana at night. It’s dark, but you can see one of the steps that Jake built, he built a matching step on the other side as well. Also hard to see, but Jake removed (with is bare hands) the tree that was in front of the cabana. Removing the tree really opened up the space.
We still plan to build a wood walkway and get some nice patio seating (currently looking at this set, or this set, but we kinda want to be able to try them out first.) And then we need to get a dumpster to clean up the remaining scraps and then from there we will focus more on the landscaping; add clover and plants. So I’m sure you will be seeing a lot more of this cabana to come.
So Please tell me, What do you think? Let me know in a comment below or come chat with me on Facebook and/or Instagram.
If you like today’s post, you are welcome to PIN it along with any of the images from my blog on PINTEREST. Find a Pin It button by hovering over any of the pictures.
Thanks for stopping by today,
Emily

