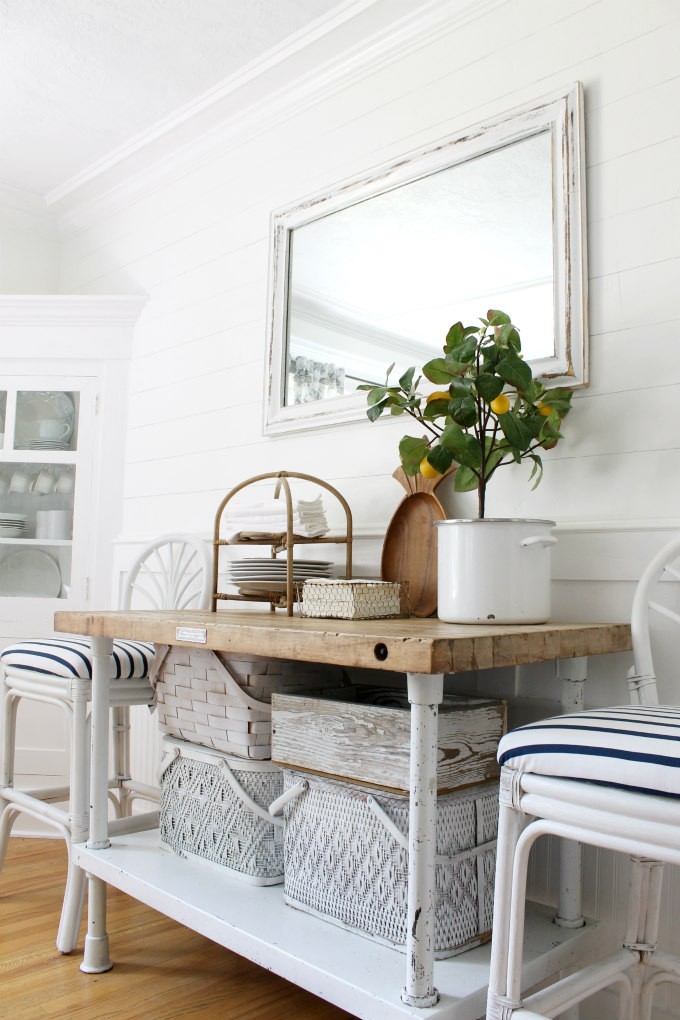
Remember when I added fake planks to my bedroom wall using a level and a pencil?
(See that post HERE)

Well I love the look so much that I decided to add fake planks to our dining room wall as well.

But I did something different this time. Instead of using a pencil to make my lines, I used a black colored pencil. Before, I had to go over the lines with a mattepolycrylic sealerto protect the lines from smearing, but because a colored pencil has wax in it, it doesn’t really smear that much and so there was no need for the sealer.
However, if the lines were to get wet they would smear. So if you are planning to do this in a kitchen or a bathroom, or if you are someone who washes your walls, then you will want to add apolycrilic sealerover the pencil lines. I can’t imagine my walls getting wet here in our dining room, so I skipped sealing it.
Also, the lines could possibly be done with a permanent marker as well and then you wouldn’t need a sealer, but I haven’t tried it yet because I feel that the lines would come out darker than I want. But if you do try this with a marker, I would love to know how it turned out in a comment below 😉

Other than the colored pencil, I pretty much did my fake planks the same way as before.
I first measured my wall to figure out how many inches to space my lines. For example: my wall is 50 inches tall so I was able to make my lines every 5 inches to get my planks all the same size.

I used a ruler to make a mark on the wall every 5 inches. Then using my colored pencil and a level, I made my lines across the wall. I made my lines heavier in some areas, lighter in others to create the illusion of spaces that you would typically get with wood planks.

The lines are actually quite subtle but they adds so much more character to the wall than before. I’m even debating on doing this to the rest of the walls in our living areas because I love the look of it so much. Also, in case you are interested, the color on our walls is called, Subway Tile by Valspar. Oh and I should also mention, once my lines were finished, I cleaned up the walls a bit with paint to give it a fresh, clean look. The level made a lot of scuffs that I just painted over.

And then before I rehung the mirror, I gave it a quick run with my mouse sander to give it a distressed look. The mirror now stands out on the wall a little more than it did before.

I’ve also simplified the dishes in my corner hutches a bit.

I had colorful bottles and seashells in the hutches before, and now they just hold some pretty white dishes and a few metal tins.

My collection of small mix-matched plates keeps growing, so it’s fun to see them all stacked up on the shelf.

I love to decorate with collections, I also find myself collecting picnic baskets. I have a few of them that I’ve painted white on my antique butcher block table.

Our dining room use to be one of my least favorite rooms in our house, but after painting the chandelier, the table, and now the fake planks, I’m starting to like it a whole lot more.

Thanks for stopping by today,
*Emily
like it? Pin it!


Wow this is so creative and looks great!! I'm going to try this in my bedroom. This is why I love your blog and have followed it for a long time!! You keep it real and within reach.
Melanie
This is brilliant! Thanks for sharing!
Going to draw shiplap on 1bedroom wall as an accent today.Thank You so much for making it possible for a person on a fixed income,to add charm to my home.