
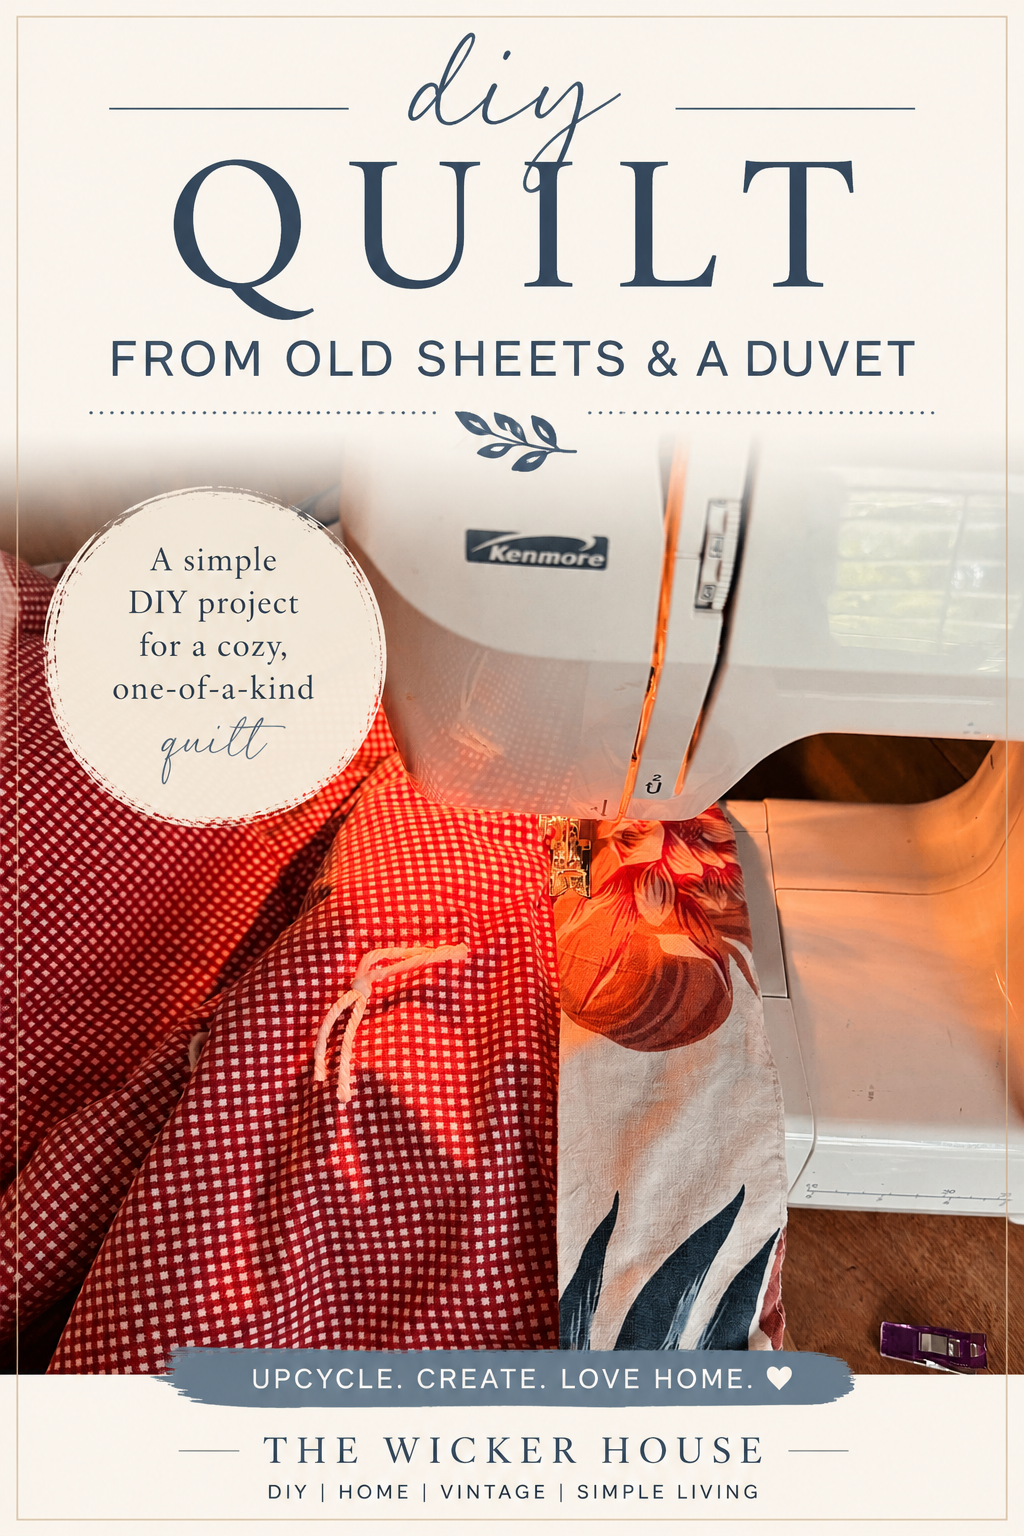
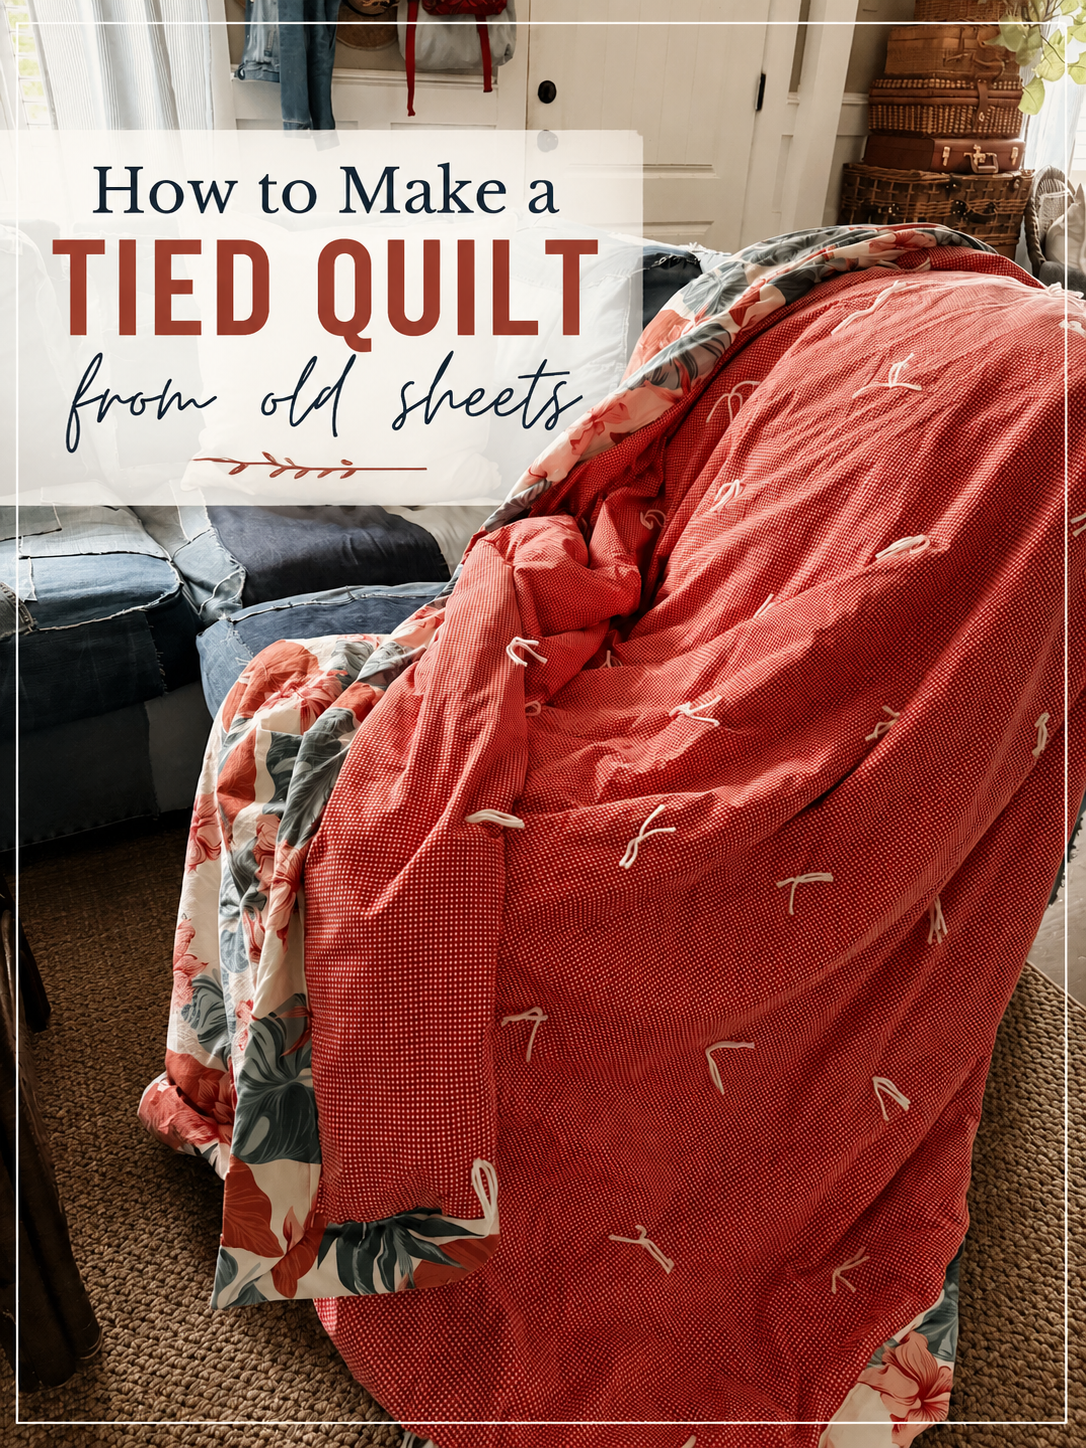
I love finding new uses for things I already have around the house, and this tied quilt turned out so cute. We don’t use a top sheet on our bed, so over the years I’ve collected several flat sheets that were no longer being used. So I decided to pair two of my favorite sheets with an old lightweight comforter to create a cozy double-sided quilt. The entire project was made from items I already owned, making it a budget-friendly way to give old bedding a second life.

What is Needed for this Project:
- Two Flat Bed Sheets (I used queen – but any size will work)
- One lightweight duvet insert, comforter, or quilt batting
- Yarn in a cordinating color
- Large Needle
- Fabric Scissors
- Sewing Machine
- Sewing Clips or Sewing Pins
- Quilting Clips or bag clips (optional)
- Thread in matching color
- Ruler
*Disclaimer: This blog post contains Affiliated links which means that I earn a small commission for purchases made through these links.
This projects is meant to be a way to Use what you already have– so take a look at your linen closet and see what you have to work with. If you only have one decorative sheet, you could just use a plain colored sheet on the opposite side.
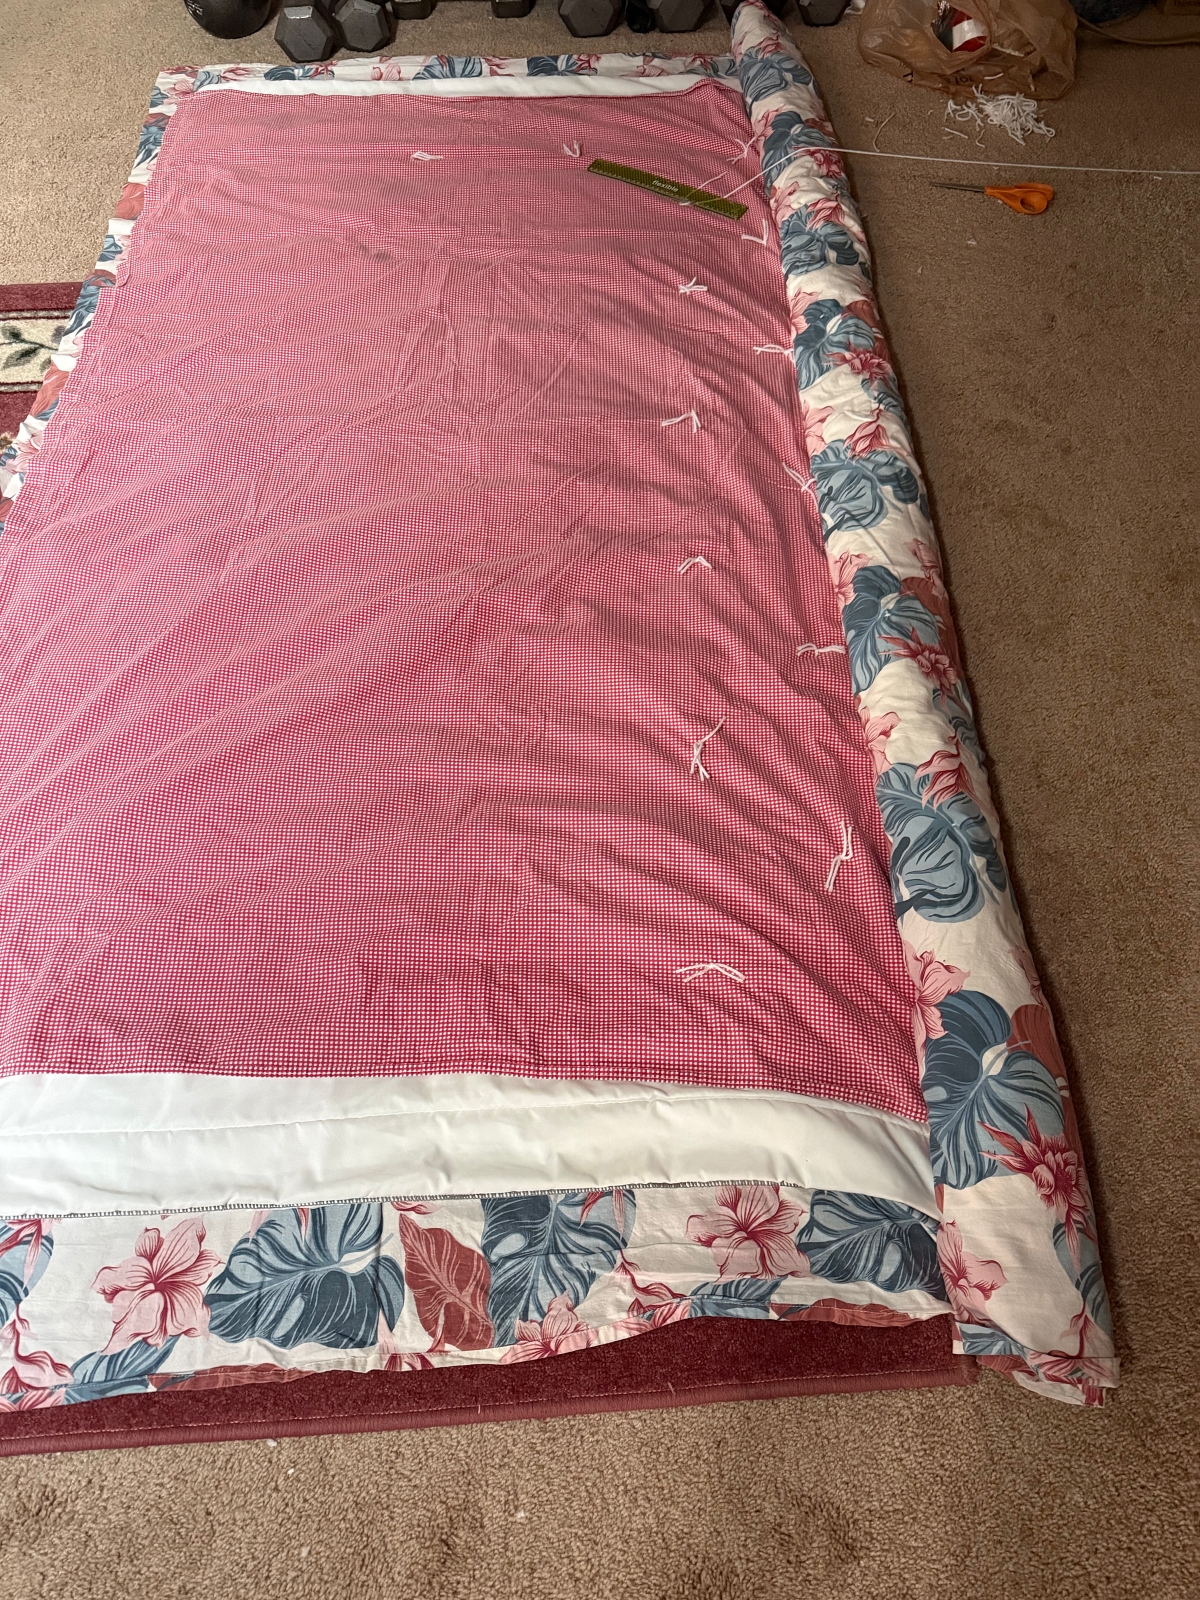
Laying out the Quilt
You will need a lot of room to lay this quilt out as you work on it. So you will first need to dedicate an area to work in. The quilt can be rolled up and moved aside once you get started on it (in case you need to put it away for a bit) but in general you will need a lot of room to work. I have an open area in my bedroom that worked great. Also, I worked on mine on top of a floor Rug and for whatever reason, I found that the rug made it easier to work on.
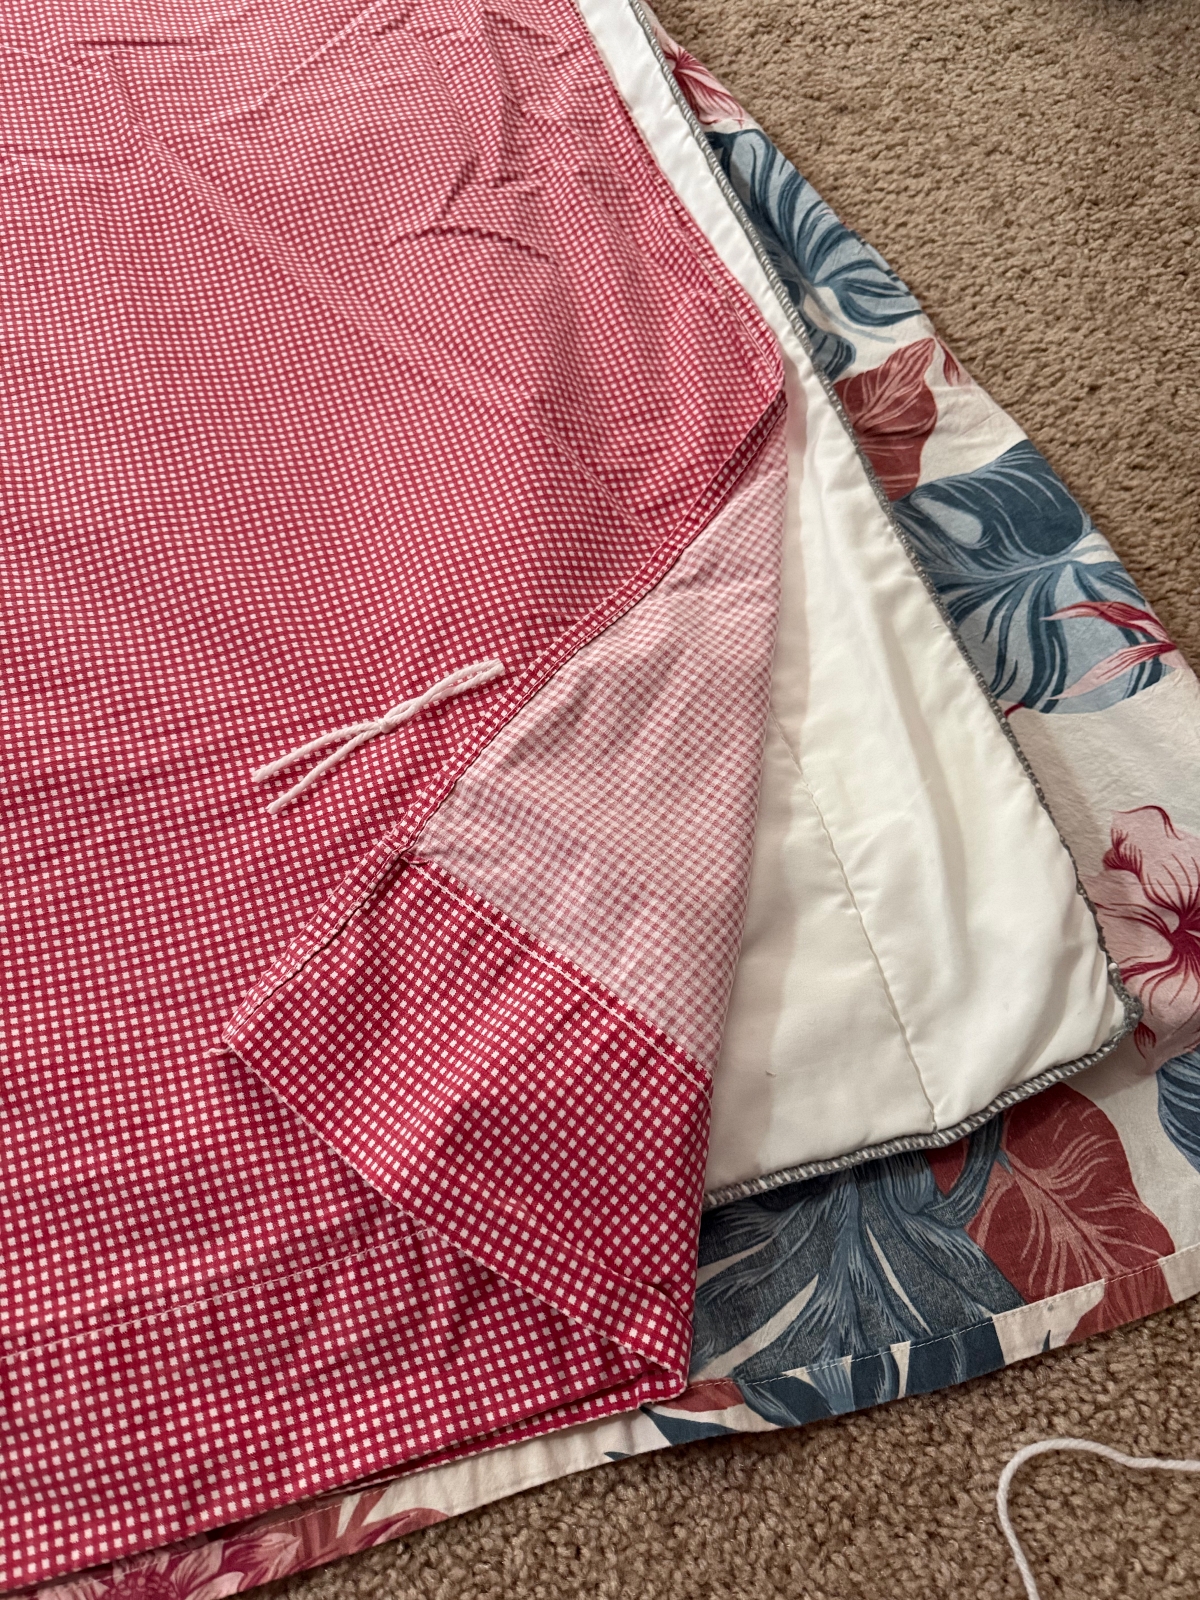
Lay down the first sheet with the pattern facing down. Then add the duvet insert, light weight comforter, or quilt batting on top of the sheet, and then layer on the top sheet with the pattern facing up. Try to match up all three layers the best that you can. Even though my sheets where both Queens they were not the same size, but that is okay. Pull them as tight as you can to eliminate any wrinkles.
Note: The Top Sheet will be the side that you add the yarn ties too, so make sure you have the sheets laid down in the order that you want to see the ties on.
Why I choose Ties instead of traditional quilting
I’m a beginner quilter/sewer and so I needed to make this project as simple as possible. I have made tie quilts before in my youth and so I already knew that the ties are easy to do. My mother-in-law suggested that I just run a sewing machine around some of the designs in my quilt, but that felt a little too advanced for me. Also, like I said I grew up making these tie quilts and so there is a bit of nostalgia in the yarn ties for me. I just love the look of them.
Making and Tying the Knots
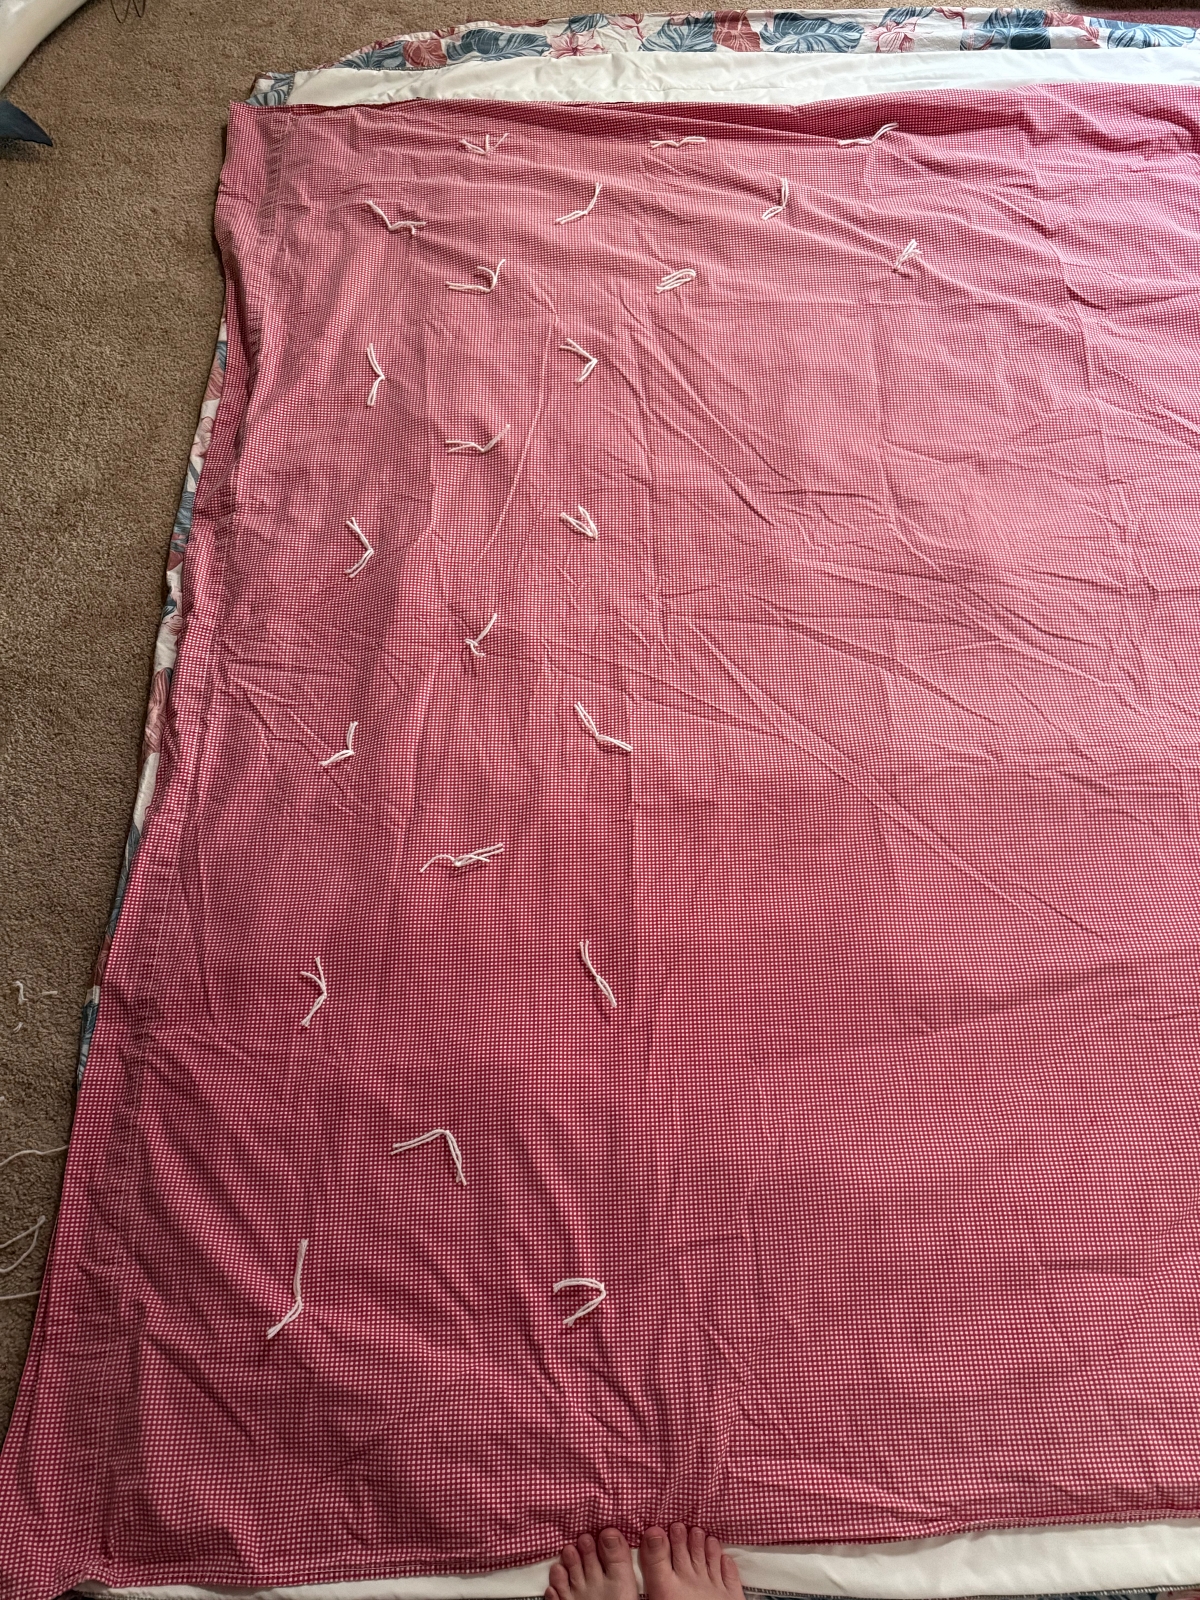
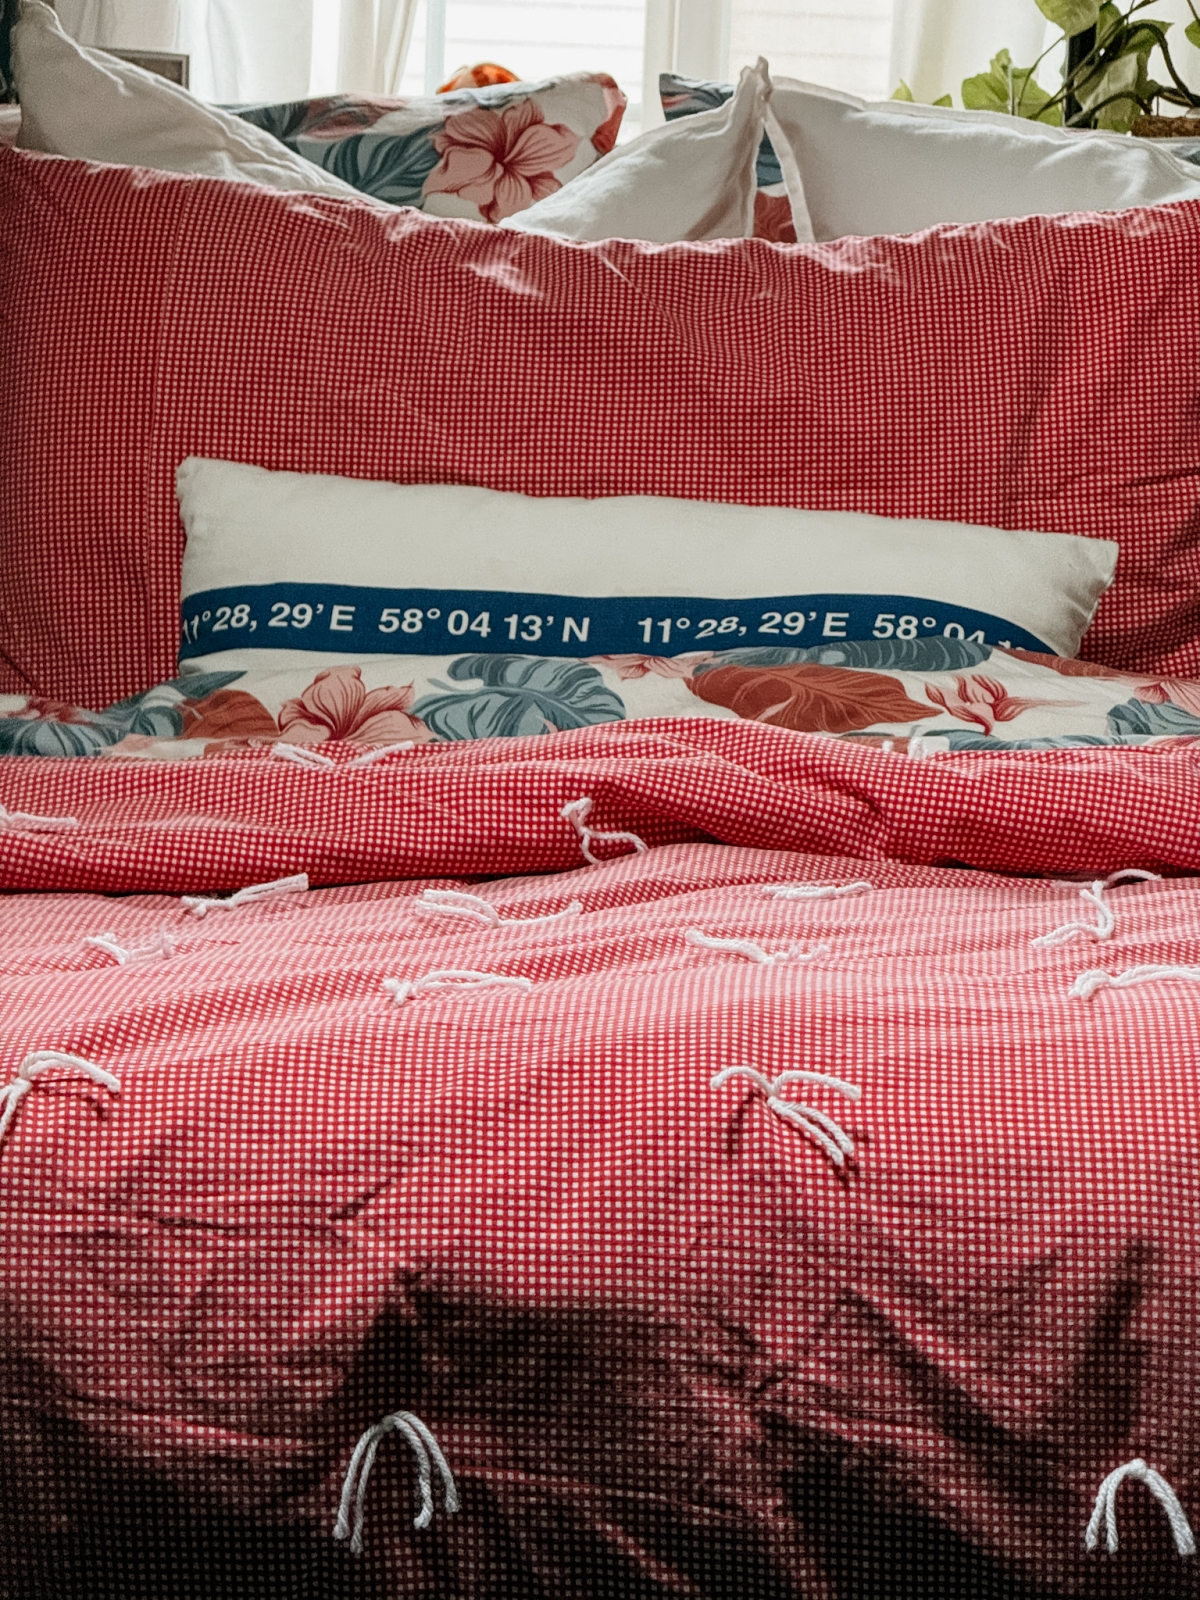
Before you begin tying your knots, you need to establish a pattern in the fabric if you can. Stripes, plaid, and repeating patterns work great, but you can figure out a plan either way. Here, I just used a ruler, along with the small print of the pattern to know where to make my ties. My ties are 1 foot apart and in a checkered pattern.
Also, make note that the ties are only on one side of the quilt. They will not be too noticeable on the opposite side.
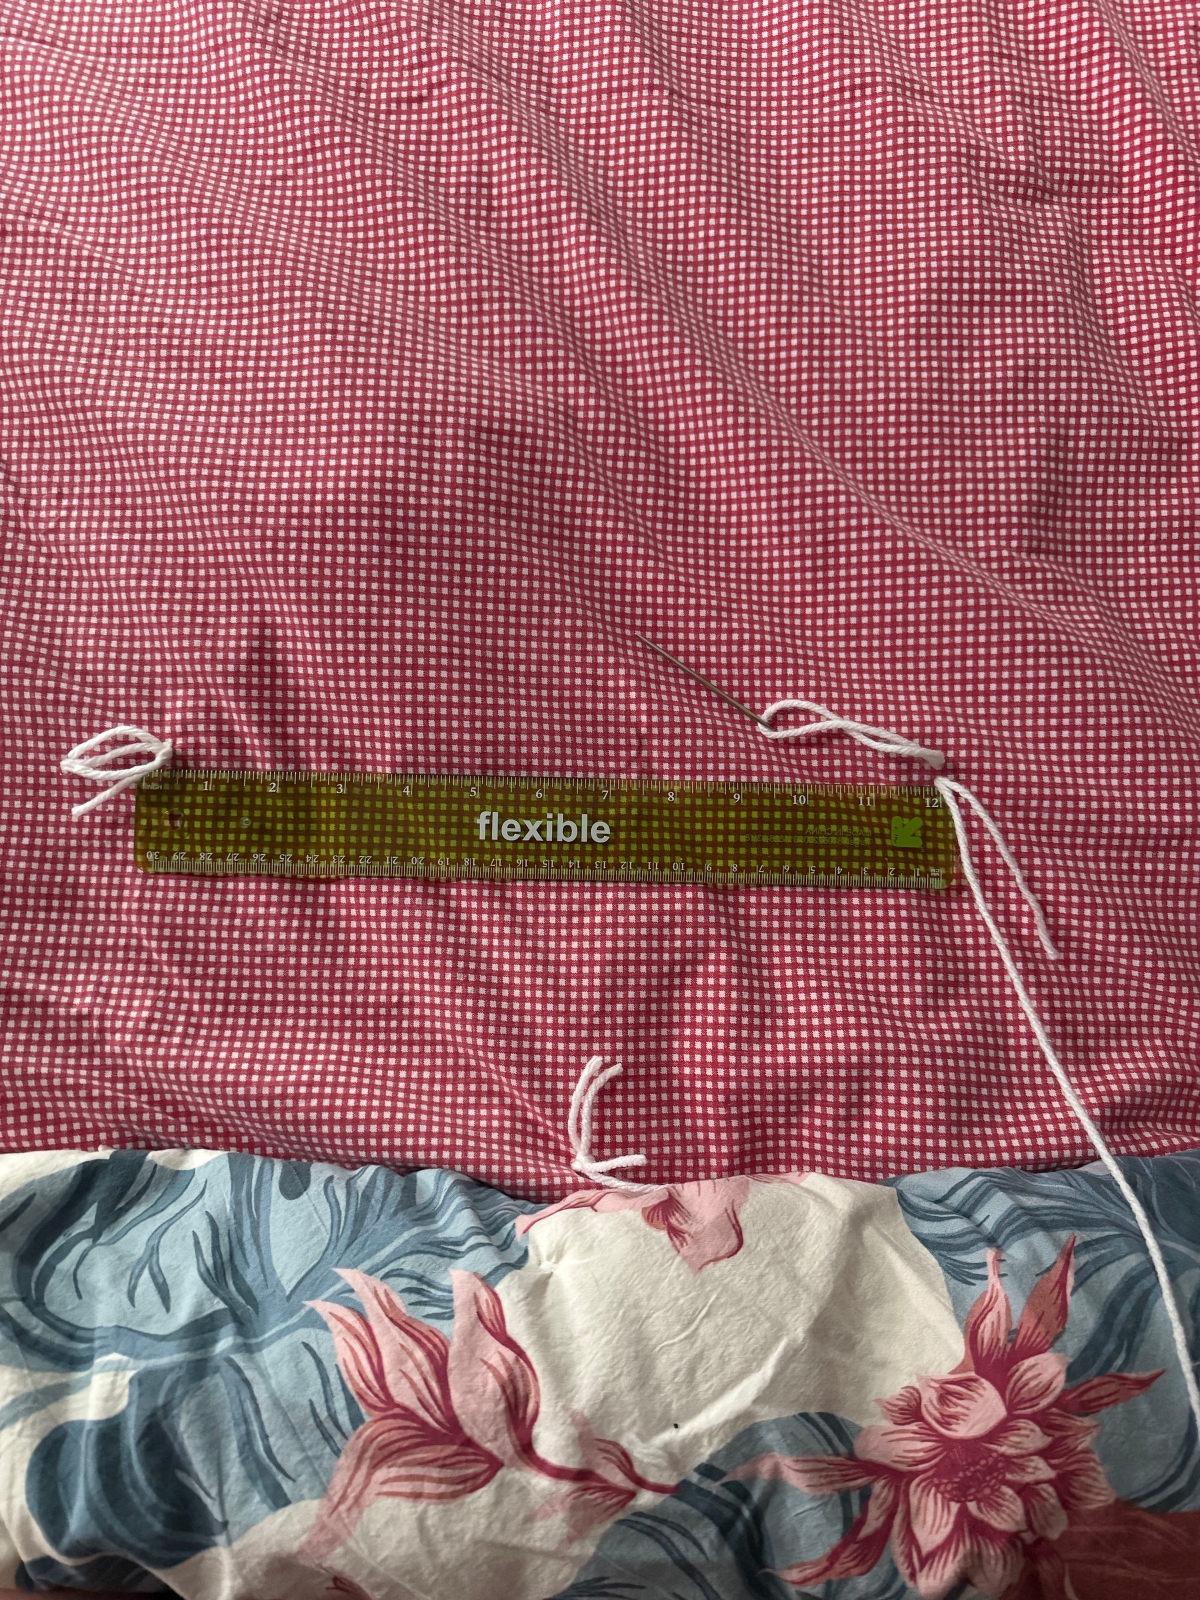
To make the ties, thread the yarn on to the eye of the needle, leaving about a six inch tail. Poke the needle down through all three layers, and then back up. Keep the tie spaced closely together. As seen in next picture
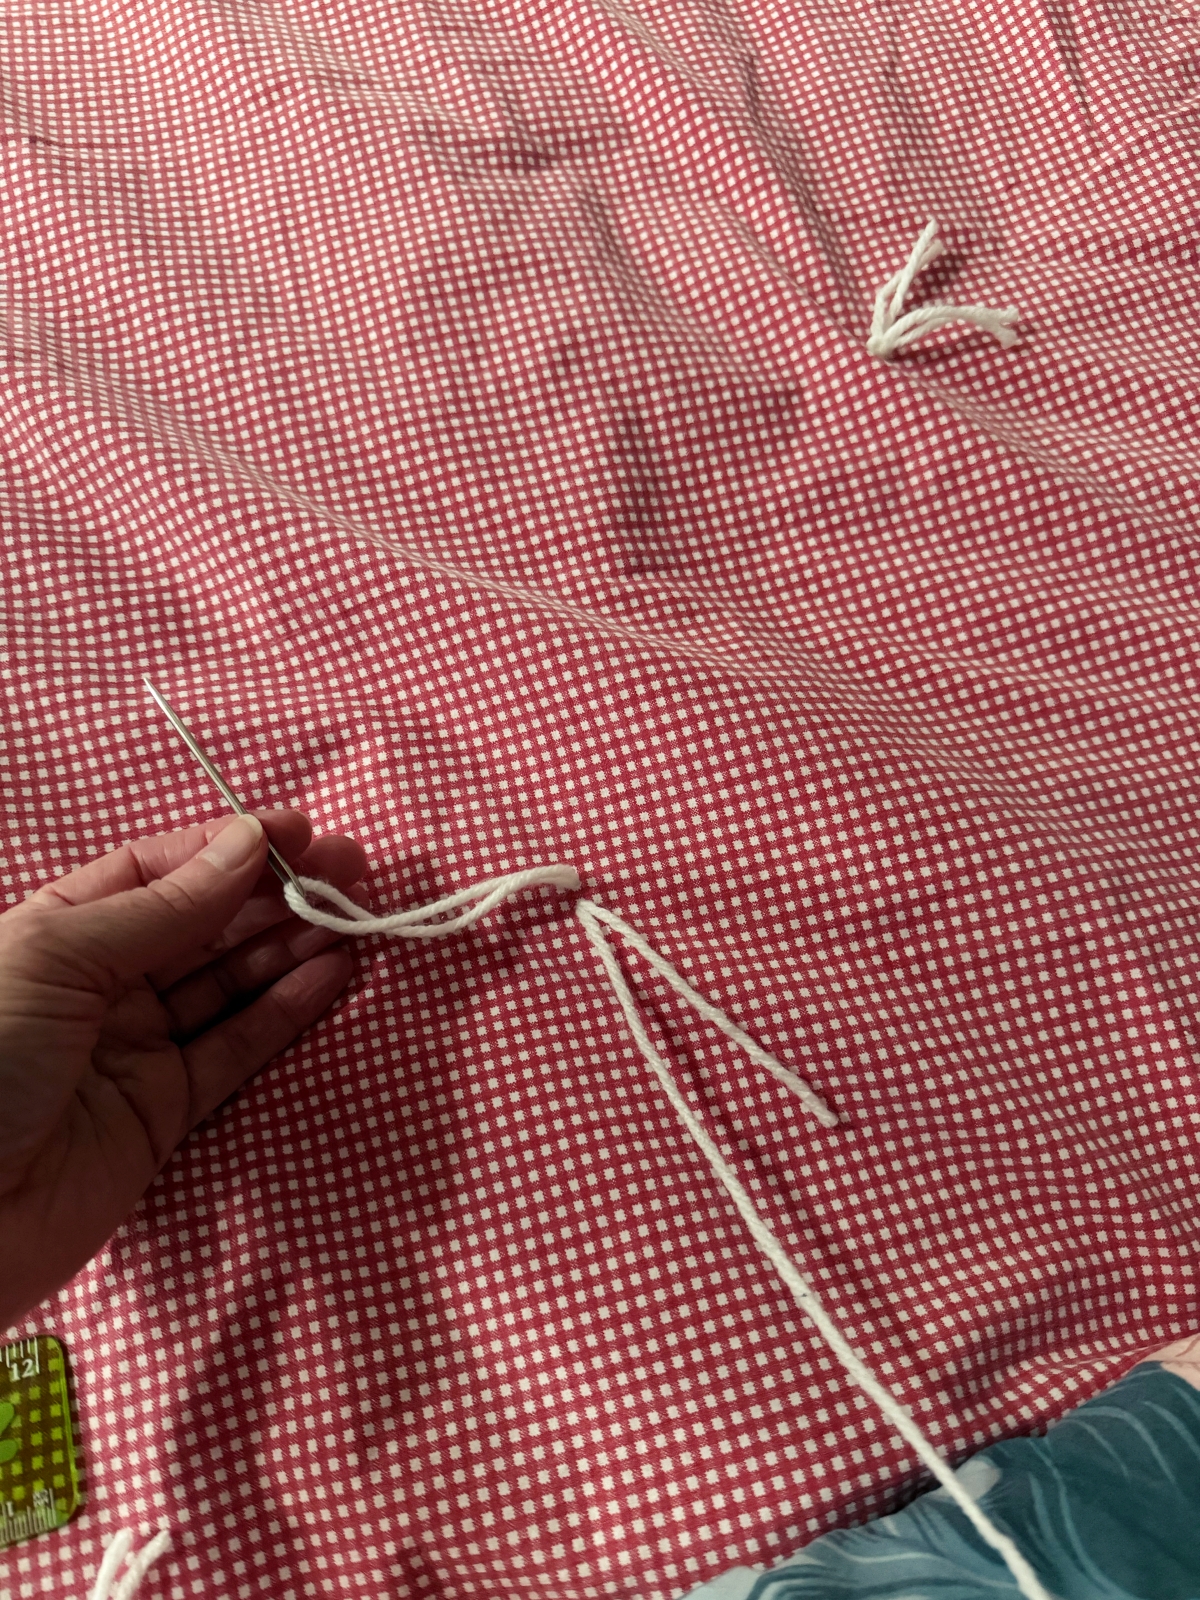
Then tie it in a simple double knot, (I like to switch the knots from over than under) and then pull the knot tight. Cut off the remaining yarn. Get a nice Rhythm going so that All your Ties are the same length. Also, be sure to check the underside as you go to make sure the yarn has been pulled tight.
Rolling the Edges as you go
Once you get going, it goes pretty quickly. At some point You’ll find yourself having a hard time reaching to the center. So in this case, you can simply start rolling the quilt as you go. Just be sure that you are keeping everything tight and smooth.
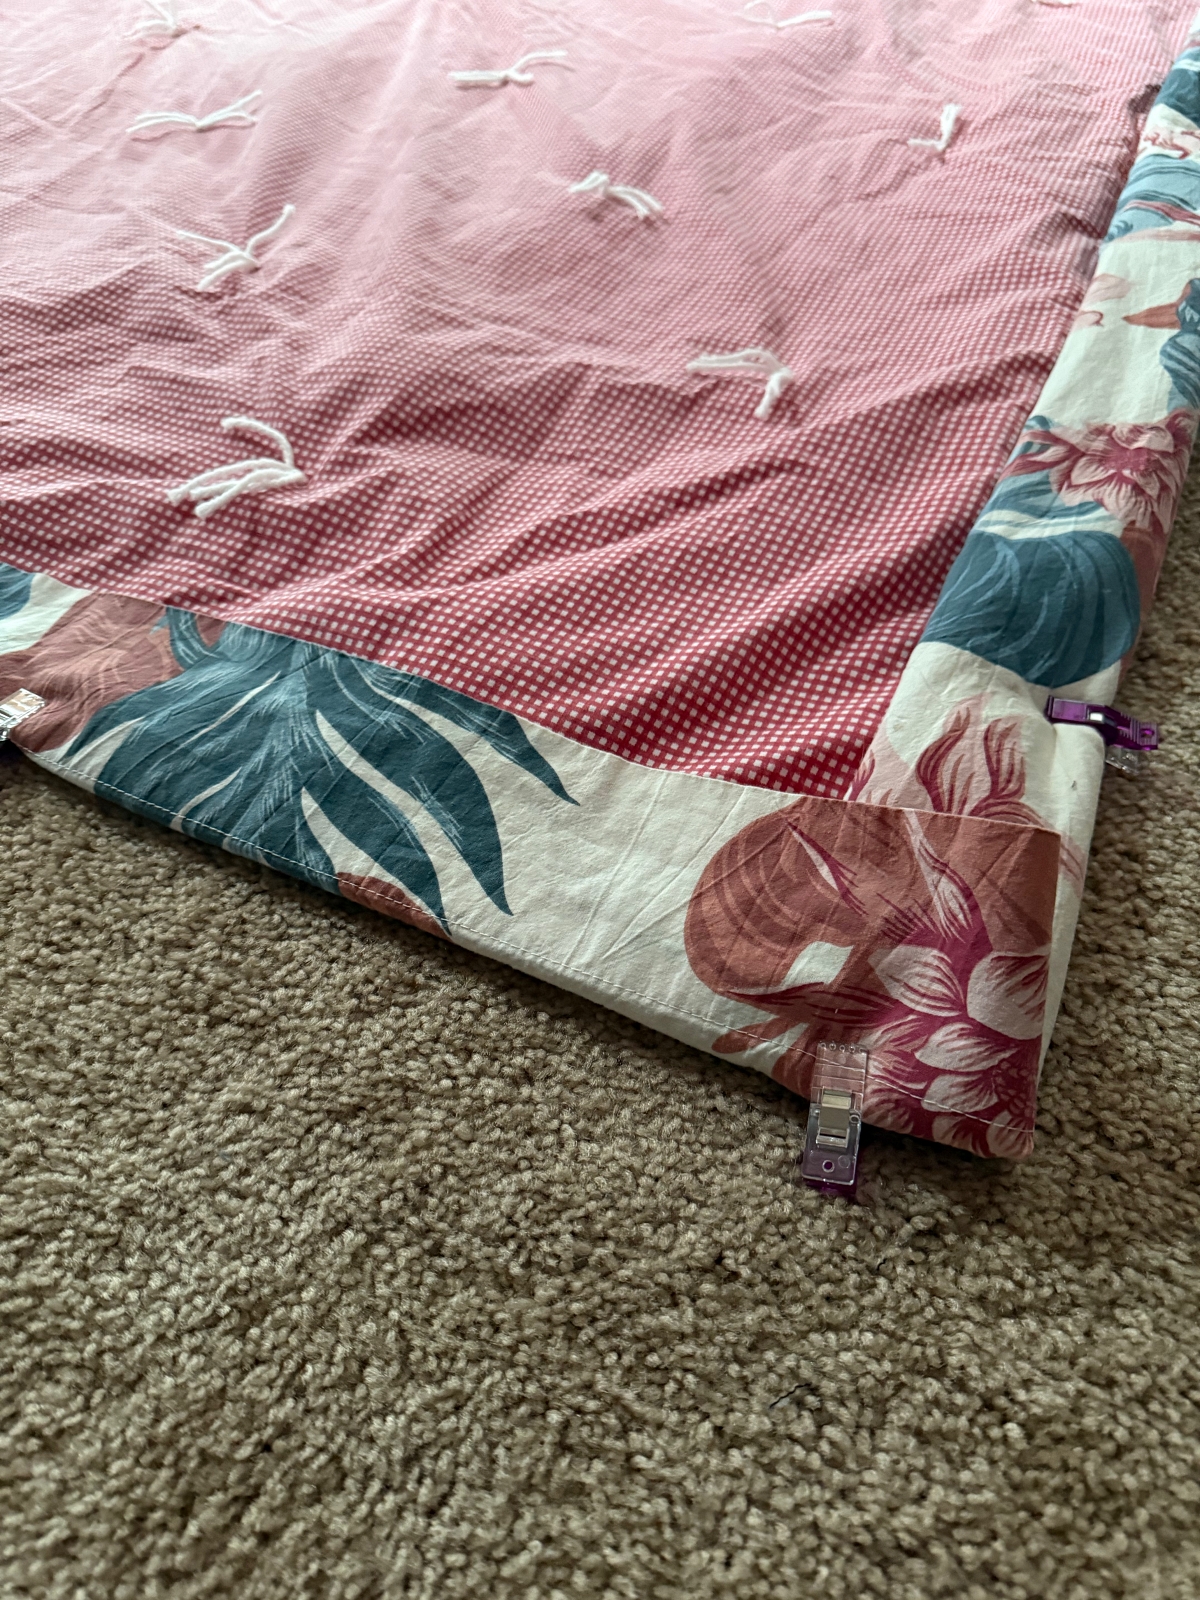
Using Clips to Hold it in Place
You could use Quilting Clips or bag clips around the quilt as you work on it if you want to. I didn’t think to, but it might have been nice. I did pull on my quilt often, just to make sure it was smoothed out good. Once I had all of my yarn ties completed I folded over the bottom sheet to make my hem and then I used Sewing Clips to hold the hem into place so I could sew it. The sewing clips were nice. I borrowed them from my Mother-in-law, but otherwise I would probably have just used sewing pins.
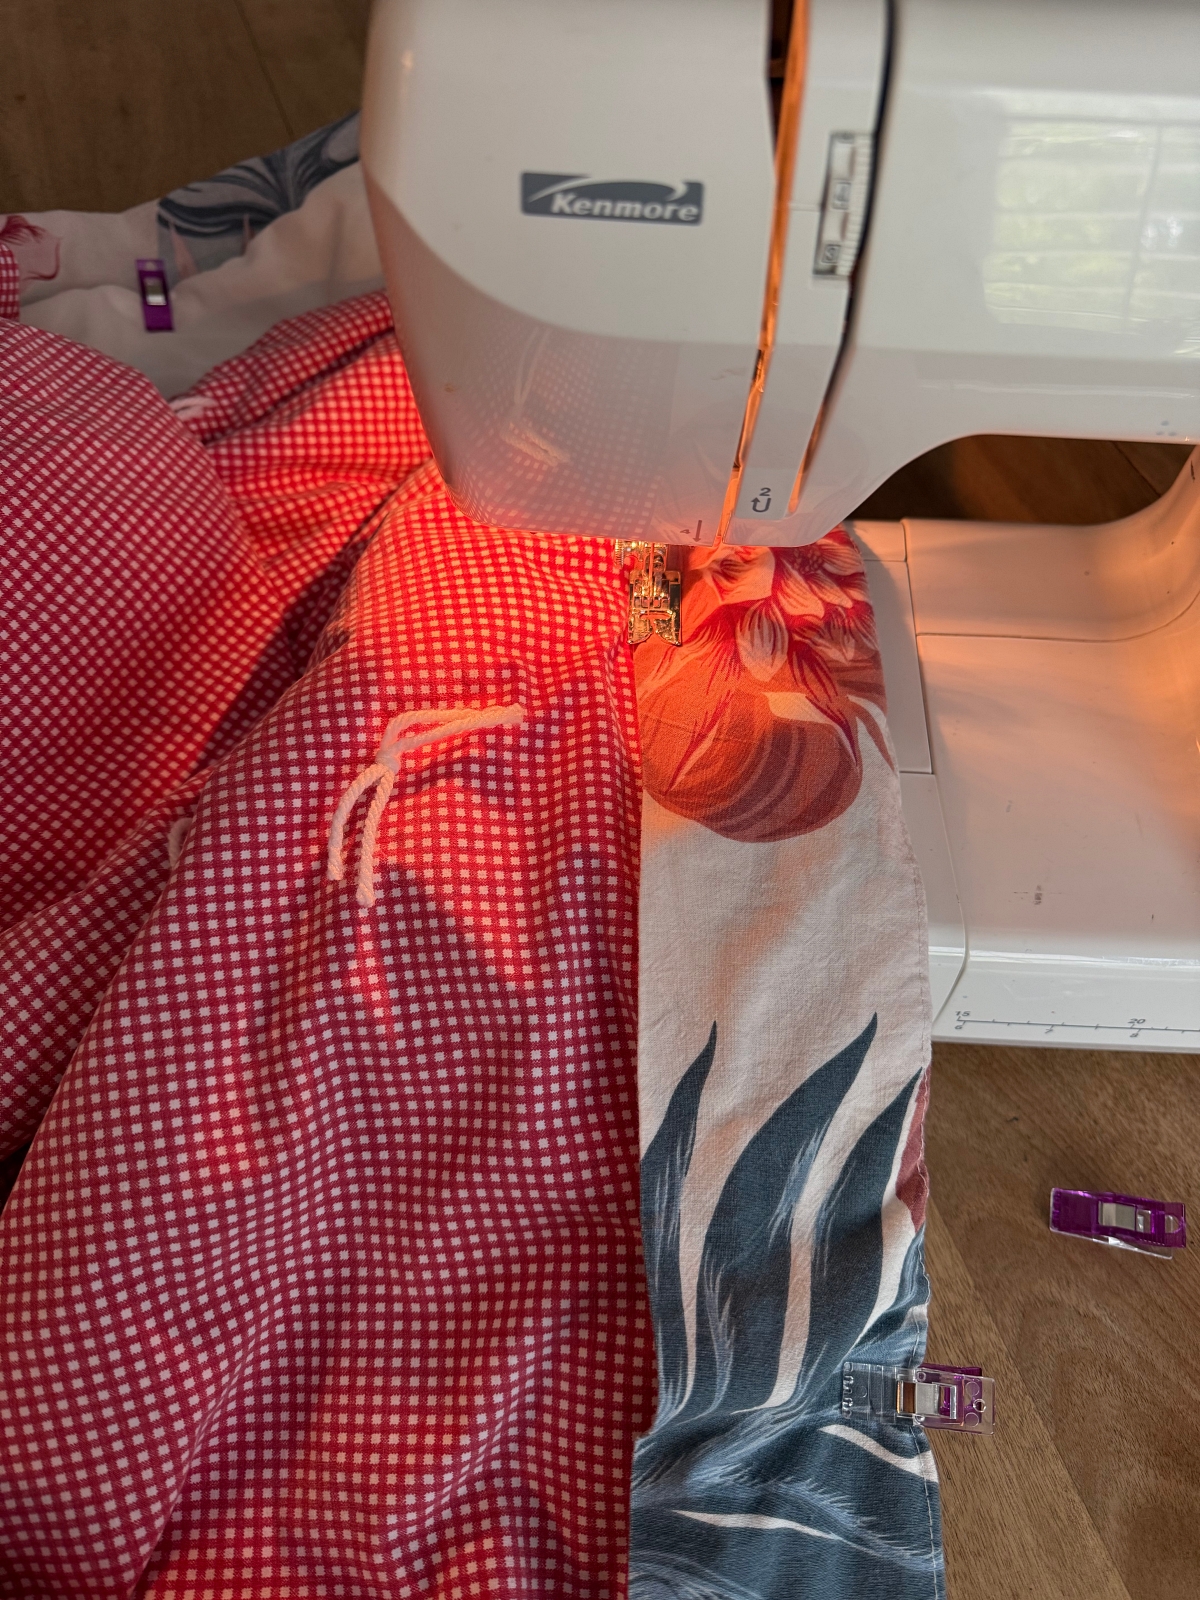
Sewing the Hem
I’m not going to lie, Sewing the Hem was the trickiest part. All depending on how much over hang your layers have you may or may not run into this same issue. My sheets had a lot of uneven over hang. I probably should have cut all of the layers the same and then worked on rolling my hem in, but instead, I worked with all of the extra uneven fabrics which made it tricky. If you look at the picture above, you can see that on the top of the quilt I just folded over the top hem, for the sides, I folded over twice the hem. The most important part is that the hem is the same length all the way around.
My Suggestion: All depending on what you have to work with, but you might think about cutting all layers the same lengths at this point. Then fold in an inch, and then fold in at about two inches. Ideally, having the bottom sheet a few inches larger all the way around and the top two layers the same size would work best, then you can just fold over that bottom layer twice so it has a finished edge.
I’m sorry, that is a little hard to explain. but I’m sure you will figure it out. We’re just going for a nice even hem around the quilt here. Folding the hem twice will give you a clean edge to to sew down.
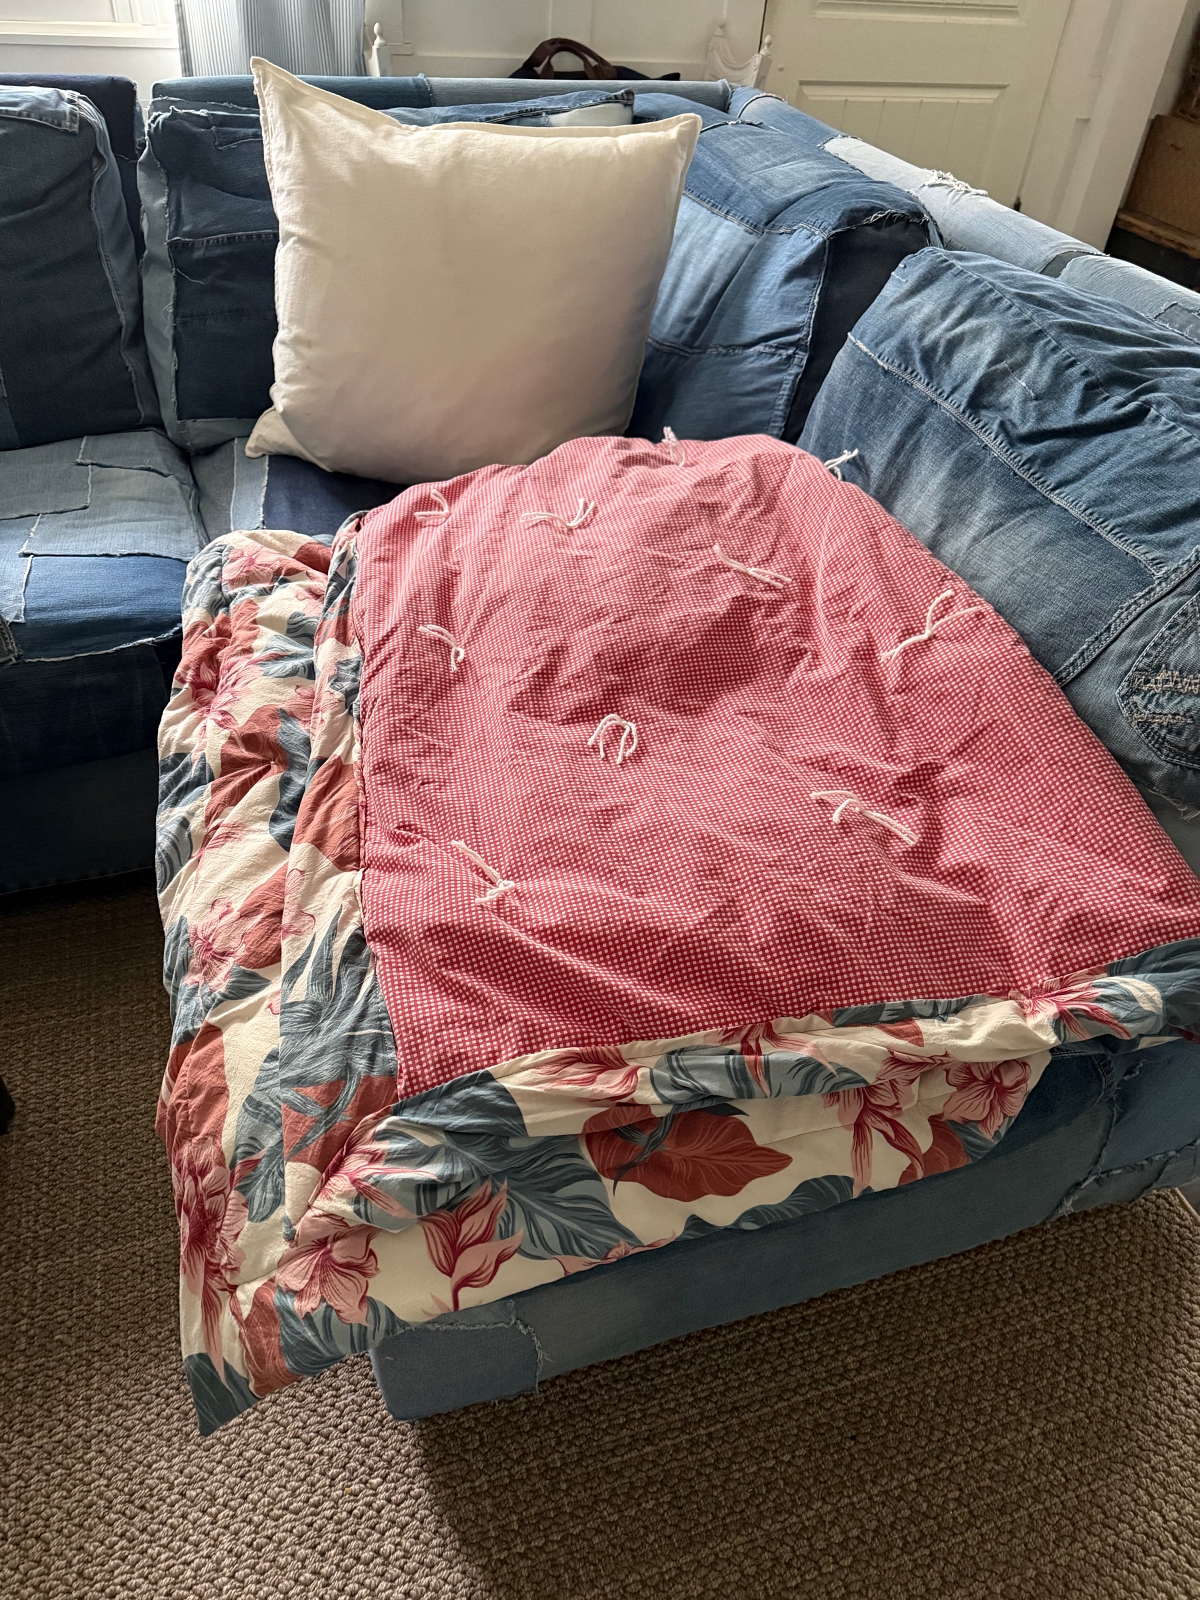
The Finished Quilt
Now my quilt is not perfect in any way, but I’m still very happy with it. This quilt is just to be used around the house and it’s nice and big and soft and will be great to cuddle up with.
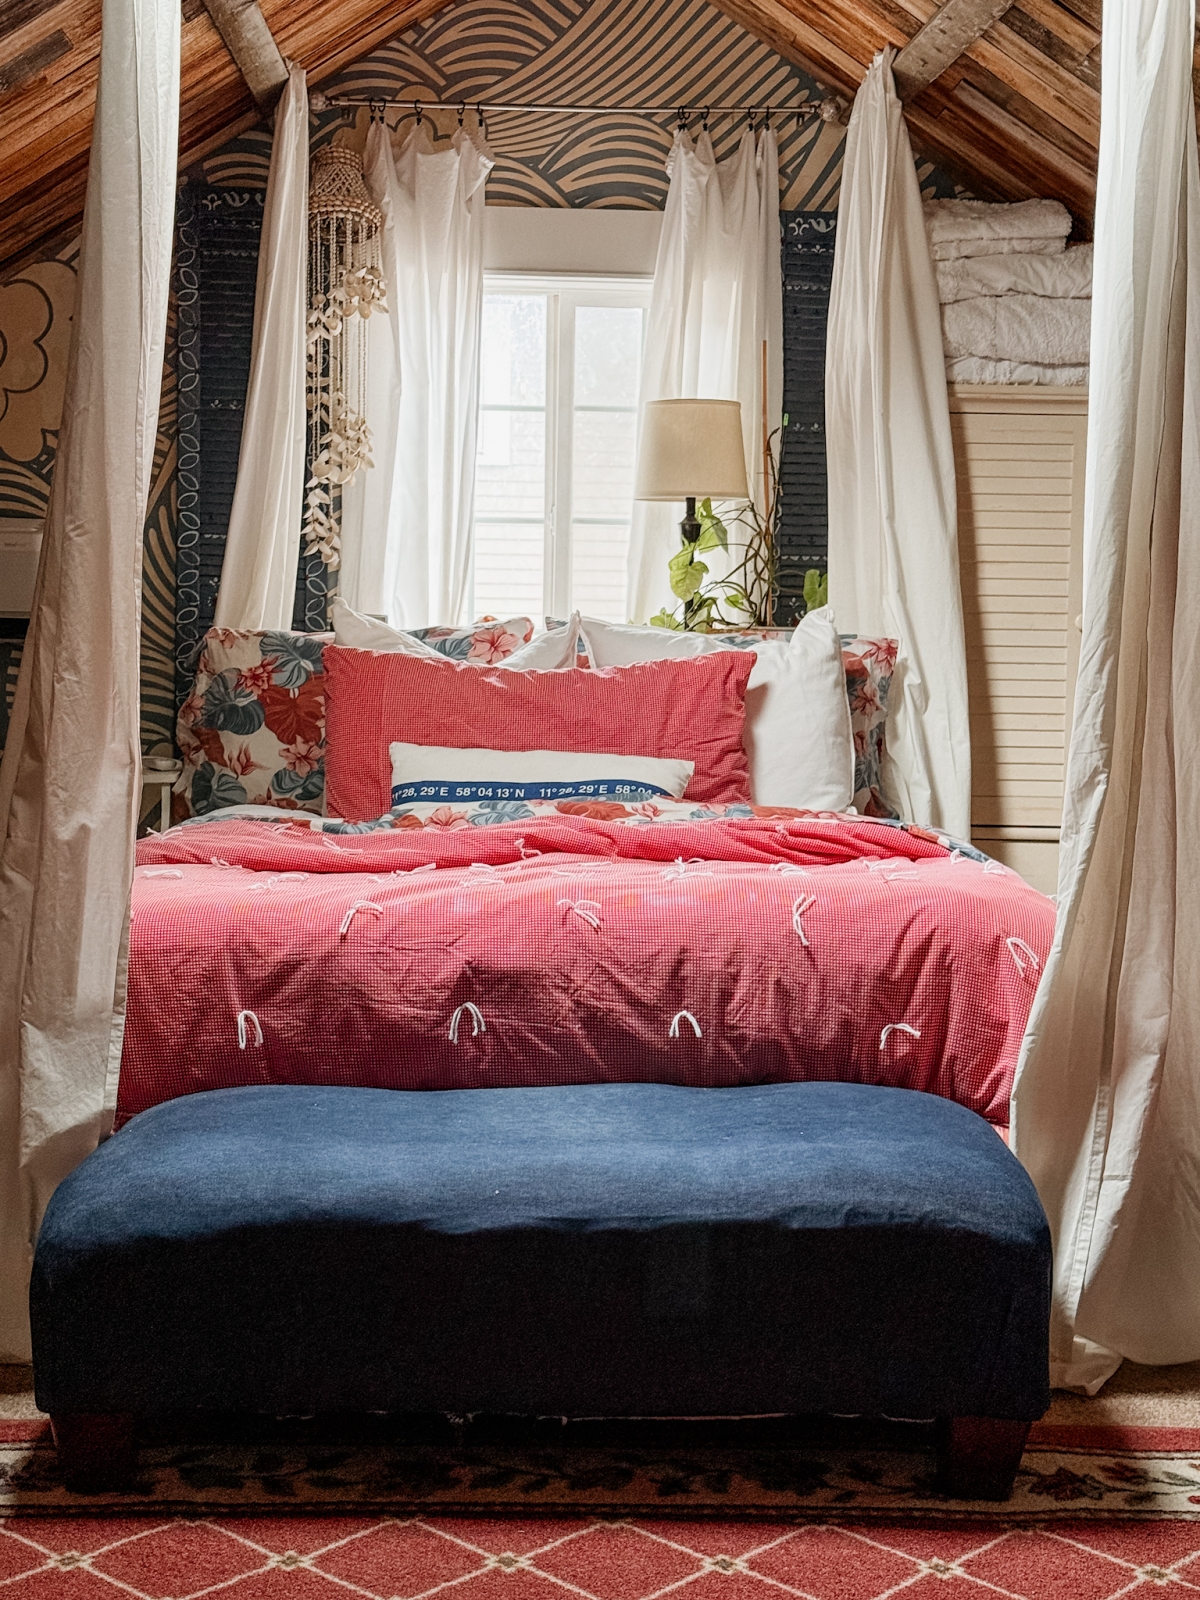
How it looks on my Bed
The nice thing about using old sheets that once came in a sheet set is that I have matching pillowcases that go with both of these sheets. After I added the quilt to my bed, I then added the matching pillow cases to finish the look.
Having this quilt double-sided gives me the option to turn the quilt around to have the other pattern facing out. I think it looks cutes when folded over so both patterns are showing.
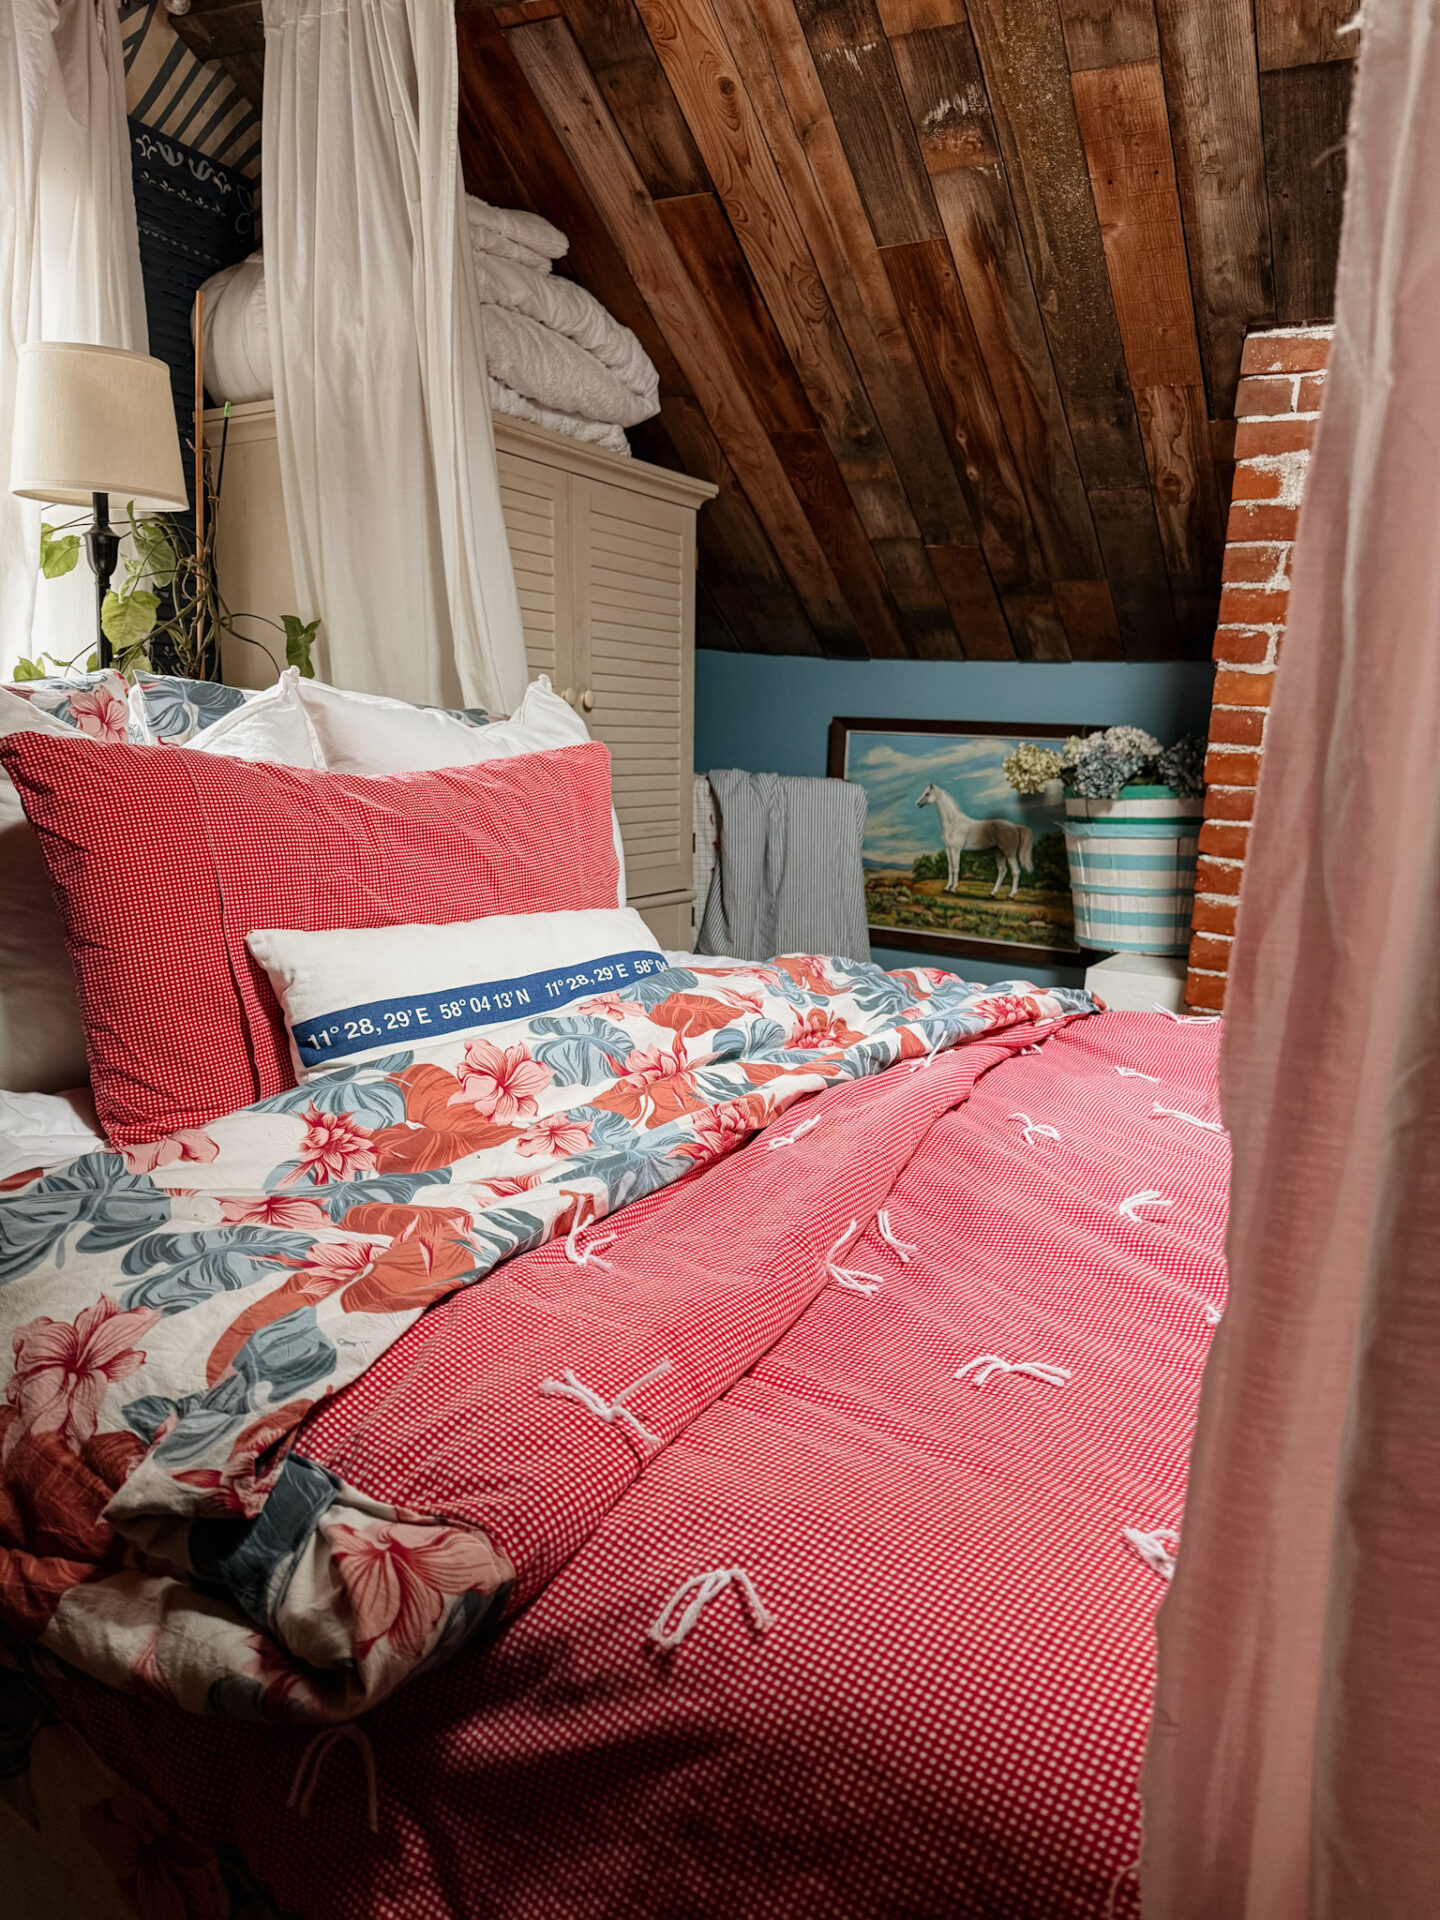

I’m really happy with how it turned out. I like that it is lightweight, making it perfect for summer. But I also love the idea of adding it to the bed more as a throw over a heavier duvet in the winter months when I need more layers.
Final Thoughts
This project is proof that you don’t always need to buy new supplies to create something beautiful and useful for your home. By combining a pair of unused sheets and an old comforter, I was able to create a soft, double-sided quilt that cost absolutely nothing to make. Not only did it keep these materials out of the donation pile, but it also gave me a cozy quilt that feels perfectly suited to our home. If you have old bedding tucked away in a closet, this may be the perfect project to give it a second life.
Shop This Post by clicking on Images Below.
*Disclaimer: This blog post contains Affiliated links which means that I earn a small commission for purchases made through these links.
See more on my Amazon Storefront HERE
Like this Post? Save it for Later!
You are welcome to PIN any of the Images from my blog on PINTEREST. Find a Pin It button by hovering over any of the pictures.
If you like This Post – You may Enjoy These Too!

If you like the type of decor that I share, then be sure to check out my SHOP MY FAVORITES Page. I keep it updated with all of the fun Coastal, Cottage, and Farmhouse Decor that I come across on a daily basis. I personally want EVERYTHING that I have listed there.
You can also Check out more on my Amazon Page [HERE]. It too is full of all sorts of favorites. Take a look around!
Thanks for Stopping by,
Emily

