
I have a really fun, easy, and affordable project to share with you today. I wrapped our hanging light cords in rope and I can’t believe how awesome they turned out. Read along to learn more.
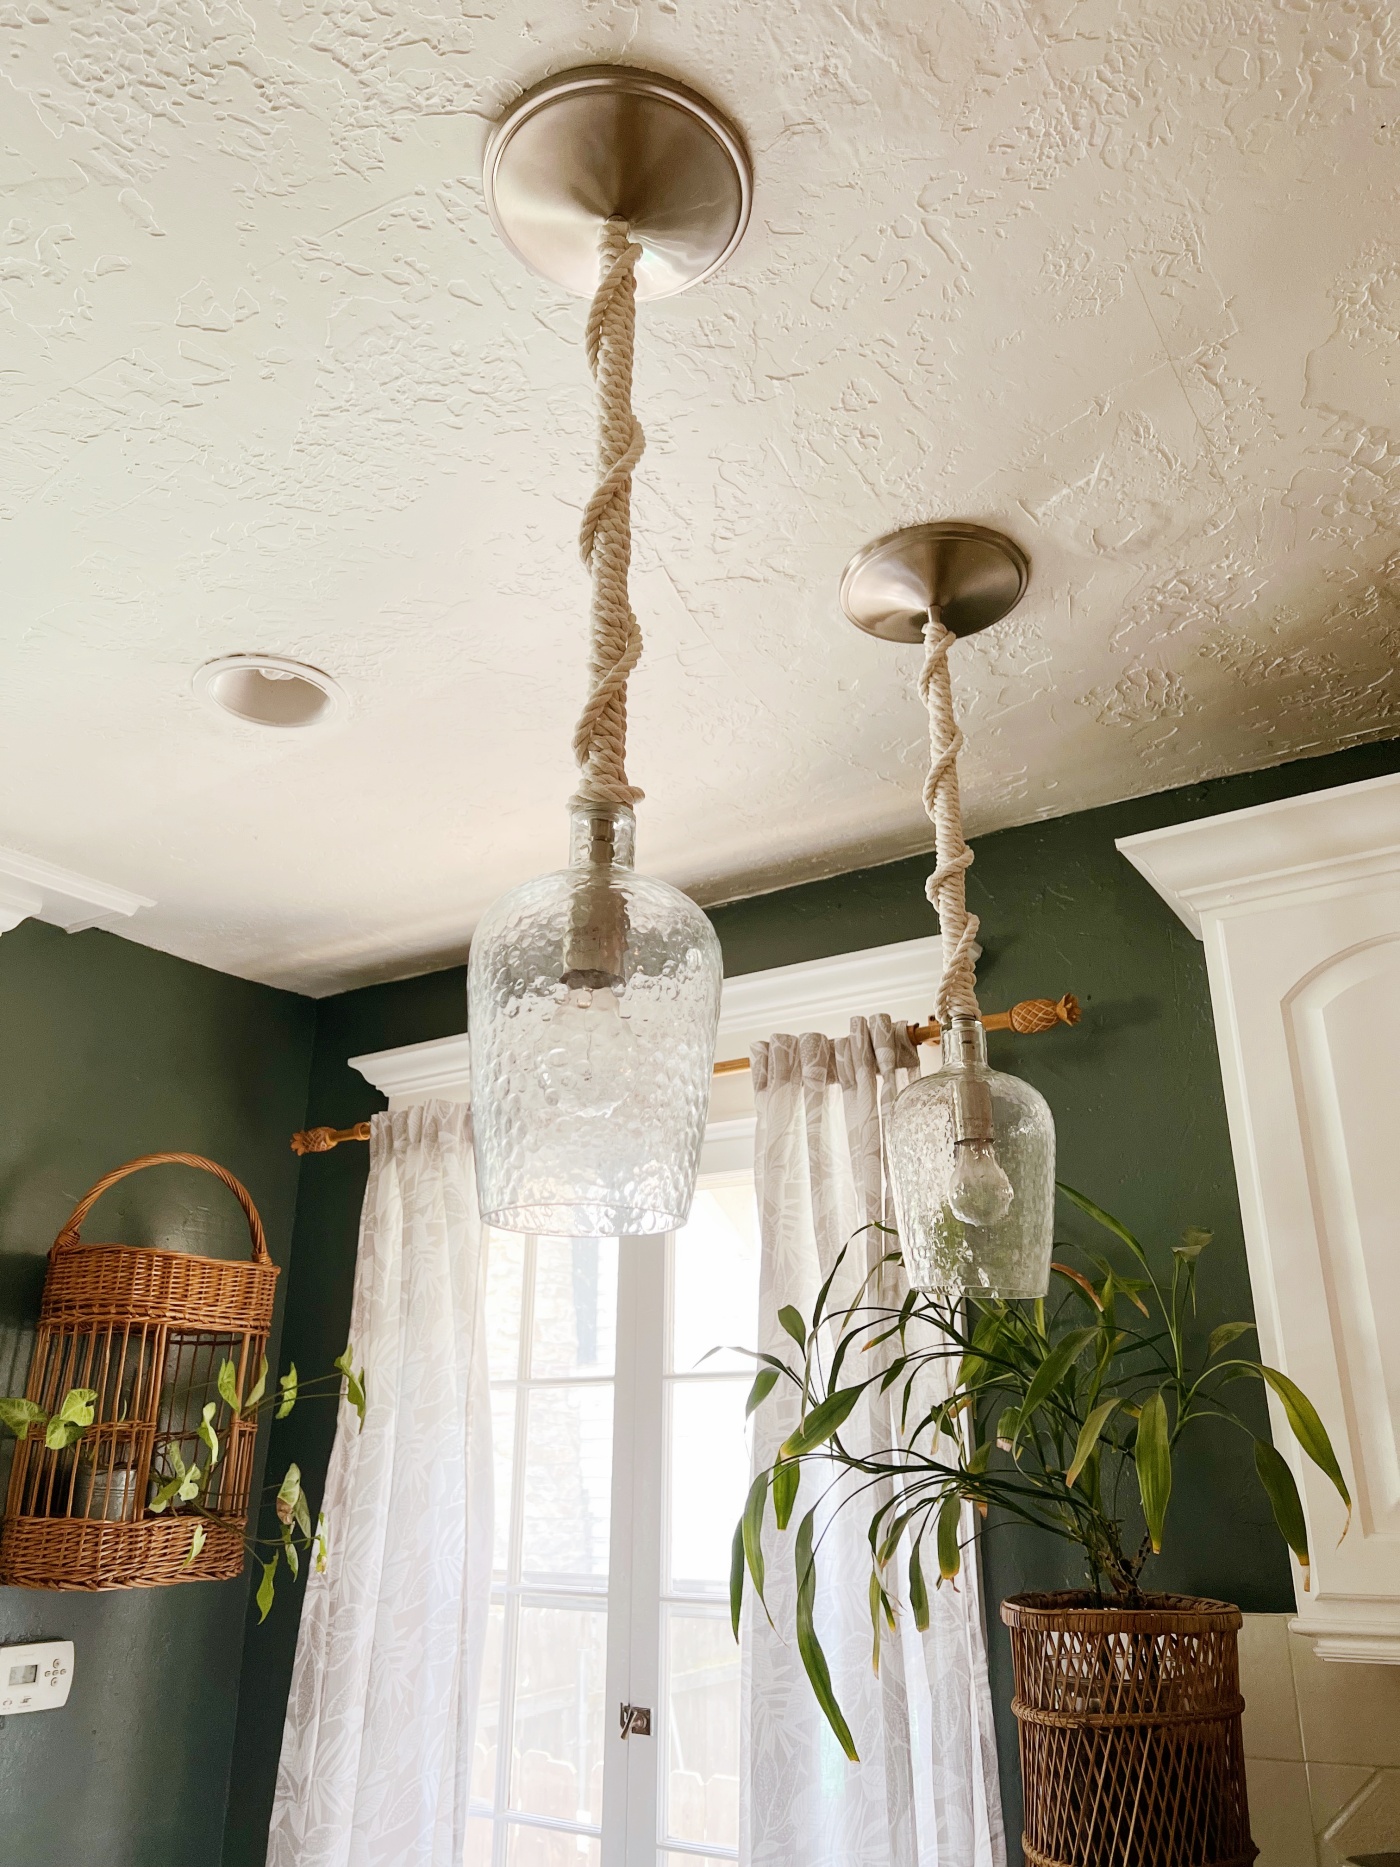
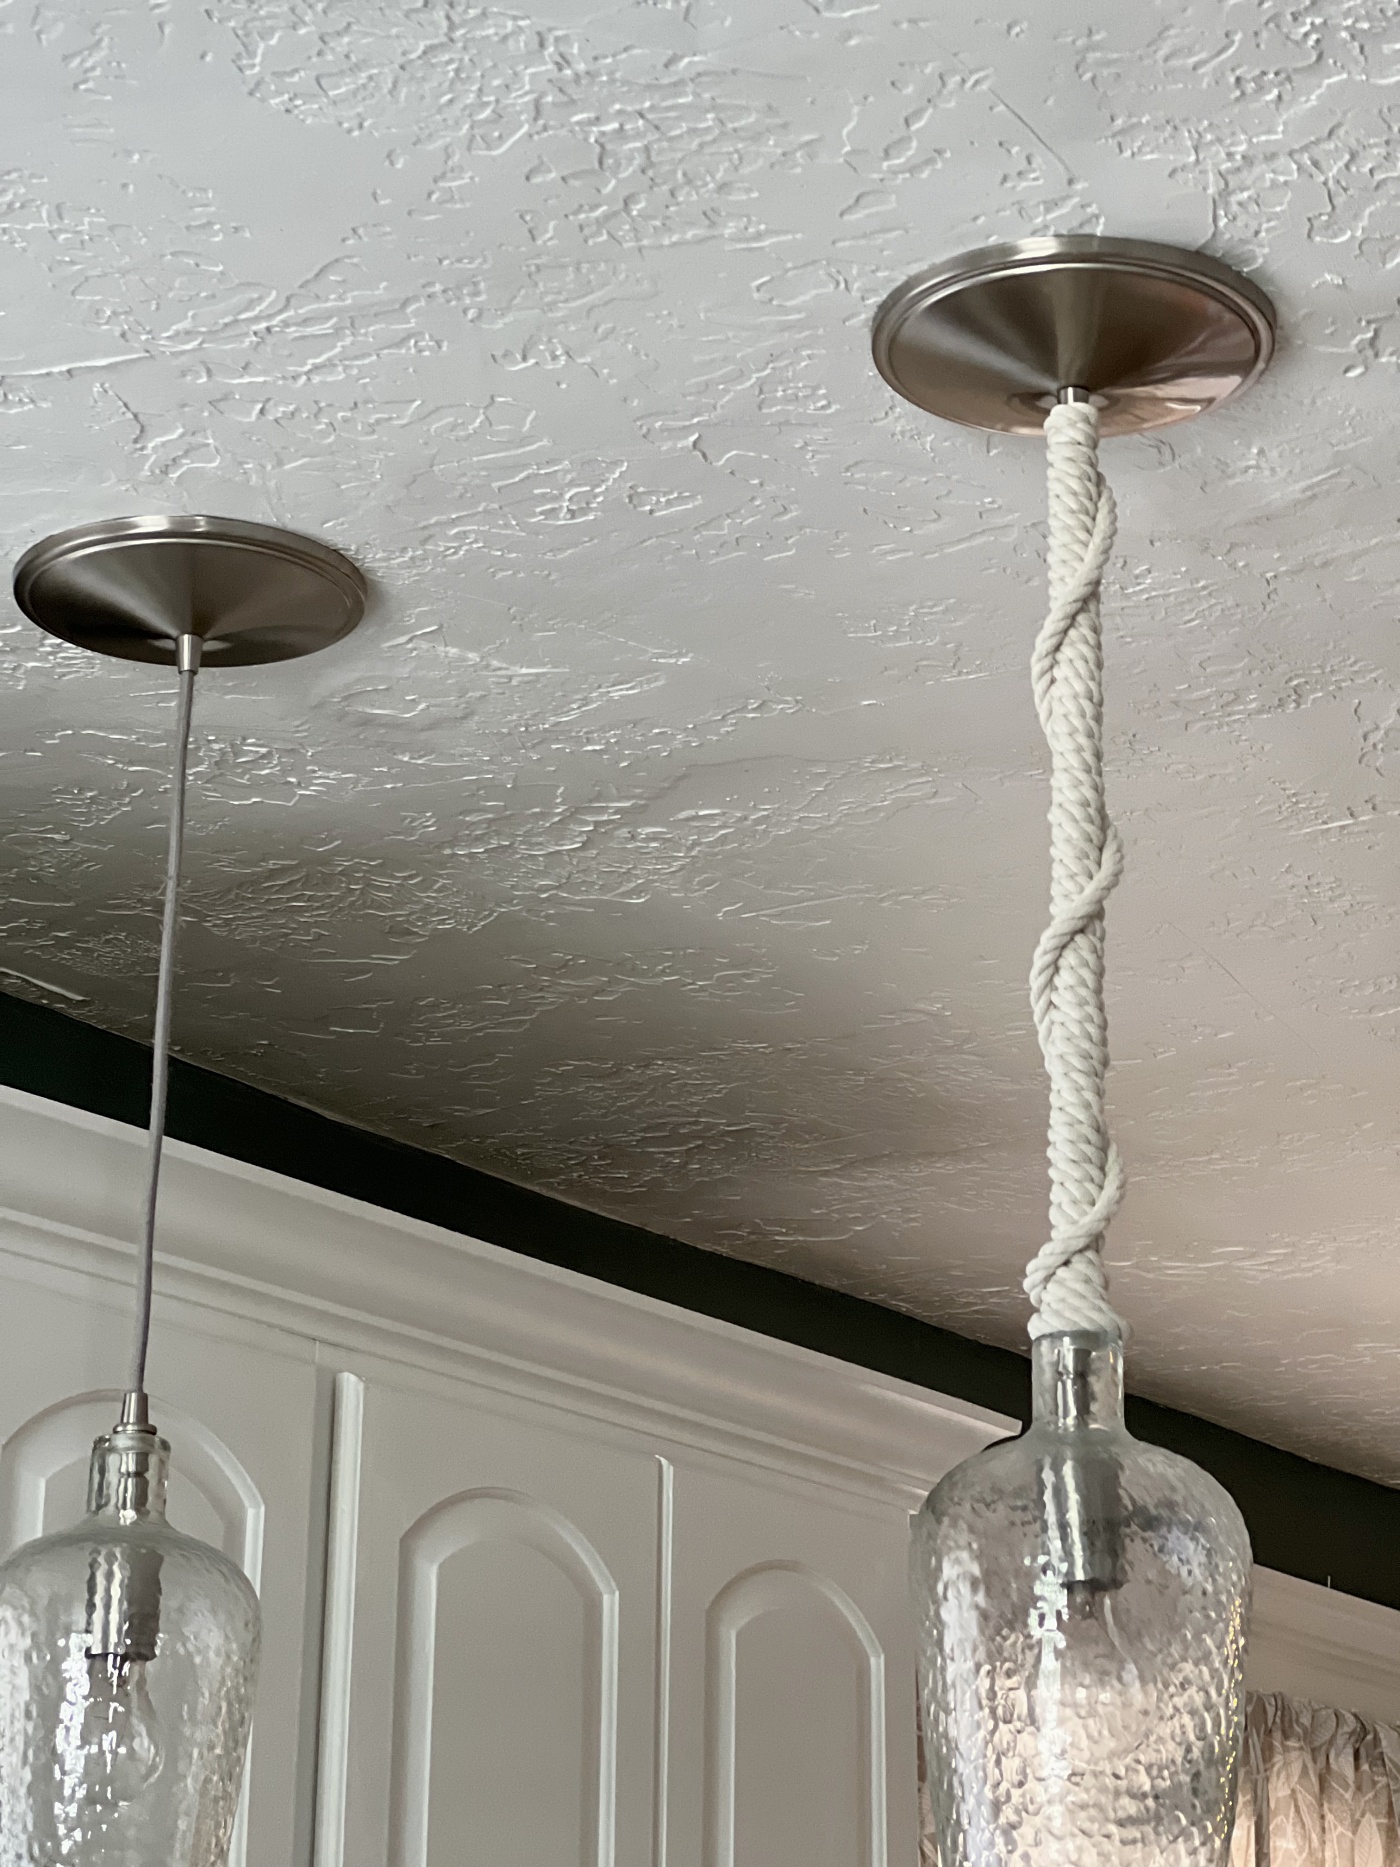
I bought these two hanging pendant lights at a yard sale years ago and I’ve always loved the thick hammered glass on them, but what I didn’t particularly like about them was the cord that they hung by.
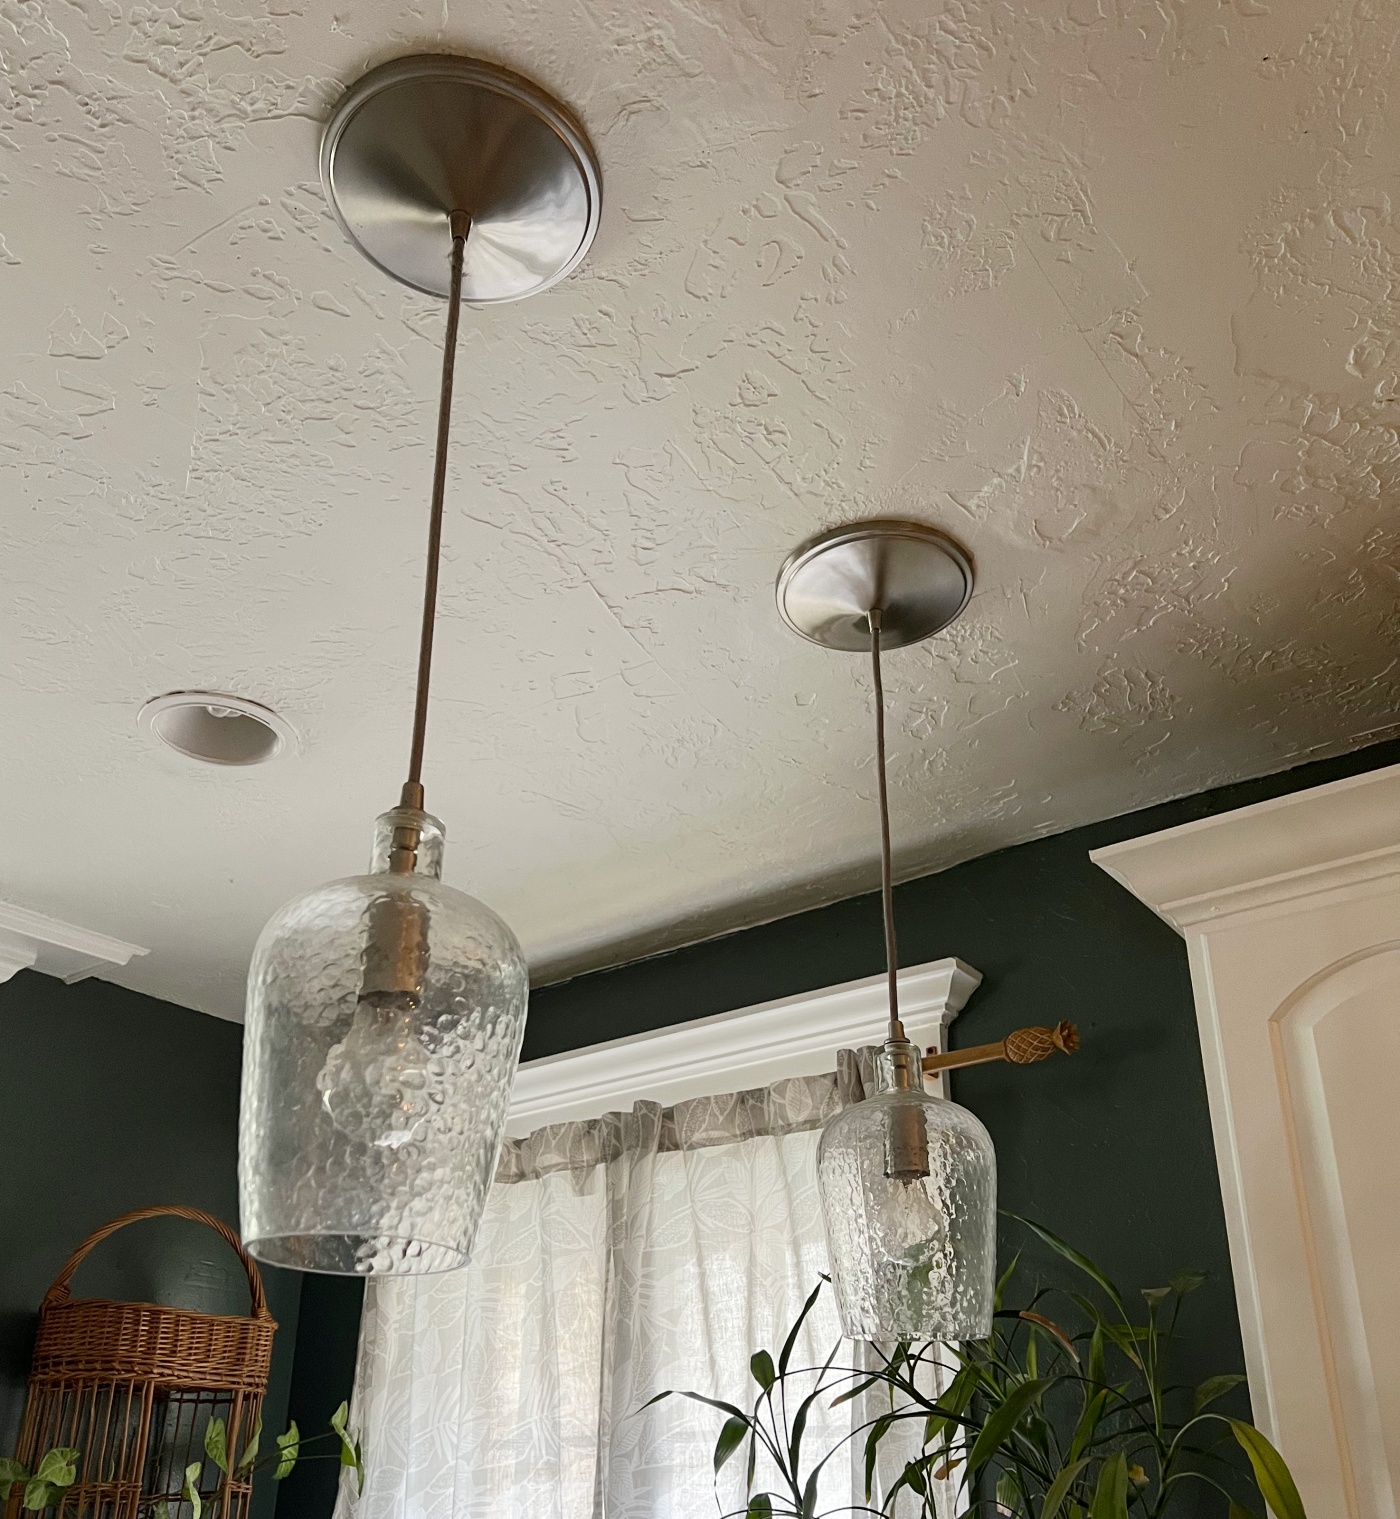
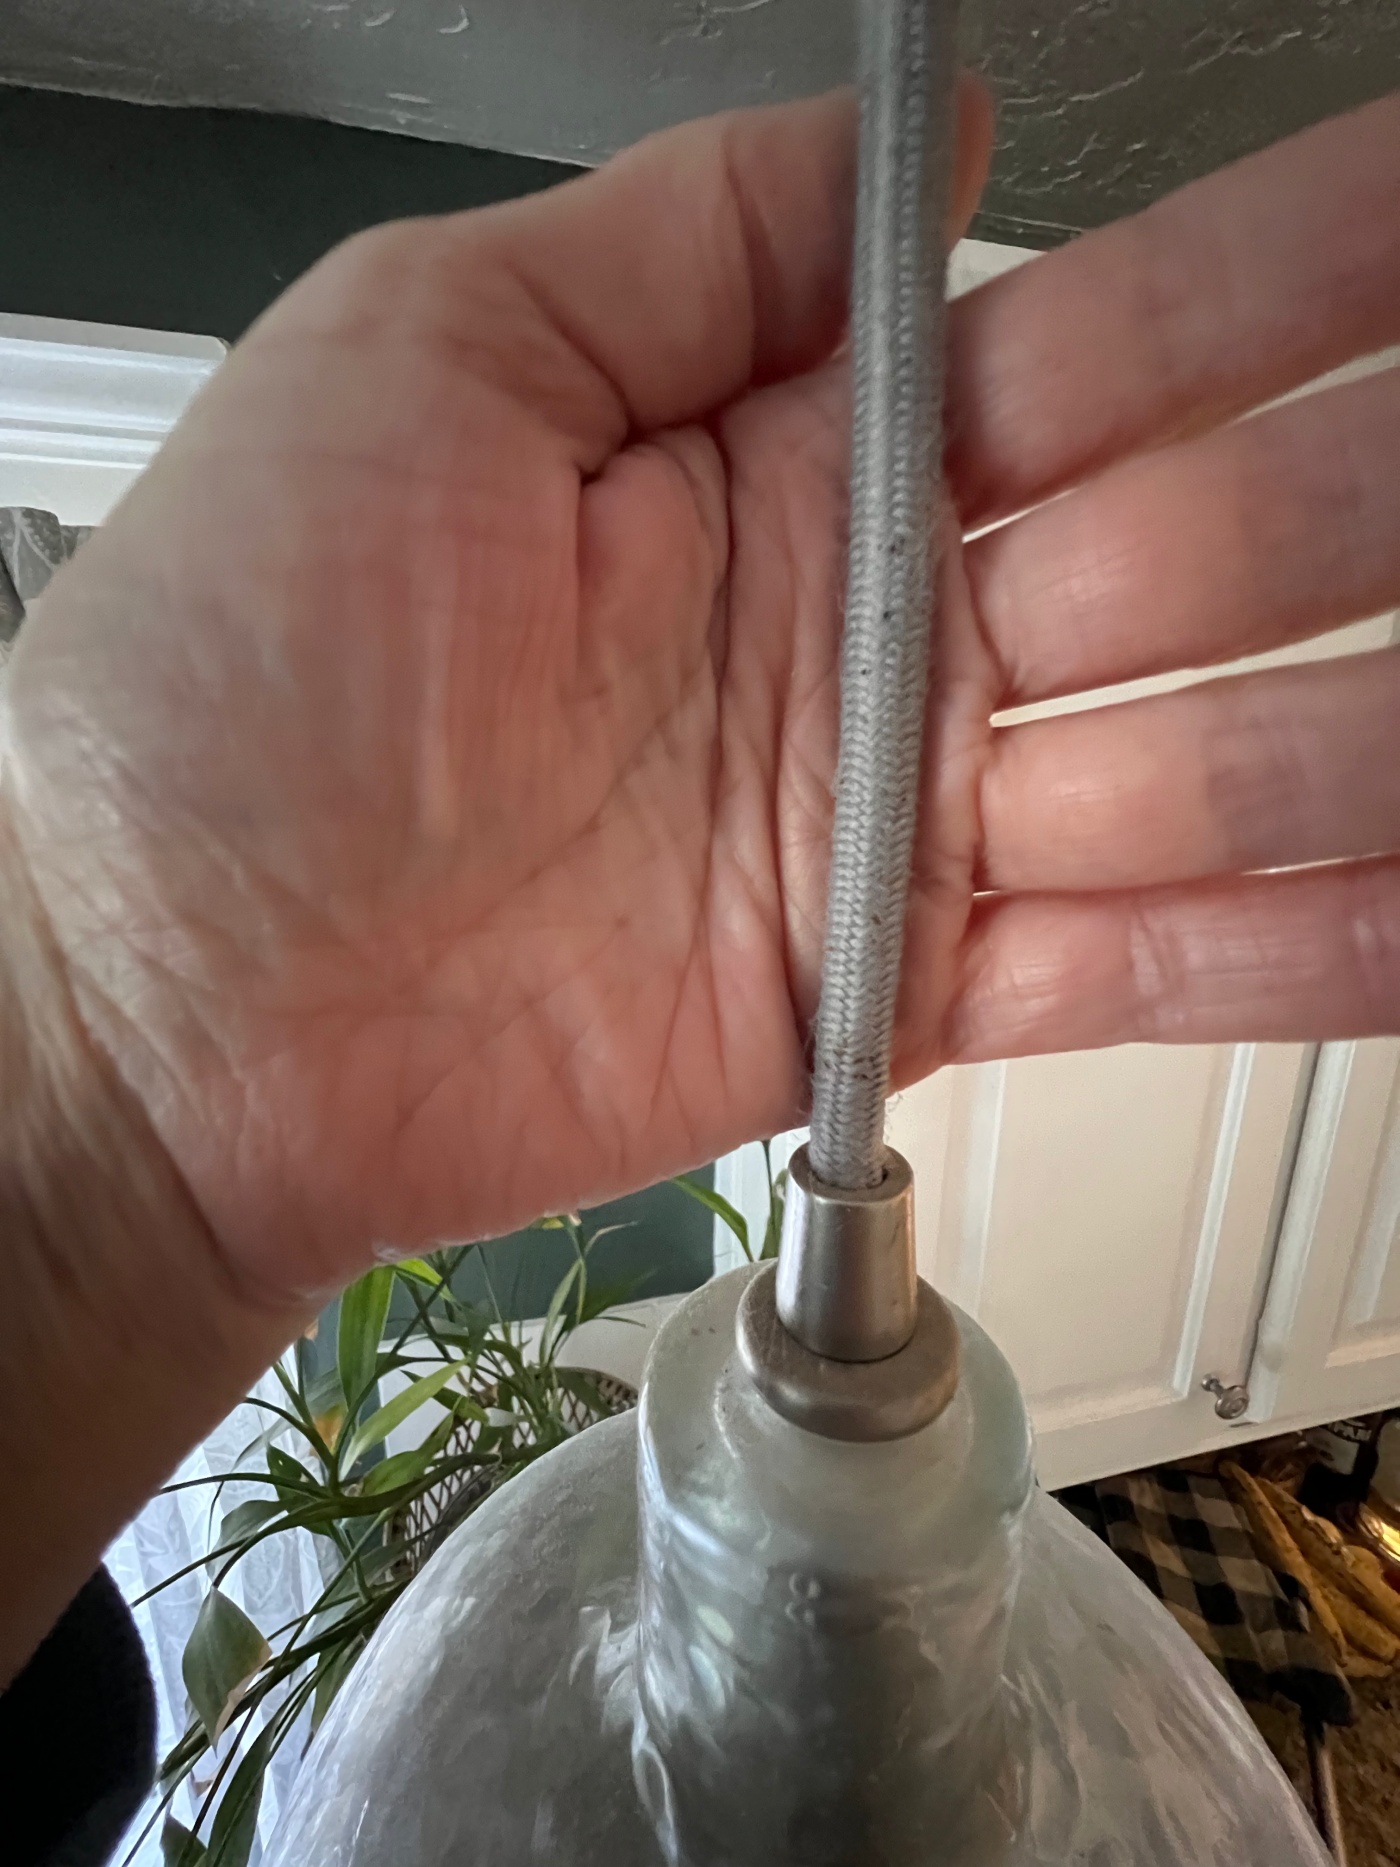
Here is an up close look at the cord. As you can see the cord is wrapped with a grey nylon material, Nothing special, but I always thought that they would look neat with rope wrapped about them. I just never got around to it until yesterday.
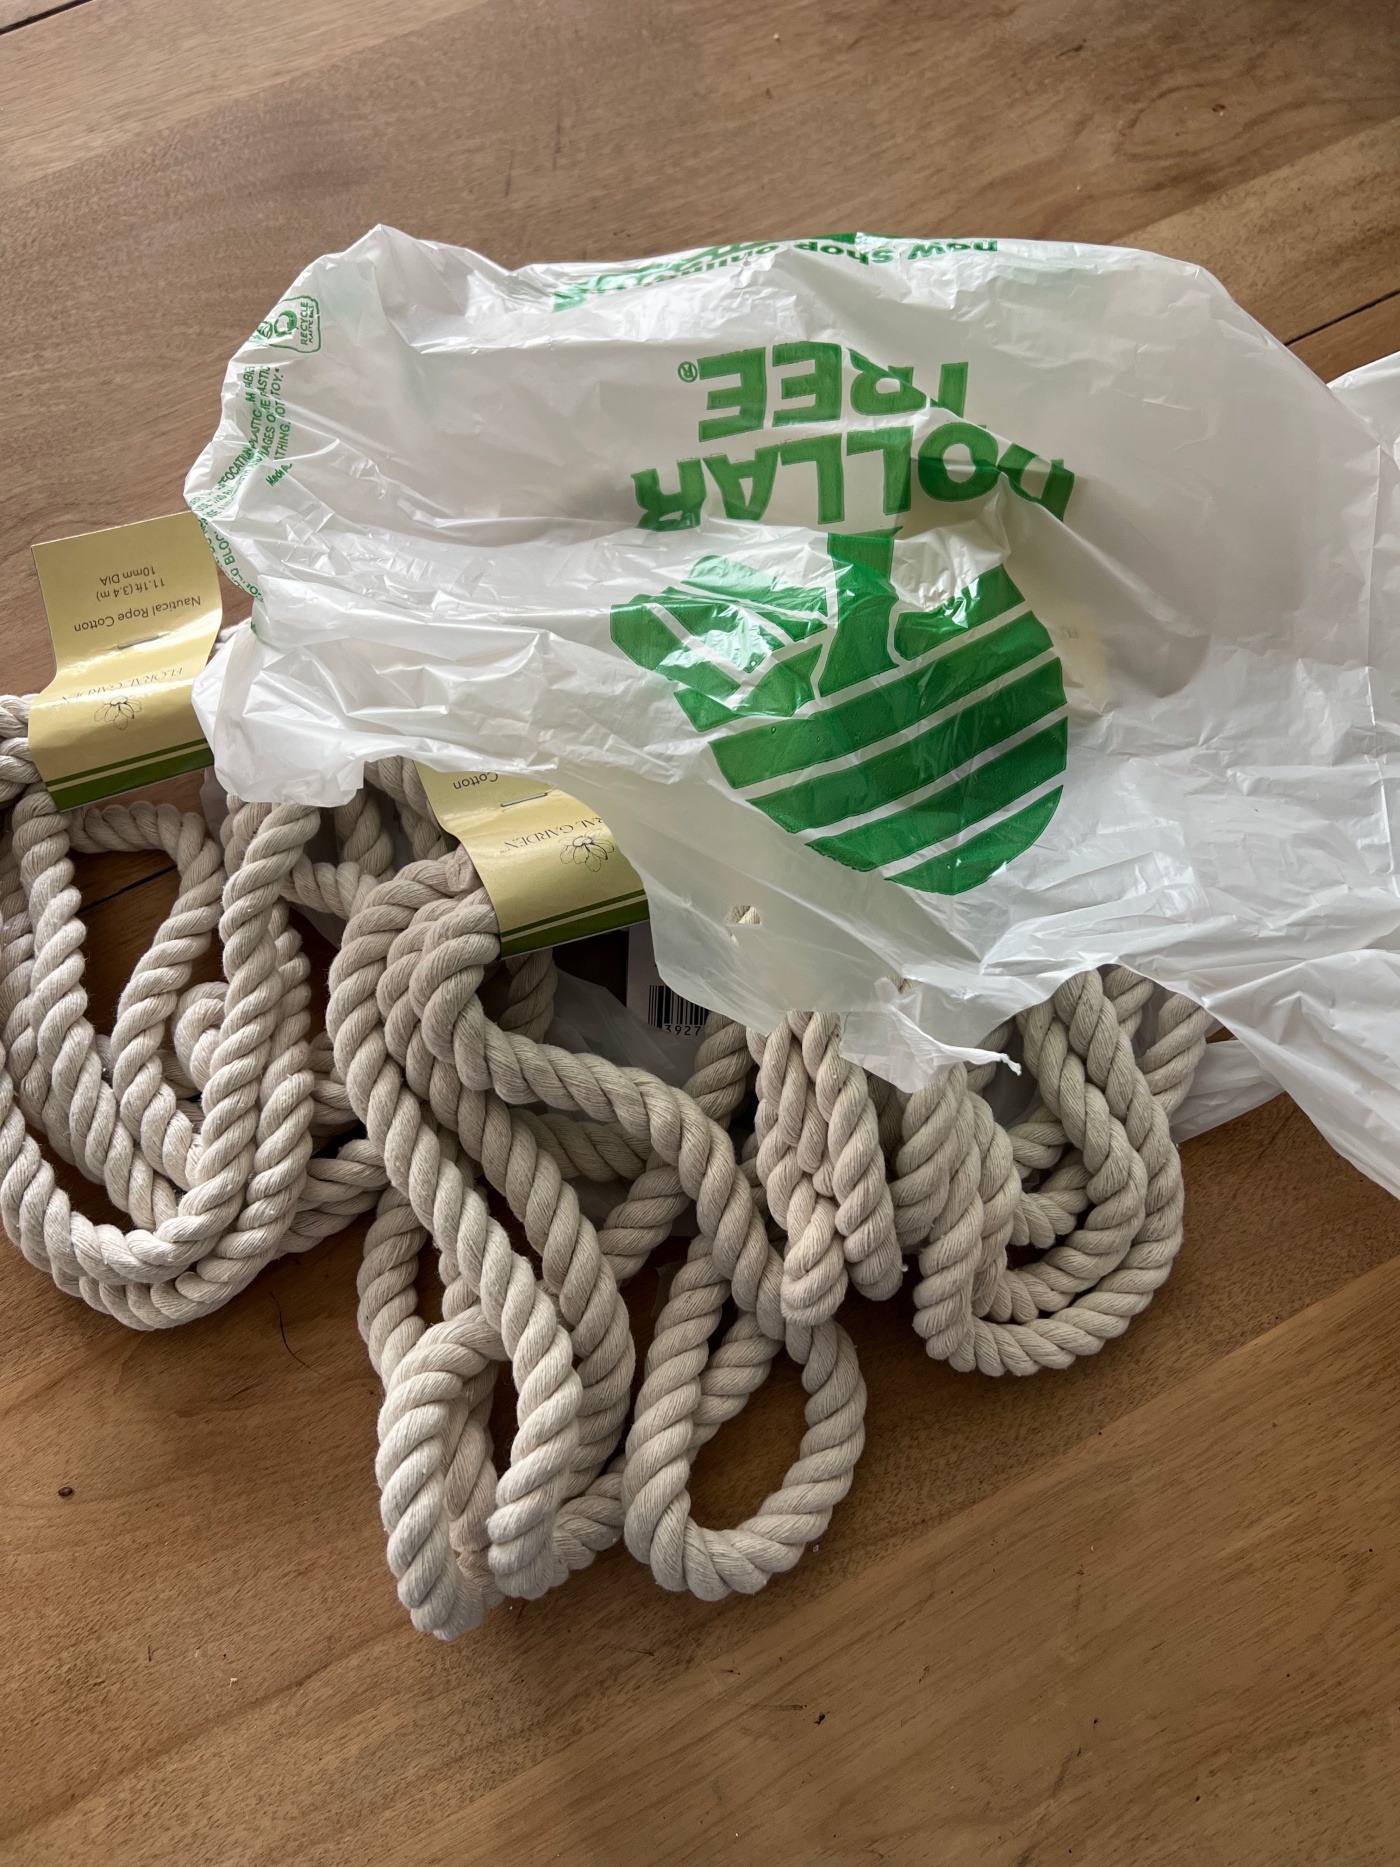
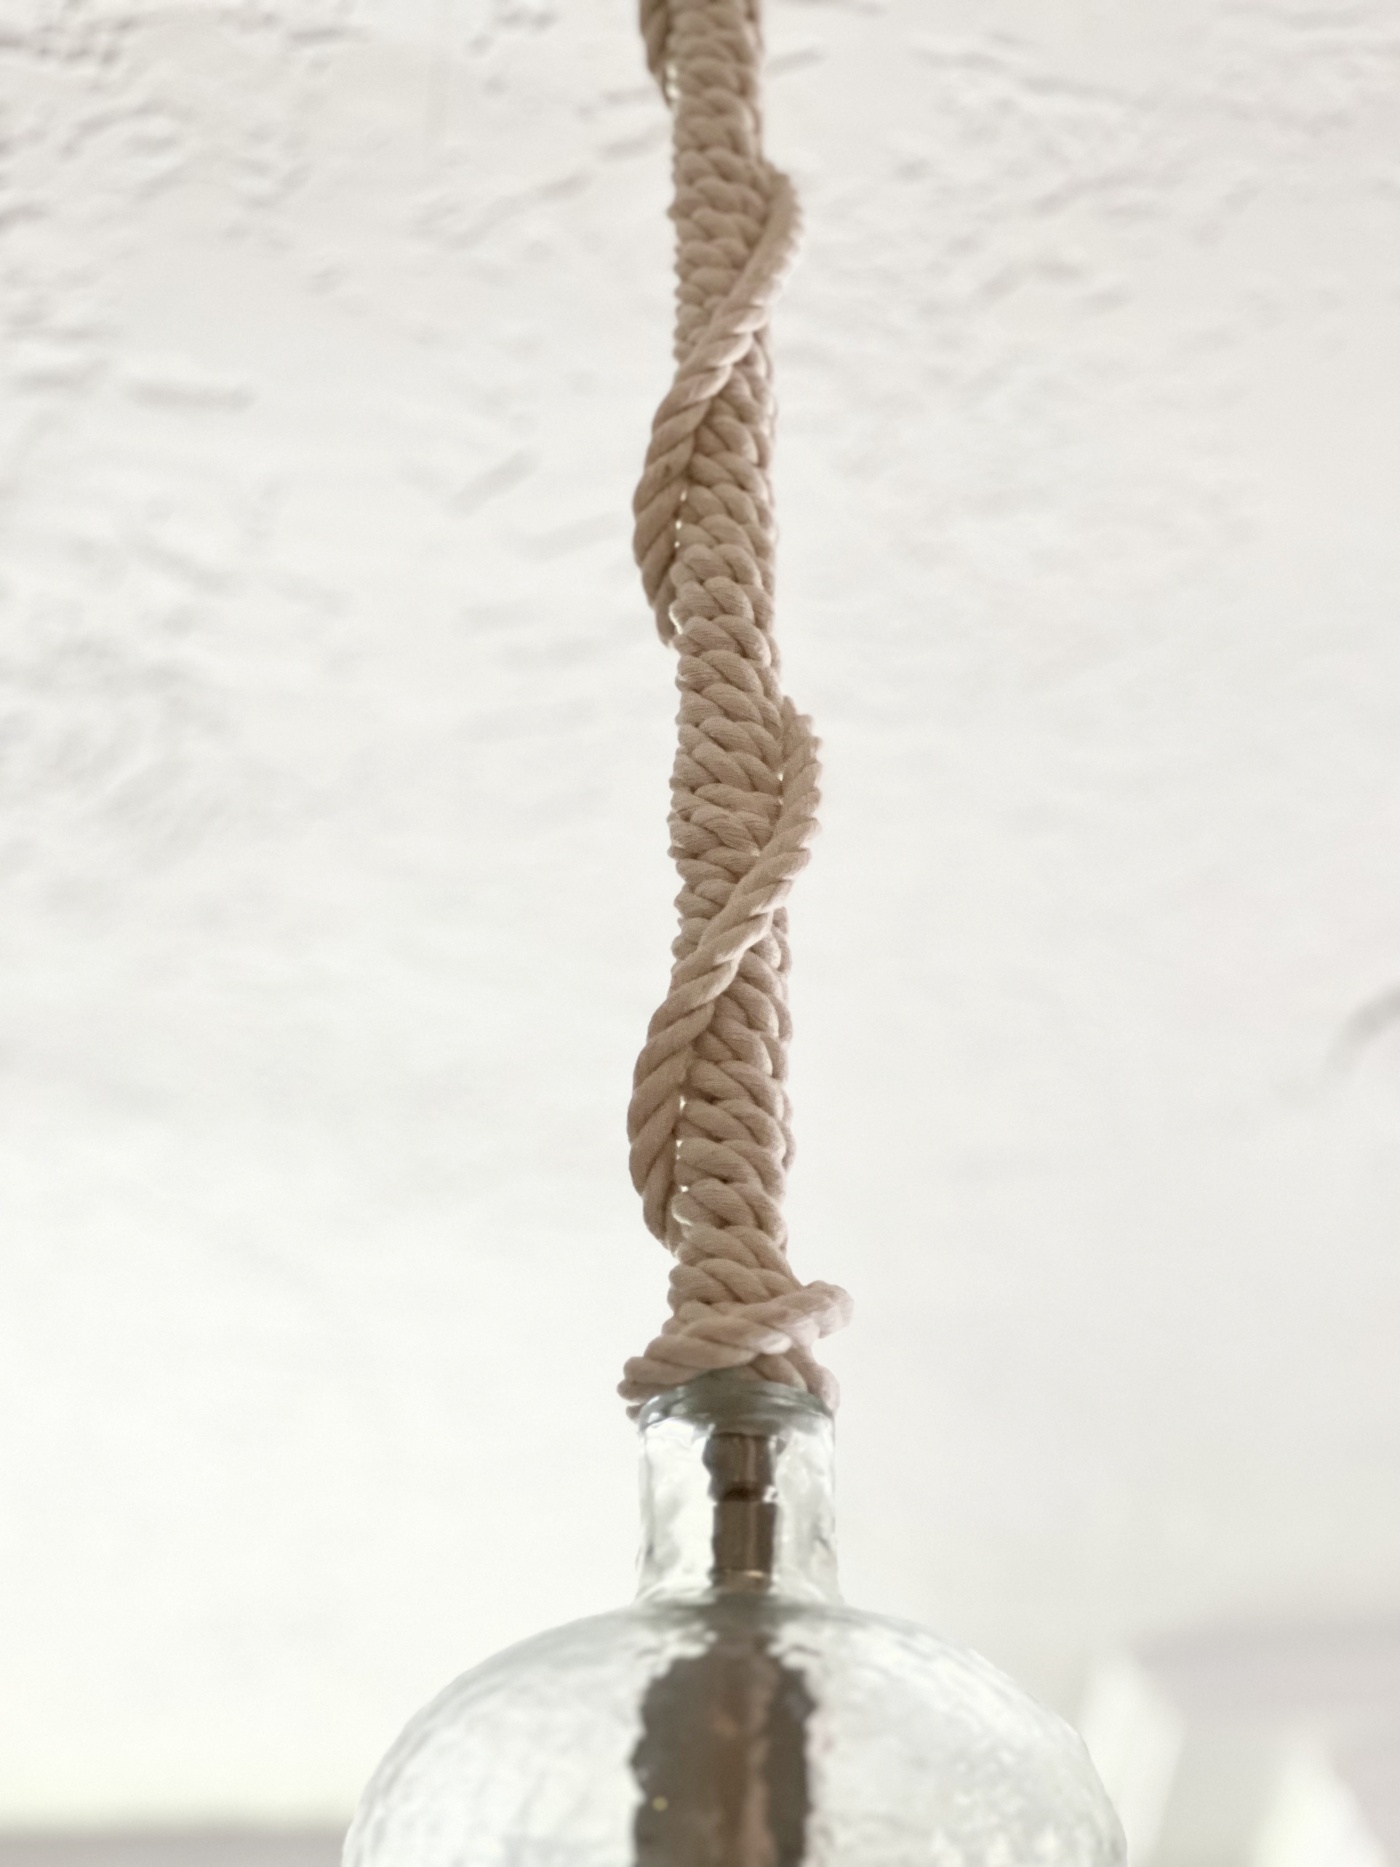
I had to stop into the Dollar Tree for something and I came across this rope and knew that it was just what I needed for my lights. The Dollar Tree had a few other options of rope that I was debating on, one was a brown jute with a blue stripe in it. It too could have looked nice on my lights, but I’m happy I went with this white cotton rope. It’s thick and soft and was easy to work with.
I bought five strands of the rope that are about 11 feet long, but I only ended up using two of them. So now I have some extra rope on hand that I’m sure I can find another project to use them for.
I will post a video at the end here, but all I did was hot glue the rope at the top of the cord. Then I just started wrapping and wrapping by way down. Every once in a while I would push the rope up so that it had a tighter wrap. This went by so fast and only took me about 10 minutes for each light. At the end I was planning on cutting the rope and hot glueing it into place, but I ended up taking the end and I loosely wrapped it back to the top which created an added layer that I really love. And so I just glued the end up at the top where I had started.
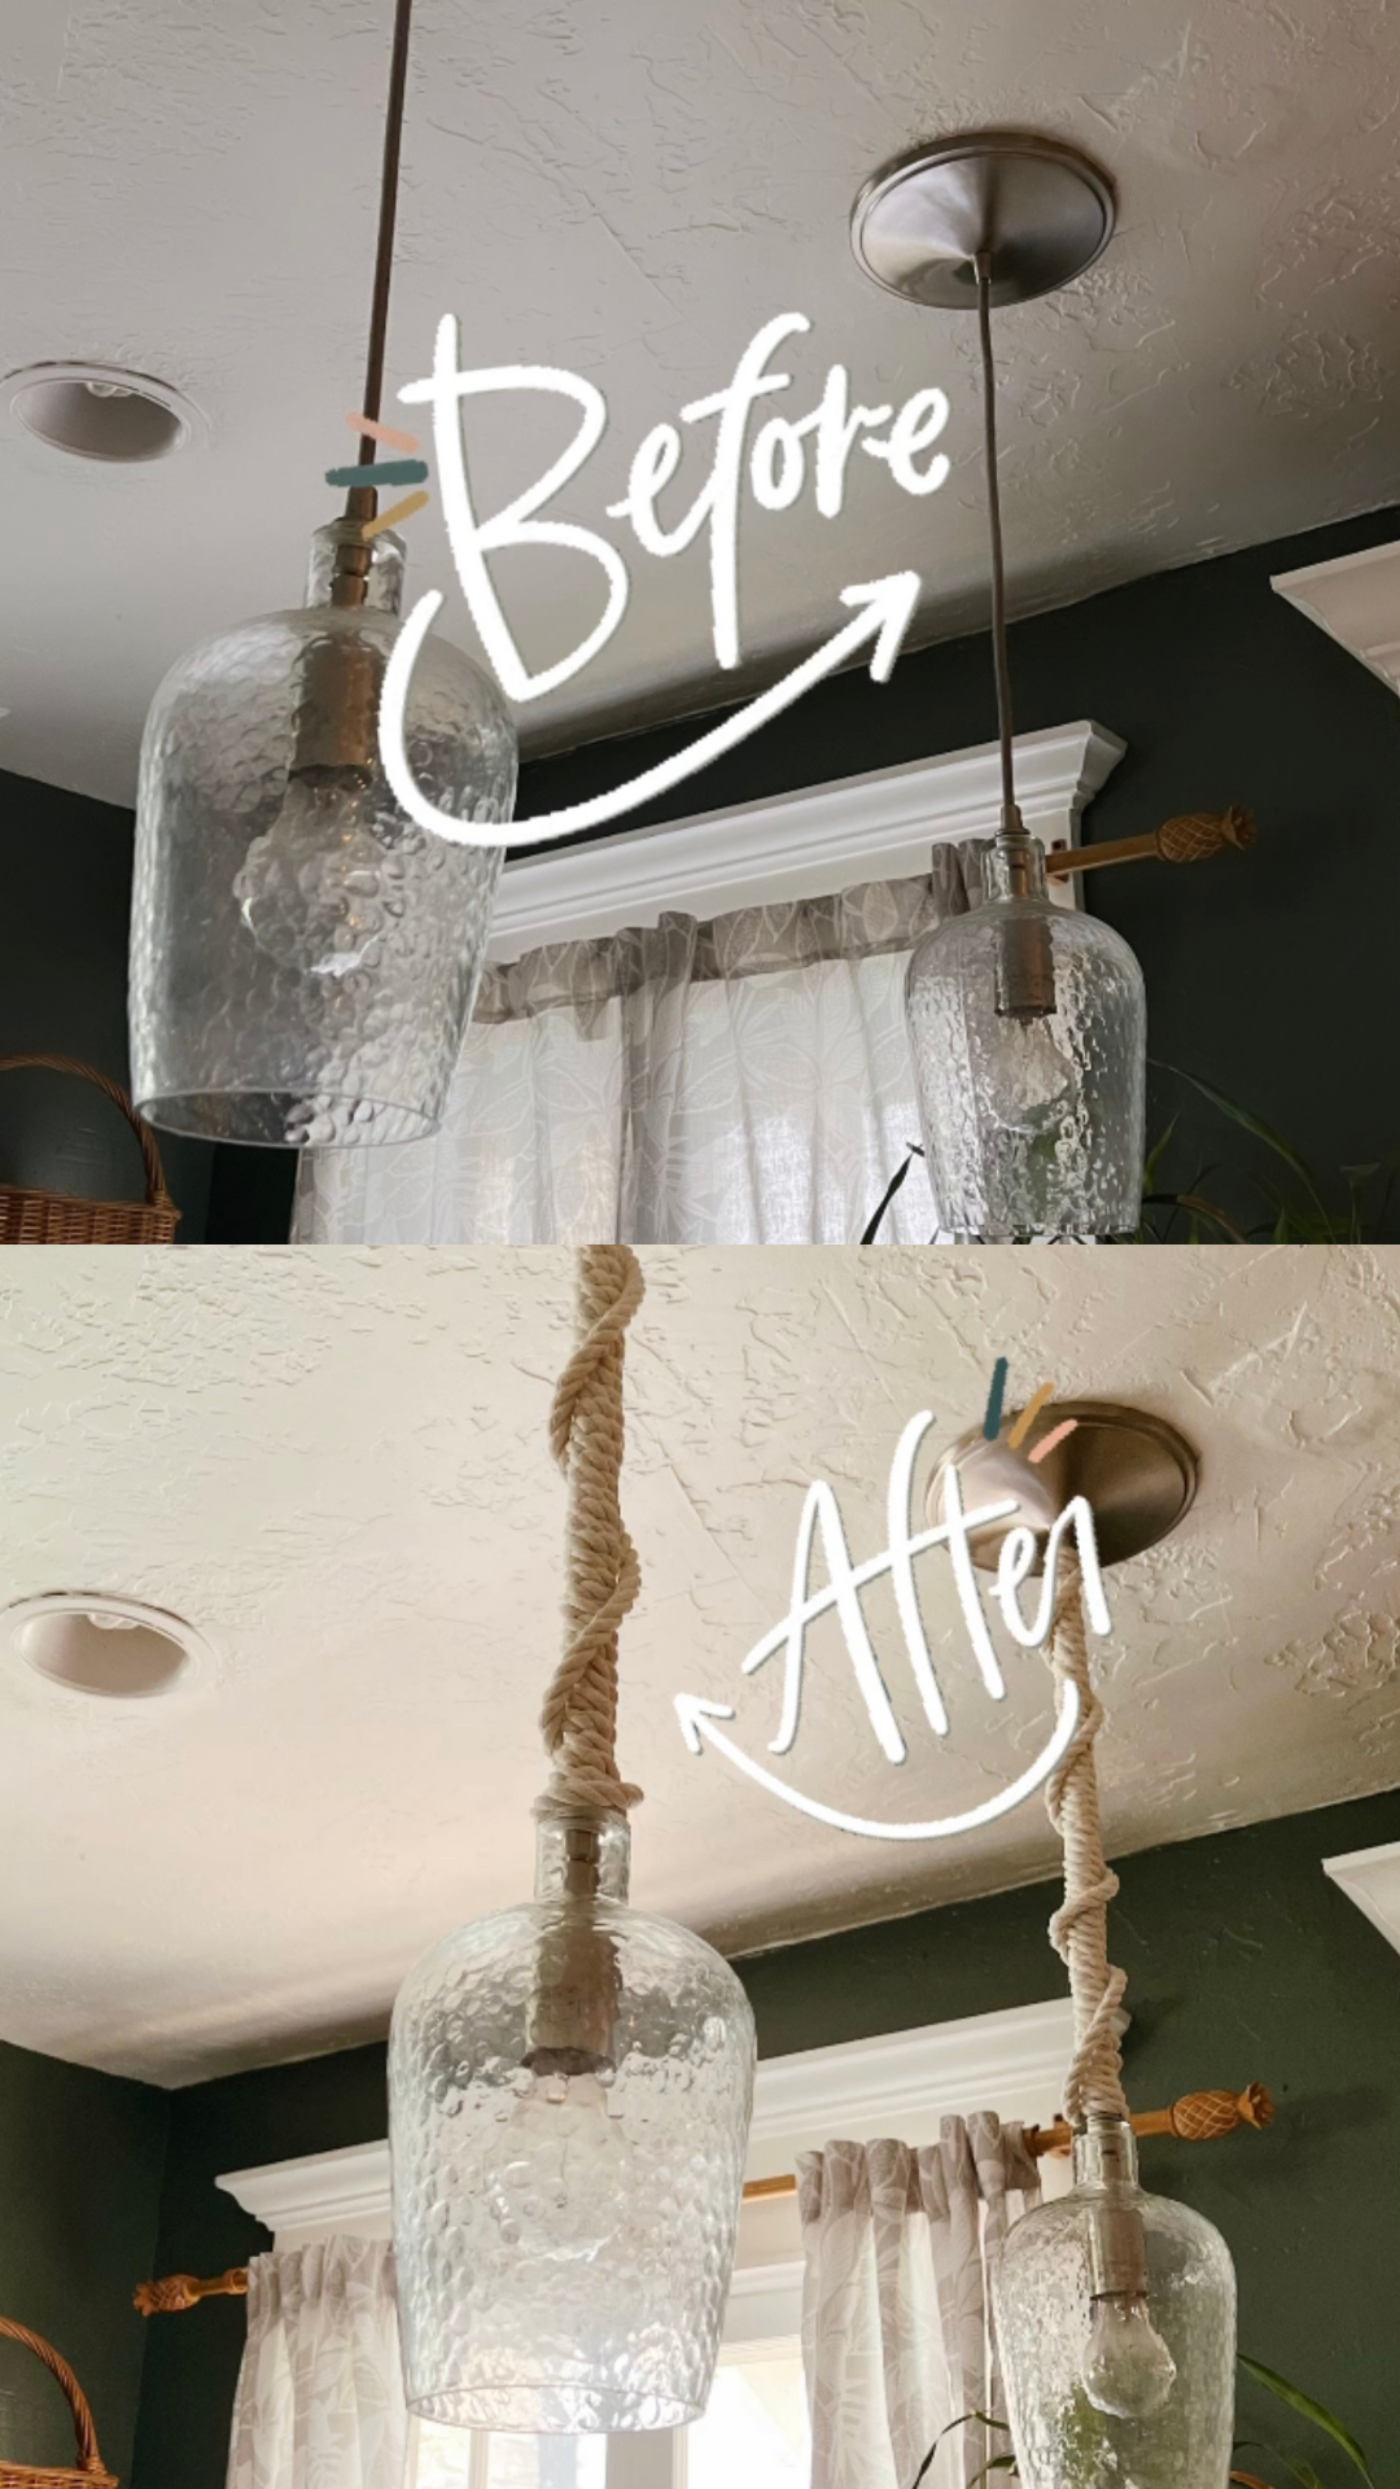
This project only took 20 minutes, cost only 2 dollars, but made these lights look 20 times better! The end result has a very nautical look to them and added so much texture and style to the lights.
Here’s one last look at the lights Before, and then after. They look so much better now.
So what do you think? Do you have a light that you could try this on? Please let me know if you have any questions that I can answer for you.
And If you like today’s post, you are welcome to PIN it along with any of the images from my blog on PINTEREST. Find a Pin It button by hovering over any of the pictures.
Let me know what you think about this blog post in a comment below or come chat with me on Facebook and/or Instagram.
Thanks for stopping by today,
Emily
Watch the video here:

